This Itechguide teaches you how to backup Windows 10. Windows 10 has a built-in backup and recovery tool that allows you to automatically backup important files.
Important notes about Windows 10 backup
- You cannot backup to the same drive that Windows 10 is installed
- To enable backup, you have to have another drive or partition
- You can backup to a network share
If your PC meets the above requirements, follow the steps in one of the methods below to backup Windows 10:
How to Backup Windows 10 to an External Drive
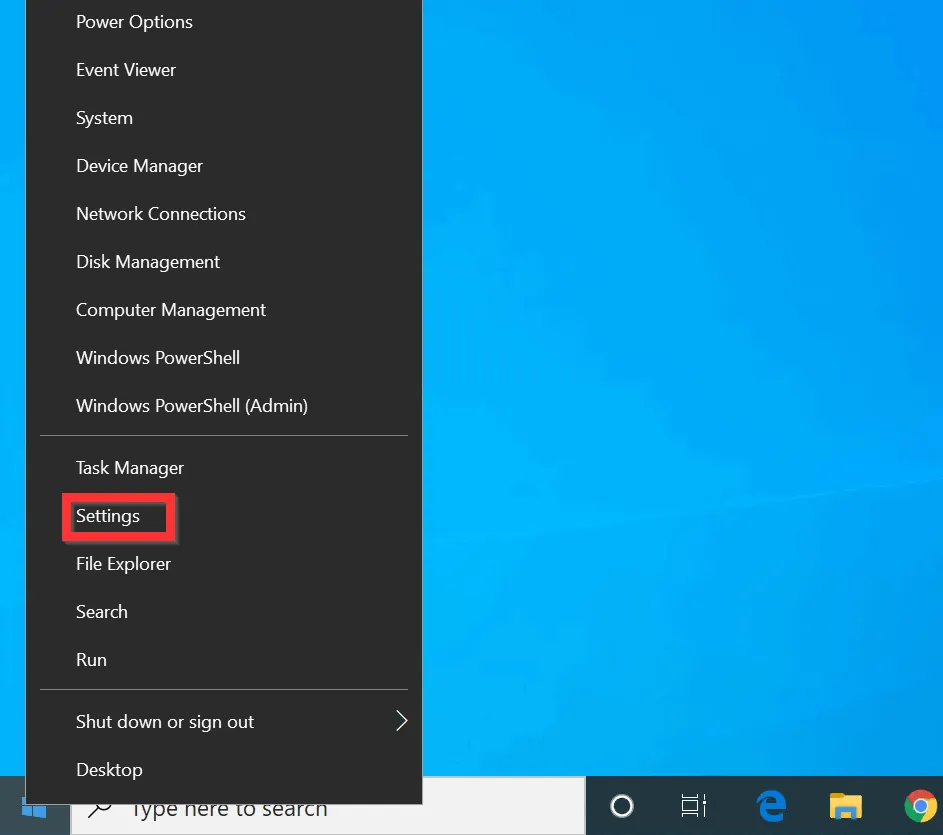
- Right-click the Windows 10 Start menu and click Settings.
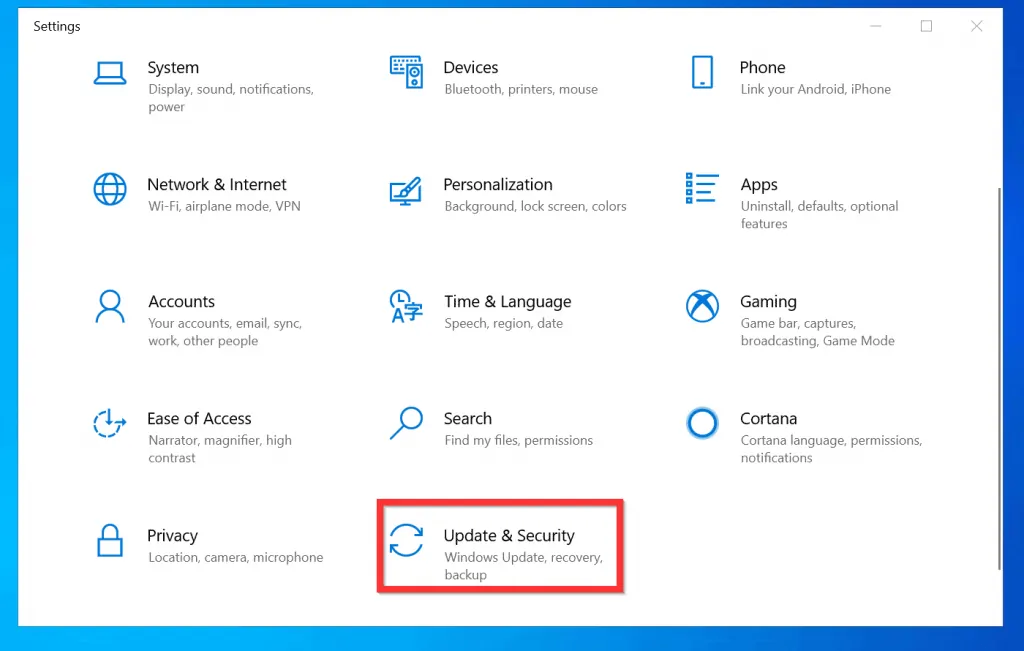
- On the Windows Settings screen, scroll down and click Update & Security.
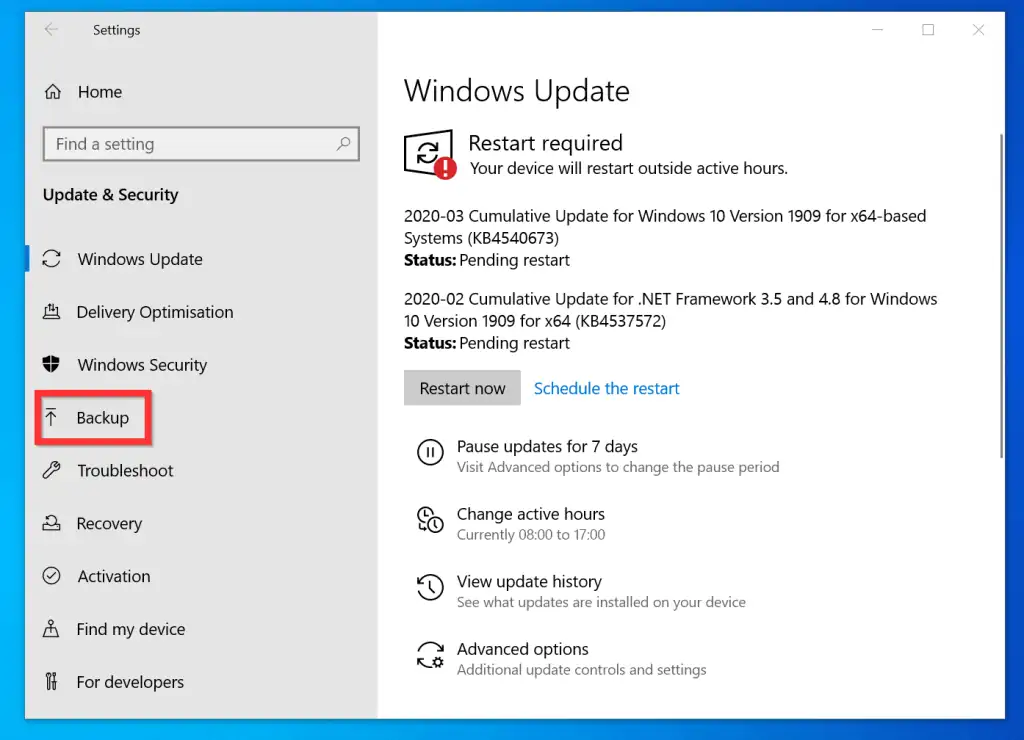
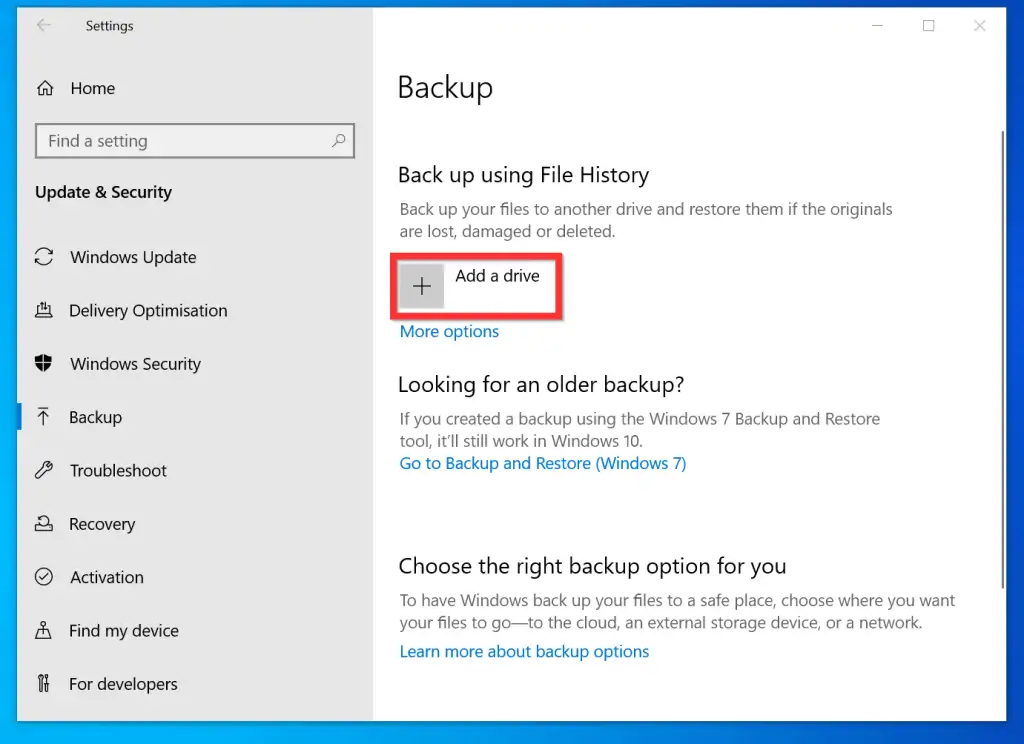
- Then, on the left pane of the Windows Update screen, click Backup.
- When the Backup screen open, beneath Backup using File History, click Add drive.
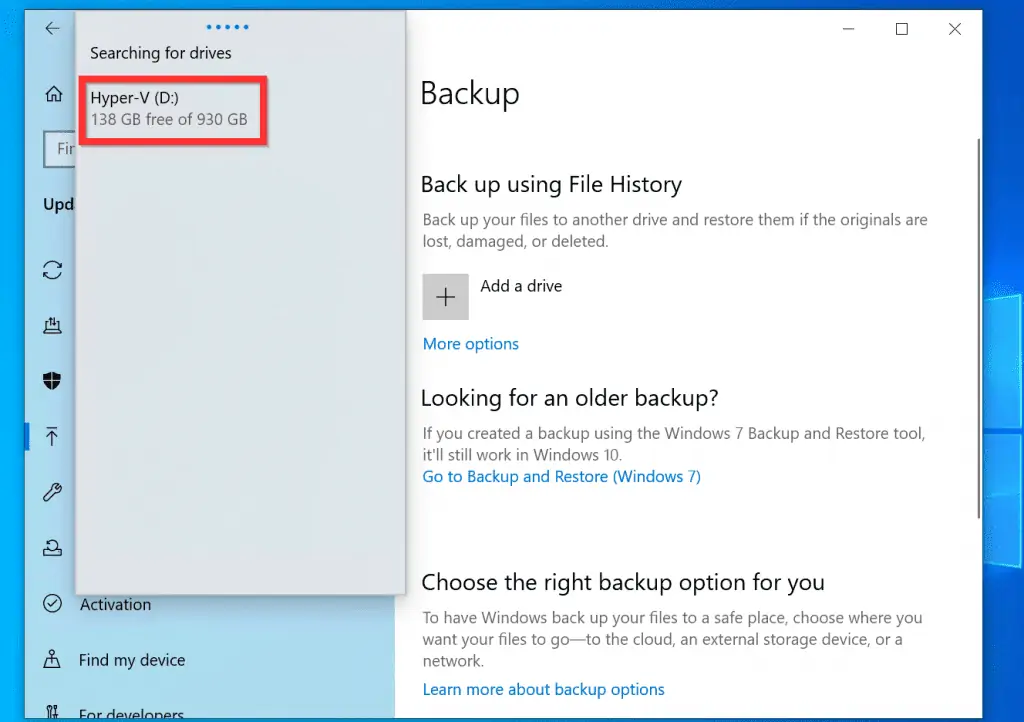
- The backup tool will search for and display all external drives or non-widows partitions. Click the drive you want to use for backup.
- Once you select an external drive or non-windows partition, the Automatically backup my files button will be turned On.
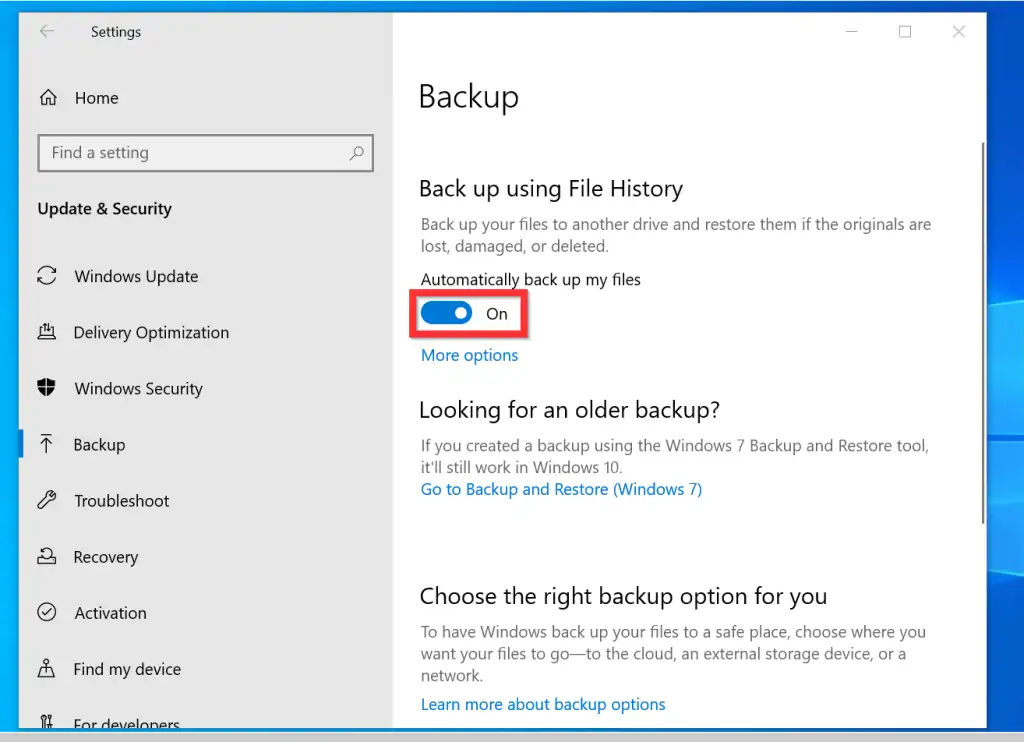
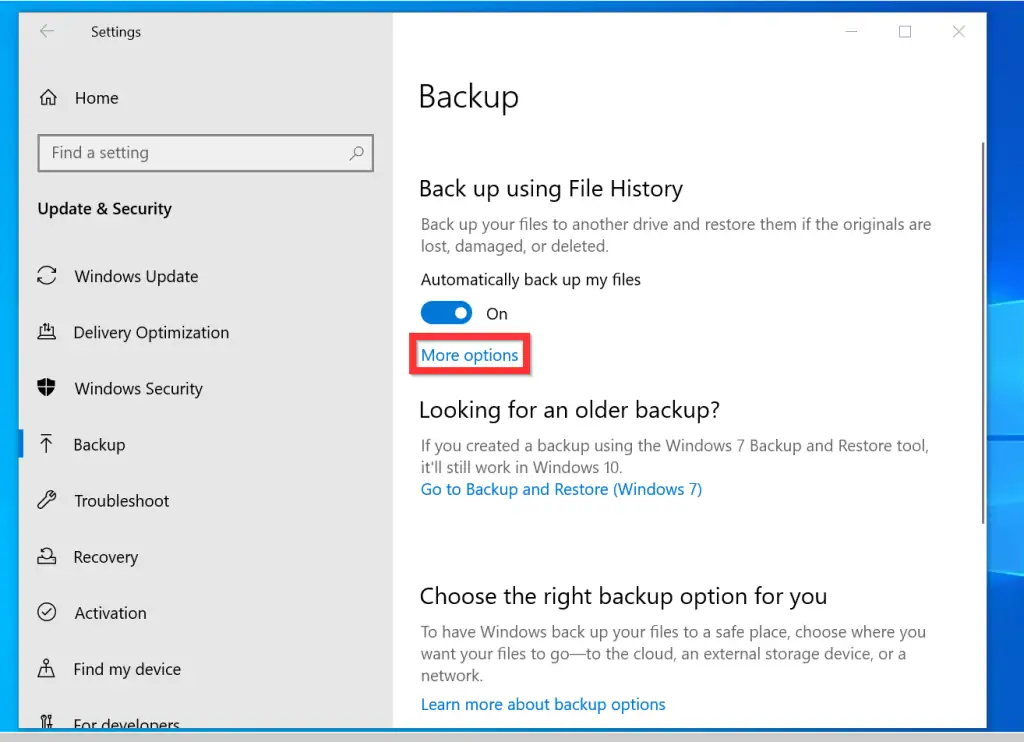
- To modify the files that are backed up or change the backup frequency, click More options.
- When the Backup options screen open, to modify the backup frequency, click the Back up my files drop-down and select how often you want your files backed up.
- You can also change how long the backed up files are kept before they are deleted. To modify this setting, click the Keep my backups drop-down and select an option.

- To add more files to the backup, scroll down to the Backup these folders section and click Add a folder.

- Alternatively, to remove a folder from the list, click the folder. Then, click Remove.
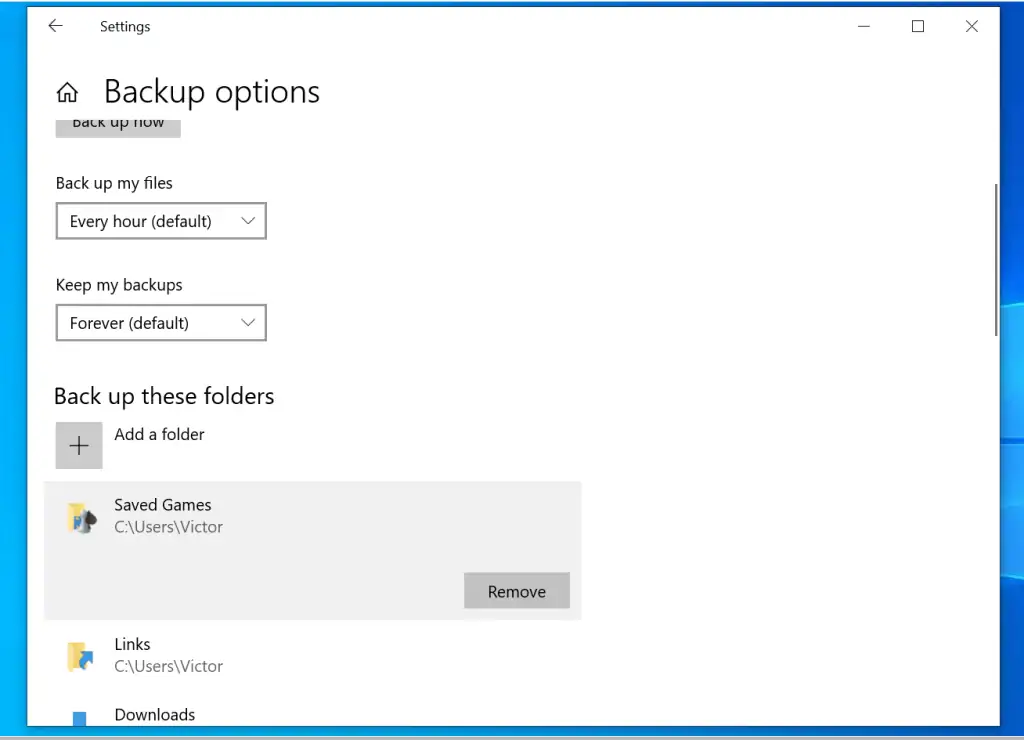
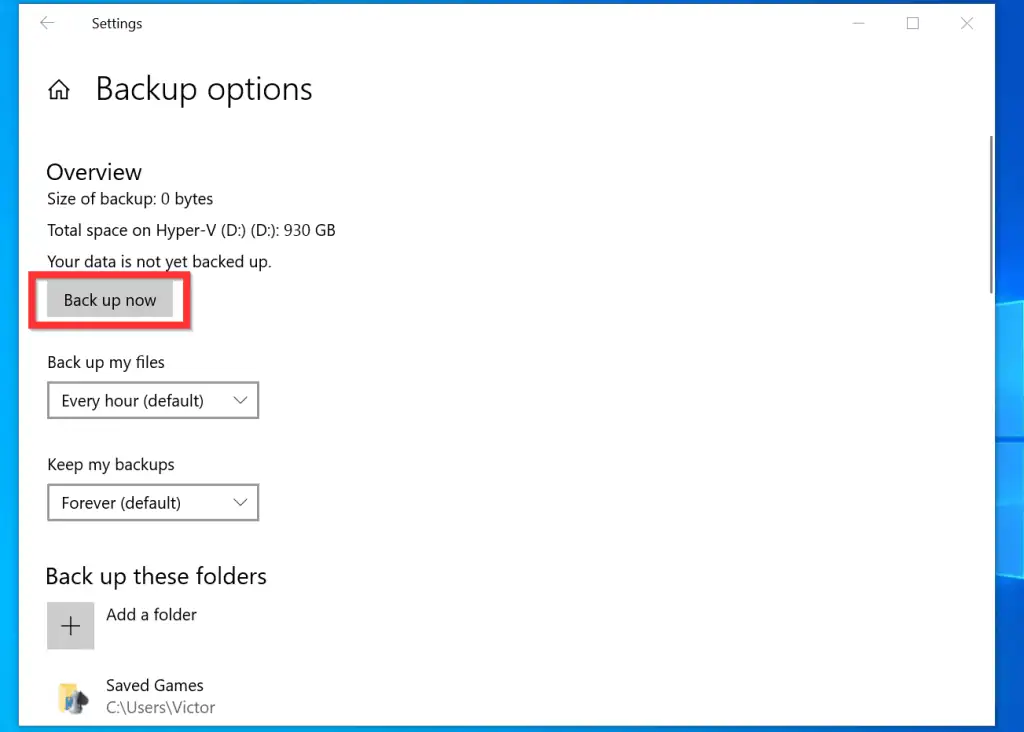
- You can also backup immediately without waiting for the schedule to run. To backup Windows 10 immediately, click Backup now.
How to Backup Windows 10 to a Network Share
- Follow the steps in the last section until you get to Backup.
- Then, on the backup screen, beneath Add a drive, click More options.

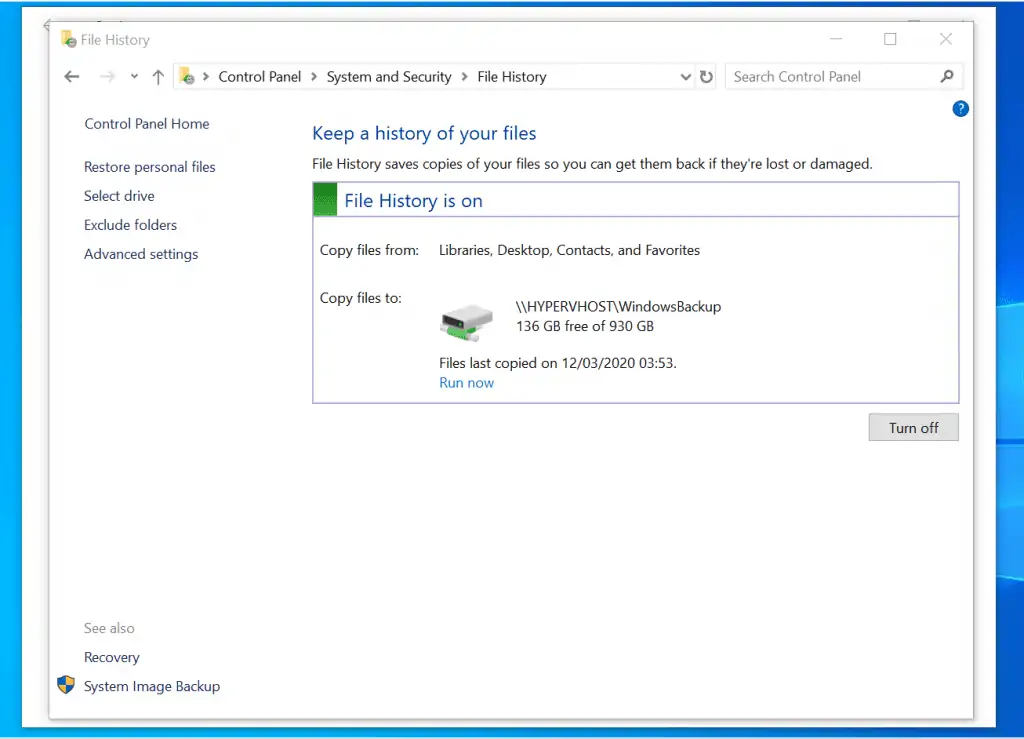
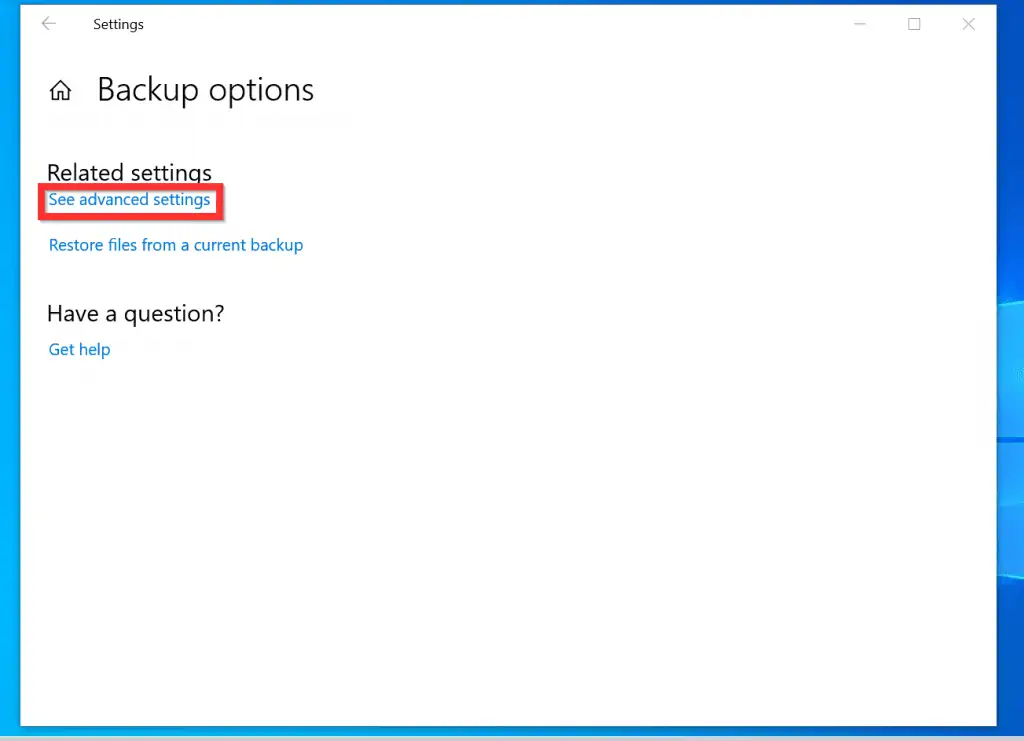
- When Backup options open, beneath Related settings, click See advanced settings. File History settings will open in a new window.
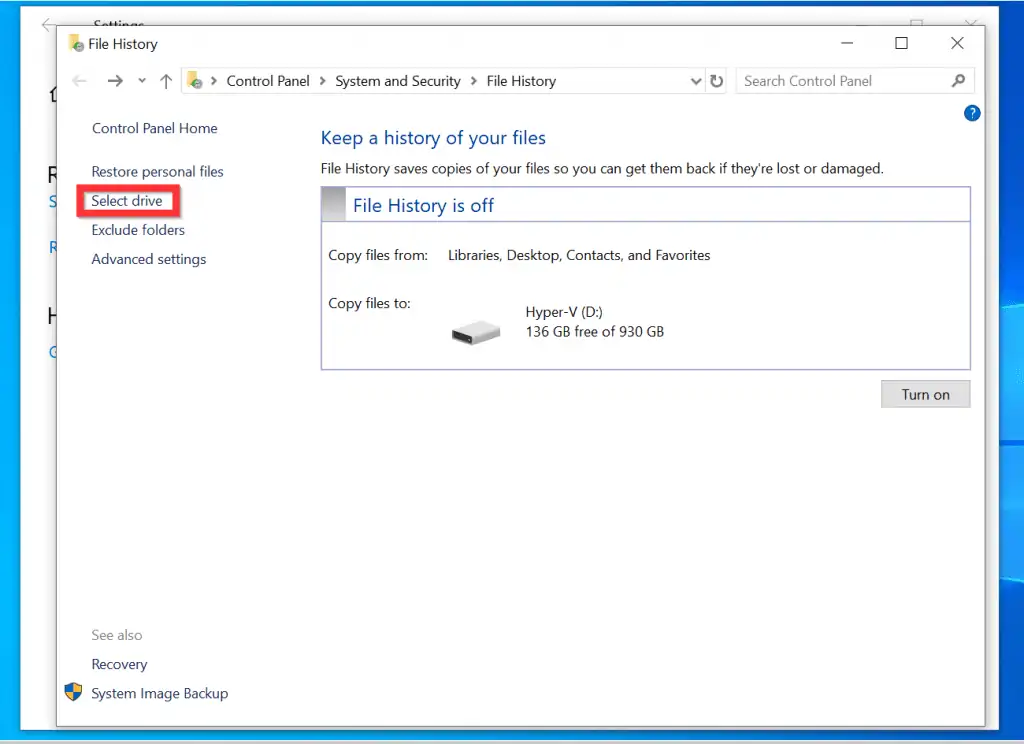
- On the left pane of File History, click Select Drive.
- Then, to add a network share, click Add network location.

- On the Select Folder window, enter the network share in the format \\hostname\sharename and click Select folder.
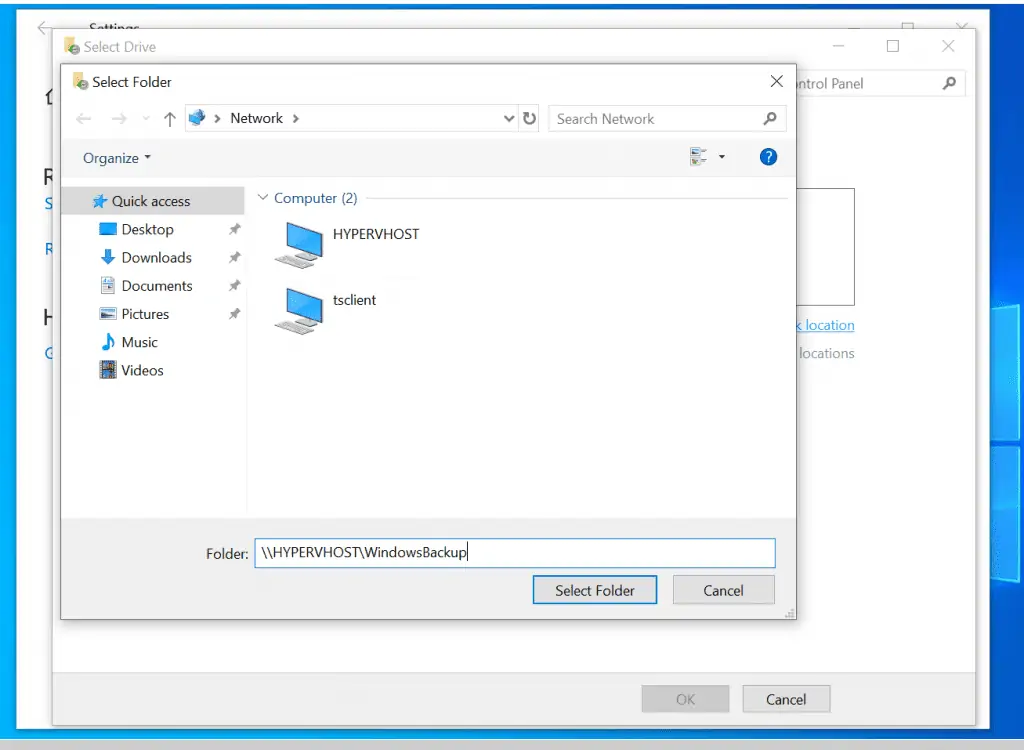
- You will be returned to the Select a File History drive window. On the bottom right of the window, click OK.

- Finally, on the Keep a history of your files window, to backup Windows 10 to a network share, click Turn on.
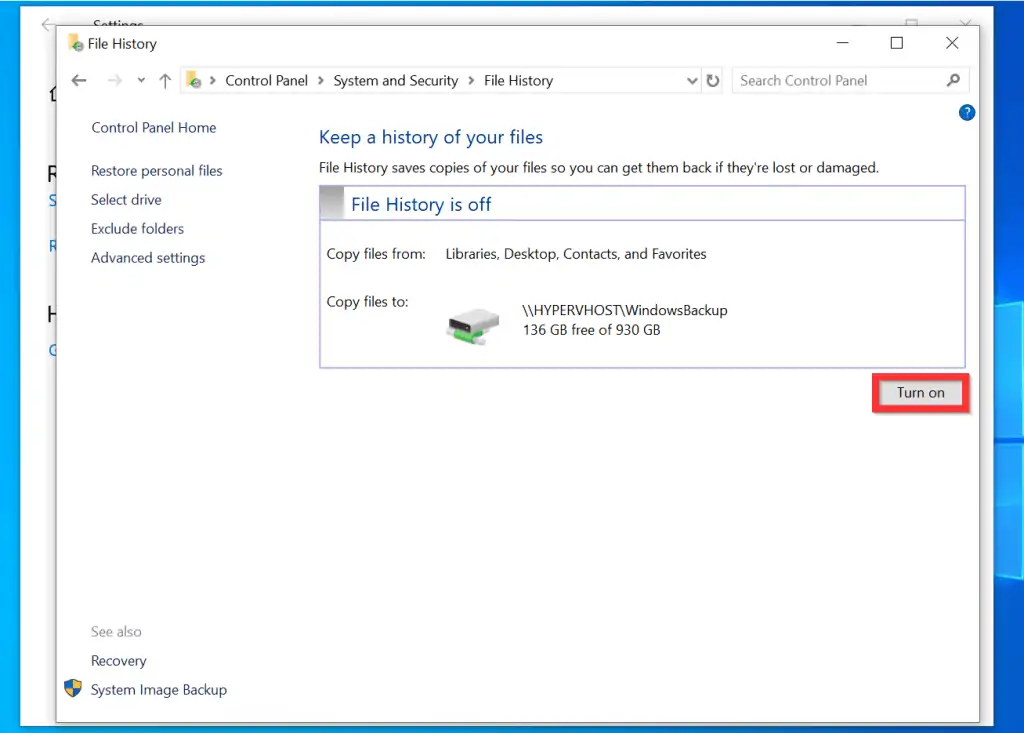
- Now, if you return to the Backup screen, the Automatically backup my files button will be turned On.

It is very easy to backup Windows 10!
I hope you found this Itechguide helpful. If you were able to backup Windows 10 with file history by following the steps in this guide, kindly share your experience at [discourse_topic_url].
However, if you have any questions regarding this article or want to share the method you used, please post them at [discourse_topic_url].
Besides, our team of forum staff and other community members are keen to answer questions from our readers.
Finally, visit our Windows How-To page for more Windows 10 Itechguides.


![How To Run Sysprep (Generalize) In Windows 10 [2 Methods]](https://www.itechguides.com/wp-content/uploads/2022/05/8-2.webp)