Do you wish to add another printer to the list of printers on your computer? This guide gives you steps to add a printer to your Windows 11 PC.
Option 1: Add a Printer from the Windows Settings
The first method I will show you to add a printer on your Windows 11 PC is from Windows Settings. That said if you wish to install a local printer, connect it to the PC via USB or WiFi.
However, if it is a network or shared printer, follow the steps below to connect it to your computer:
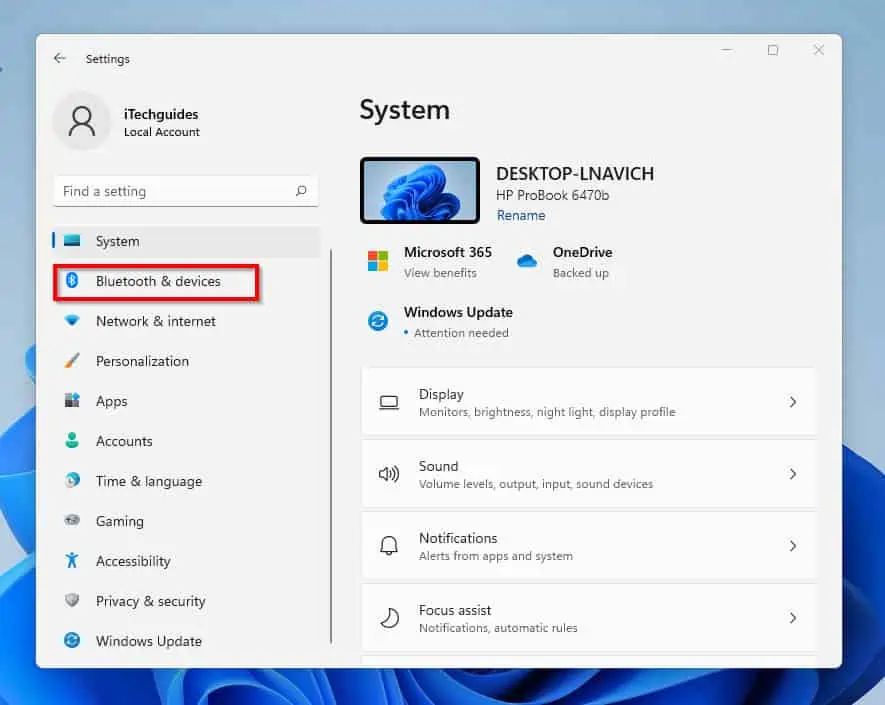
- To start with, right-click on the Windows 11 start menu on your Taskbar and click Settings.

- Then, on the left pane of the Settings screen, click on Bluetooth & devices.
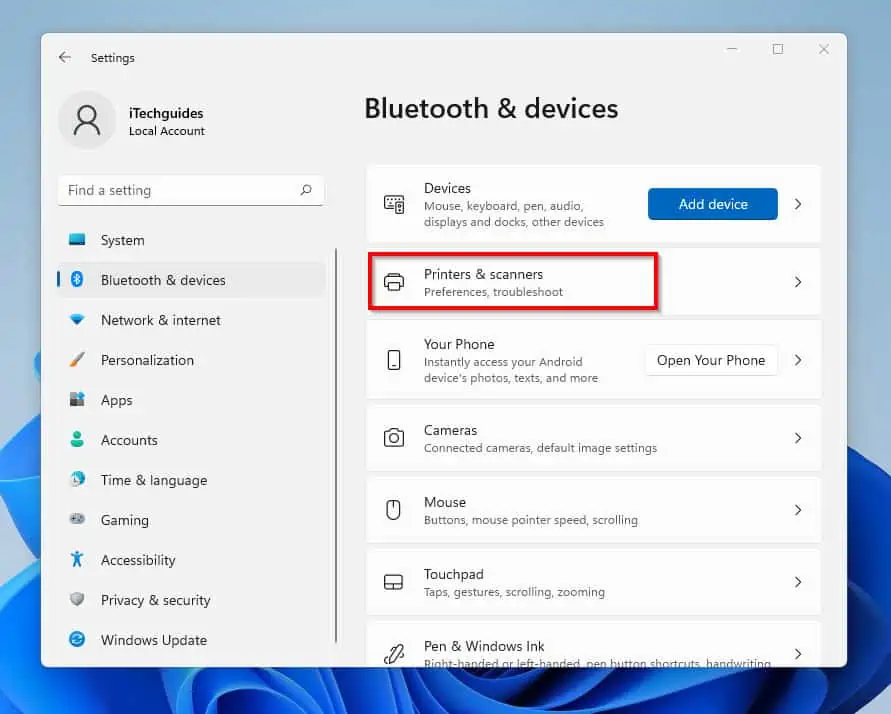
- Then, on the right pane of the Settings screen, click on Printers & scanners.
- On the Printers & scanners screen which is not the right pane of the Settings page, click on Add device. Then, wait for your printer to be detected.
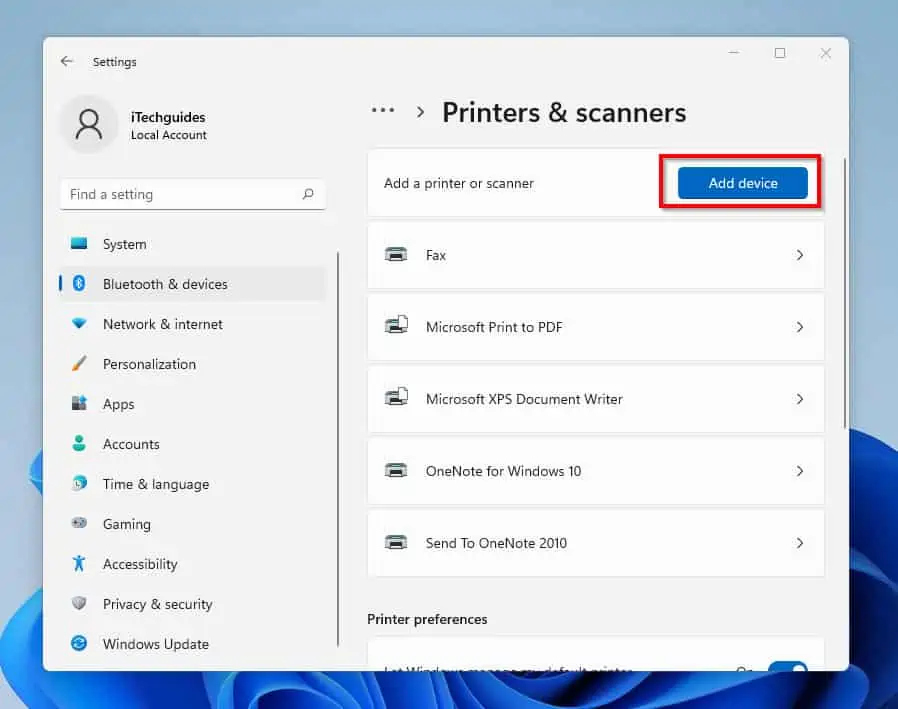
- Furthermore, click on the Add manually button next to the “The printer I want isn’t listed” message.

- When you click on Add manually, a “Add printer” pop-up screen opens. Finally, to add a printer on Windows 11 from Windows Settings, select one of the options and click Next to proceed with the printer installation.
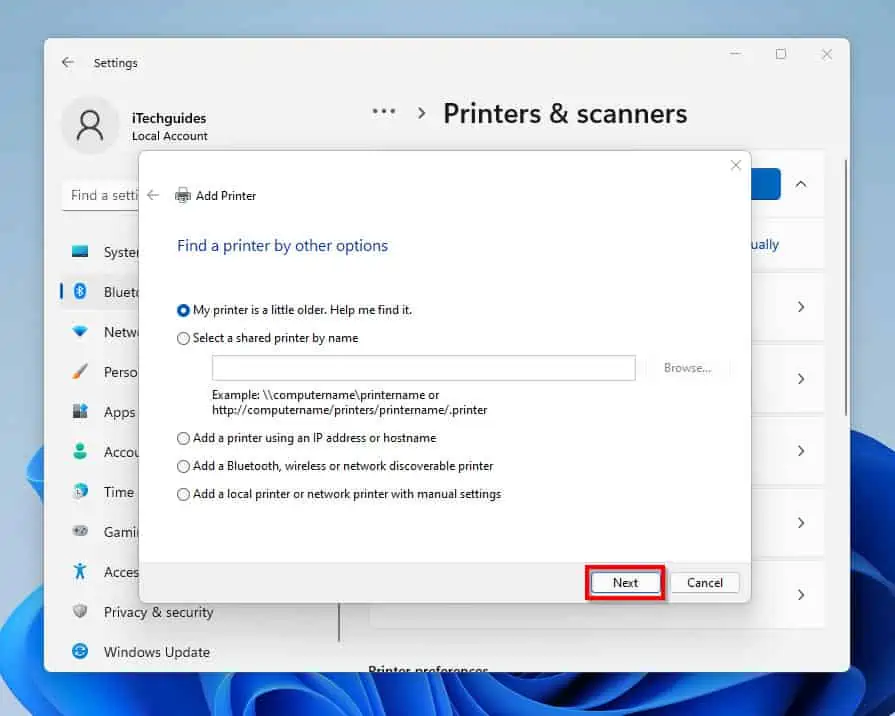
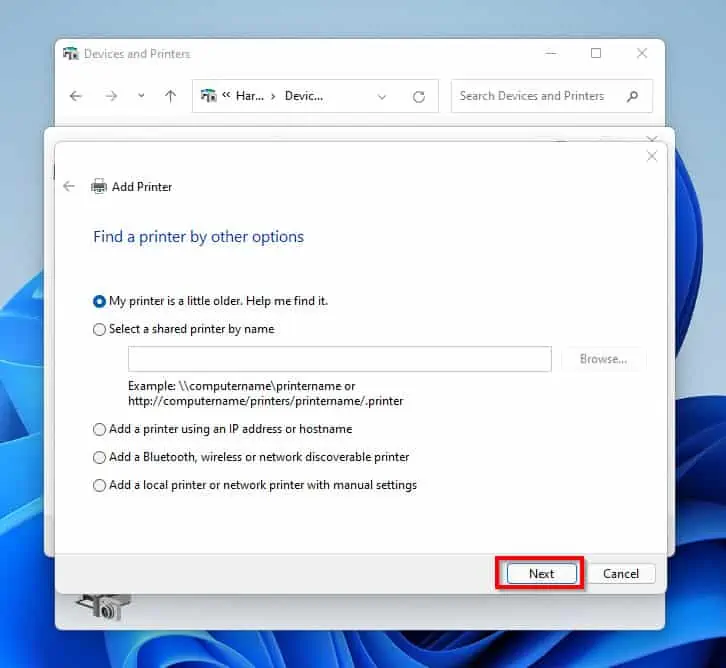
For clarity, the table below explains each of the options and how to use them.
| S/N | Printer Install Option | How to Use the Option |
| 1 | My printer is a little older. Help me find it. | Use this method if you have an older printer – Windows 11 will try to find the printer |
| 2 | Select a shared printer by name | This option allows you to add a shared printer installed on a print server. Type the full UNC path to the shared folder using this format \\ServerName\SharedPrinterName |
| 3 | Add a printer using a TCP/IP address or hostname | Use this option to add a printer on Windows 10 using the printer’s IP address and port name. |
| 4 | Add a Bluetooth, wireless, or network discoverable printer | This option allows you to add a Bluetooth-enabled printer, a wireless printer, or a printer shared on the network. |
| 5 | Add a local printer or network printer with manual settings | With this option, you will be able to install a printer that Windows 10 could not detect or does not have a driver for. The option also allows you to install a network printer by entering the network printer details manually. |
Option 2: Add a Printer from the Control Panel
The second method I will be showing you in the article is to add a printer on Windows 11 from Control Panel. As I mentioned earlier in this guide if you want to install a local printer, connect the printer to the computer via WiFi or USB.
However, if you want to install a network or shared printer, follow the steps below proceed:
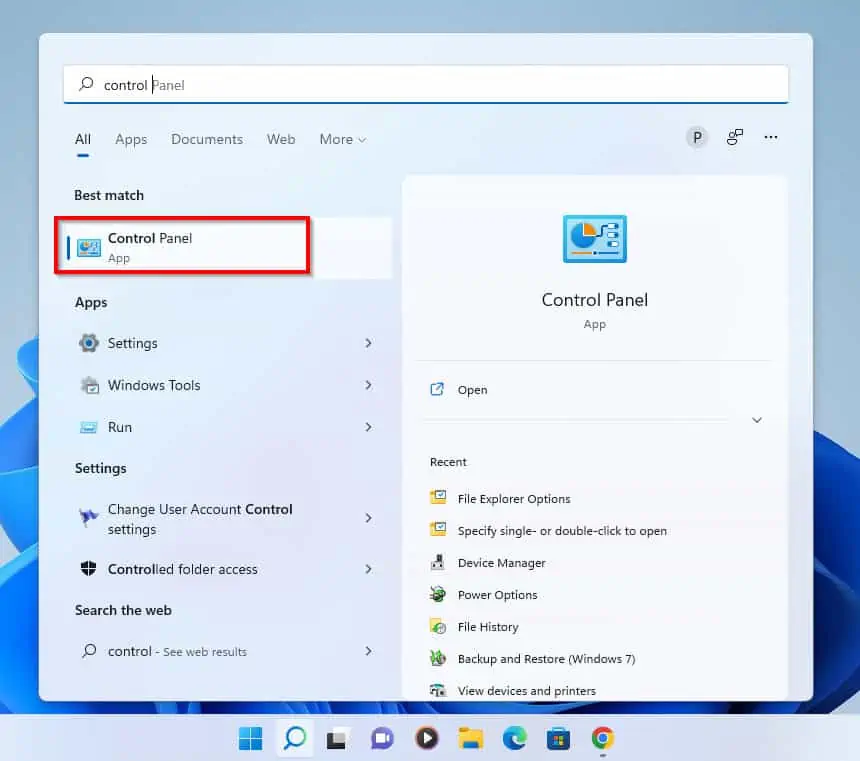
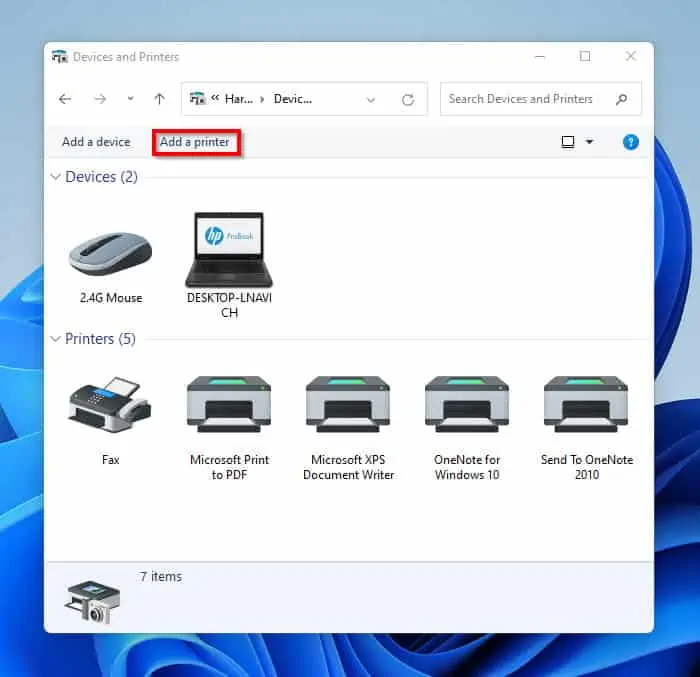
- Click on the search icon on your Windows 11 Taskbar and type control panel.
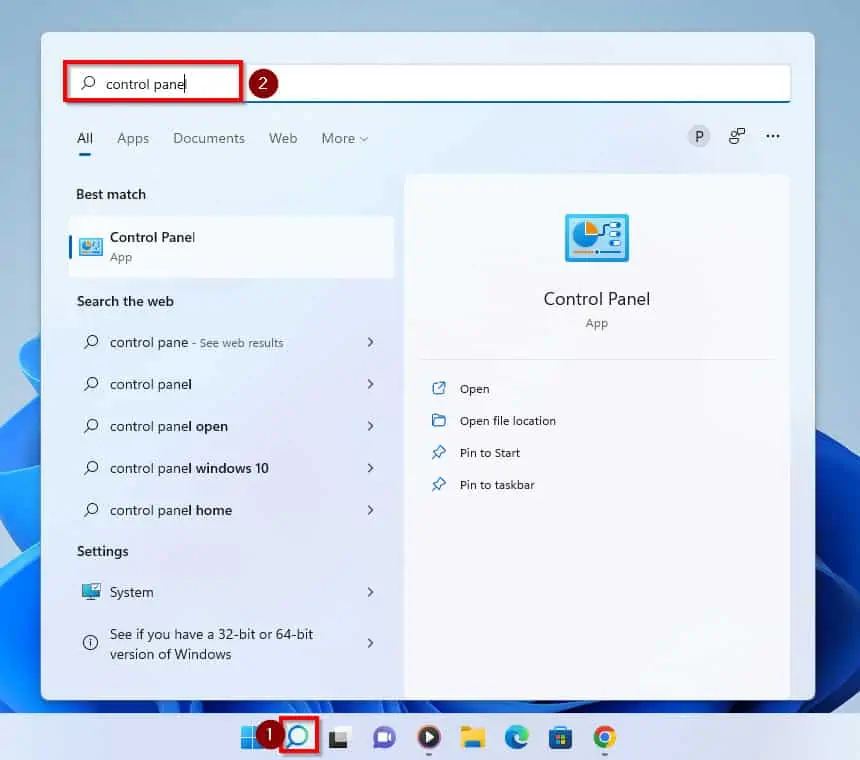
- Then, from the result of the search click on Control Panel.
- When Control Panel opens, confirm that View by is set to Category.
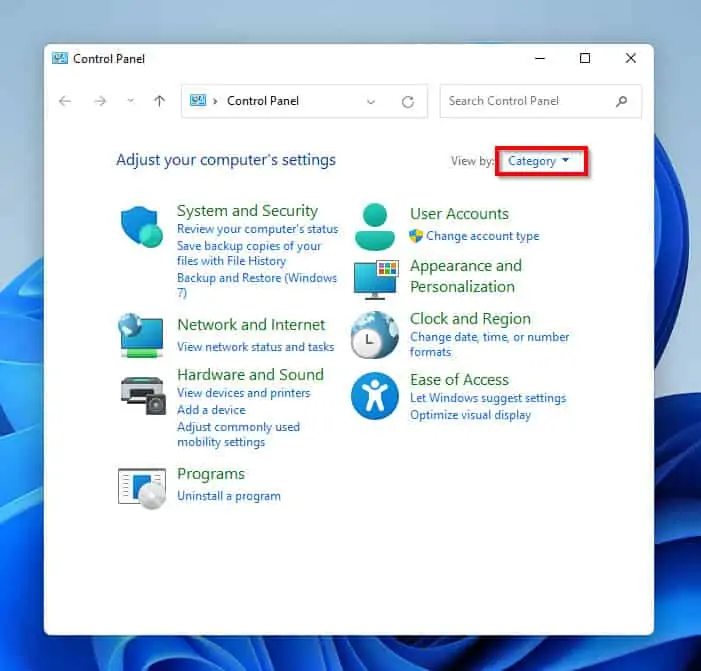
- Then, under the Hardware and Sound category, select View devices and printers.

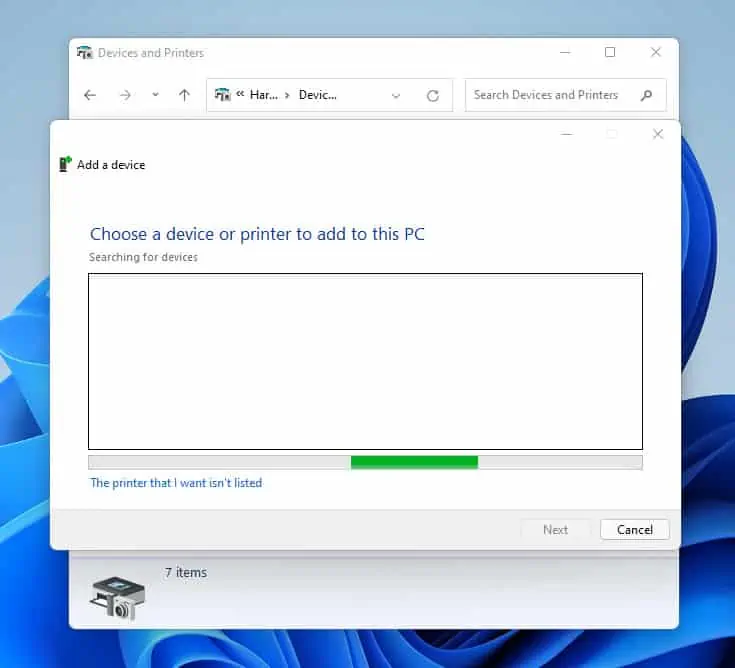
- On the top left of the View devices and printers screen, click on Add a printer. Windows 11 will try to find the printers connected to your PC.
However, the search might also pick up nearby Bluetooth wireless printers.
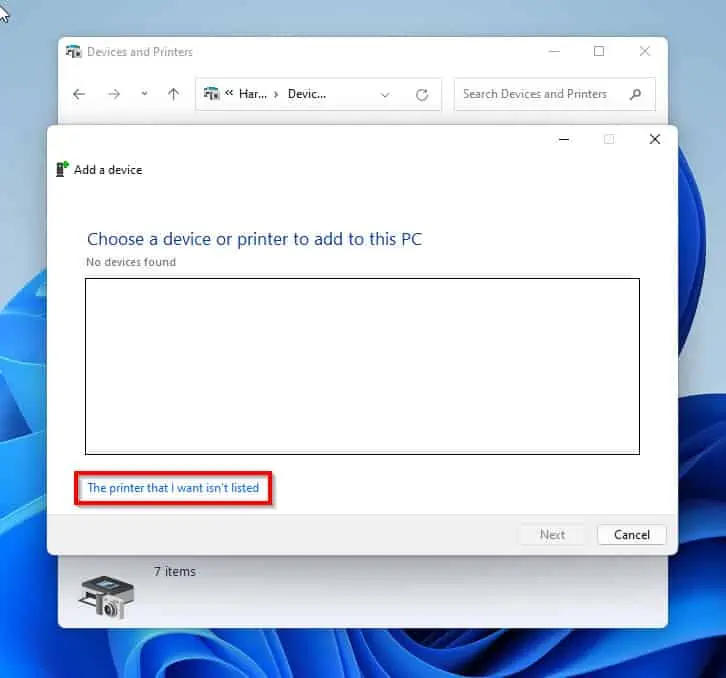
- When the search is completed, if your printer is listed select it and click Next to complete the printer driver installation.
- Nonetheless, if your printer is not on the list, click on The printer that I want isn’t listed. To proceed with the installation, follow the steps below.
- Finally, to add a printer on Windows 11 from Control Panel, select an options on the Find a printer by other options screen. Then, click Next to proceed with your printer installation.
Option 3: Add a Printer with PowerShell
Follow the steps below to add a printer on Windows 11 with Windows PowerShell.
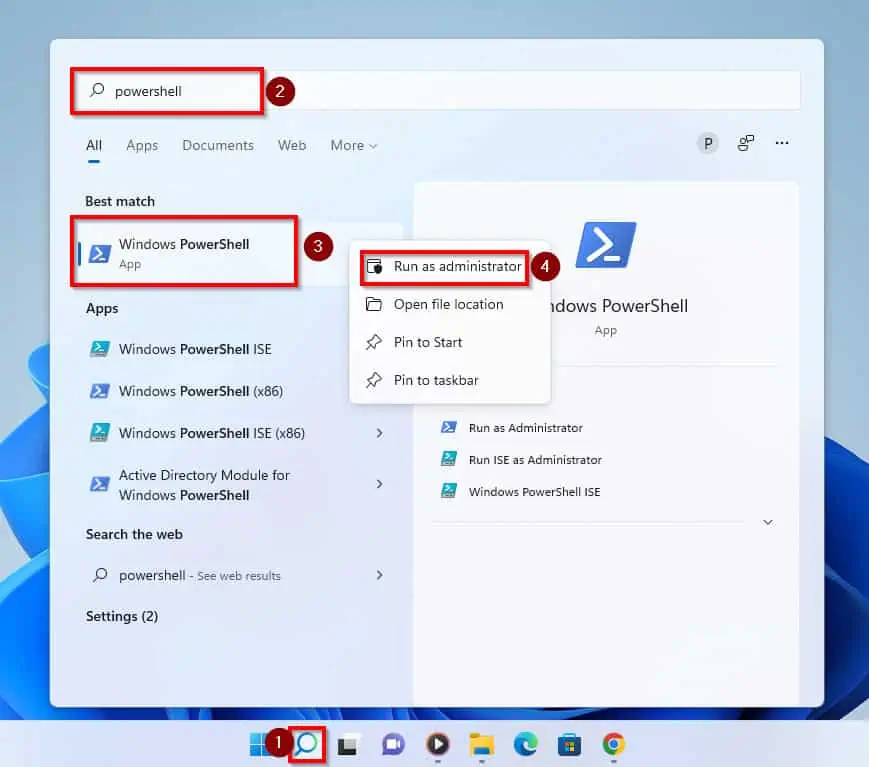
- First and foremost, click on the search icon on the Taskbar and type powershell in the search box. Then, from the result of your search, right-click on PowerShell and click on Run as Administrator.
- When PowerShell opens, type the commands below and press enter to add a printer on Windows 11. The first command adds a local printer to you computer, while the second adds a shared printer or a network printer to your PC.
Add-Printer -Name "Printer Name" -DriverName "Printer Driver name"
Add-Printer -ConnectionName \PrintServer\SharedPrinterName
- In the first command above, replace “printer-name” with the name you want to be displayed for your printer. In that command “printer Driver name” is the name of the printer driver.
- Furthermore, PrintServer in the second command is the name of the print server where the shared printer is installed. Also, SharedPrinterName is the name of the network printer you wish to add to your PC.
Frequently Asked Questions
a) Navigate to your Windows 11 Settings page.
b) On the left pane of the Settings screen, click on Bluetooth & devices.
c) Then, on the right pane of the screen, click on Printers & scanners.
d) Furthermore, on the right pane of the screen, click on Add device to add a new printer or scanner. Windows will start searching for available printers.
e) When the search is completed, click on Add manually. This will direct you to a “Add printer” pop-up screen.
f) In the pop-up screen, click on Add a printer using an IP address or hostname.
g) Then, for Devices type click on the drop-down and choose TCP/IP address field.
h) For the hostname or IP address option, paste the IP address of your printer.
i) Then, Click Next to proceed.
j) Furthermore, type in the name of your printer and select Do not share this printer.
k) Finally, click on the Finish button to conclude the process.
Yes, they will. Older Printers that cannot be found by search can be manually added to the list of printers on your Windows 11 PC.
Yes, they will. Printers will work on Windows 11 just as they did with Windows 10.
a) Right-click the Windows Start menu and select Device Manager.
b) When Device Manager opens, scroll down to Printers group and expand it.
c) Next, right-click the printer you want to update its driver and select Update driver.
d) Finally, follow the driver update wizard to complete the printer driver update.
a) Open the document you want to print on Word.
b) Then, click on the File tab and select Print. Alternatively, press the Ctrl and P keys simultaneously on your keyboard – this opens the Print dialogue.
c) Next, choose the printer, number of copies, paper size, print orientation, and the scale of the document you want to print.
d) Finally, click on the Print button to print the document.
Conclusion
The usefulness of printers can never be over-emphasized. This is because they allow you to scan files, make photocopies, and print documents easily.
As a result, it is recommended that every office and business place have a ready printer. On that note, with the methods in this article, you should be able to install a printer on your Windows 11 computer.
To be more specific, this article provides you with steps to add a printer to your PC from Windows Settings and Control Panel. Also, you learned how to perform this task from PowerShell.
I hope you found this guide helpful. If you did, click on “Yes” beside the “Was this page helpful” question below.
You may also express your thoughts and opinions by using the “Leave a Comment” form at the bottom of this page.
Finally, visit our Windows 11 How-To page for more Windows 11 guides