In this Itechguide, Victor teaches you how to use DISKPART to create a partition and assign a drive letter. The guide also covers steps to use DISKPART to delete a partition.
Option 1: Create a Partition and Assign a Drive Letter
DISKPART is one of the most useful CMD commands for System Administrators. This section covers steps to use this must-know tool to create a new partition and assign a drive letter to the partition.
Step 1: Open Command Prompt as an Administrator
To use DISKPART, you need to open Command Prompt as administrator. Here are the steps to run CMD as Administrator…
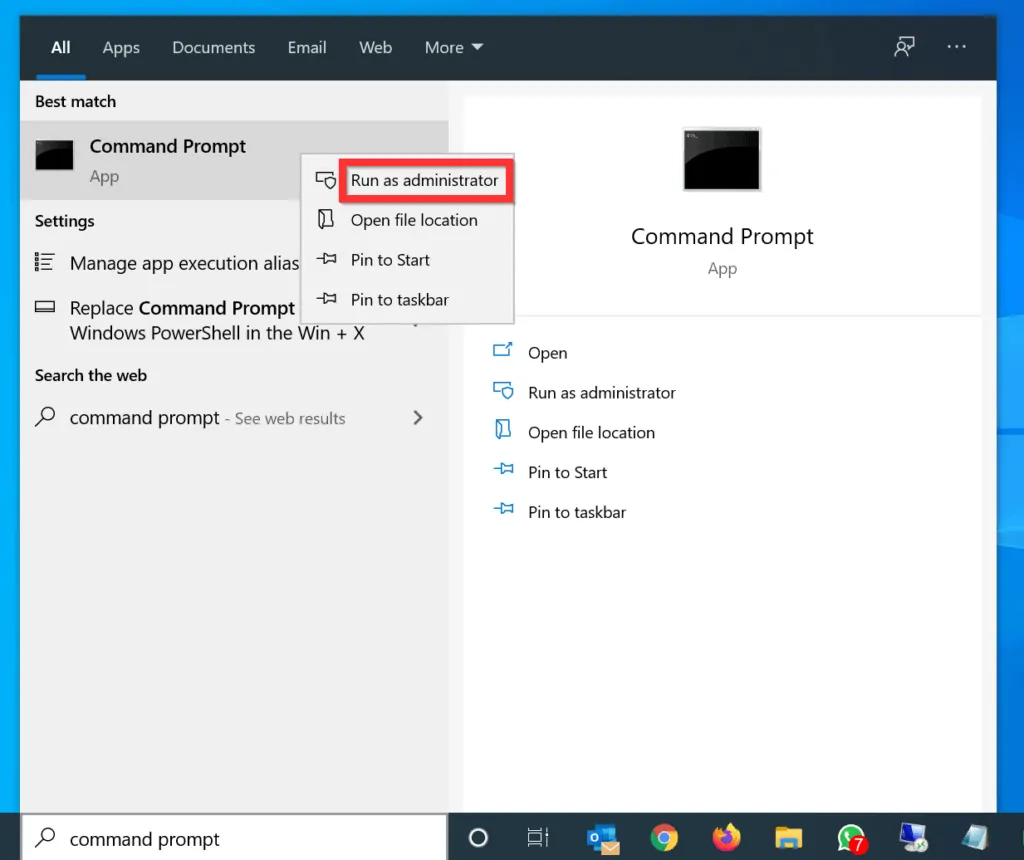
- Type command prompt in the search box. Then, from the search results, right-click Command Prompt and select Run as Administrator.
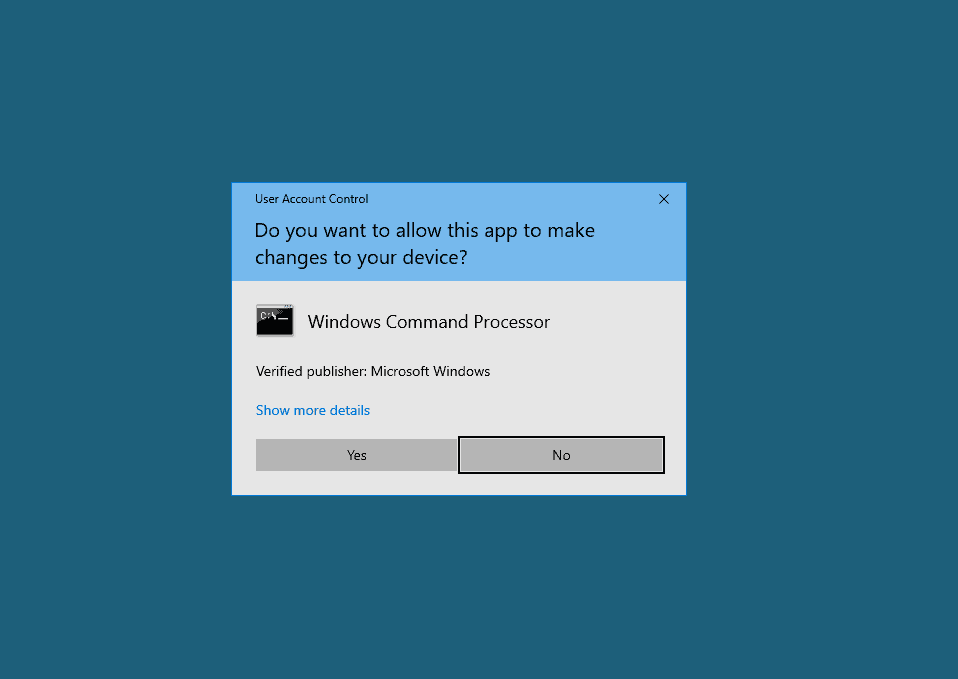
- When you receive a User Access Control (UAC) confirmation, requesting you to allow the “app to make changes to your PC”. On the UAC prompt, click Yes.
Step 2: Create a Partition
After opening Command Prompt as administrator, use the steps below to create a partition.
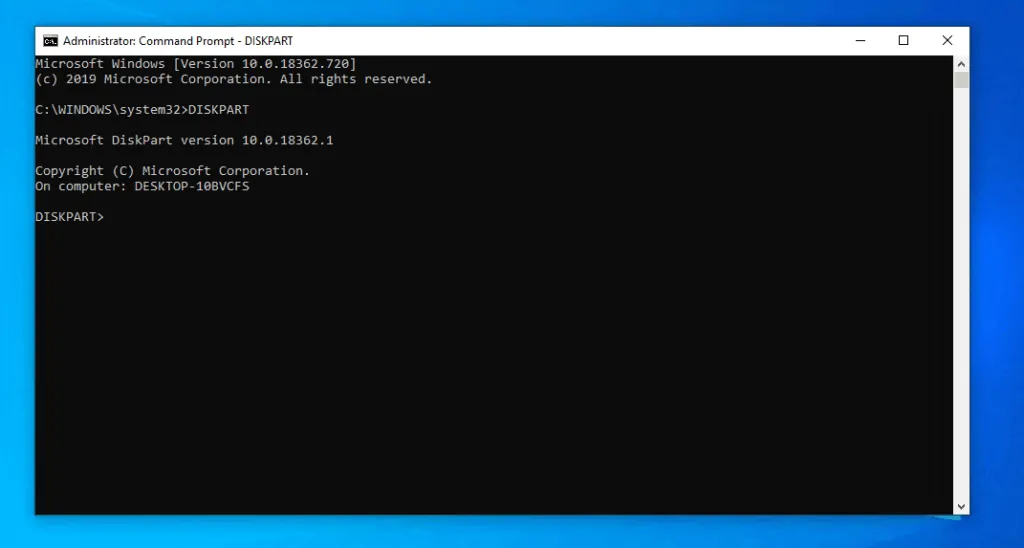
- On the CMD Prompt, to open the DISKPART command prompt, type the command below and press enter.
DISKPART
- The DISKPART CMD prompt will open.
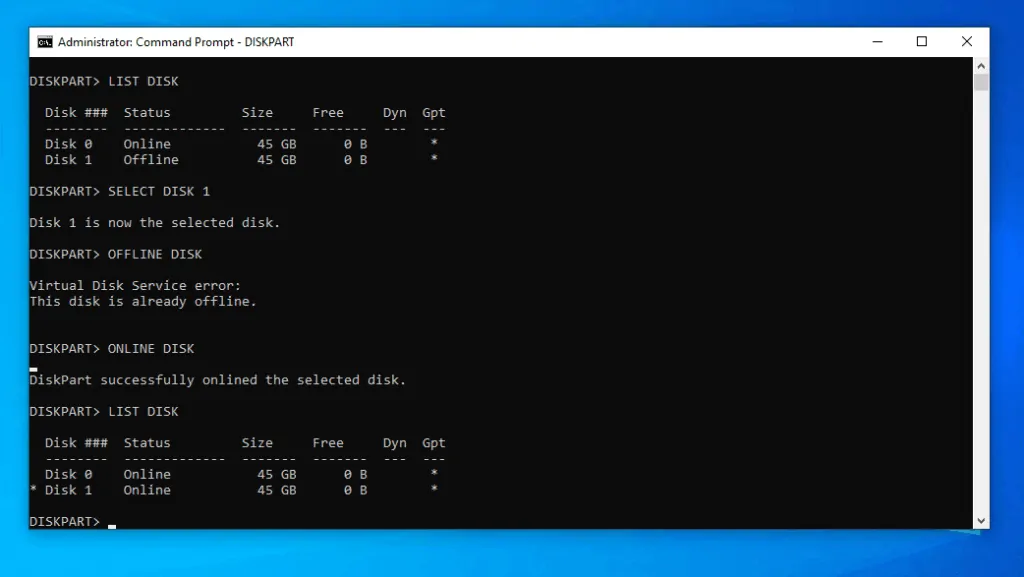
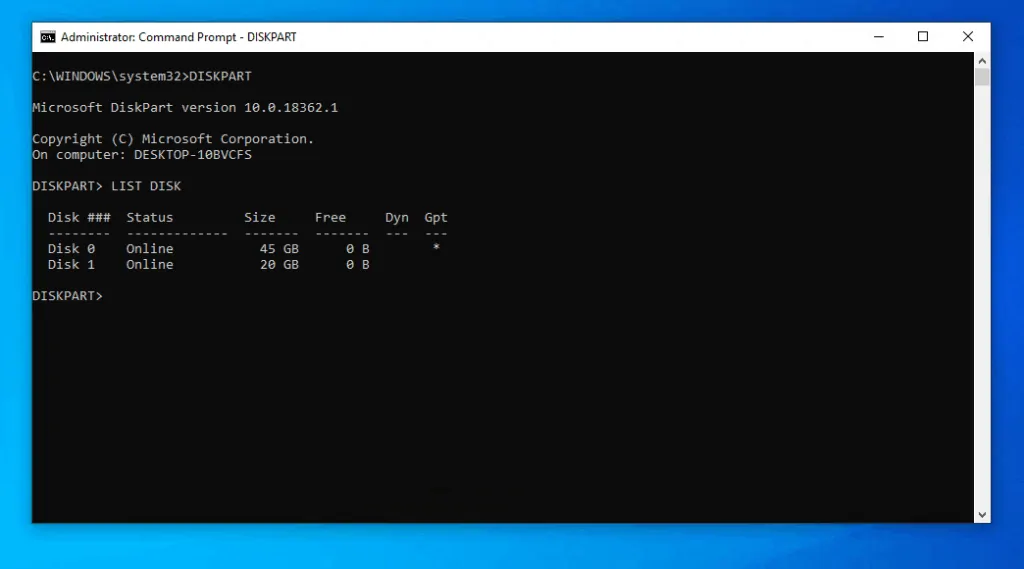
- On the DISKPART prompt, use the LISK DISK command to list all available disks – type the command and press enter.
LIST DISK
- The LIST DISK command displays all the disks on your PC. The next step is to select the disk you want to use DISKPART to create a partition on.

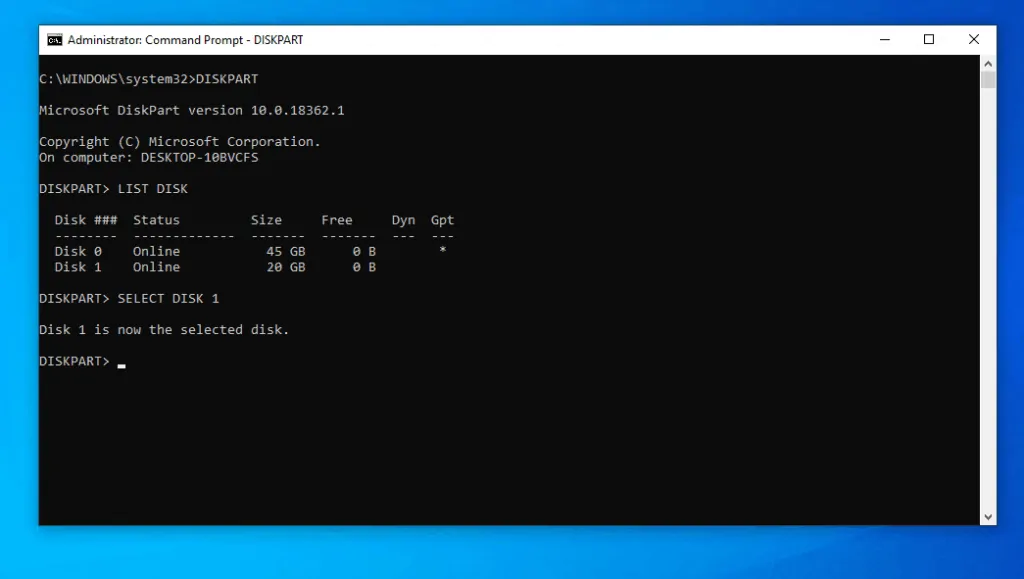
- To select the disk, use the command below – enter the command and press enter.
SELECT DISK 1
- The last command should return “Disk # selected successfully”
- If your disk is Offline, you need to take it Online. Use the command below.
ONLINE DISK
- The command should return “DiskPart successfully onlined the selected disk”. To confirm that the disk is now online, run the LIST DISK command.
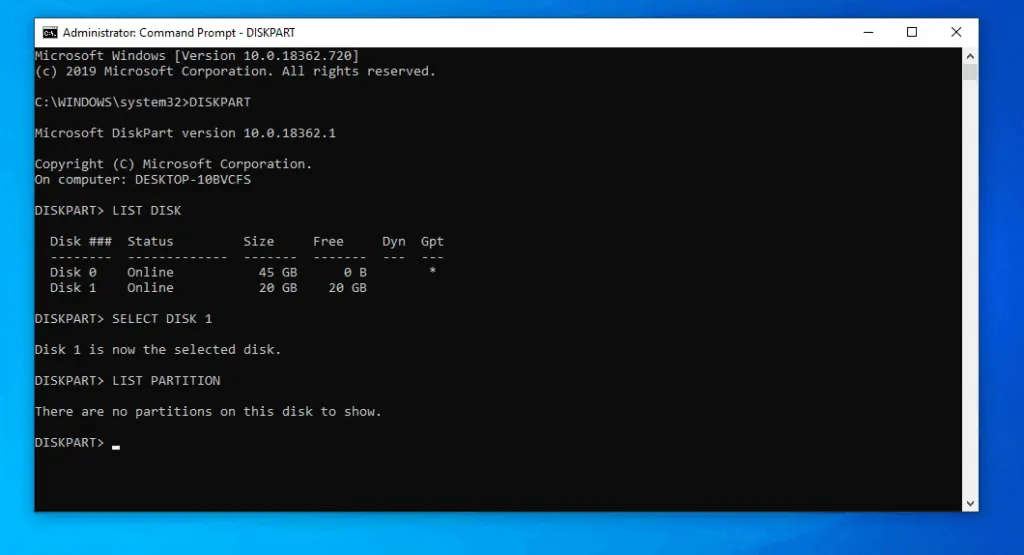
- To be sure that your disk is still selected, run the SELECT DISK command again. Then, to see if there are any partitions on the selected disk, run the command below – this will list all available partitions on the selected disk.
LIST PARTITION
- If there are partitions on the disk, they will be displayed. Otherwise, the command will return “There are no partitions on this disk to show”.
- To use DISKPART to create a partition, type the command below. Then, press enter. Before you press enter, read the notes below the command.
CREATE PARTITION PRIMARY SIZE=n
The above command will create a Primary partition. If you want to create an Extended partition, replace PRIMARY with EXTENDED. In the command, n is the size of the partition in Megabytes. To create a partition with all available disk space, DO NOT specify the SIZE parameter.
To read more about disk partitions, read this How-to-geek guide – Hard Disk Partitions Explained.
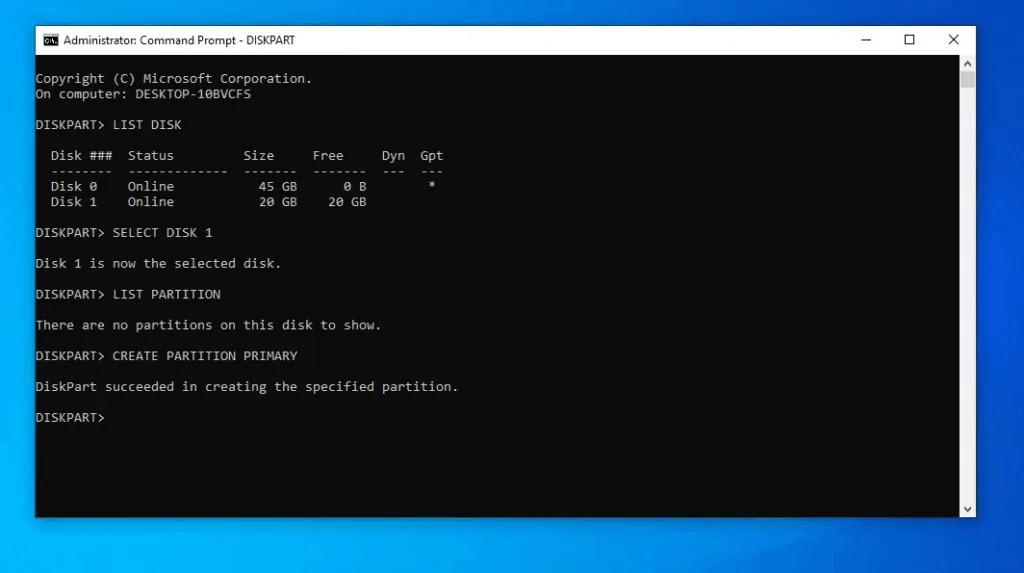
- Here is a real sample command – this DISKPART command creates a partition with all available spaces on the selected disk.
CREATE PARTITION PRIMARY
- If DISKPART returns “DiskPart succeeded in creating the specified partition”, the partition was created. Otherwise, if it returns an error, read the error details and fix the problem.
- To confirm that the partition was created, run the LIST PARTITION command again. The partition will now be listed!

Step 3: Assign a Drive Letter
After creating a partition, you need to assign a drive letter to the partition. Here are the steps…
- Still on the DISKPART prompt, type the command with the format below.
ASSIGN LETTER=N
N is your drive letter. The command below assigns letter D to the partition you created in the last section…
ASSIGN LETTER=D
- If the drive letter is not available, you will receive an error message – try another letter.
- In the command shown in the image below, I used drive F and the drive letter was assigned successfully!

Option 2: Delete a Partition
If you can DISKPART to create a partition, you can also use DISKPART to delete a partition. Here are the steps…
- Open Command Prompt as Administrator. Then, on the CMD prompt, type this command and press the enter key.
DISKPART
- The DISKPART prompt will open.
- On the DISKPART CMD prompt, type the LIST DISK command. Then, press enter.
LIST DISK
- The LIST DISK command lists all the disks on your PC. The next step is to select the disk you want DISKPART to delete a partition from.
- To select the disk, use the SELECT DISK command. Here is an example command that selects disk 1.
SELECT DISK 1
Replace 1 with your disk #. The next step is to list partitions on the select disk.
- Use the command below to list available partitions on the disk.
LIST PARTITION
- Then, select the partition you want to delete with this command…
SELECT PARTITION 1
Replace 1 with your partition #
- Finally, to use DISKPART to delete a partition, type the command below and press enter.
DELETE PARTITION
- To see how to run the commands above, see the image below…
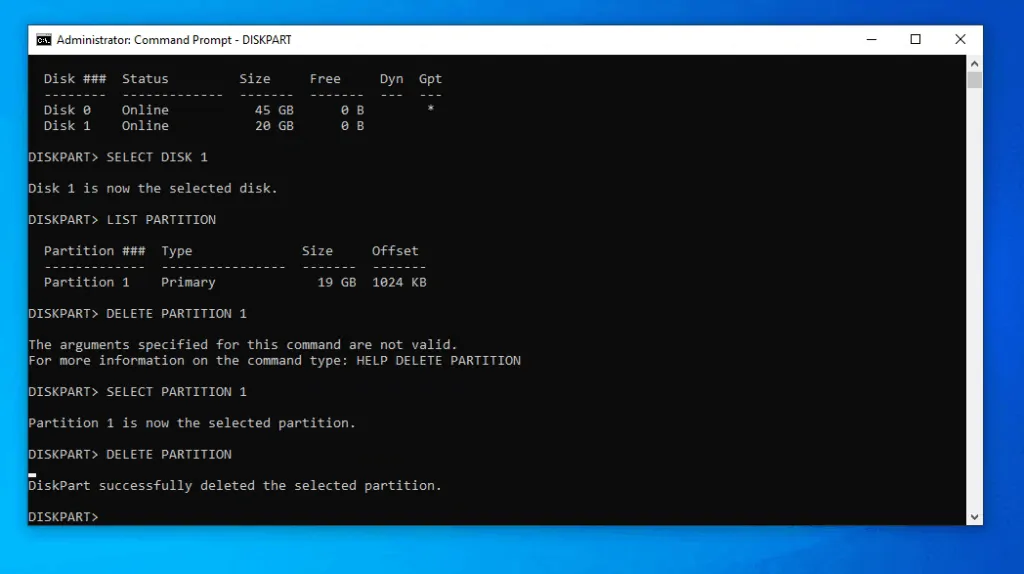
As you can see, it is very easy to use DISKPART to create or delete a partition!
I hope you found this Itechguide helpful. If you were able to use DISKPART to create or delete a partition by following this guide, click on “Yes” beside the “Was this page helpful” question below.
You may also express your thoughts and opinions by using the “Leave a Comment” form at the bottom of this page.
Finally, for more Command Prompt Itechguides, visit our Windows Command Prompt page.