This Itechguide teaches you how to share an album on Facebook. The guide covers steps to share an album on Facebook from a PC or the Facebook Apps.
You can only share a Facebook album you created. If you are not the owner of an album, the option to edit it will NOT be available.
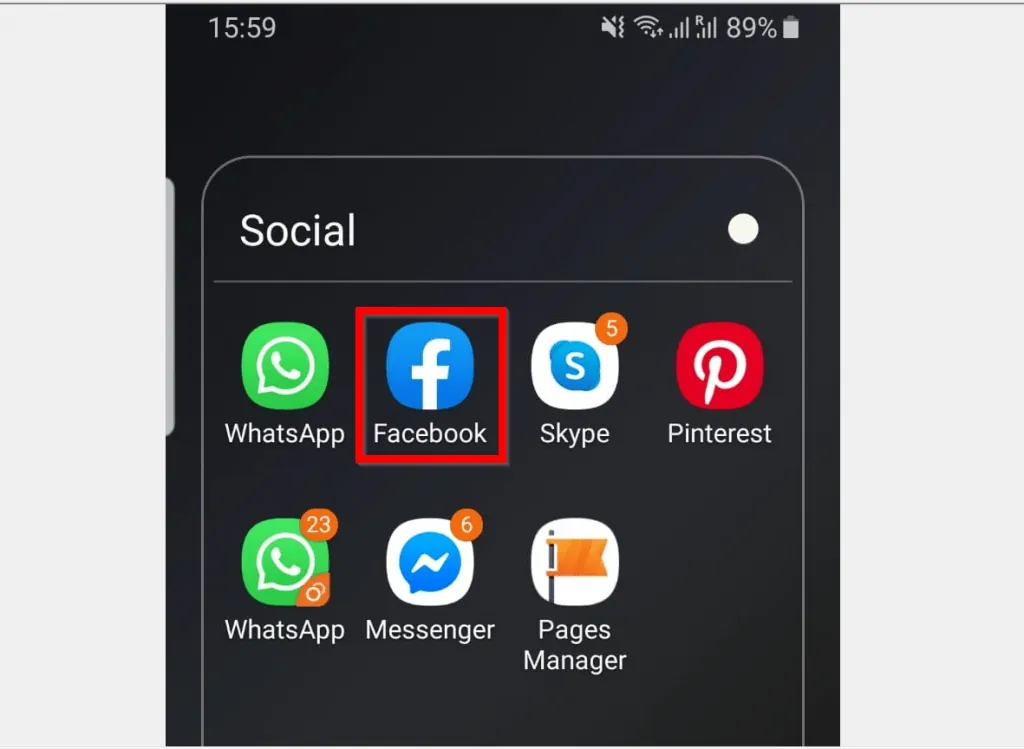
Option 1: Share an Album Using the App
The steps in this section was performed from the Facebook Android App but they are applicable to the iPhone App.
- Open the Facebook App on your Phone. Then, if you have not signed in, sign in with your Facebook account.
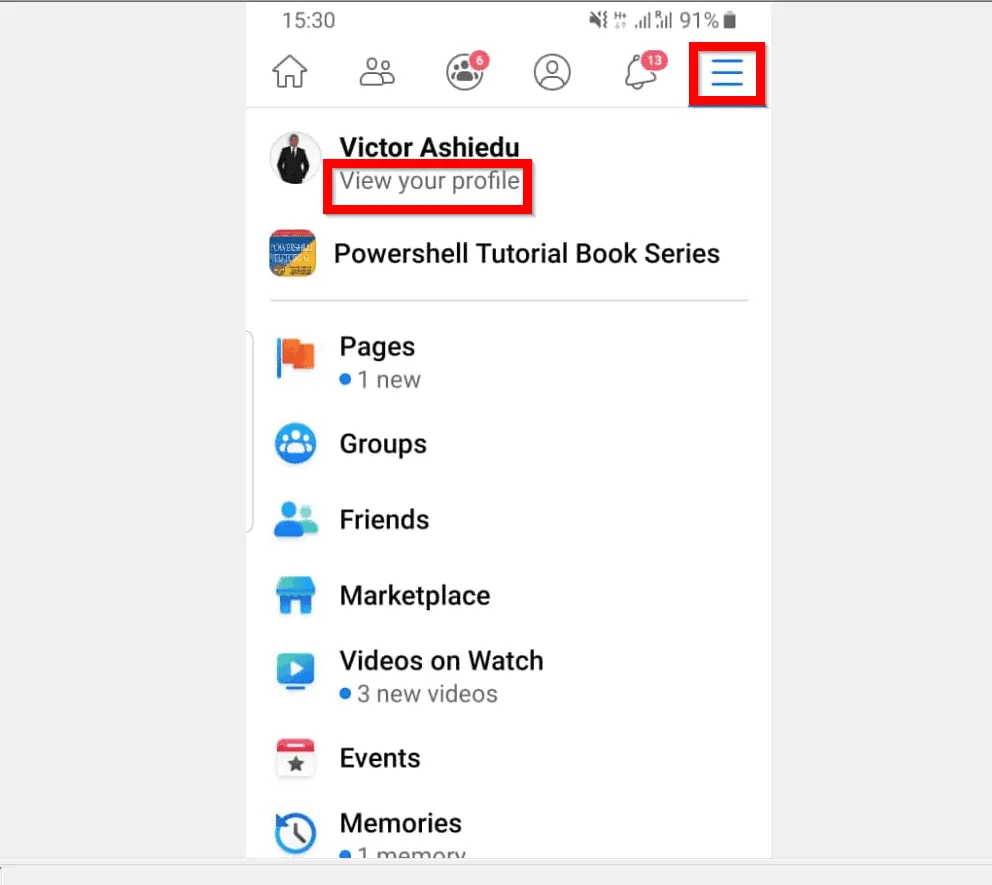
- On the top right of the App, tap the 3 lines. Then, tap View your profile.
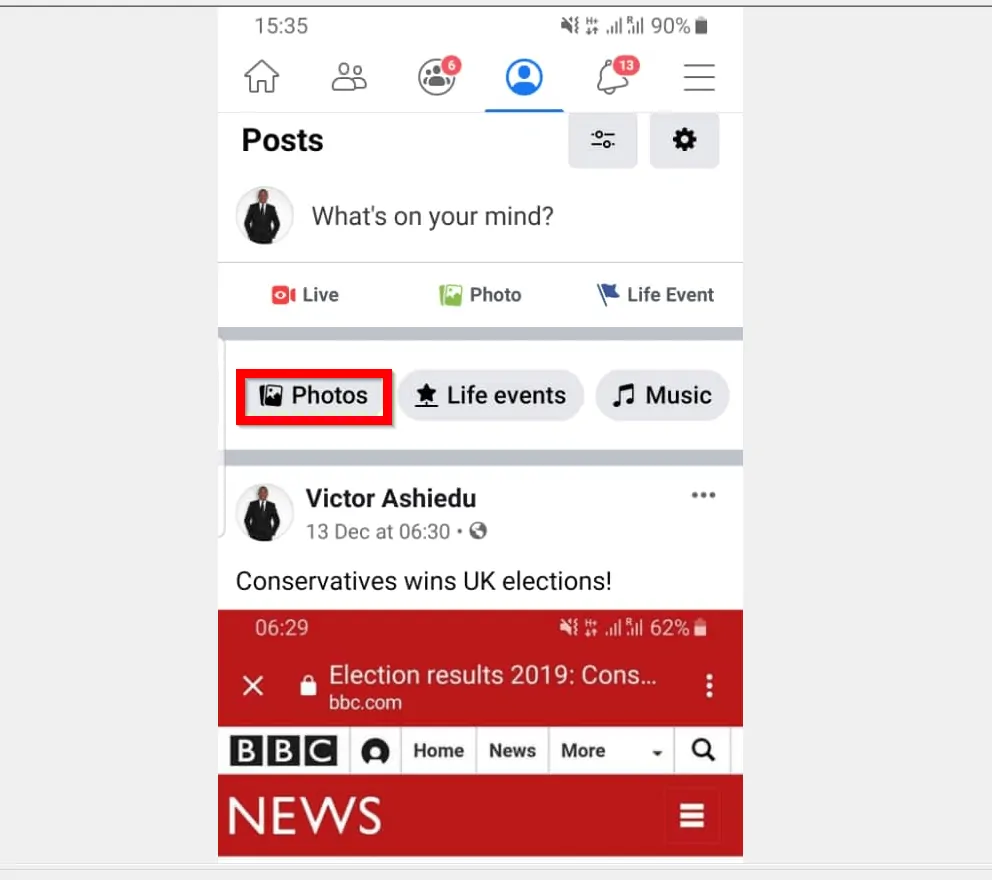
- When your Facebook profile opens, scroll down and tap Photos.
- Then, on the top right of your Facebook photos, tap ALBUMS.

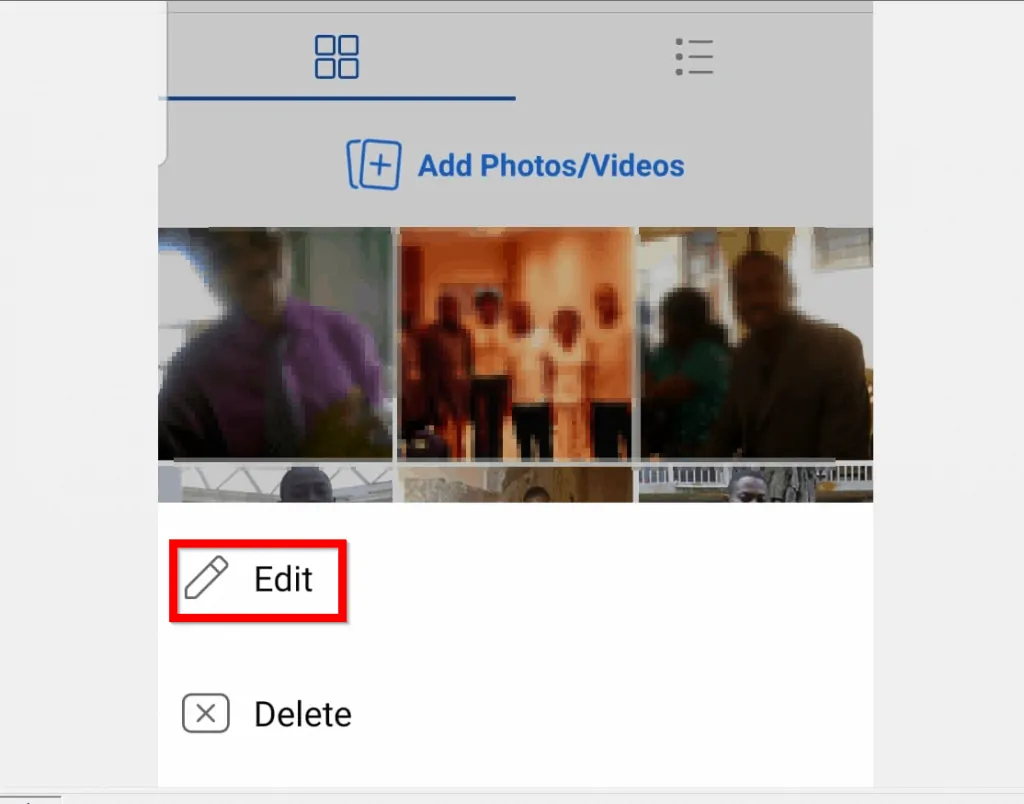
- Tap the Facebook Album you want to share. If you have the permission to share the album, there will be 3 dots on the top right of the album.
- To share the album, tap the 3 dots. Then, at the bottom of the screen, tap Edit.

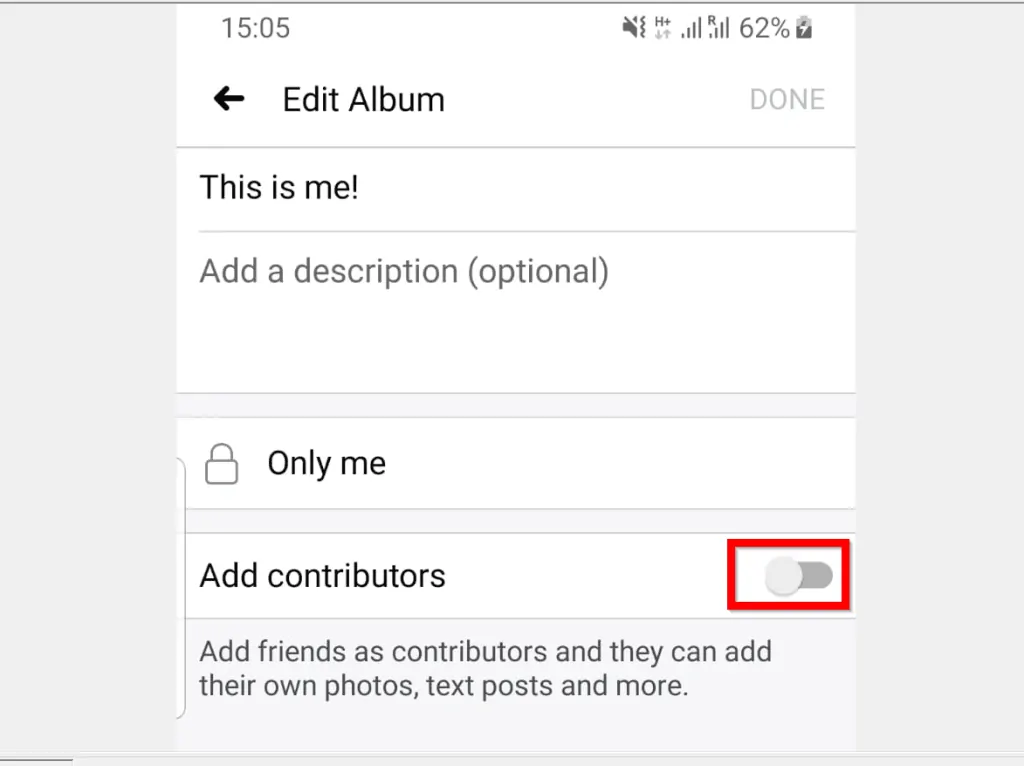
- When the album opens for editing, there are 2 options to share it.
- 1, tap the Privacy padlock icon and select who can view the album. 2, flip the Add Contributors switch on and add people allowed to edit the album.

Share Album for View Only (Album Privacy)
- To share the album to allow view-only, tap the the Privacy padlock icon (displaying Only me in the image below).
- Then, when the Edit Privacy screen opens, select an option (the options are self explanatory). On the top left of the screen, left of Edit Privacy, tap the arrow to return to Edit Album.
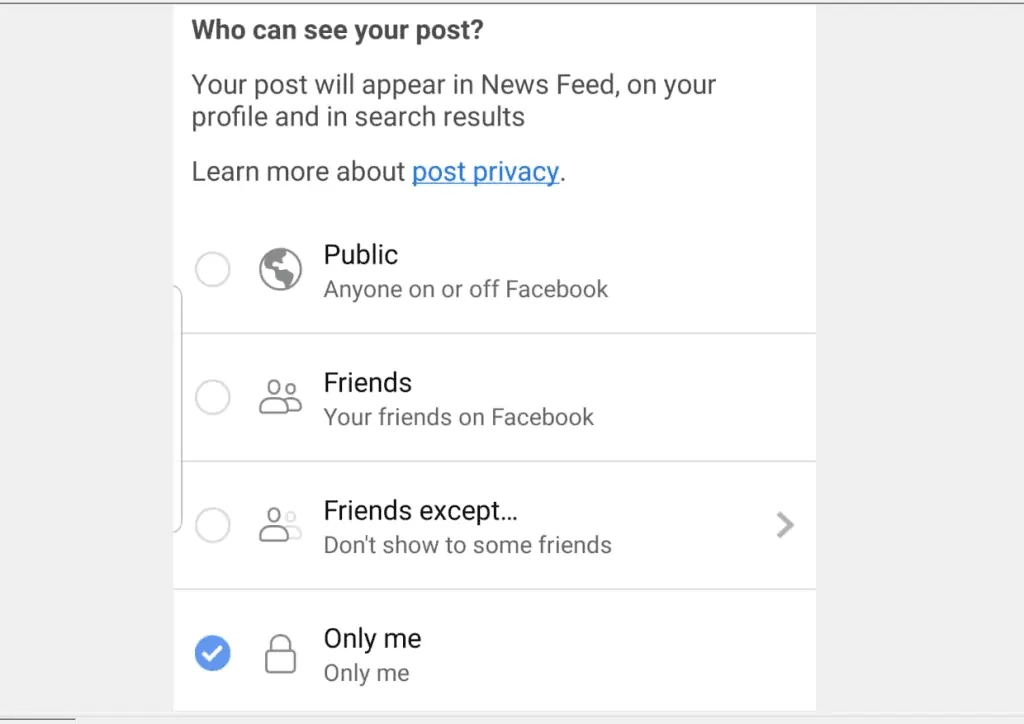

The options to share an album on Facebook is pretty robust. As an example, you can share an album with Specific friends. You could also share with all your friends, except certain friends.


- When you return to Edit Album screen, to save your changes, on the top right of the screen tap DONE.

Share Album to Allow Edit (Add Contributors)
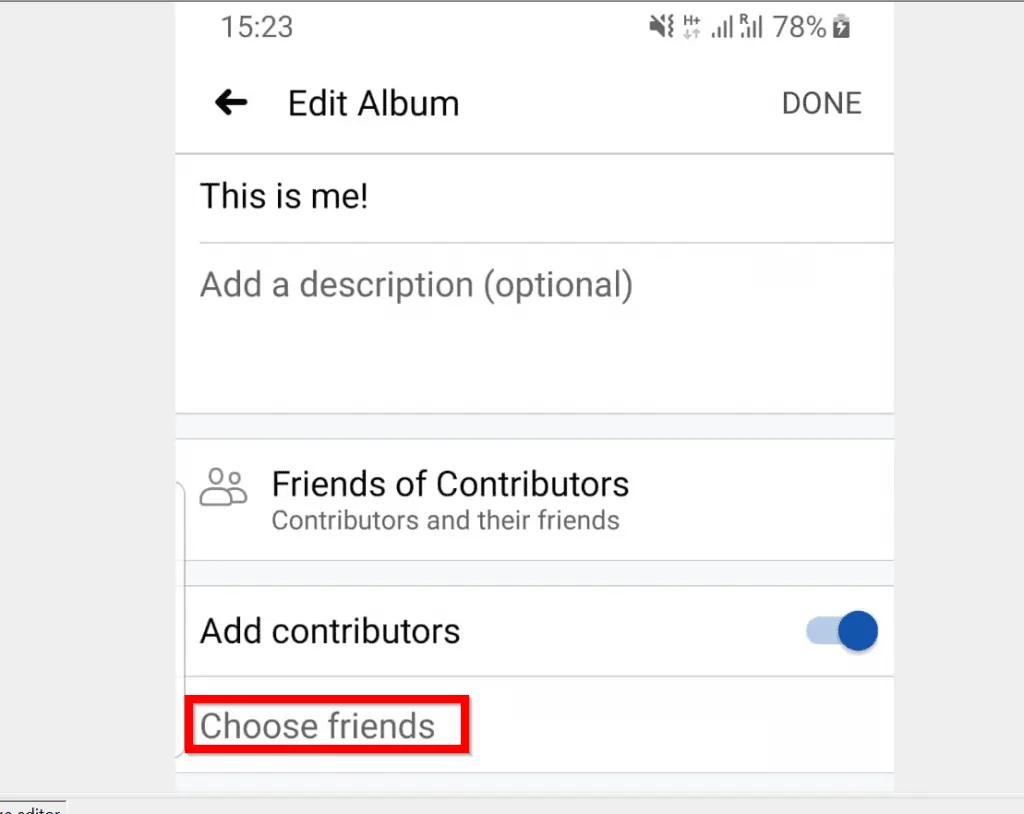
- From the Edit Album screen, flip the Add contributors switch On.
- Once the switch is turned on, Choose friends becomes available. To share the album to allow some of your friends to upload photos to the album, tap Choose friends.
- Finally, on the Edit Contributors screen, select each friend you want to be able to upload photos to the album.
- If the friend you want to add is not listed, type the person’s name in the search box.
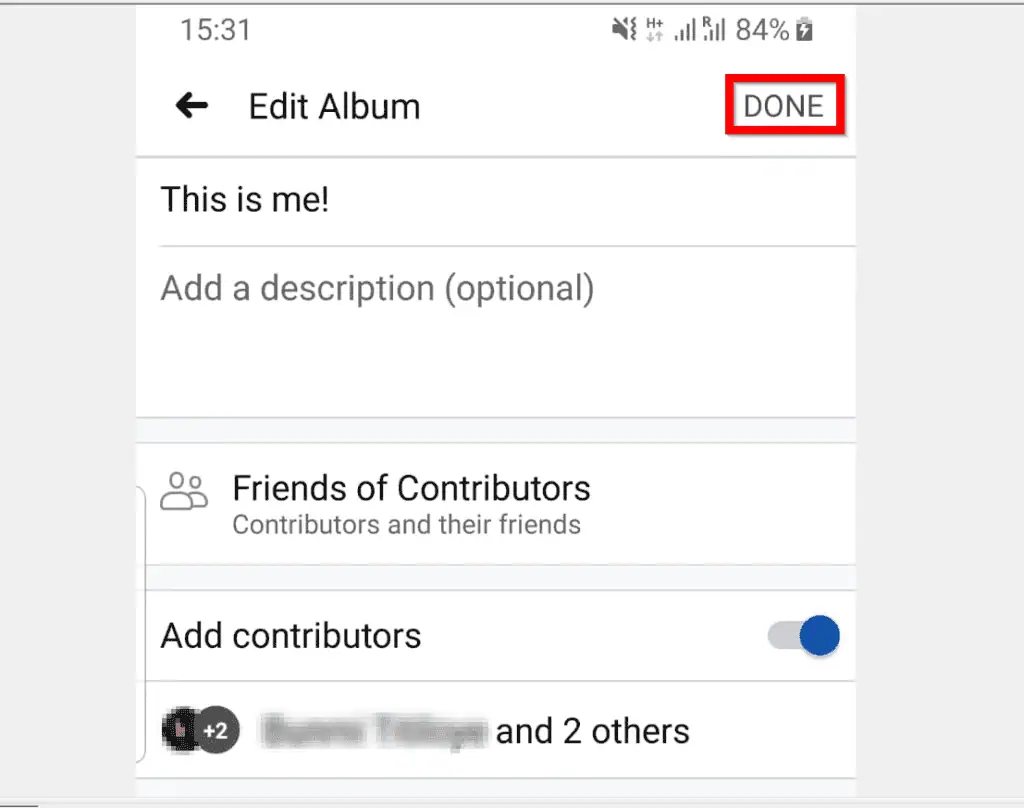
- When you finish, on the top right of the screen, tap DONE.

- Finally, to share an album on Facebook and allow friends upload photos to the album, on the top right of Edit Album screen, tap DONE.
Option 2: Share an Album via a PC (Facebook.com)
- Open Facebook.com on your PC. Then, if you have not yet signed in, sign in with your Facebook account.
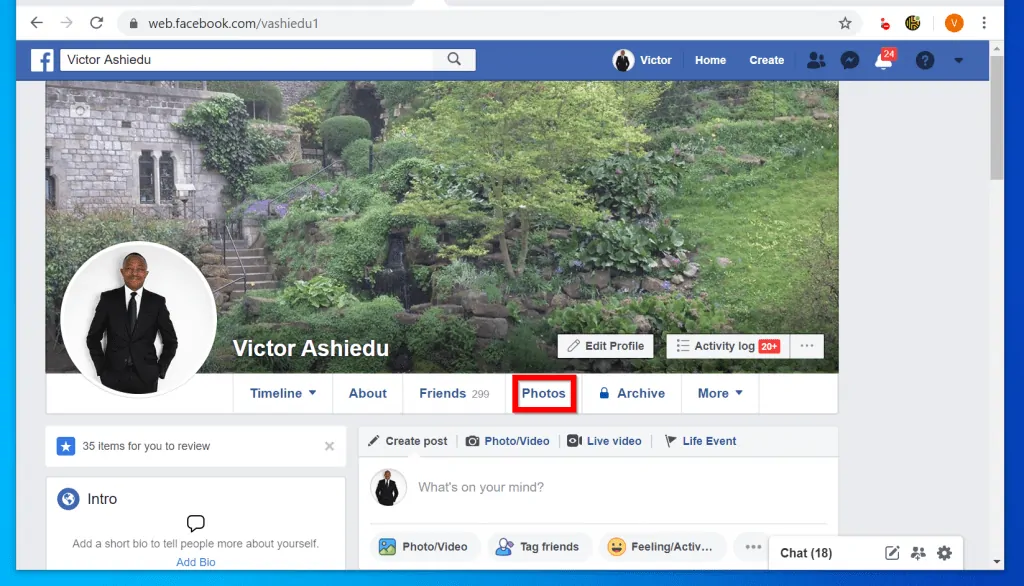
- On the top left of your Facebook News Feed, click your Profile picture. Your Facebook profile will open.

- Beneath your profile picture, click Photos.
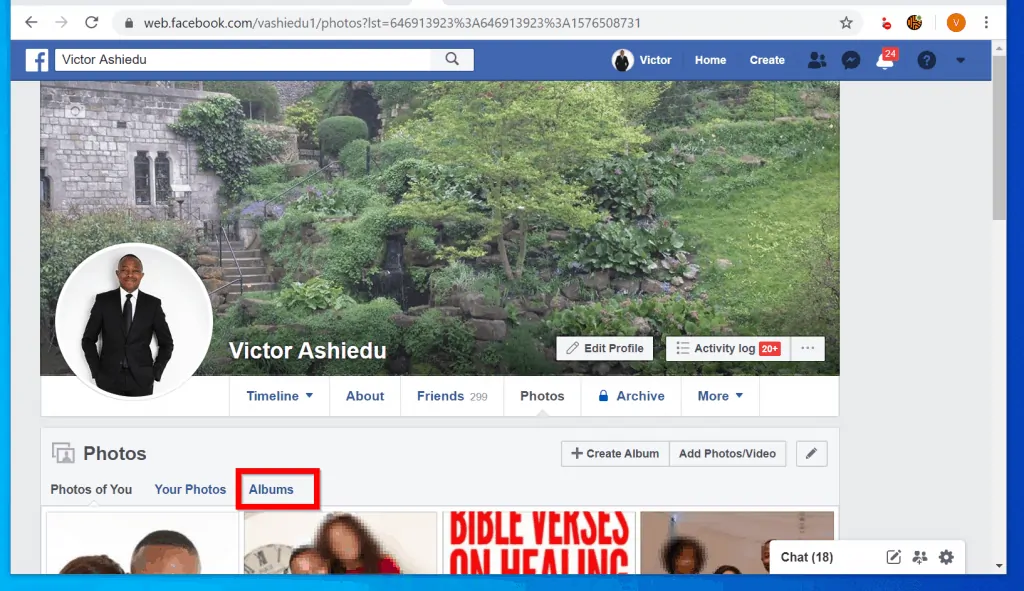
- Then, on your Facebook Photos page, click Albums.
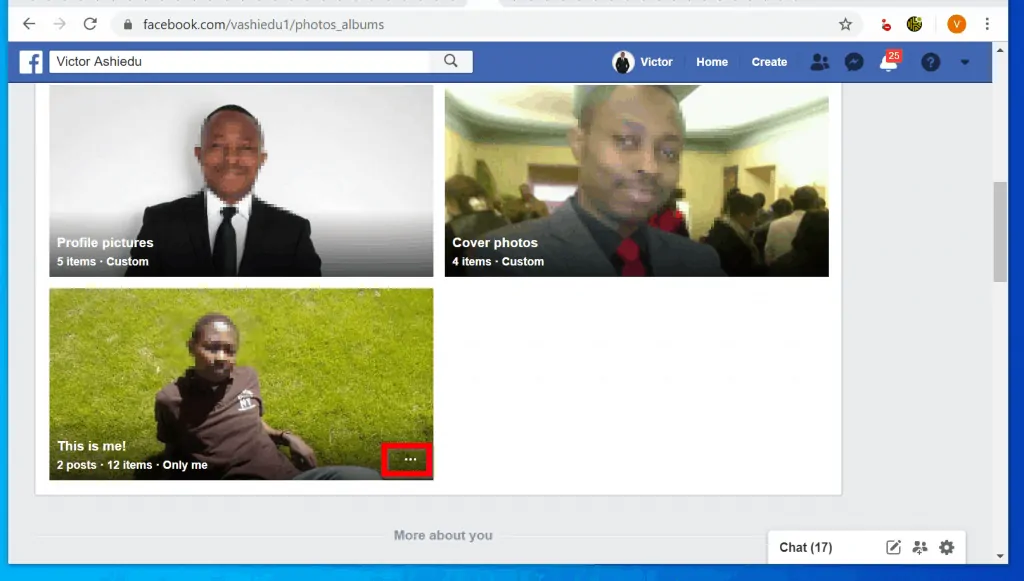
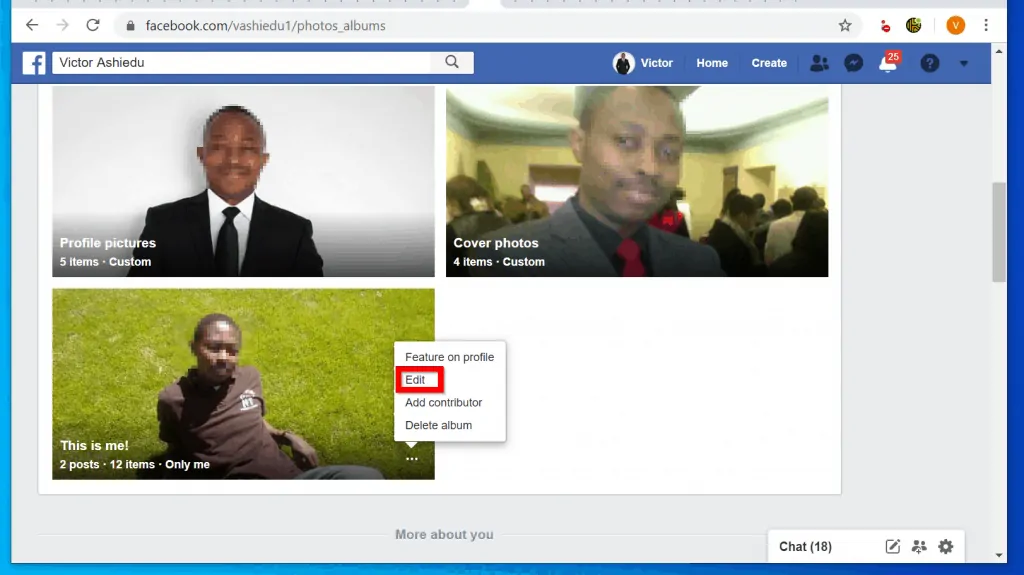
- If the have the permission to share a Facebook Album, the album will have 3 dots at the bottom right. Click the 3 dots, then select Edit.
- When the album opens for editing, you have two options to share it. 1, edit the Privacy setting to allow certain people to view the album. 2, Add Album contributors to allow certain people to make changes to the album – upload photos to the album, etc.

Share Album for View Only (Album Privacy)
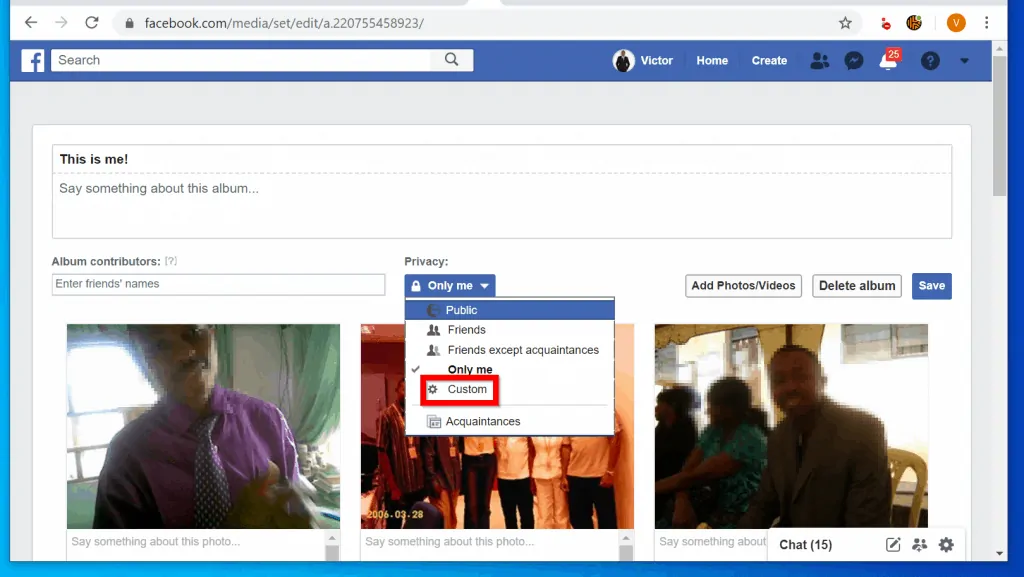
- When you open the album for editing, click the Privacy drop-down (currently set to Only me in my album below). Then, from the listed options, select Public (everyone on Facebook can view), Friends (only your Friends can view). See more options below…

- If you want to share the album with specific friends, click Custom.
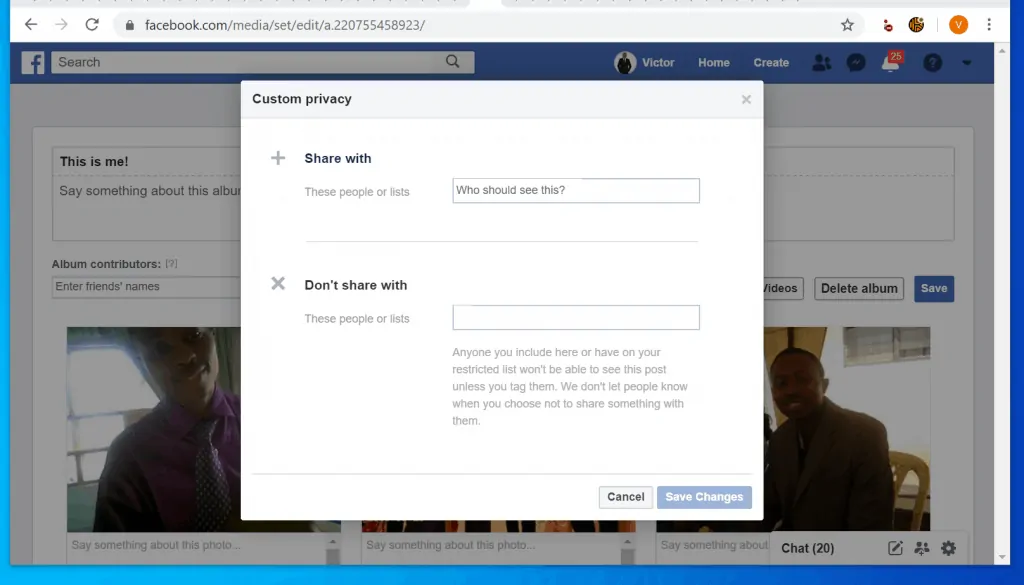
- Then, on the Custom privacy pop up window, enter the friends you want to view the album in the Share with field. If you want specific Friends NOT to be able to view the album, enter their names in the Don’t share with field.
- When you finish setting the custom privacy for the album, beneath the pop up, click Save Changes.
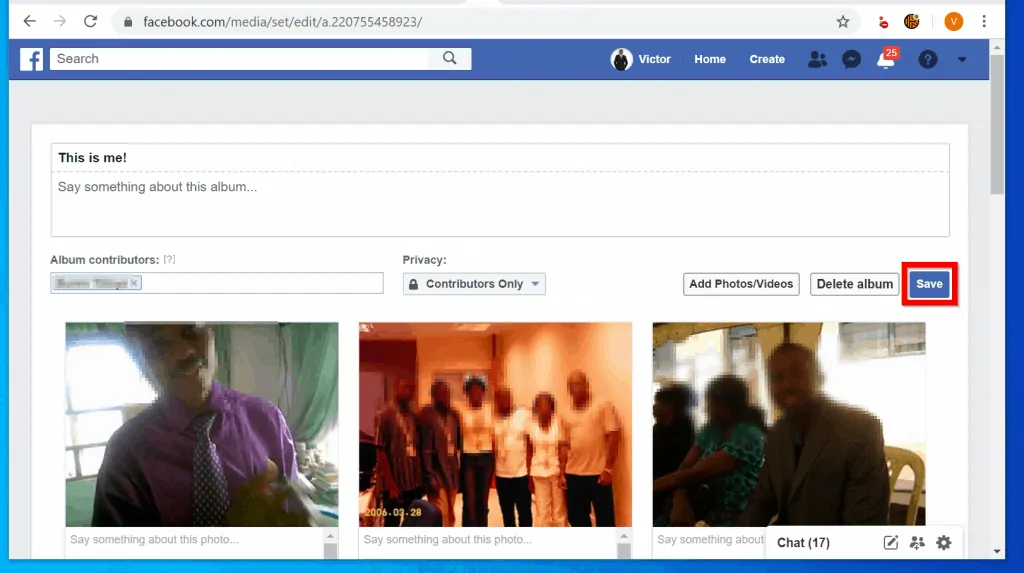
- When you finish editing the album, click Save.
Share Album to Allow Edit (Add Contributors)
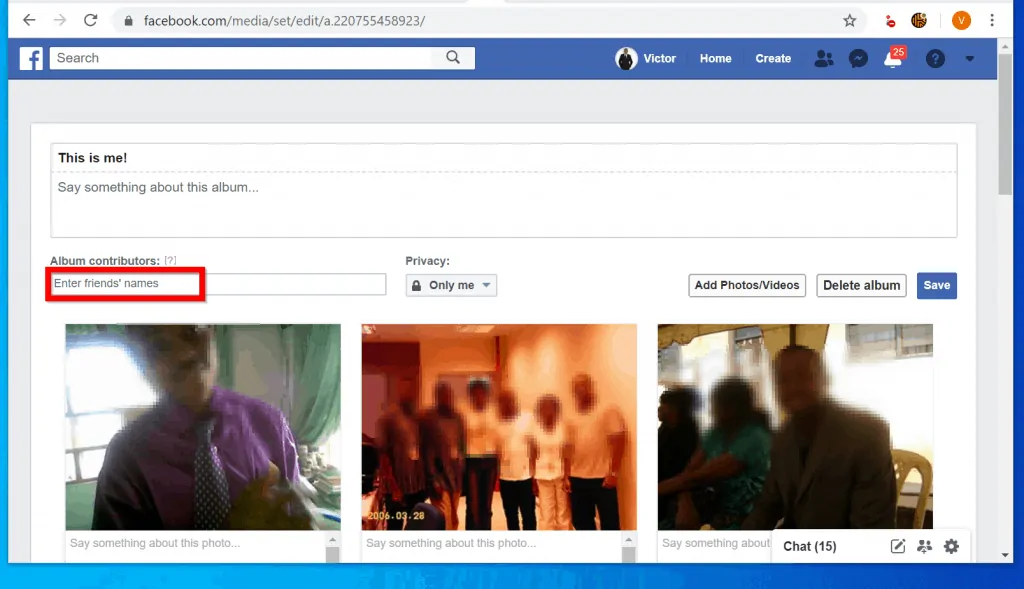
- When the album opens for editing, on the Album contributor’s field, type the names of the Friends you want to upload photos to the album.
- Then, from the list of suggestions (based on your search), select a friend.
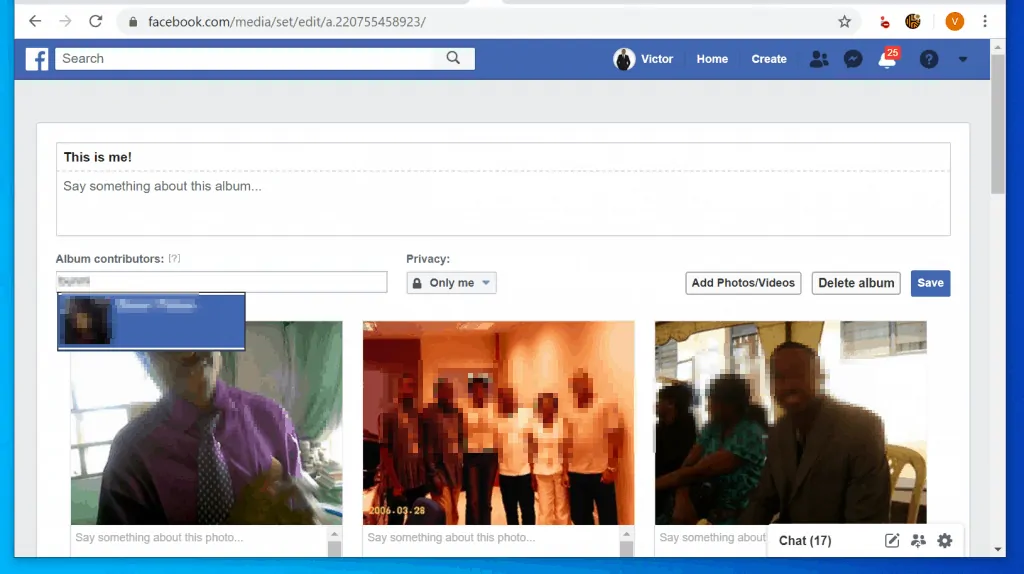
- When you finish adding contributors, click Save.
I hope that you found it helpful. If you did, click on “Yes” beside the “Was this page helpful” question below.
You may also express your thoughts and opinions by using the “Leave a Comment” form at the bottom of this page.