This Itechguide teaches you two methods to enable Remote Desktop on a Windows 10 PC – via Windows Settings or System Properties.
Option 1: Enable Remote Desktop From Windows Settings
Here are the steps to enable RDP with this method:
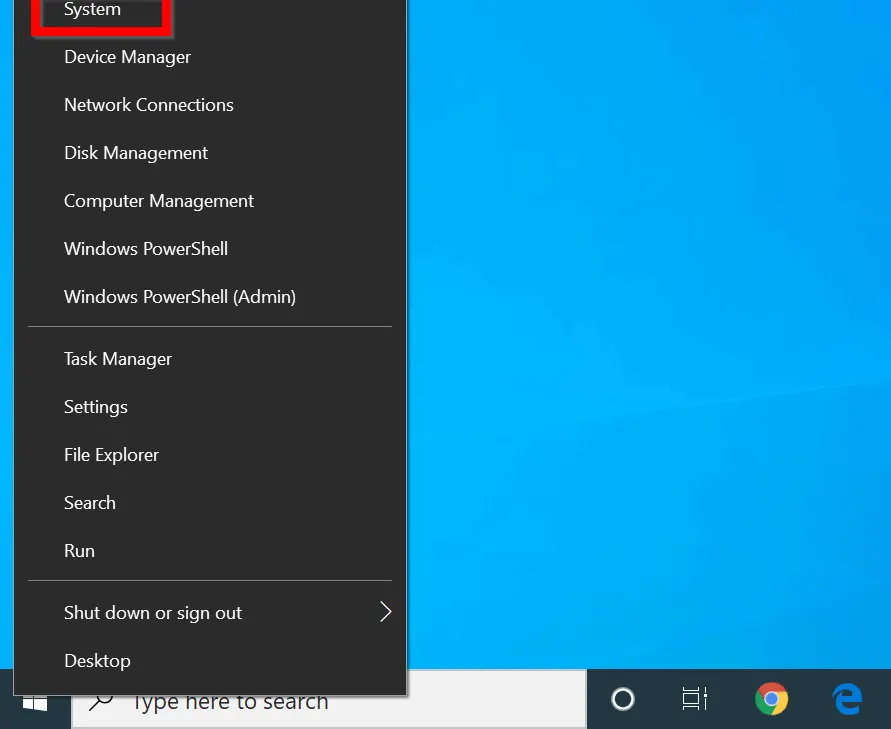
- Right-click Start menu. Then click System.
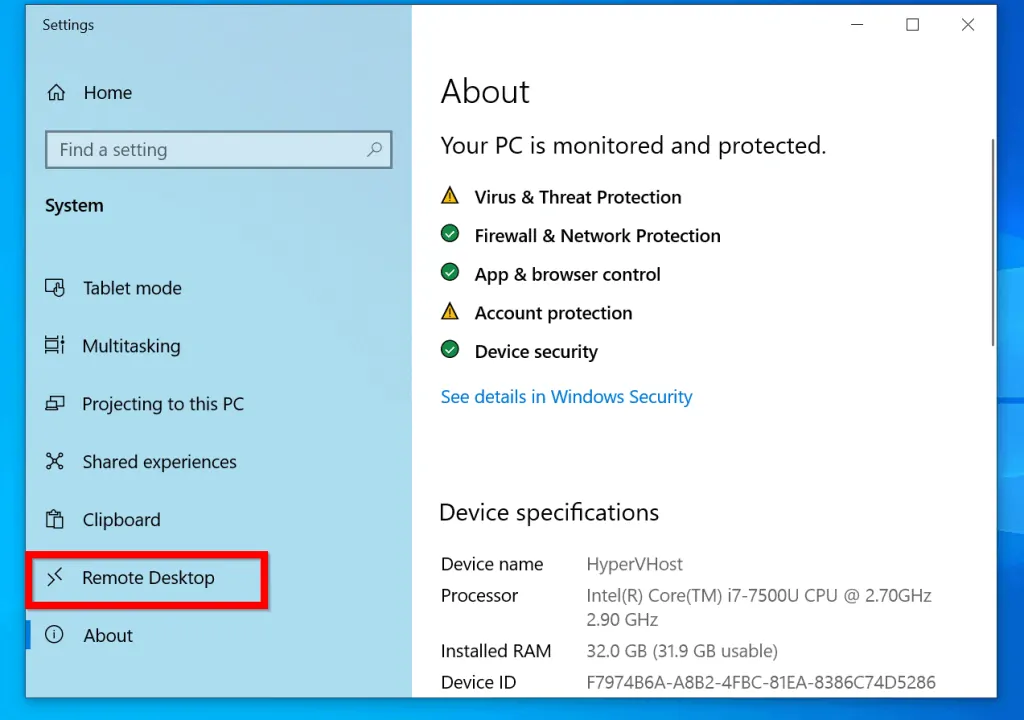
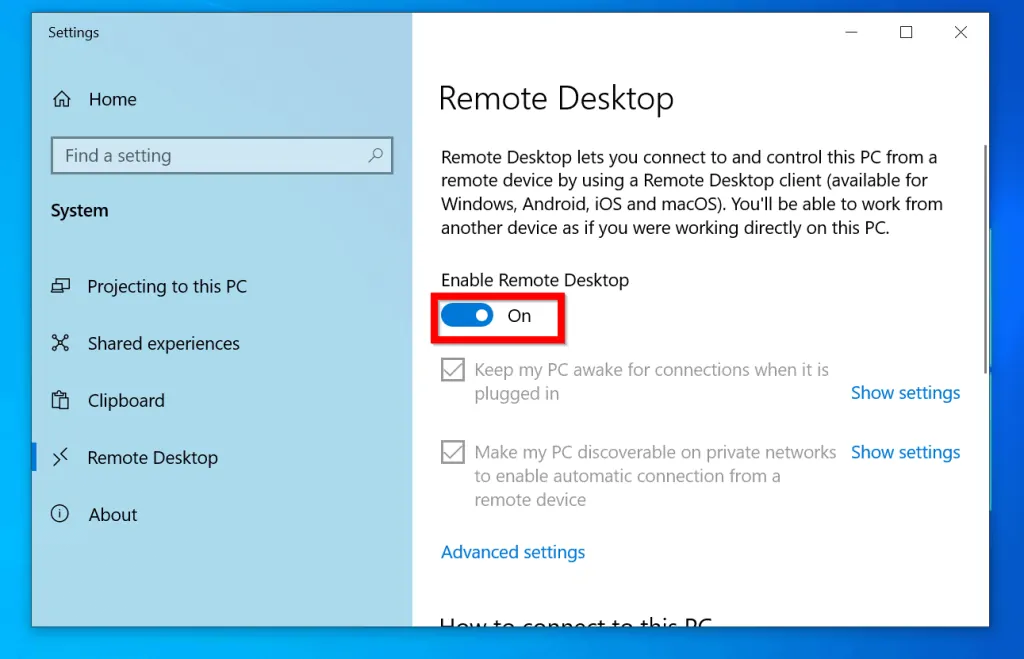
- When System settings opens scroll down to Remote Desktop and click t.
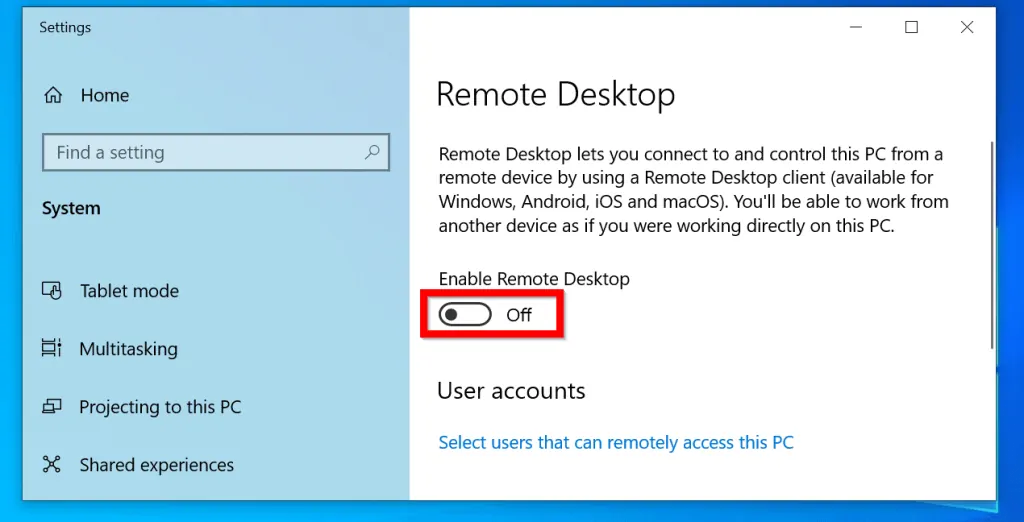
- Finally, to setup remote desktop on Windows 10, on the Remote Desktop settings, flip the Enable Remote Desktop switch from off to on.
- You will receive a request to confirm, click Confirm.
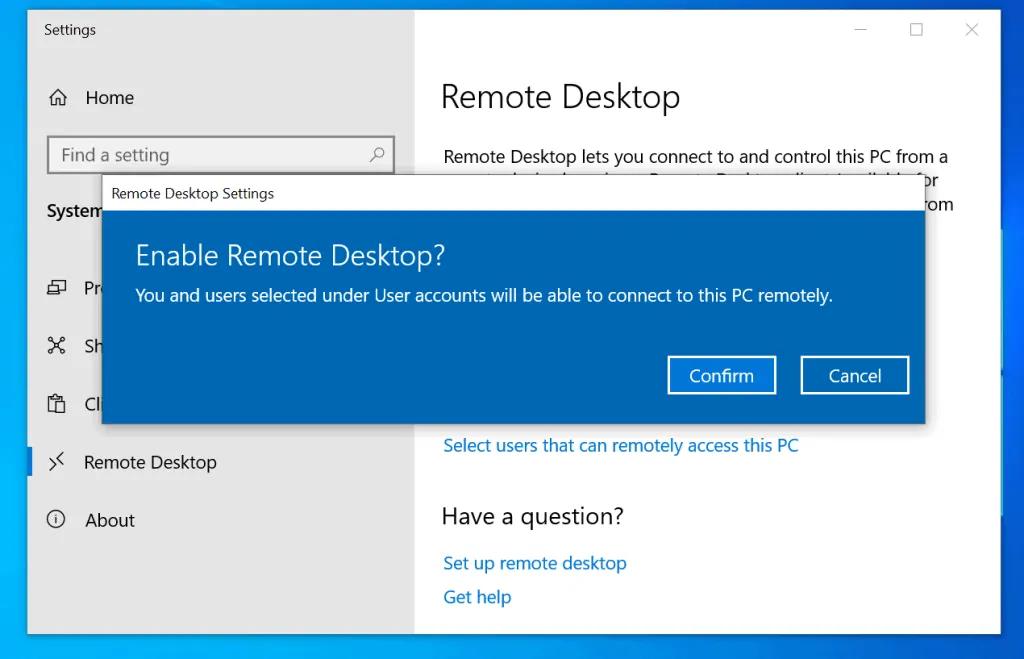
- RDP is now enabled on your PC.
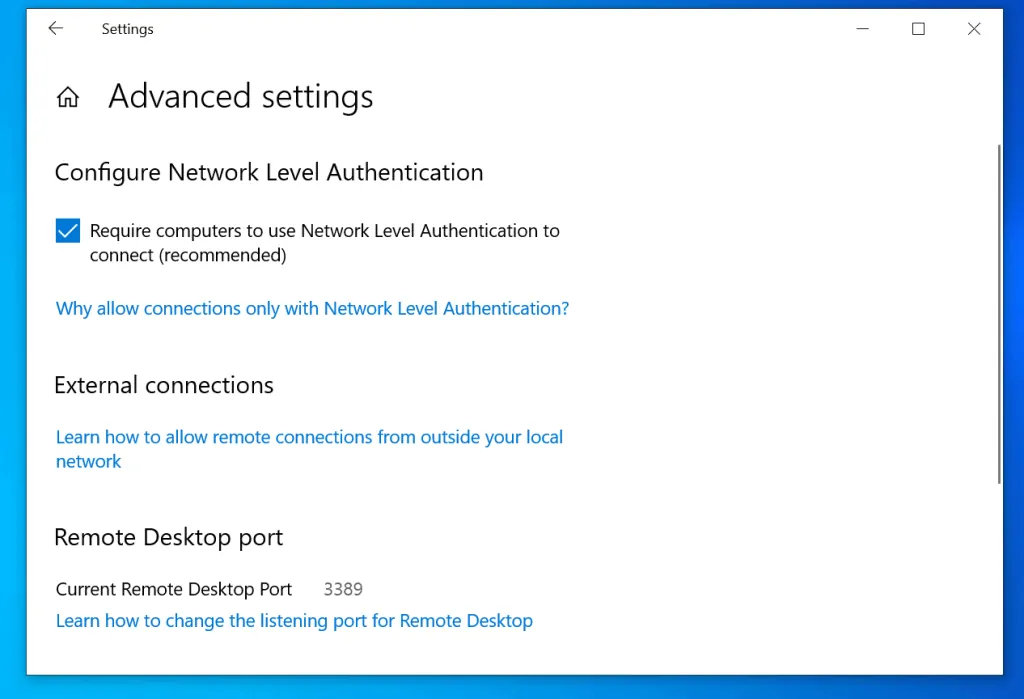
- To configure more options, click Advanced settings.
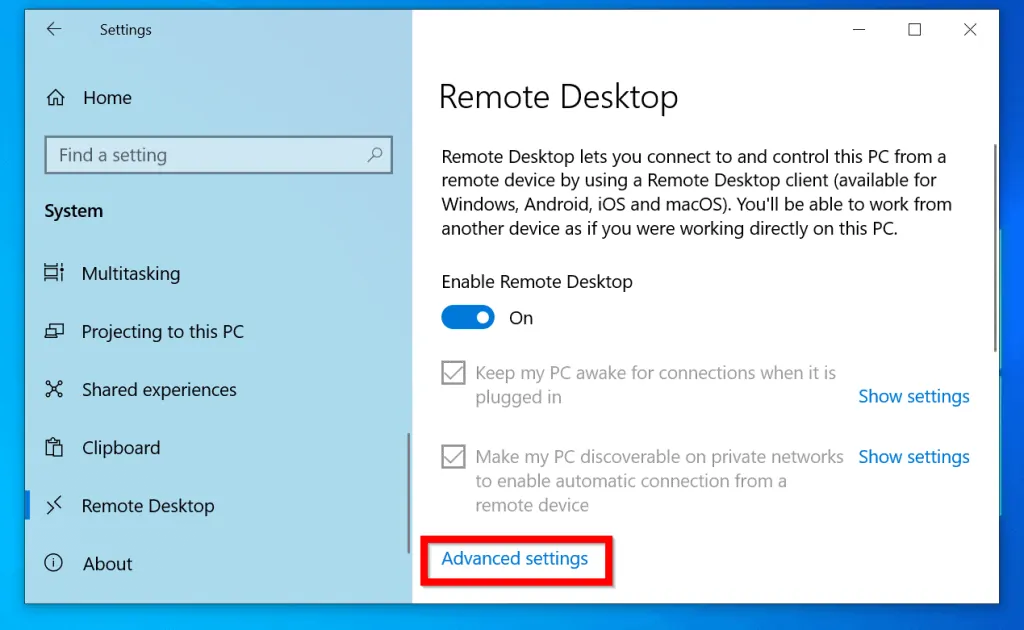
- You can configure additional settings here. There are also additional information. For instance if you wish to RDP to your PC from outside your network, click the link beneath External connections.
Option 2: Enable Remote Desktop From Systems Properties
Though Windows 10 has a new way to enable RDP, you can still use the old method available prior to Windows 10.
Here are the steps to enable RDP from Control Panel:
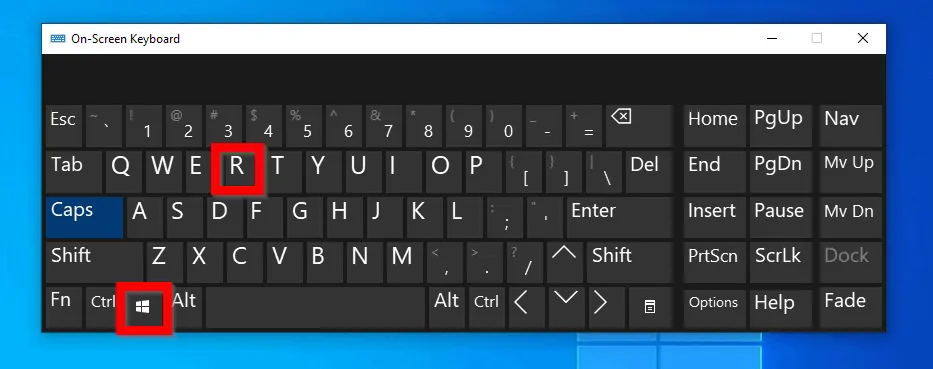
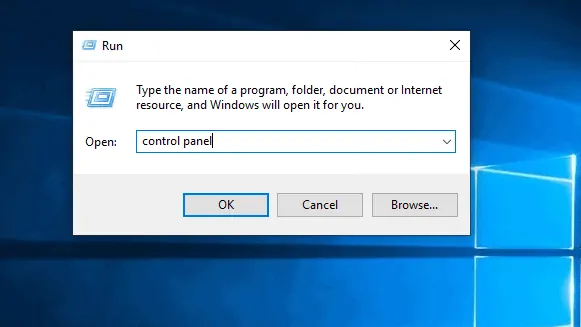
- Press Windows logo + R to open Run command.
- When Run command opens, type Control Panel. Then click OK.
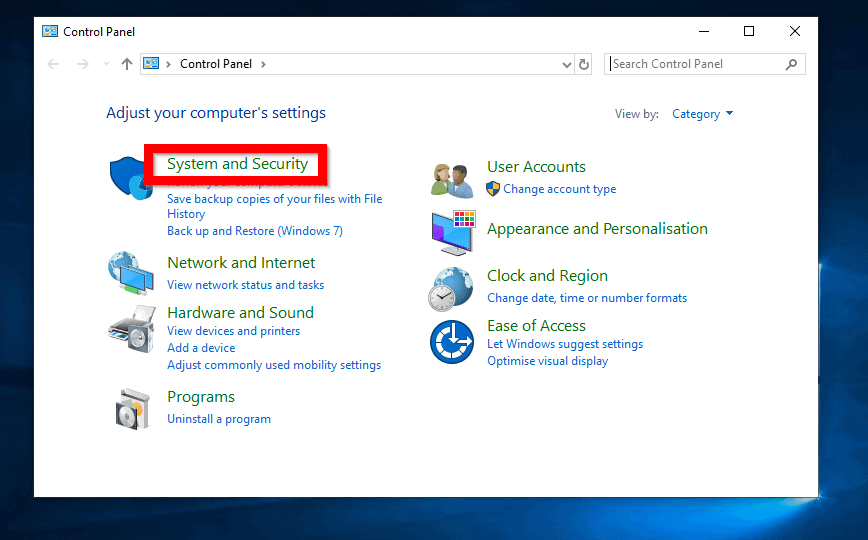
- When Control Panel Opens, click System and Security.
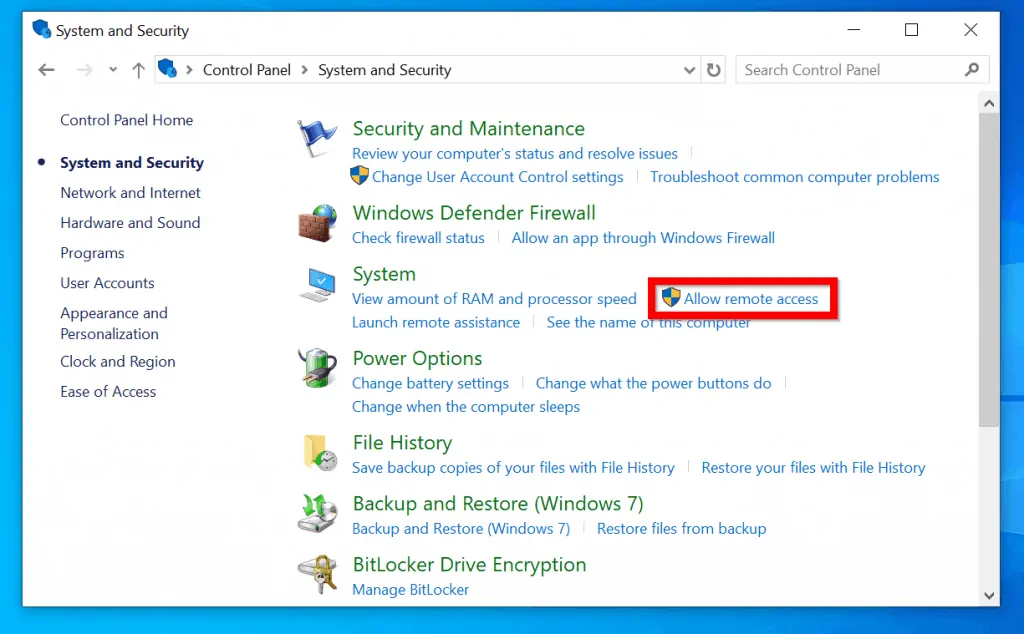
- At System and Security, beneath System click Allow remote access.
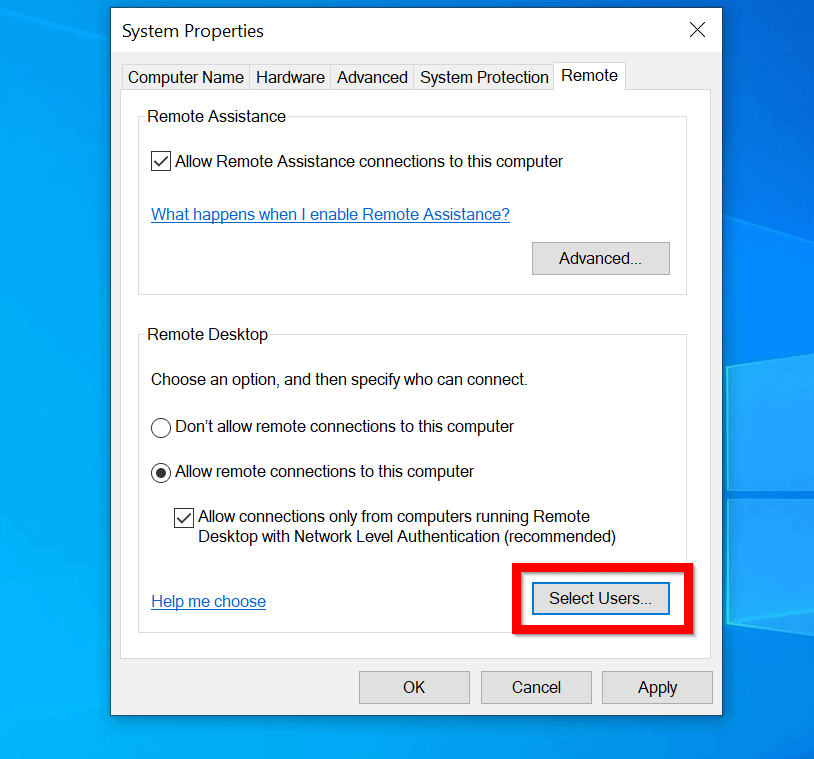
- When System Properties opens, click Allow remote connections to this computer. Click Apply then click OK.
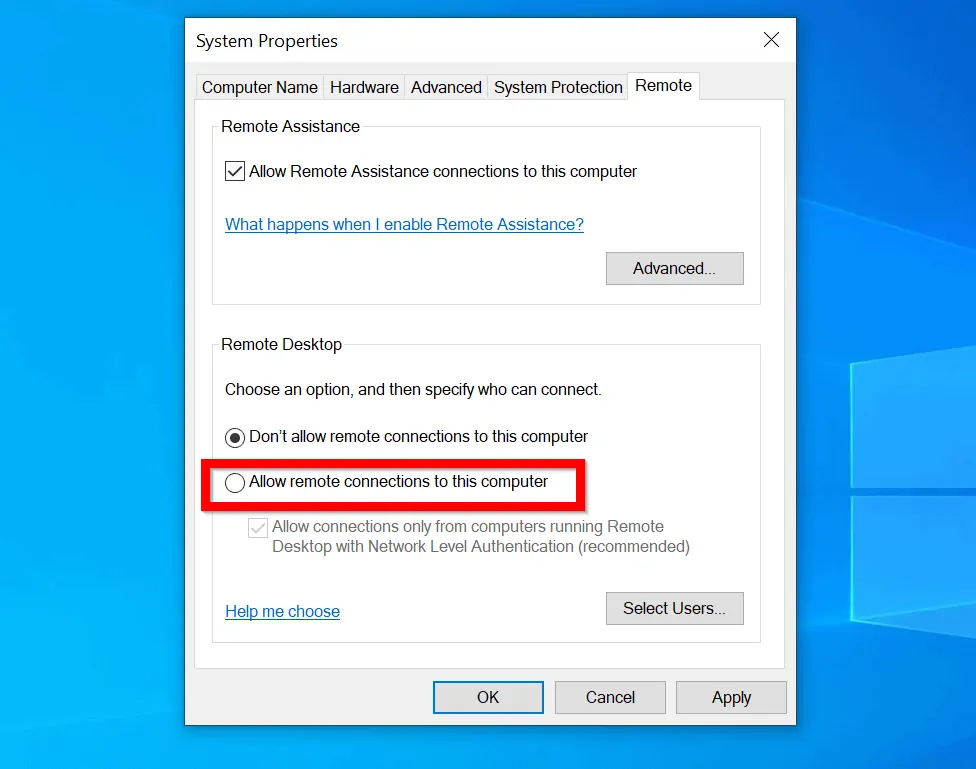

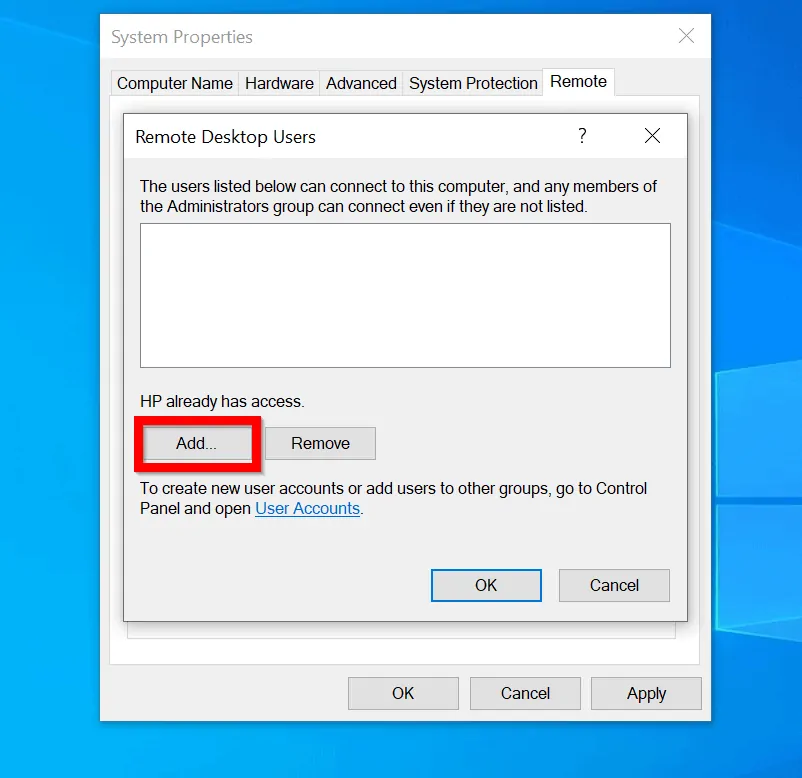
- To allow users to RDP to the PC, click Select Users.
- Then on the Remote Desktop Users settings, click Add and follow the steps to add a user.
Conclusion
Enabling RDP on a Windows PC allows you to manage the PC remotely from another Windows computer. I am confident that you were able to turn on Remote Desktop with one of the methods discussed in this guide.
If you did share your experience by responding to the “Was this page helpful?” question below.
Finally, for more Windows 10 Itechguides, visit our Windows 10 How-To page.


![How To Run Sysprep (Generalize) In Windows 10 [2 Methods]](https://www.itechguides.com/wp-content/uploads/2022/05/8-2.webp)