In this Itechguide, Victor teaches you how to remove a Microsoft account from Windows 10. The guide covers 3 steps to remove a Microsoft account from Windows 10.
Step 1: Create a New Local Account
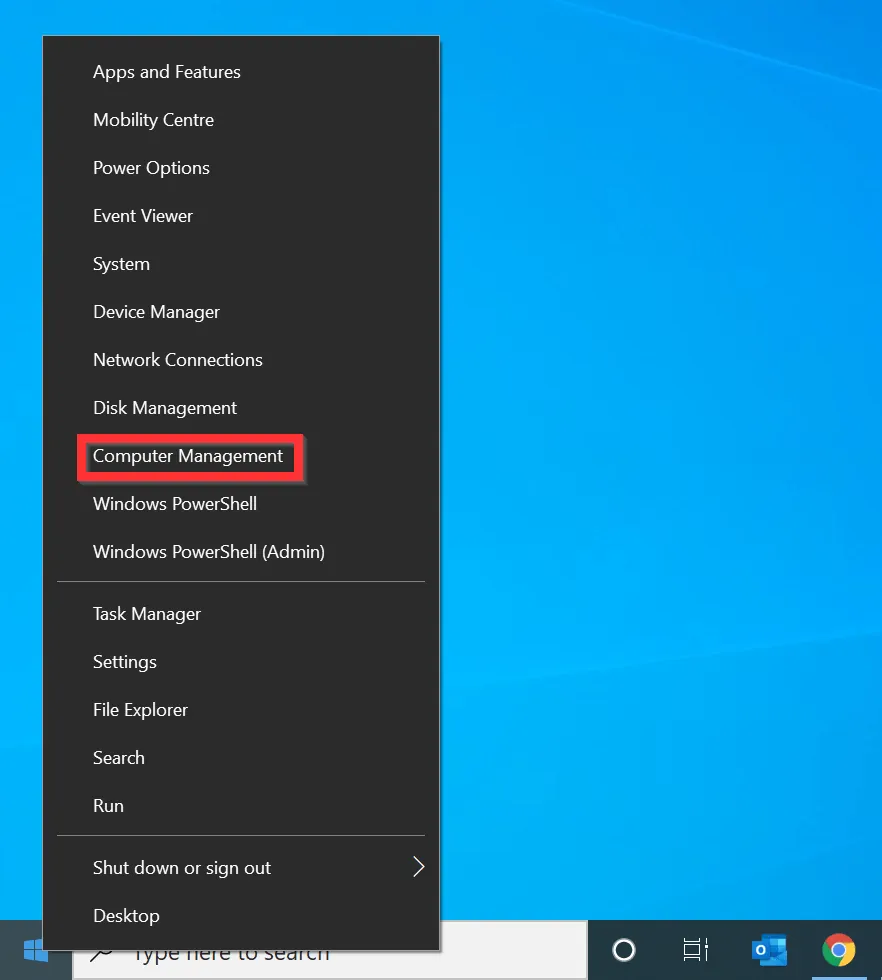
- Right-click the Windows 10 Start menu and click Computer Management.
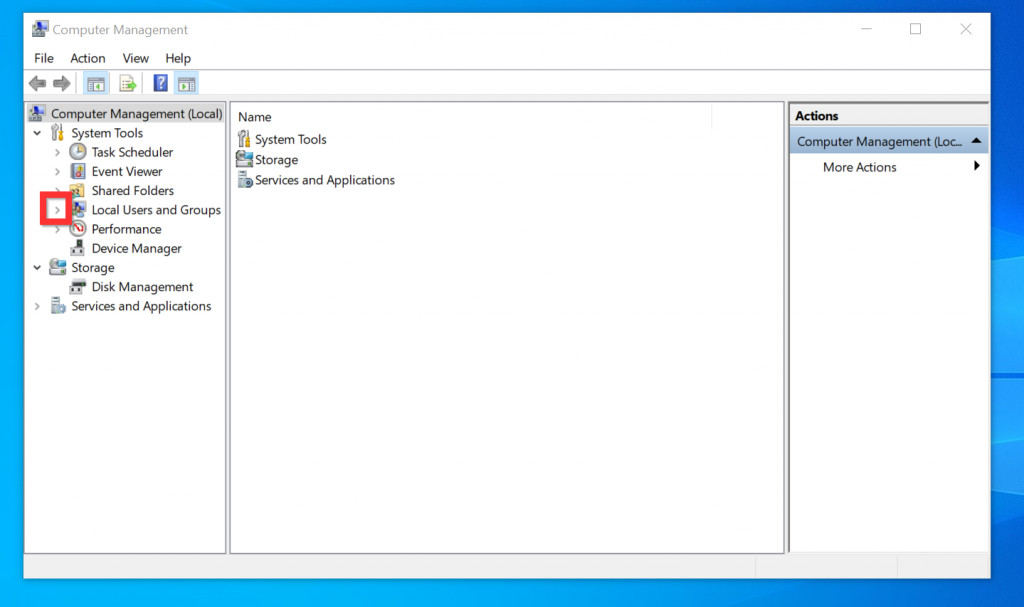
- On the left pane of Computer Management, click the arrow on the left side of Local Users and Groups to expand it.
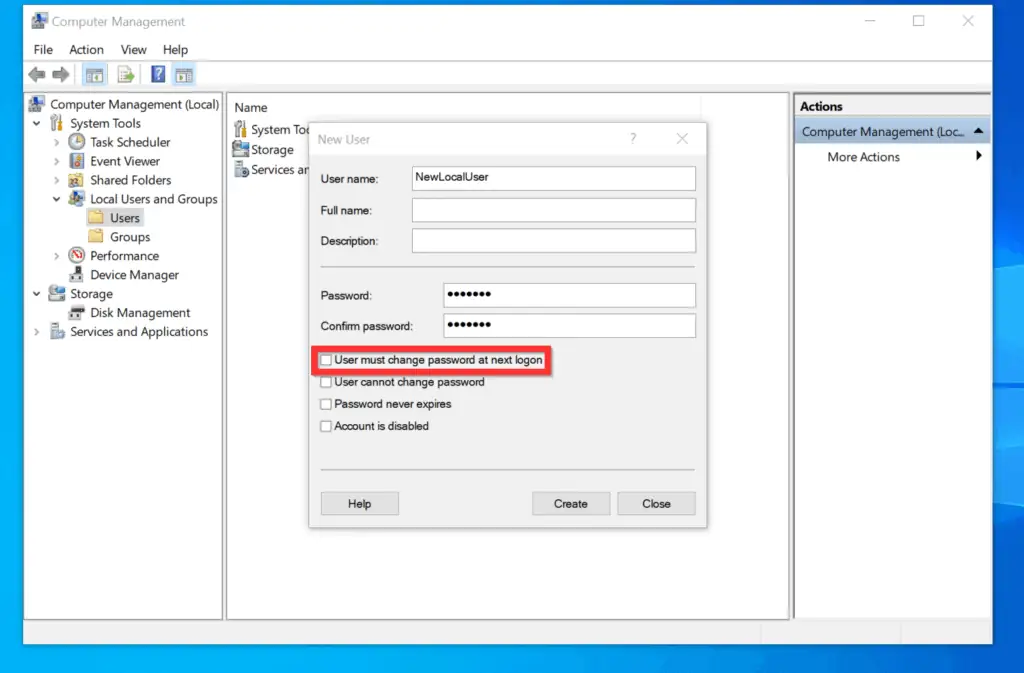
- Right-click the Users node and select New User. The New User window will open.

- On the New User window, enter a user name. Then, enter a password in the Password field and re-enter the same password in the Confirm password field.
- Uncheck User must change password at next logon (this is checked by default)
- When you finish, on the bottom right of the New User window, click Create.
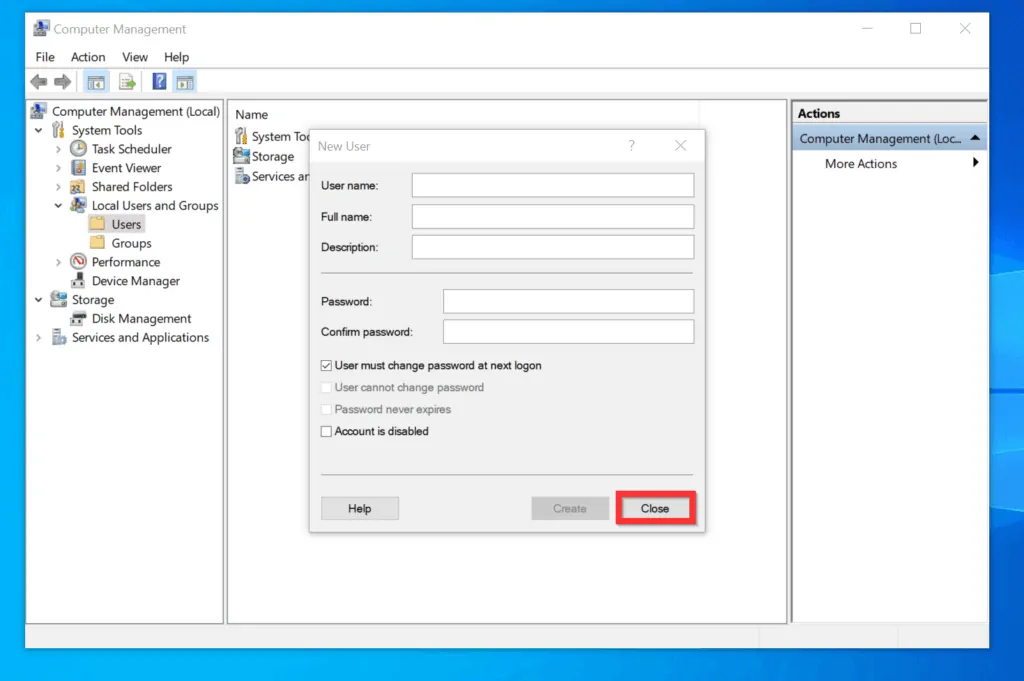
- The new user will be created and the New User window will become blank – close the window.
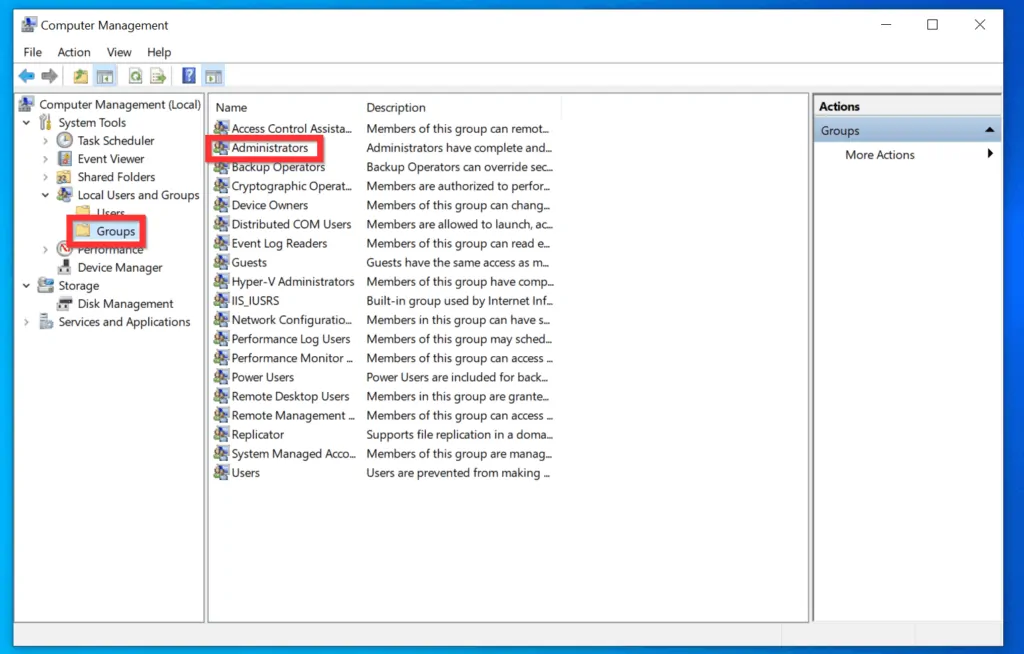
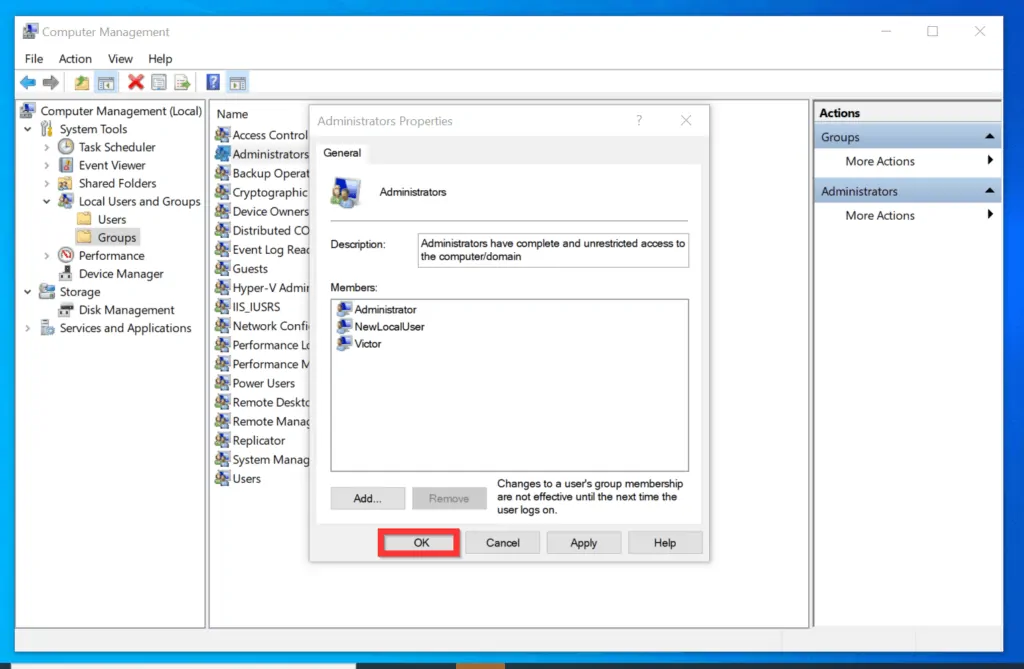
- To add the user to the Administrator’s group, on the left pane of Computer Management, beneath Local Users and Groups, click the Groups node.
- Then, on the right pane of the Groups node, double-click Administrators. The properties of the Administrators group will open.
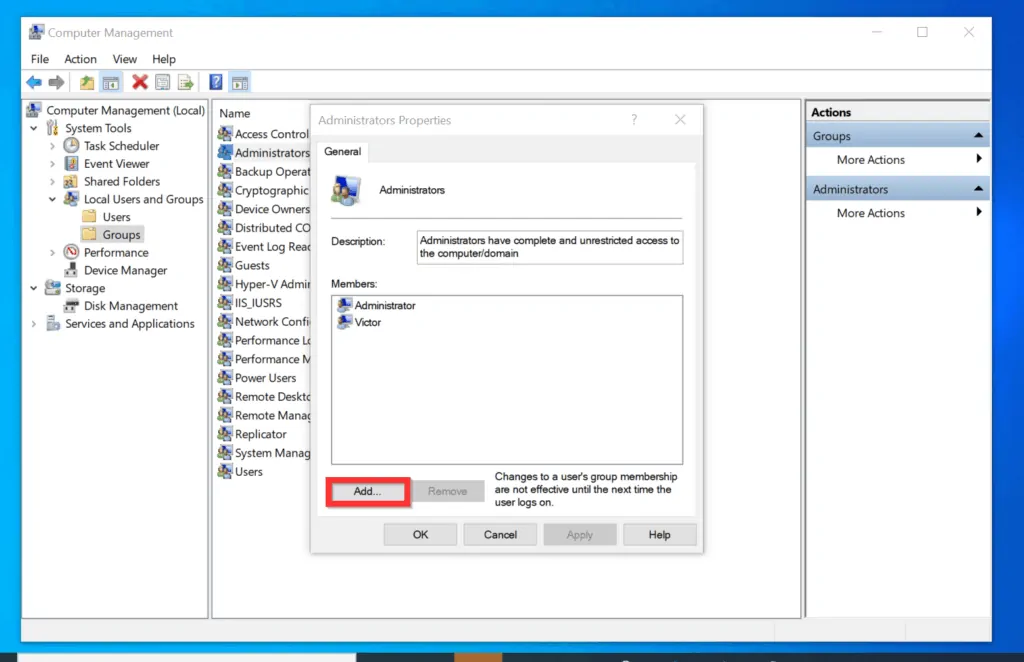
- Then, on the bottom left of the properties of the Administrators group, click Add.
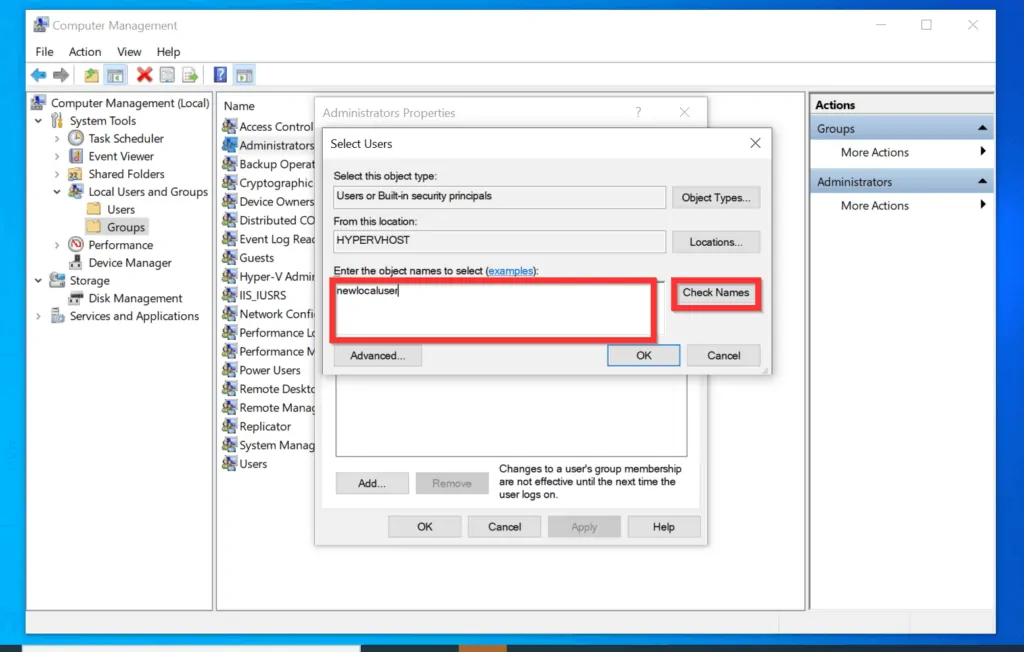
- On the Select Users window, type the user name for the new local user you created earlier and click Check Names.
- Finally, to add the new user account to the local Administrator’s group, click OK.
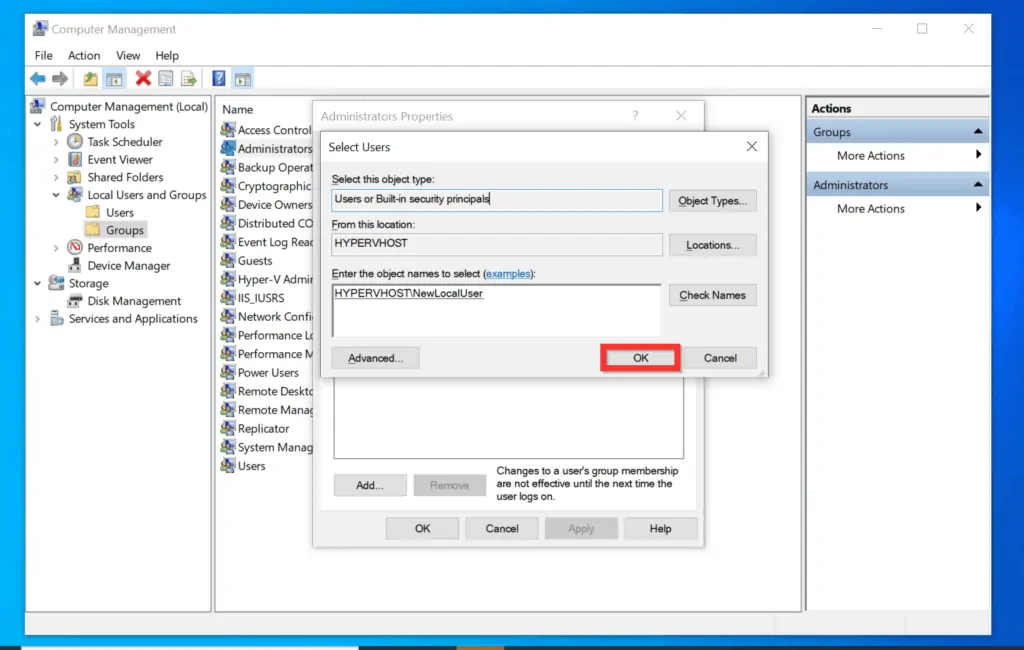
- On the bottom left of the Administrators Properties window, click OK.
Step 2: Login with the New Local Account and Remove Microsoft Account
The next step to remove Microsoft account from Windows 10 is to sign out from your current Microsoft account and sign in with the new local account. Here are the detailed steps…
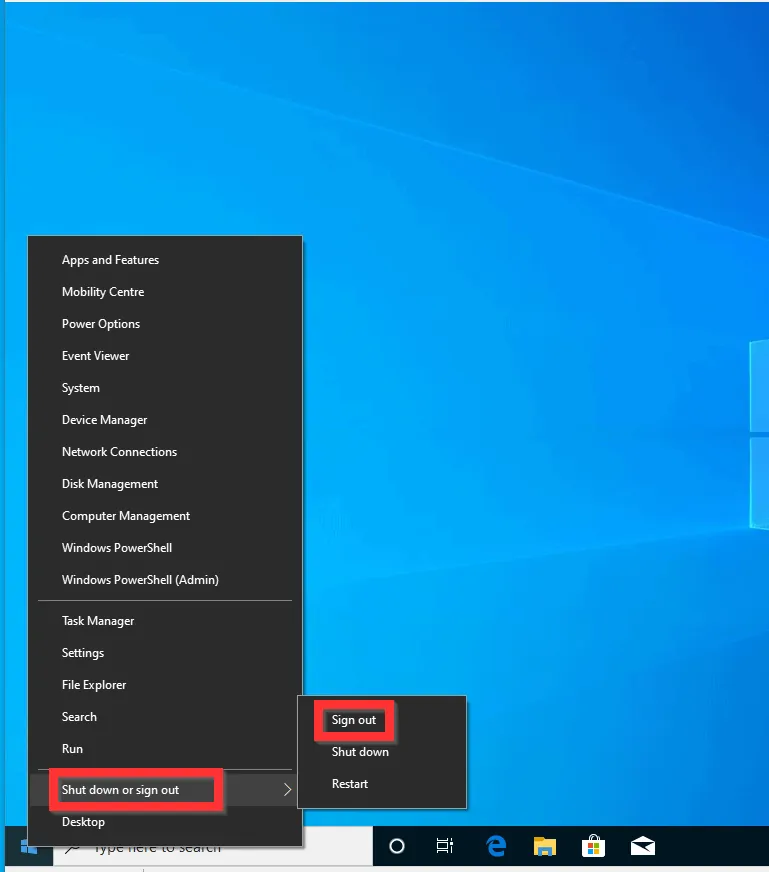
- Right-click the Windows 10 Start menu point to Shut down or sign out and click Sign out.
- When the sign out is complete, click on the screen to display the login screen.

- The login screen will have the sign in details for the Microsoft account you use to sign in to Windows 10.
- On the bottom left of the login screen, click the new local you created in step 1 of this Itechguide.

- Finally to remove Microsoft account from Windows 10, enter the password for the new local user account and press enter.

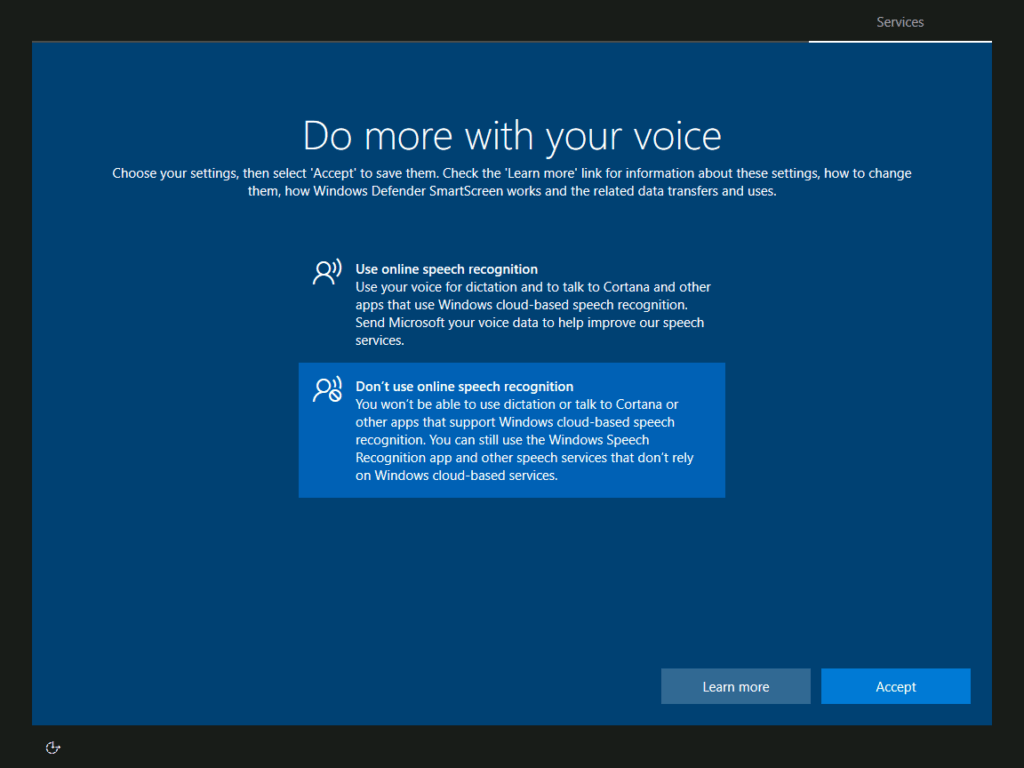
- Windows 10 will take a while to prepare your new profile on the PC.

- When you receive a screen like the one below, select an option and click Accept.
Step 3: Copy Data and Settings
The final step to remove Microsoft account from Windows 10 is to copy your data.
In this section, I will teach you how to copy your desktop, favorites, bookmarks and other personal settings from the Microsoft profile on your PC to your new local account.
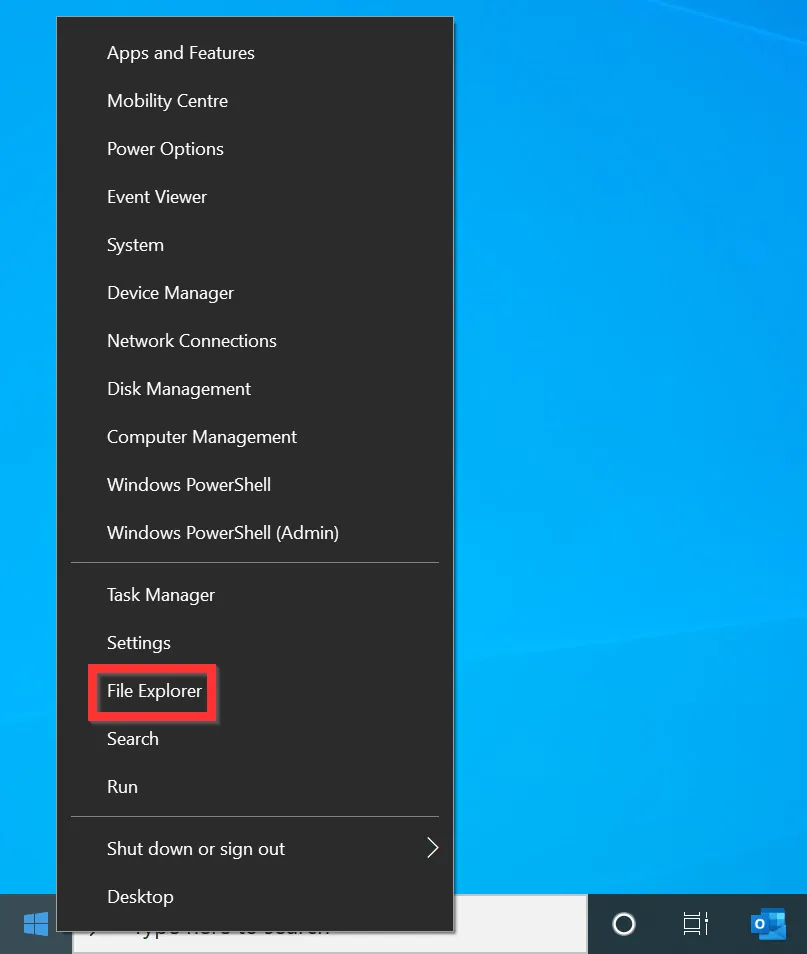
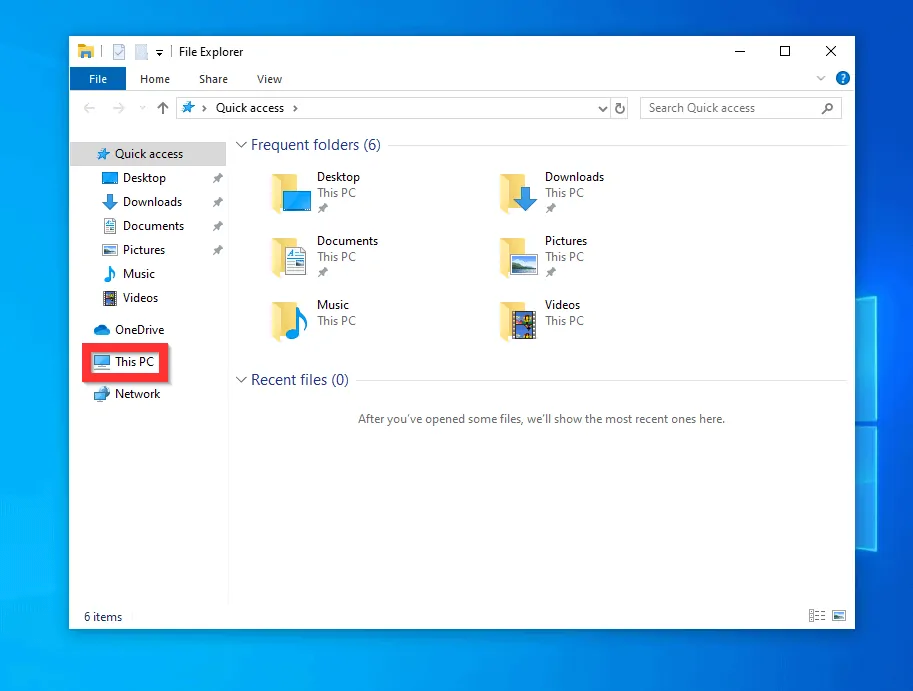
- Right-click the Windows 10 Start menu and click File Explorer.
- On the Quick access pane of File Explorer, click This PC.
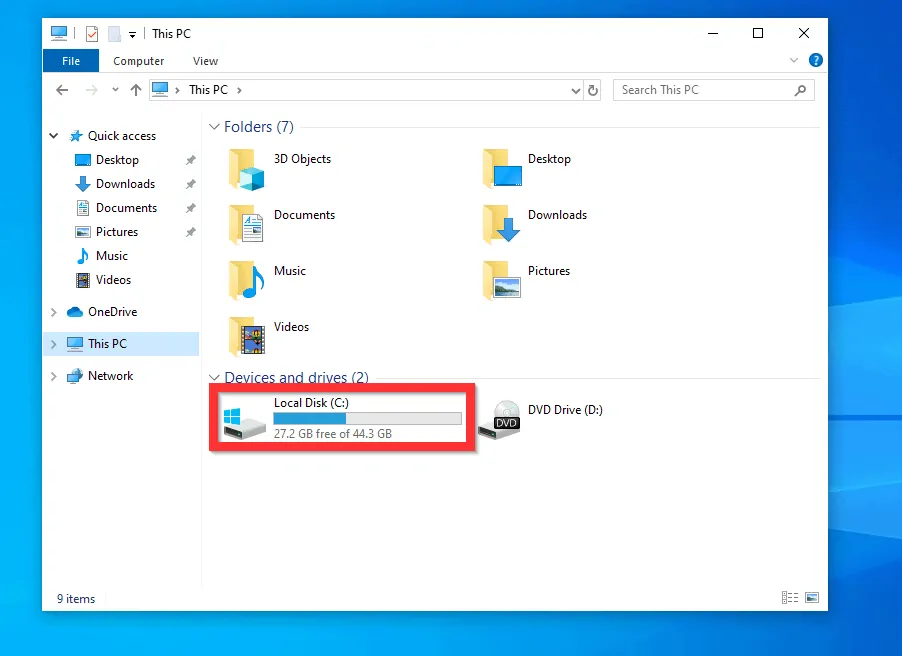
- When This PC opens, open Local Disk (C:).
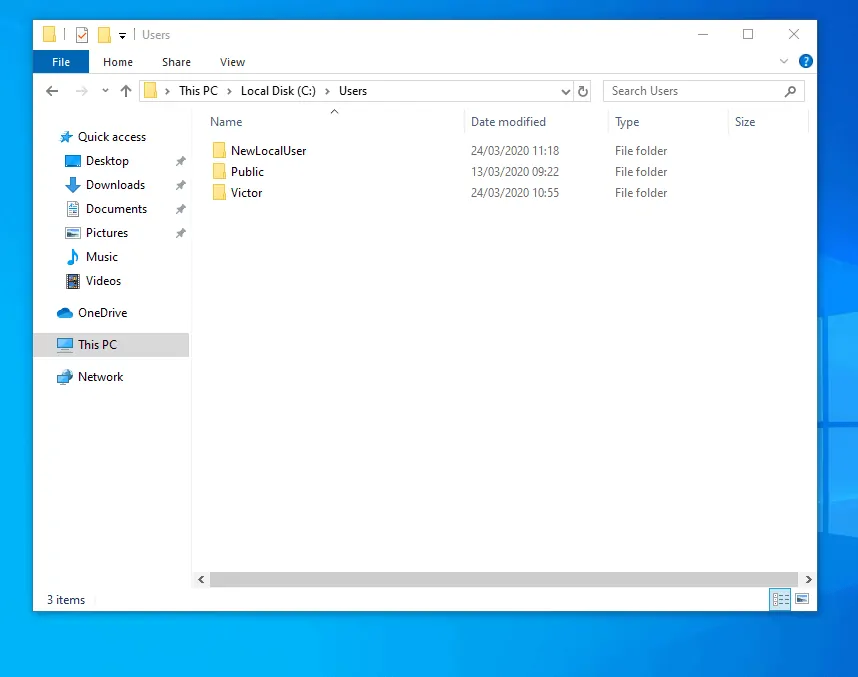
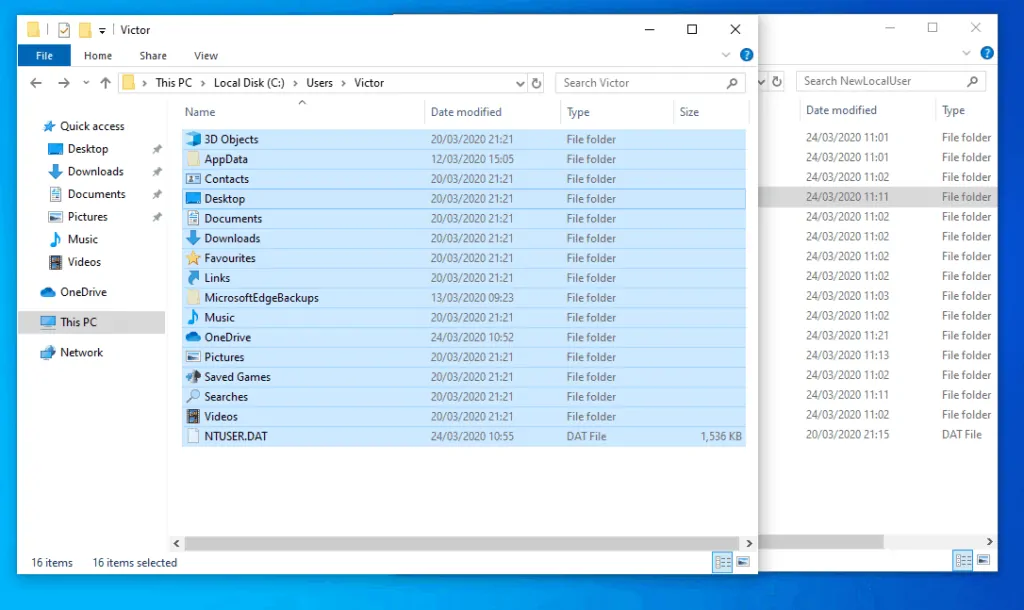
- Then, open the Users folder.

- When the Users folder opens, open the folder for your Microsoft account. In this example, my Microsoft profile folder is “Victor”. Leave the folder open.
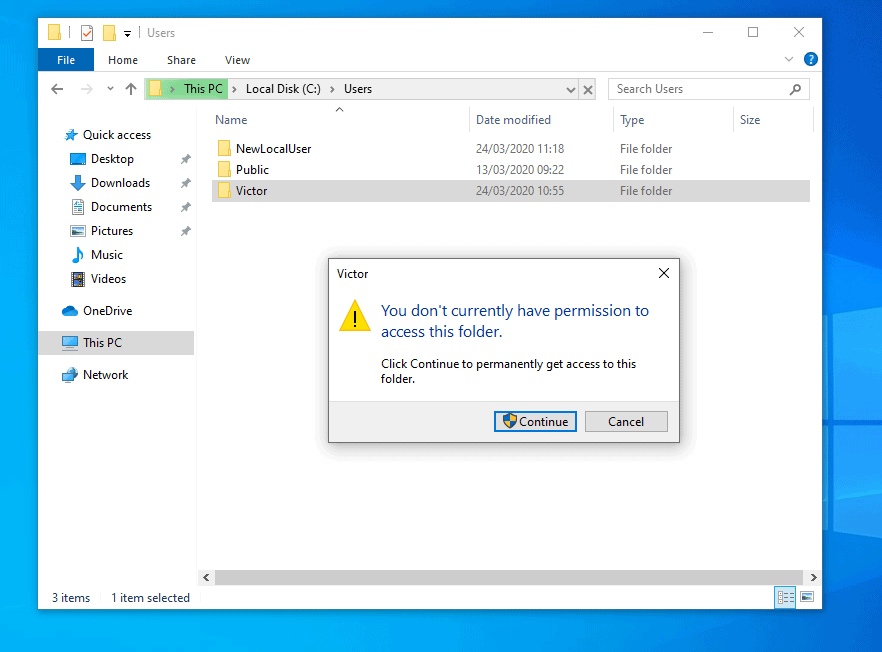
- When you click the user’s folder, you may be required to confirm that you have administrator permission. To proceed, click Continue.
- Open another File Explorer and repeat the steps until you get to the Users folder. Then, open the folder for your new user account.
- Once you have enabled your PC to show files and folders that are hidden, press Ctrl and A keys to select all the files/folders on your old Microsoft profile.
- Then copy all the contents of the old profile.
- Now, open the new account profile folder, press Ctrl and A to select all the contents. Then, press Ctrl and C to paste the contents you copied from the old profiler folder.
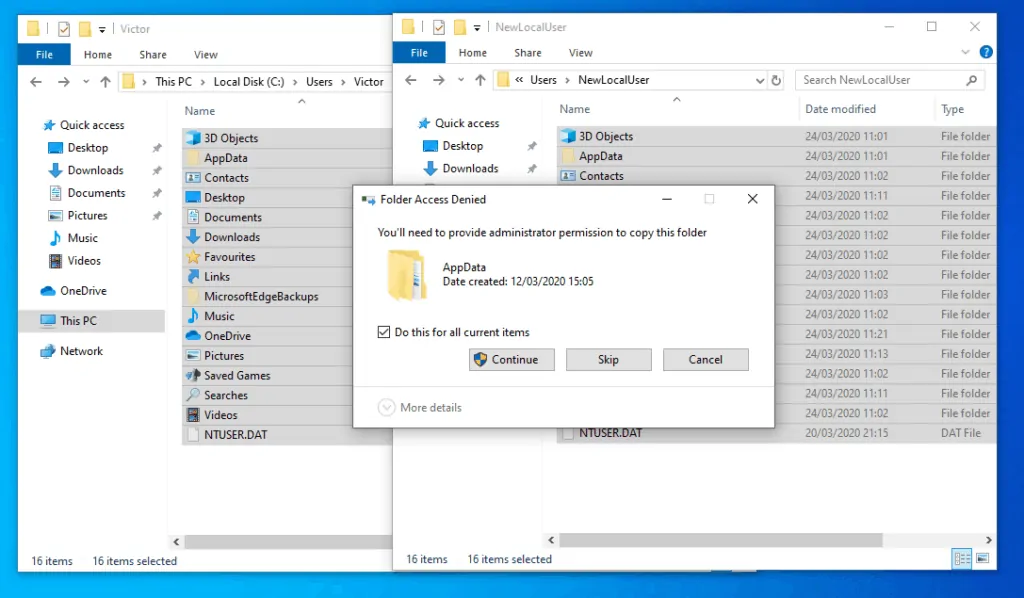
- You may receive a Folder Access Denied pop-up window requesting that you provide administrator permission to copy some of the folders. Check the Do this for all current items checkbox. Then, click Continue.
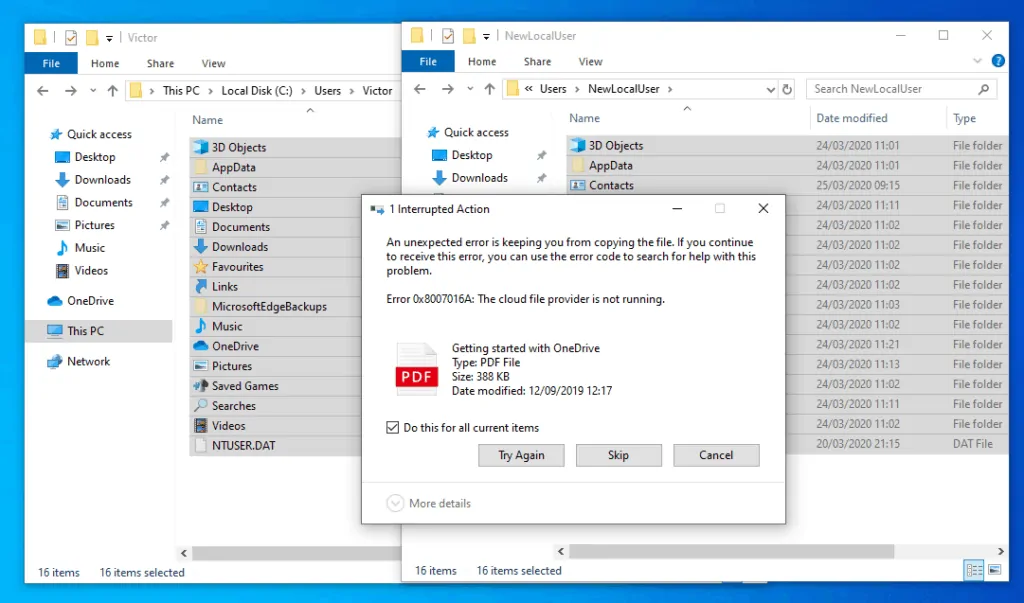
- If you receive any file or folder copy error, check the Do this for all current items checkbox. Then, note the file or folder that triggered the error and click Skip.
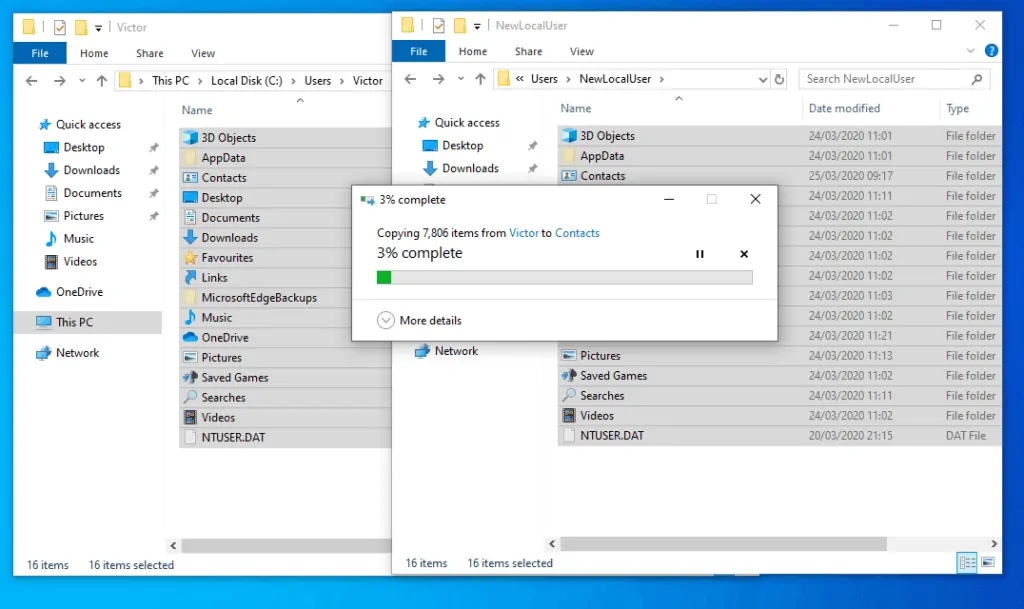
- Finally, wait for the copy to complete. Depending on the size of your old profile, it may take a while to complete the copy.
As you can see, it is very easy to remove a Microsoft account from Windows 10! I hope you found this guide helpful. If you did, click on “Yes” beside the “Was this page helpful” question below.
You may also express your thoughts and opinions by using the “Leave a Comment” form at the bottom of this page.
Finally, for more Windows 10 Itechguides, visit our Windows 10 How-To page.


![How To Run Sysprep (Generalize) In Windows 10 [2 Methods]](https://www.itechguides.com/wp-content/uploads/2022/05/8-2.webp)