
To paint a 3D-printed costume prop, remove supports, fill and sand visible defects, clean the surface, apply a compatible primer, inspect it, then add thin color coats and any desired finish effects. The amount of filling and sanding depends on your target: a glossy display finish needs more correction than a weathered or intentionally textured prop.
Choose the finish before you start
Decide which surfaces will be most visible and how smooth they need to look. Primer makes remaining imperfections easier to spot, but thick coats can soften small details. On a prop with fine engraving or sharp edges, correct defects selectively and keep each coating thin. For a deliberately worn or textured finish, you may not need to remove every line.
Prepare the printed parts
Remove supports and rough marks
Remove support material carefully, then clean up attachment points and high spots with tools suited to the part. Flush cutters, files, a rotary tool, and sandpaper are among the options described in Formlabs’ guide to painting 3D-printed parts. Take care around thin sections and details so the cleanup does not create new gouges.
Fill seams and visible defects
For assembled props, inspect joints and gaps as well as the print surface. Spot putty or epoxy putty can be used to fill seams and localized defects. One documented armor workflow used a cyanoacrylate (CA) adhesive-and-powder seam fill and a two-part epoxy coating, then added spot putty where needed; it is an example, not a universal recipe. Check that each filler and coating is suitable for your print material and compatible with the rest of the products you plan to use.
Quick wins for a faster PC:
Clear out junk files and repair common Windows errorsFree Scan →Scan for outdated or missing drivers - takes under a minuteDriver Scan →#1 Best Overall
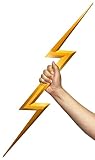
- This 3D-printable accessory is perfect for cosplay or adding electrifying effects to your costume, capturing the essence of thunderous power
- The assembled lightning prop measures 27 inches (70 cm) in length. For convenient transportation, the prop is divided into 4 sections and requires self-assembly
- The ultimate choice for role-play enthusiasts and anime fans!
- Lightning props can be used directly, or they can be glued, sanded, and painted to enhance durability and alter their color.
- All of our products are made using a high quality 3D printer to a professional standard but have visible layer lines from the process and aren't totally smooth.
Sand in stages
Sand support marks, filled areas, and other high spots, then refine the surface before priming. Formlabs suggests 220- or 320-grit abrasive followed by 400- or 600-grit; other prop workflows use additional sanding stages. Treat these as starting examples rather than fixed requirements: the right progression depends on the plastic, the condition of the print, and the finish you want. Avoid sanding away edges or shallow details.
Prime, inspect, and correct
Clean and apply compatible primer
Remove sanding dust before priming, using a cleaning method suitable for the material and products involved. Choose a primer identified as compatible with your plastic and intended paint. Apply light, quick spray passes if using spray primer, and follow the product label for application, drying, and curing. Filler primer can help with small surface texture as part of a repeated fill-and-sand process; it should not be expected to conceal substantial defects on its own.
Rank #2

- Complete Fun Kit: Includes 3 pairs of chicken arms, 11 mini accessories, and adjustable wire. Designed for quick setup, helping you create playful looks for up to 3 chickens.
- Add Fun To Backyard Life: Bring humor to daily chicken care, weekend gatherings, and family photos. A creative prop for Halloween, Christmas, and farm-themed events.
- Lightweight And Durable: Made from 3D-printed plastic that is lightweight and sturdy. Designed for short-term wear without adding extra burden during normal activity.
- Easy To Adjust And Secure: Bendable wire allows flexible sizing. Simple to attach and keeps arms in place while your chickens move around the yard.
- Multi-Pet Use: Suitable for chickens, ducks, geese, and large birds. Adds personality to pet photos, social sharing, and everyday farm moments.
Use primer as an inspection stage
When the primer is ready for inspection, examine the prop in good light. Layer lines, pinholes, support scars, and seams that were hard to see on raw plastic may now stand out. Fill or sand only the areas that need more work, clean them, and reprime those areas as appropriate. Repeat until the surface matches your finish target, while keeping an eye on fine details.
Apply color and finishing effects
Once the primer is ready for paint, apply thin color coats and let each layer dry or cure according to its label. Check the compatibility of every product in the coating stack, especially when combining primers, paints, fillers, and clear finishes. Test the combination on a spare print or an inconspicuous area before committing to a visible surface.
Rank #3

- Perfect replica for display Can be used for light use props or movie set use Ideal conversation piece
- Can be used for Cosplay when reinforced
- Comes in pieces for completetion buy user. Takes just minutes to complete with new screw together design! Hundreds of happy owners over years of offering.
For added character, prop makers use effects such as dry brushing, washes, sponge weathering, or metallic underpainting with intentional wear. Choose a matte, satin, or gloss final appearance to suit the prop. These effects and finish levels are creative options, not evidence of a particular product’s durability.
Independent reader supportYour contribution helps us test, update, and keep practical guides available for everyone.Choose supplies by task, not by brand claims
Useful supply categories include files and flush cutters for cleanup; abrasives such as 220/320 and 400/600 grit or flexible sanding strips; compatible primer or filler primer; and spot putty for localized repairs. A tack cloth may help remove dust where appropriate for the products being used. These are categories rather than tested product recommendations. The cited guides do not provide controlled comparisons of cost, brand performance, or durability, so use product labels and a test area to guide your choices.
Quick Recap
Best Value
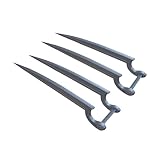
- Authentic Replica: Meticulously 3D printed using PLA plastic to recreate the iconic X-23 Wolverine claws from the Logan movie.
- Set of 4 Claws: Includes two sets of 2 claws each, providing a complete set for both hands.
- Adjustable Fit: Innovative connection piece allows you to slide the claws closer or farther apart to accommodate different hand sizes.
- Impressive Size: Each individual claw measures 7.5 inches in length for an imposing cosplay appearance.
- These come unfinished with vizable 3d print lines. If you would like a smooth metalic look, you will need to sand and paint them.
Rank #4
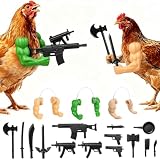
- Injection Molded Plastic Props:Unlike common 3D printed accessories, this kit includes 14 injection molded plastic mini props with smoother surfaces, sharper details, and a more premium look. The solid molded design creates a better-quality decoration experience
- Arm Styles:Includes 2 chicken arms with accessory holes for interchangeable props and 1 unique gesture-style arm. Easily create different funny chicken characters with multiple combinations
- Flexible & Durable:Arms for chickens Made with flexible rubber arms and durable injection molded plastic accessories, this set is easy to install, reusable, and designed for long-lasting fun
Work safely and avoid common finish problems
- Layer lines still show: Add targeted filling and sanding rather than relying on another heavy primer coat.
- Small details are fading: Stop applying broad filler or thick coats in that area; preserve details with localized corrections and thin layers.
- Coatings behave unpredictably: Recheck compatibility across the plastic, filler, primer, paint, and clear finish, and test the stack on a spare or hidden area.
- Dust or roughness appears in the finish: Clean sanding residue before the next coat and follow the product’s preparation instructions.
- Working with sprays or chemical coatings: Ventilate appropriately for the specific products and follow their safety directions.
Product prices and availability are accurate as of the date/time indicated and are subject to change. Any price and availability information displayed on Amazon at the time of purchase will apply.

