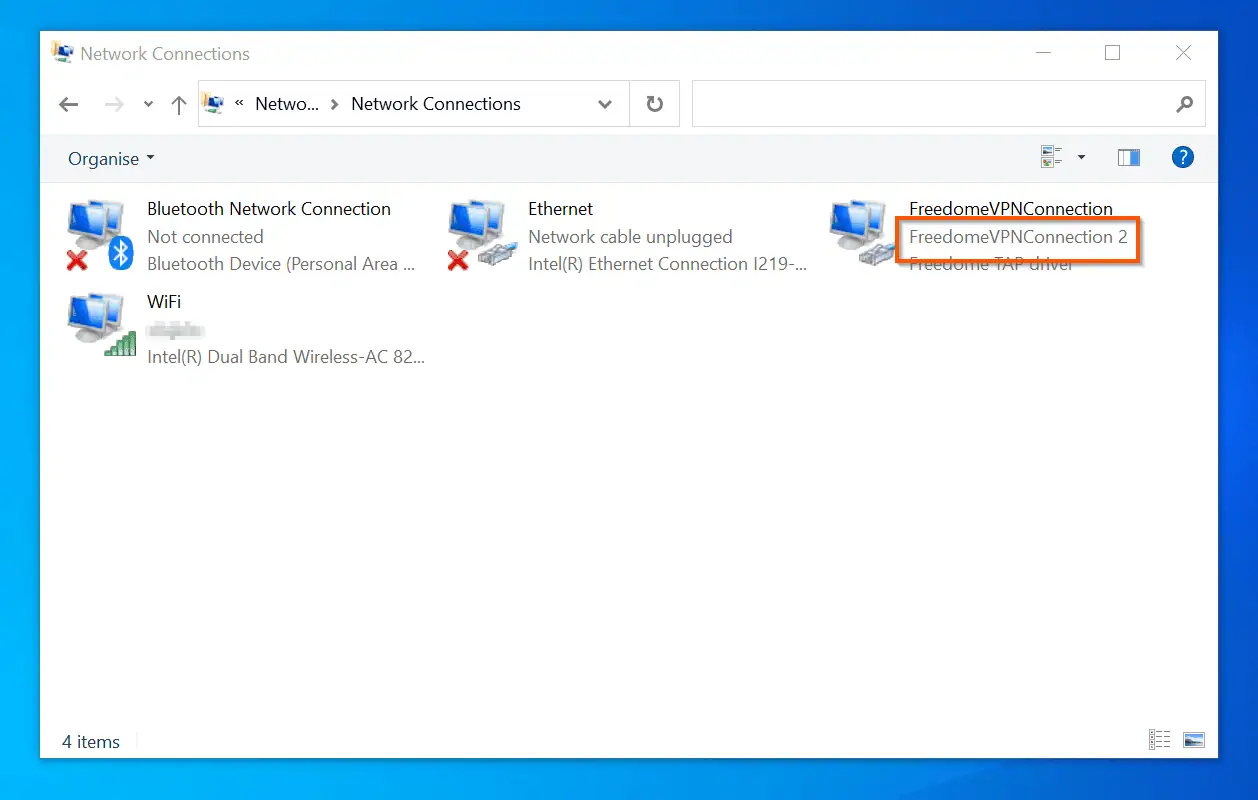
This Itechguide teaches you 2 methods to change network name in Windows 10. In this guide, I will change the highlighted network name from “FreedomeVPNConnection 2” to “Itechguides”.
Option 1: Change Network Name with Windows Registry
This method works for Windows 10 home and Pro. If you have Windows 10 Pro, I recommend the second method. Otherwise, proceed with the steps below.
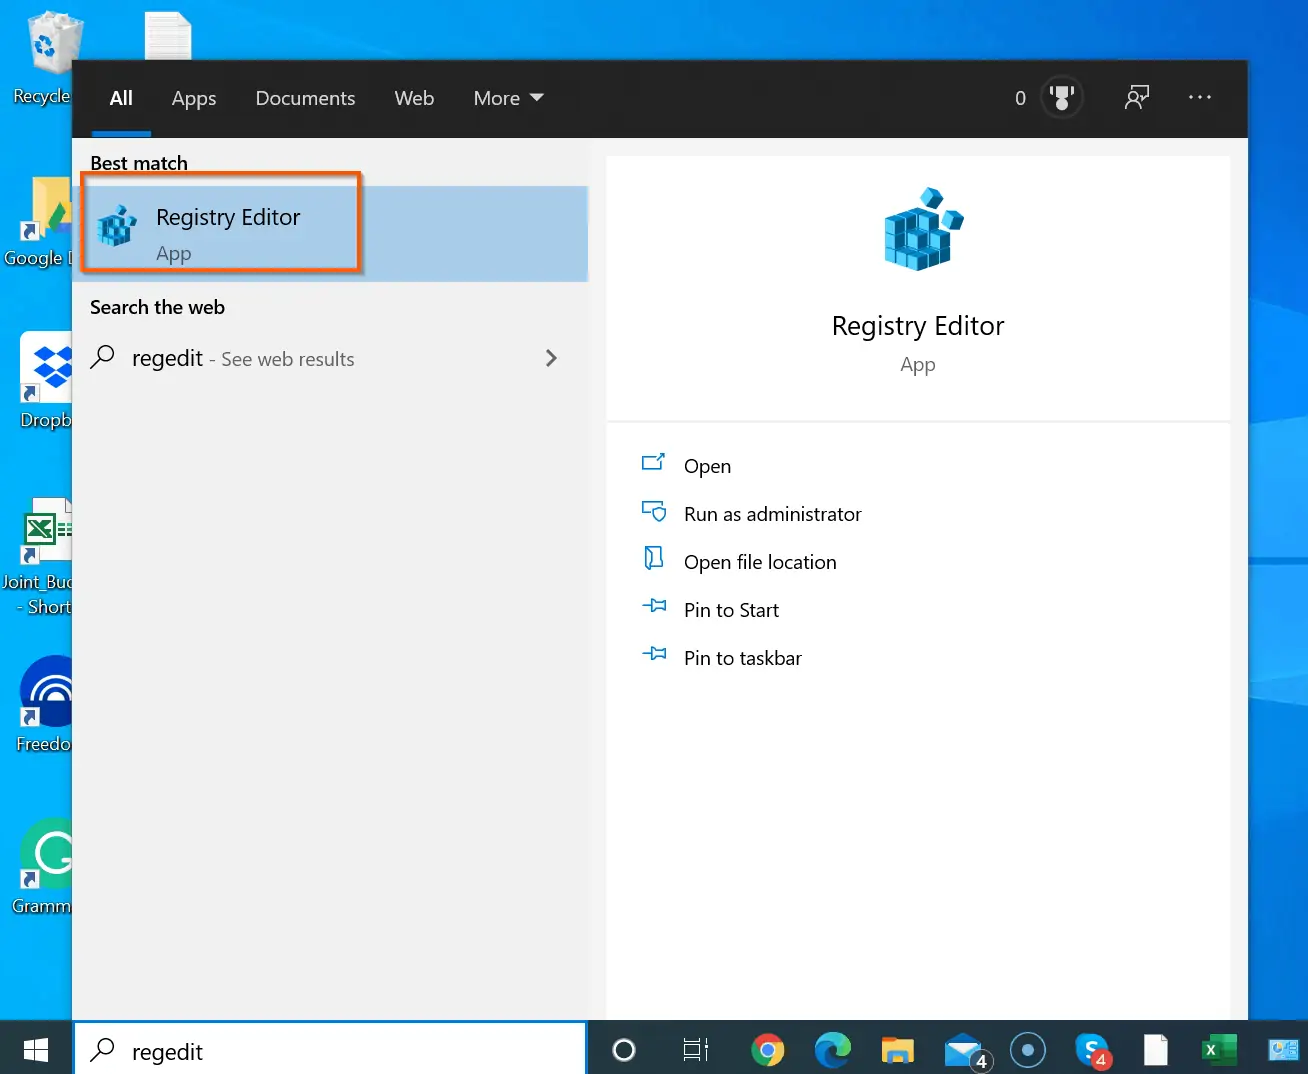
- Type regedit in the Windows 10 search box. Then, from the search results, select Registry Editor.
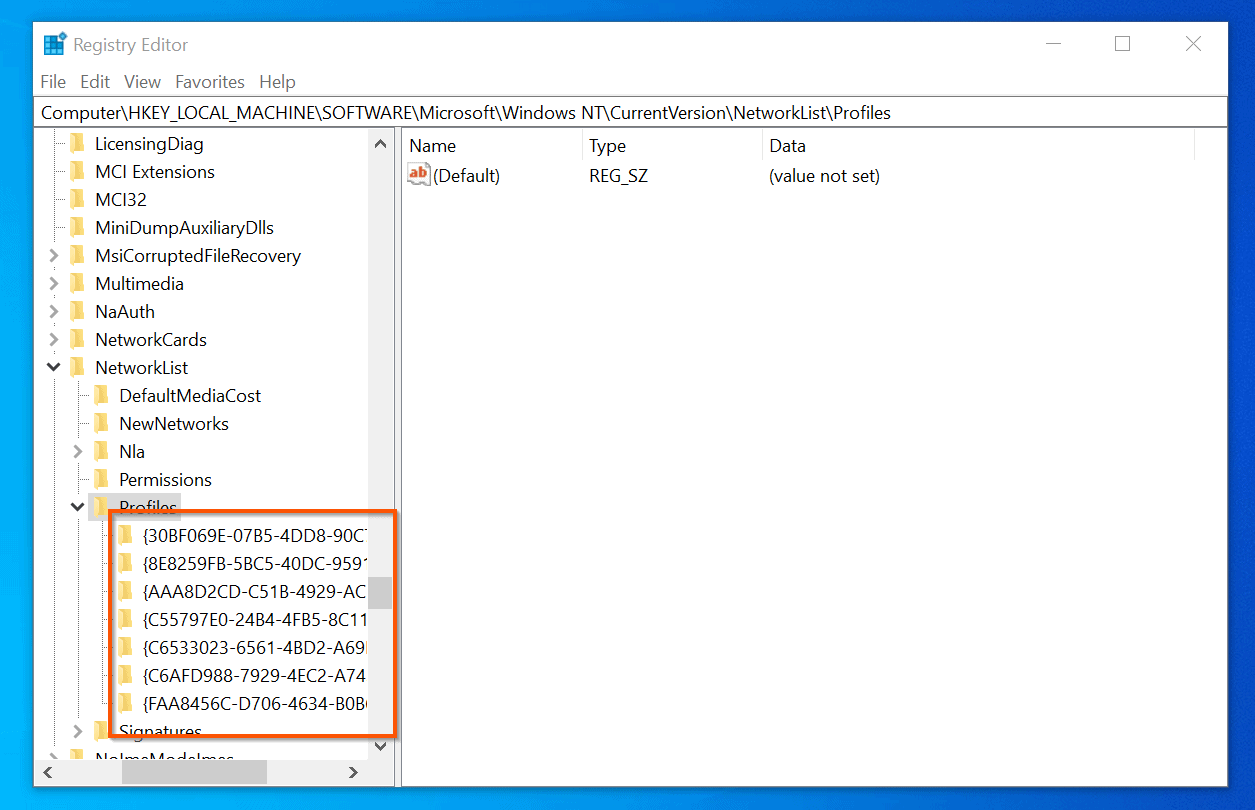
- When Registry Editor opens, navigate to the path below –
HKEY_LOCAL_MACHINE\SOFTWARE\Microsoft\Windows NT\CurrentVersion\NetworkList\Profiles
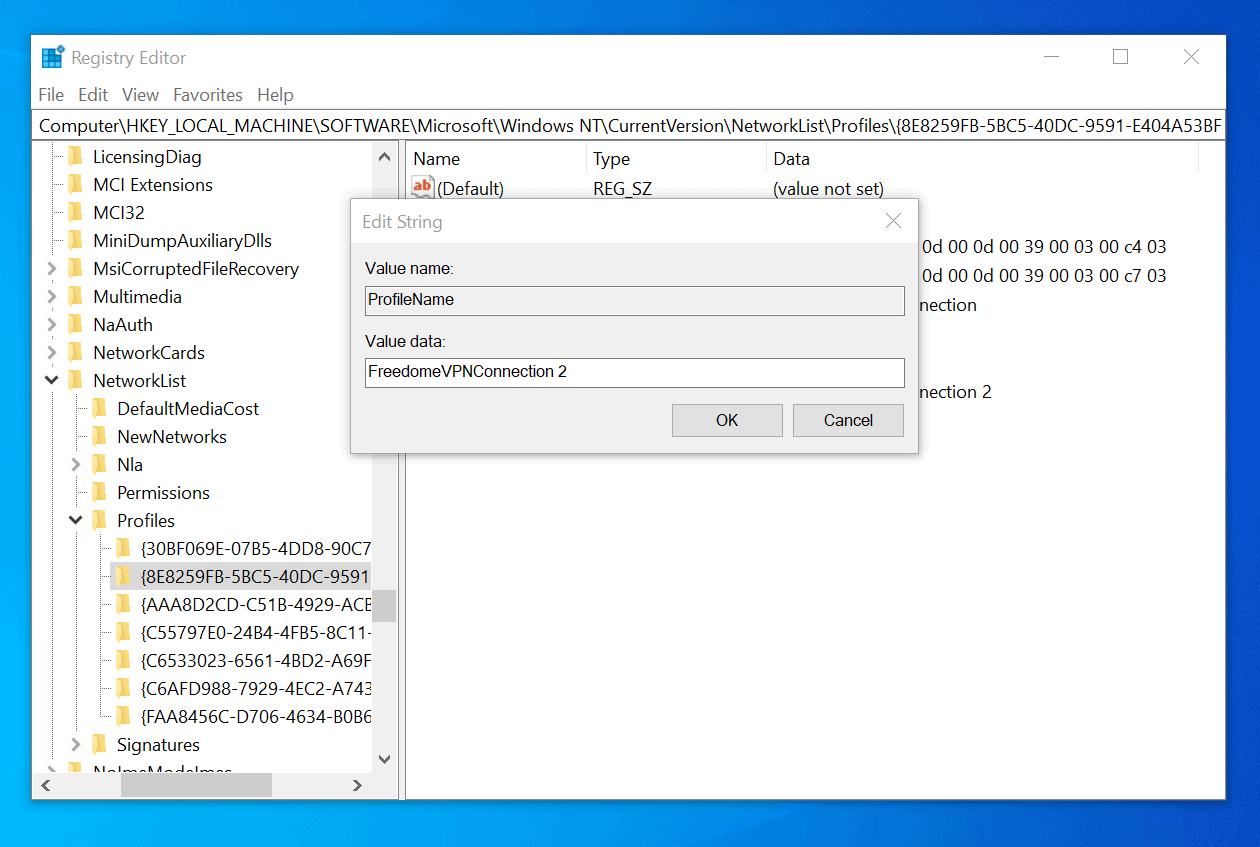
- To change the network name, double-click ProfileName field.
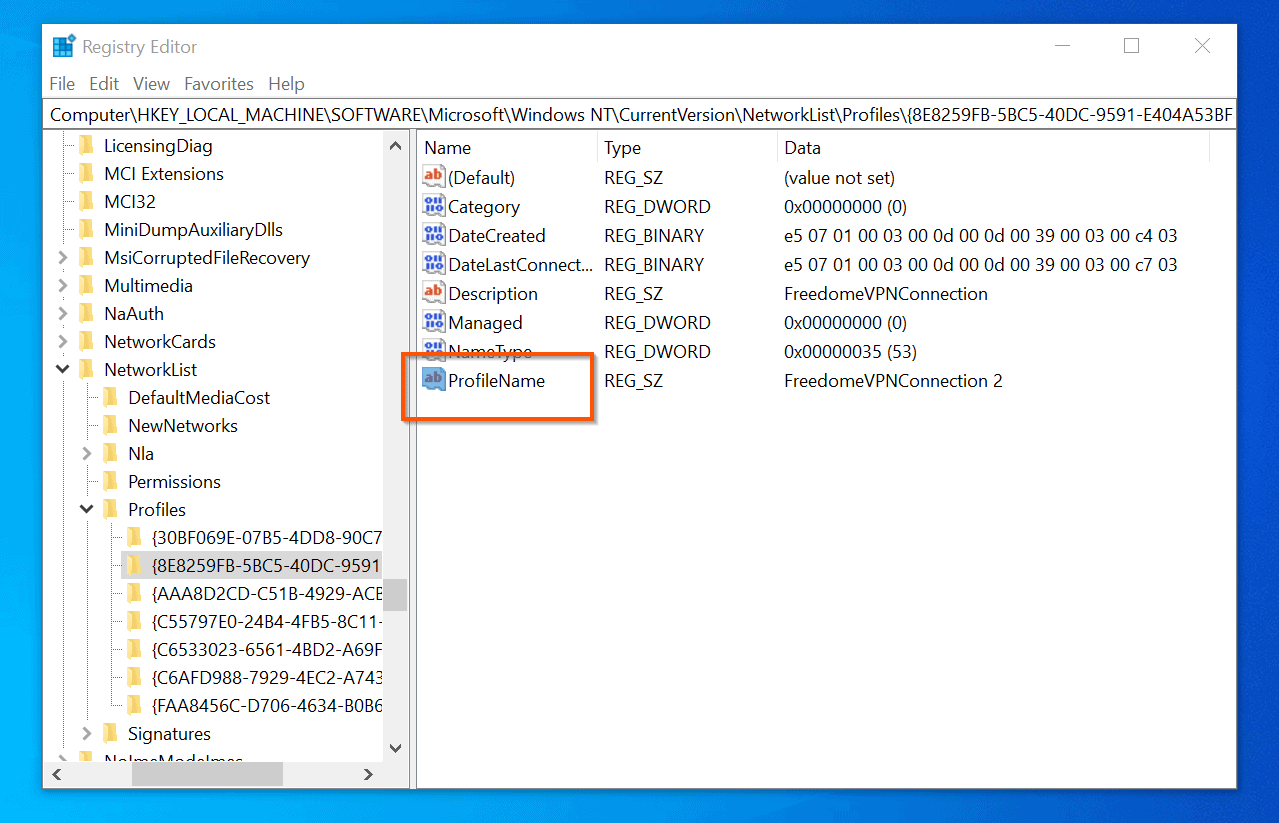
- Finally, to change the network name in Windows 10 from the registry, change the name in the “Value data” field and click OK.
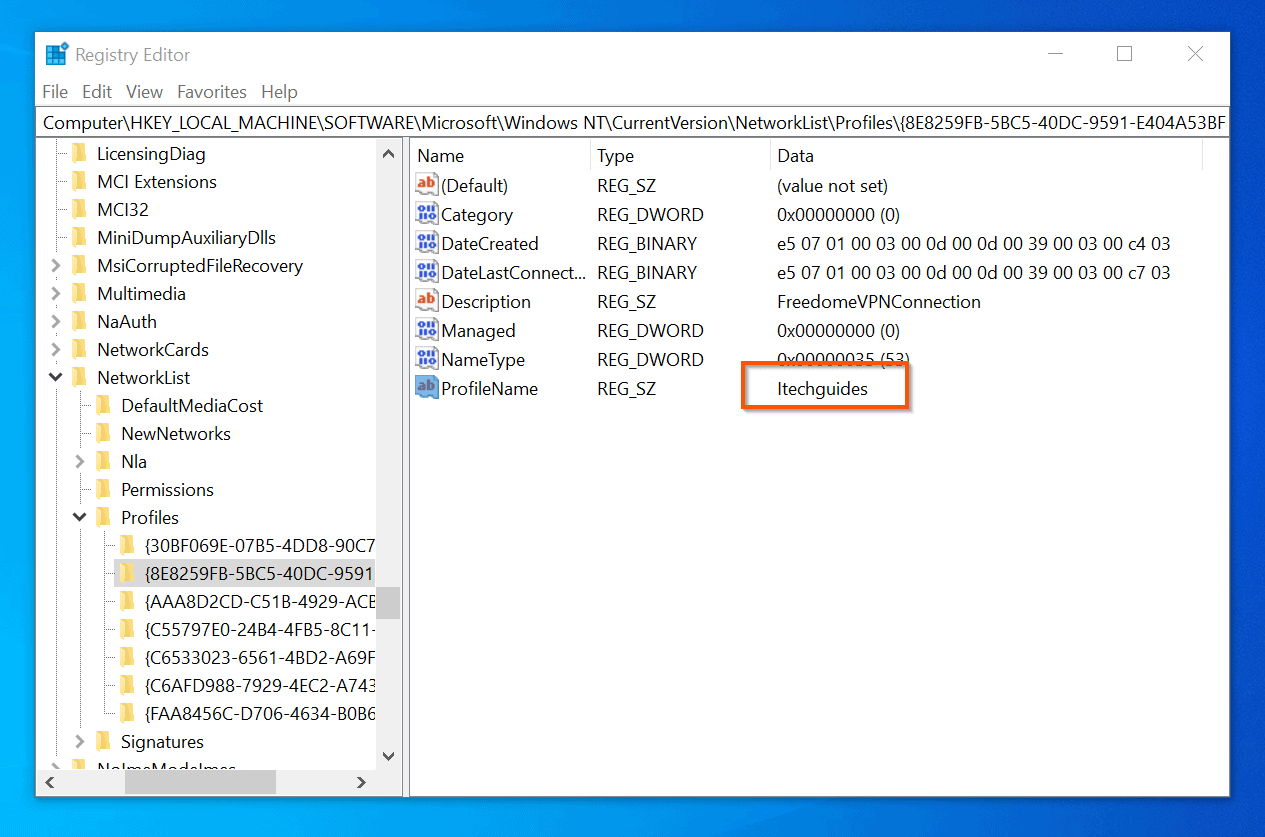
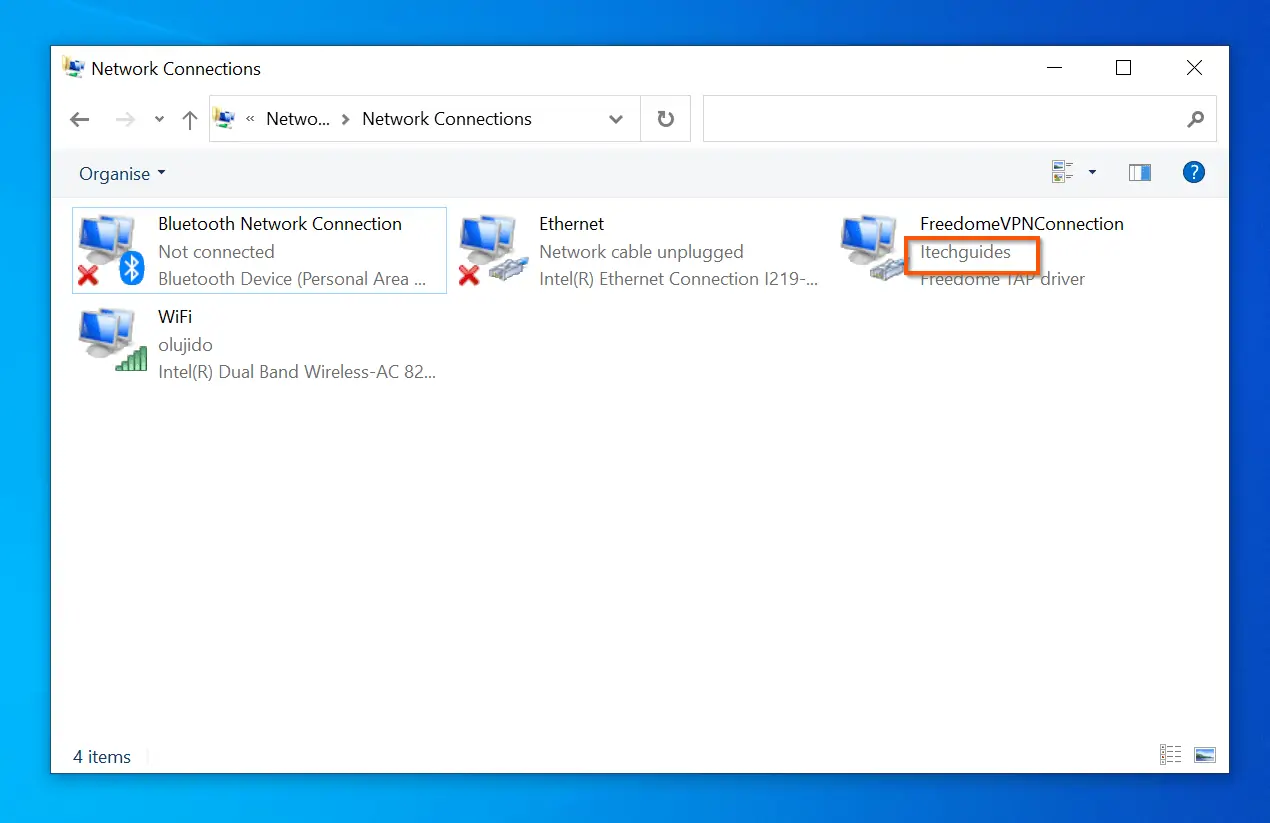
- Finally, to verify that the network name changed, open Network Connections and refresh it.
Option 2: Change Network Name with Local Security Policy
This method will only work if you have Windows 10 Pro. If you have a Windows 10 Home PC, use method 1 discussed above.
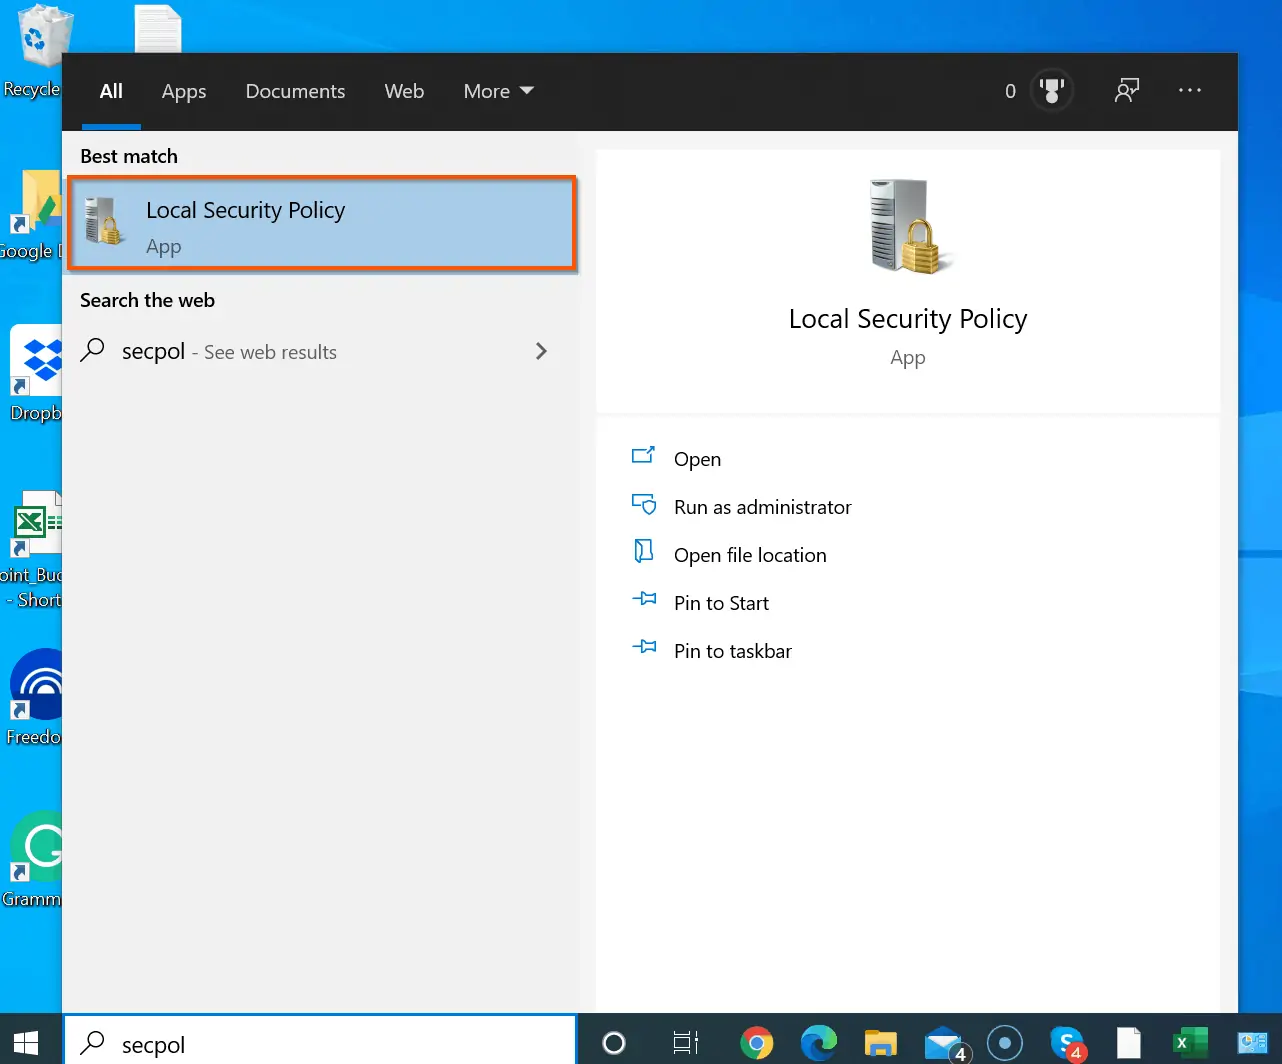
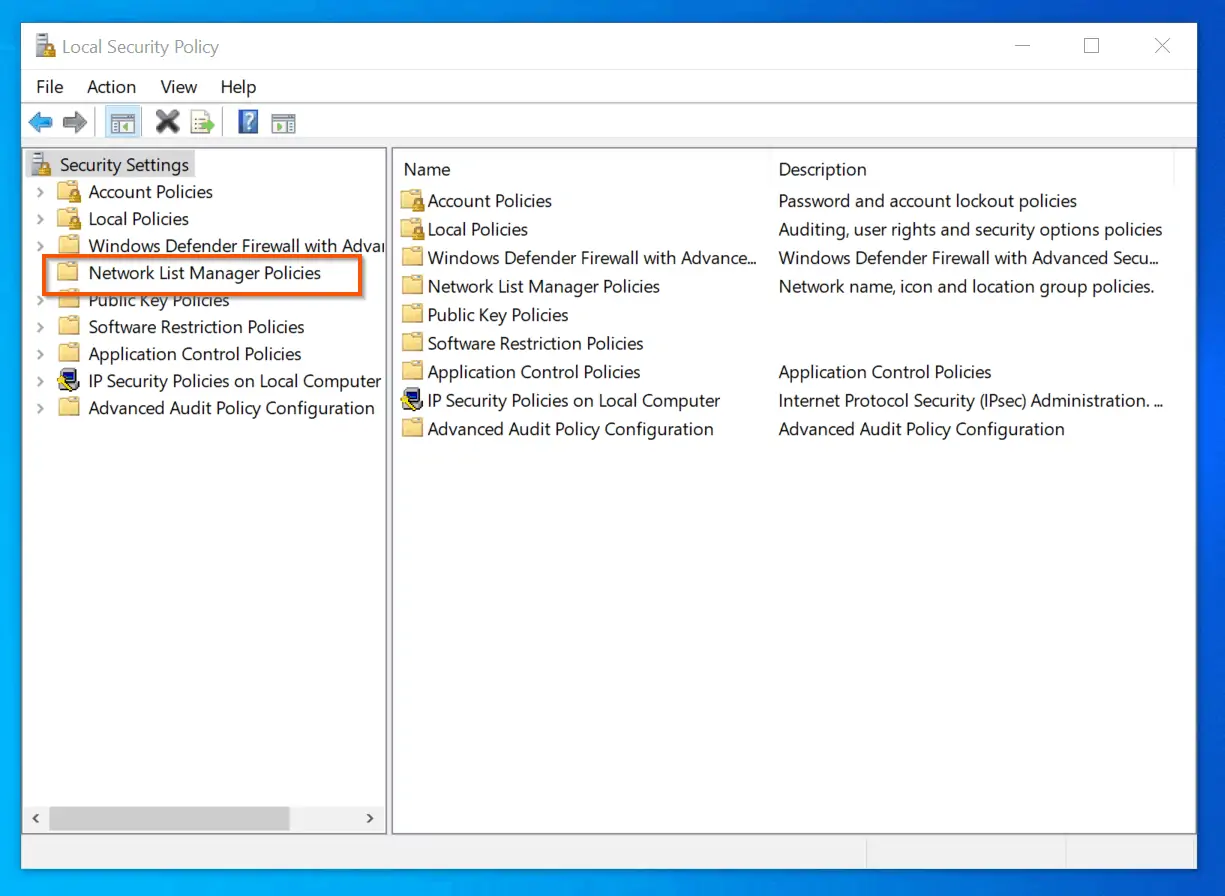
- On your Windows 10 search box, type secpol. Then, from the search results, select Local Security Policy.
- When Local Security Policy opens, on the left pane, click Network List Manager Policies – the names of the network names on your PC will be displayed on the details pane.
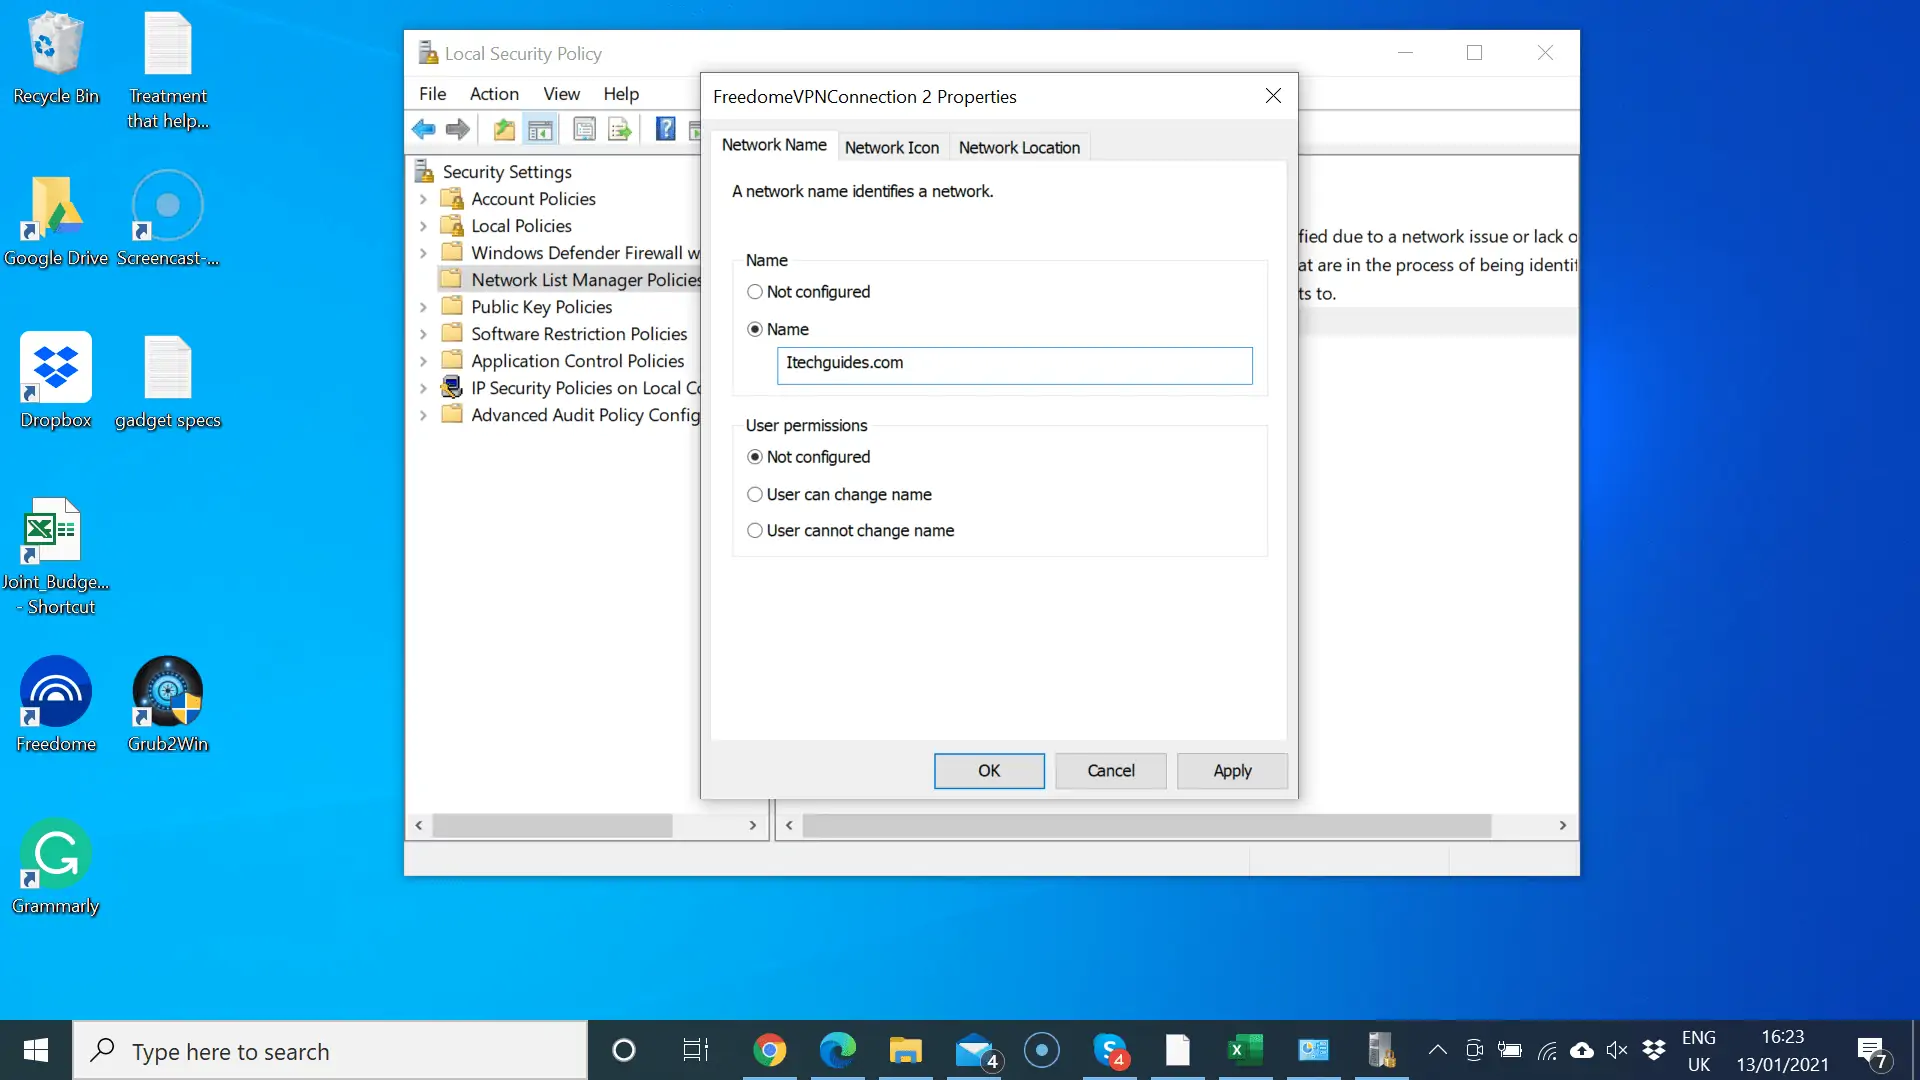
- Double-click the name of the network you wish to change. Then, on the Name section of the Properties sheet of the network name, click Name – see the second image below.

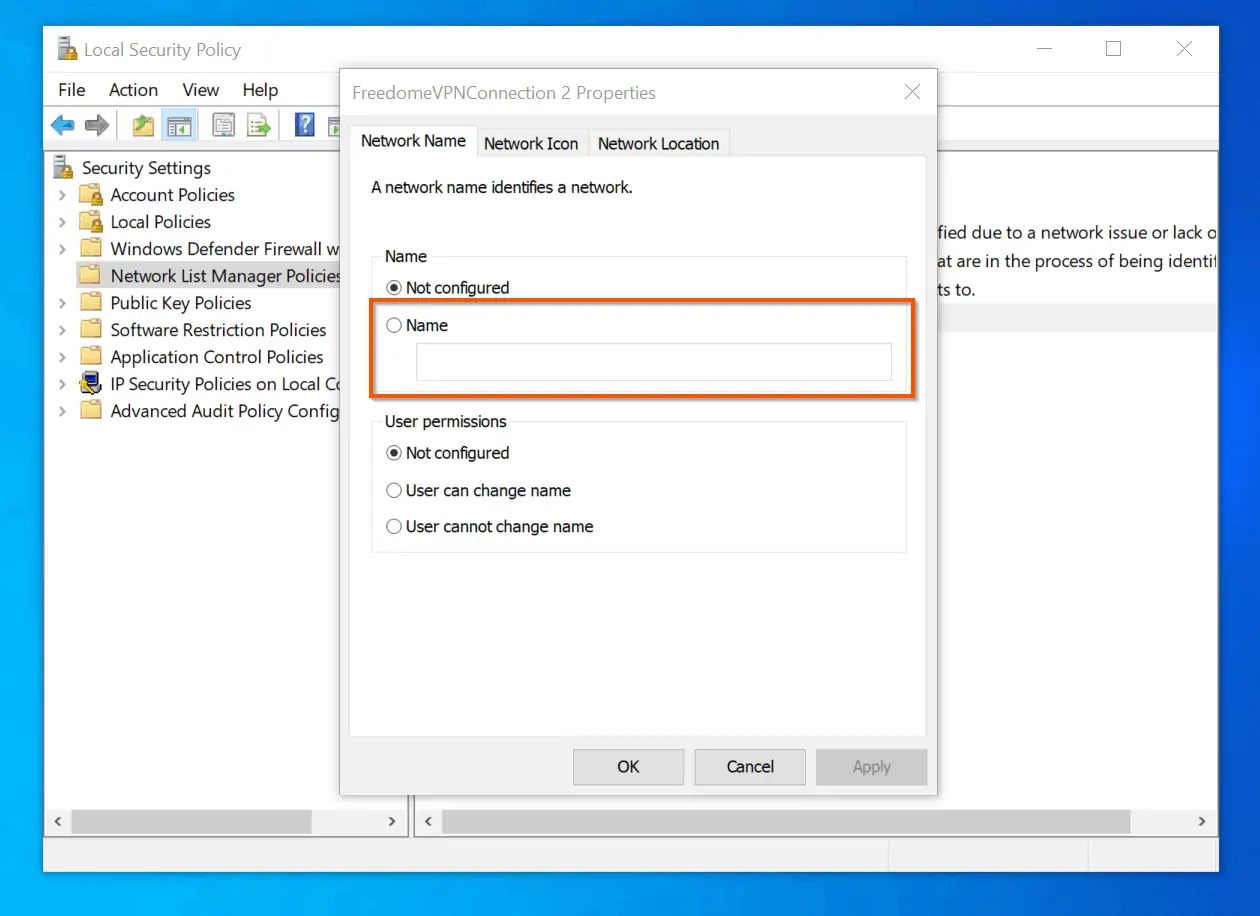
- Finally, to change the network name in Windows 10 with Local Security Policy, enter the new name in the Name filed and click OK.
Conclusion
I hope you found the guide helpful and you were able to successfully change a network name in your Windows 10 PC.
If you could change the network name on your computer with the aid of the steps in this guide, kindly let us know by responding to the “Was this page helpful?” question below.
Finally, for more Windows 10 Itechguides, visit our Windows 10 How-to page. You may also find our Work from Home page very helpful.


![How To Run Sysprep (Generalize) In Windows 10 [2 Methods]](https://www.itechguides.com/wp-content/uploads/2022/05/8-2.webp)