
What’s actually slowing this PC down?
Pick the symptom - the matching free tool is one click away.
iTechGuides is reader-supported. When you buy through links on our site, we may earn an affiliate commission. As an Amazon Associate I earn from qualifying purchases. Learn more
Escape from Tarkov does not provide a live GPS-style position marker. The dependable substitute is a three-part routine: study an external interactive map before deployment, use the EYE MK.2 compass for direction, and double-tap O to see the extractions available in that raid. In the raid itself, move between recognizable landmarks rather than trying to follow a constantly updating route line.
This method works because it separates three different navigation problems: learning where major features are, maintaining a bearing, and confirming which exits your current spawn and faction can actually use. Once those jobs are separate, getting oriented becomes a sequence of short checks instead of a guess based on scenery.
What “GPS navigation” means in Tarkov
The ordinary map-learning workflow in Escape from Tarkov does not place a real-time dot on your character. An external map can show the game world, but it cannot automatically tell you which building or patch of terrain you occupy. The EYE MK.2 compass supplies a bearing, not a position. You still have to identify your location from roads, buildings, shorelines, terrain, rail lines and other visible features.
That limitation is intentional in practical terms: navigation is a reconnaissance skill. You compare what you can see and hear with a prepared map, establish a direction, and verify the next landmark. A route memorized without those checks is brittle when your spawn, faction or extraction conditions change.
Popular on Amazon
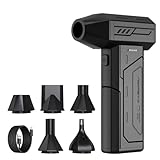
- Powerful Turbo Fan:CAGIWIRU Electric Air Duster have reached speed up to 130000RPM,Can efficient remove dust and debris.With LED light and Three Adjustable Speed to meet with different cleaning tasks.
- With Attached USB C Fasting Charging cable.Charing 3 hours,Enjoy up to 240 minutes of use on the lowest setting, For third speed can use for 25mins.with four charging options to meet with your needs.
- Wide Application: attached 5 different nozzles,making it suitable for a variety of scenes, such as car,pet, pc, keyboards, and other electronic devices. It also serves for office and home clean duster.
- Handy Design & Portable:Cordless air duster electric nozzle is Light weight and small size, design and comfortable to hold and space saving, convenient to carry around. You can put it in your room or inside the car without taking up space.
- Economical &Reusable: Built durable materials with a long-lasting battery,our CAGIWIRU air duster it's a sustainable alternative to disposable air cans.
The no-GPS system at a glance
| Job | Best tool | What it tells you | What it cannot tell you |
|---|---|---|---|
| Learn the layout before the raid | External interactive map | Relative positions of spawns, extracts, landmarks, quests, keys, loot, caches, bosses, transits and hazards, depending on enabled layers | Your live in-raid position |
| Maintain direction | EYE MK.2 compass | Your current azimuth (bearing) | Your location, route, distance or destination |
| Choose an exit | Double-tap O | Extractions available for the current raid | A universal list that applies to every spawn, faction or raid |
| Recognize where you are | Landmarks and map memory | Position by matching visible features to the prepared map | Exact coordinates or an automatic waypoint |
The strongest workflow combines all four. Removing any one creates a predictable weakness: a map without a compass leaves you unsure of direction, a compass without landmarks leaves you unsure of position, and a memorized route can send you toward an unavailable extract.
Prepare an external map before queueing
Preparation is where an interactive map delivers most of its value. The official Escape from Tarkov interactive-map hub and TarkovWiki document map features, while dedicated services such as MapGenie: Tarkov Map and Tarkov Navigator provide browser or app-based layers. Treat any map as a planning reference rather than a live tracker.
Choose the map and hide noise
- Open the map for the location you selected. Confirm that you are looking at the same map and a current version of its layout.
- Turn on only the layers needed for the next raid. Start with PMC or Scav spawns, extracts, major landmarks, quest locations and hazards. Keep loot, keys, caches, bosses and transit layers hidden until you need them.
- Check the map’s orientation. Rotate or position it so its north agrees with the EYE MK.2 reading you will use in the raid. An orientation mismatch can make a correct bearing look wrong.
- Mark two viable extraction zones. Select a primary exit and a backup that are reachable from your expected side of the map. Do not assume both will be available until you check O after spawning.
Layer filtering matters in a firefight. A map covered with every stash, room and item marker can hide the road, river, industrial block or terrain edge that actually tells you where you are. Add detail only after the major route is familiar.
Free tools Windows power users keep installed
One-click scans. No signup required.
Use progress features deliberately
MapGenie’s US App Store listing describes a dedicated Tarkov map app with progress syncing. A progress system can help you record completed quests or locations across devices, but it does not replace in-raid observation. If you use a service with saved progress, treat that information as a study checklist: learn the next landmark or extract, then confirm it in a low-risk raid.
Build a landmark chain instead of memorizing a whole map
Start with one anchor that is difficult to confuse with anything else. Examples include a major building, a mall, a shoreline, a tower, a train line, a large industrial complex, a road junction or a distinctive terrain boundary. Your first objective is not to know every room; it is to connect your spawn area to that anchor.
Also popular on Amazon

- Screen Cleaner is Your Screen’s New Bestfriend! - EVEO is proud to present a screen cleaner that’s perfectly suited for your TV. Meet your new screen cleaner, computer screen cleaner, laptop cleaner, iPad cleaner, Macbook,tv cleaner or any other electronic device. Our screen cleaner spray and wipe along with the included plush microfiber cloth, easily removes dust, fingerprints & other smudges on the screen’s surface. Clean effectively for a streak-free screen
- Gentle on your Screens - Our screen cleaner spray and wipes is compatible to be used even for the most sensitive LCD, LED, CRT, and OLED screens in proper use. Be at ease knowing that this product is compatible with all the major brands: LG, SONY, Samsung, Sharp, iPad, iPhone, Android screens, Kindle, PC monitors - we’ve got you covered! Can be used as LCD screen cleaner, tv cleaner, smart tv screen cleaner, and more
- Premium Super Soft Plush Microfiber Cloth - Included in this efficient screen cleaning kit. This screen cleaner spray and wipe has our signature plush microfiber cloth specially designed to comply with screens and monitors and leave them streak-free. Has been shown to effectively absorbs stubborn stains, zero streaks, and no fiber shedding. Always use this together with our screen cleaner for the best results
- Easy-to-Use Screen Cleaner Kit + microfiber cleaning cloth - The EVEO Screen Cleaning Kit will easily be your new favorite tool when it comes to taking care of the things you love most, quick and easy solution for a streak-free screen. Simply screw on the sprayer gun on the screen cleaner bottle. Spray the cleaning liquid onto the microfiber cloth, then wipe the screen until desired cleanliness & shine is achieved.
- Quality Screen Care Kit Worth Purchasing - Enjoy a convenient Screen Cleaner anytime, anywhere you need it. Your satisfaction is our top priority. We stand behind the quality of our products and that’s why, you shouldn’t be worrying at all. We manufacture the Best Screen Cleaner. and can be used for laptop cleaning kit, laptop screen cleaner, tv screen cleaner for smart tv. MacBook screen cleaner, monitor cleaner or screen cleaner spray for electronic devices with microfiber cleaning cloth
How to select a useful anchor
- Large: It should remain visible or recognizable from several approach angles.
- Distinctive: Its silhouette, color, sound or surrounding terrain should not closely resemble multiple alternatives.
- Connected: Roads, fences, power lines, rails, water or open ground should lead naturally from the anchor to the next checkpoint.
- Relevant: It should lie on the way to a planned extract, quest area or safe rotation.
Turn the anchor into checkpoints
Break the route into three or four legs: spawn to the large anchor, anchor to a secondary landmark, secondary landmark to the extraction zone, and an optional detour for a quest or supply stop. At each checkpoint, ask three questions:
- What should be visible if I am on the correct approach?
- What bearing should the next leg take?
- What alternate feature would confirm or disprove this position?
For example, a road may be your primary cue, while a parallel fence or a visible tower confirms that you are on the correct side of it. Using two independent cues is safer than trusting a single tree, rock or small structure that can look different at night or from another angle.
Use the EYE MK.2 compass for direction
The official compass page states that the EYE MK.2 lets you “easily determine the azimuth.” It is a direction instrument, not a locator: the needle can tell you which way you are facing, but it cannot identify your building or draw a line to an exit.
Acquire and configure it
- The compass is sold by Jaeger at loyalty level 1.
- Place it in the special item slot so it is retained when you store equipment; the research describes this slot as the intended way to keep it available.
- Assign it to a hotkey. The official compass instructions say it “must be placed in any inventory slot and assigned to a hotkey to be used.”
Set the hotkey before deploying and practice opening the compass while moving. You want a quick bearing check, not an extended inventory pause in an exposed area.
Read a bearing as one leg of a route
Use the compass after you identify a landmark and before you leave it. Note the approximate azimuth for the next checkpoint, move while watching terrain and cover, then recheck when the landscape opens or the route branches. A bearing is most useful when paired with a visible feature: “travel roughly east toward the rail line,” not simply “travel east.”
Also popular on Amazon

- 【Large size】:Measuring 800 x 300 mm/ 31. 5×12 inches, which is wider and taller than others. Large mouse pad can perfectly fit your keyboard and mouse of any size, and there is also ample space for peripherals such as phones, tablets, etc.
- 【LED backlight mouse pad】:Blade Hawks RGB mouse pad provides 7 static modes and 7 dynamic modes will give you the options you are looking for. Power-off memory function remembers the last lighting mode you selected. The super glow fiber Chroma will give you a colorful gaming setup that you want.
- 【Anti-slip rubber base】:Made from Natural rubber, this gaming mousepad will firmly grip your desktop, allowing you to enjoy the ultimate precision in the games you are most passionate about. It also comes with a texture that enhances this ability even further.
- 【Smooth and waterproof surface】: Micro-textured cloth surface, for extremely precise mouse control and a smooth movement. When liquid splashes on the gaming mouse pad, it forms water droplets and slides down. Will not delay your work or gameplay.
- 【Plug and play】: This mouse and keyboard pad is powered by USB, plug and play, no driver required. One button control light modes. Press one time to change the lighting mode, press twice to change the brightness, press and hold about 3 seconds turn ON/OFF.
Do not expect the compass to solve a wrong starting assumption. If the map is rotated differently from your mental picture, or if you misidentified the anchor, a perfectly read azimuth can carry you farther from the objective. Reconfirm the landmark whenever the scene stops matching the map.
Confirm extracts with a double-tap of O
The official guide says: “To see the available extractions, double tap O.” Do this as soon as the raid begins and again if your plan changes. The list is raid-specific: extraction choices vary by spawn point and by whether you are a PMC or Scav.
Why a memorized exit can fail
A route learned from another raid may lead to an exit that is not listed this time. Some extraction points also have special conditions. Depending on the exit, the requirement can involve a payment, an item, a PMC/Scav partner, a single-use limitation, or a visual signal such as lamps, spotlights or green smoke. The O screen tells you which choices are available; the map and the exit’s in-world clues tell you how to reach and activate them.
Plan primary and fallback exits
- Double-tap O immediately after spawning.
- Cross-reference the listed exits with your external map and identify the one closest to your spawn-side landmark.
- Choose a second listed exit that remains plausible if the first route becomes unsafe or its condition cannot be met.
- When you cross into a new area, check your bearing and landmark chain rather than blindly following the original path.
- Check O again after a major detour, a faction change or any point where the available-extraction list might have been misunderstood.
Move checkpoint to checkpoint during the raid
Once you have an anchor and a bearing, avoid staring at the external map while exposed. Use it for preparation, then navigate through short visual decisions.
The five-step movement loop
- Locate: Match your current view to a large feature on the map. If nothing matches, stop and identify a road, wall, shoreline, rail line or elevation change before moving farther.
- Orient: Use the EYE MK.2 to establish the direction of the next checkpoint.
- Advance: Move from cover to cover toward a feature you expect to see, keeping the next landmark in mind.
- Verify: Compare the expected feature with what is actually visible. A second cue, such as a parallel fence or adjacent building, should agree.
- Replan: If the view does not match, return to the last confirmed landmark, recheck the map and select the nearest safe checkpoint rather than improvising a long cross-map run.
This loop reduces cognitive load. You are not trying to remember every path between every point; you are making one bounded decision at a time.
Also popular on Amazon

- 【Softer and More Comfortable】Vaydeer wrist rest has unique diamond pattern, which is the combination of softness and aesthetics. The materials of wrist rest are improved into higher quality memory foam and covered with silky smooth lycra. The computer wrist rest makes you as comfortable and cushiony as like rest your wrists on clouds.
- 【Ergonomic Wrist Saver】The wrist rests for keyboard and mouse comes with a 17.32×3.15×0.83 inch keyboard wrist pad and a 5.94×3.15×0.83 inch mouse wrist support. Based on ergonomic design, the unique concave shape is the perfect fit for your wrist joints. The wrist rest pad fits most computer keyboards and laptops, improve hand and wrist posture, release your wrist and arm stress.
- 【Non-Slip Rubber Bottom】Featuring an anti-skid silicone base on the bottom, this wrist keyboard support stays firmly in place on your desk, preventing the padding from sliding around, ensuring stable and consistent wrist support during extended computer sessions.
- 【Better Experience & Pain Relief】Our keyboard arm rest is beneficial to alleviate the soreness caused by direct contact and friction between your arm and a hard desk surface, reducing the risk of wrist fatigue or carpal tunnel. The soft texture of memory foam can evenly distribute the pressure around your wrists and provide good support with just enough give.
- 【Helpful in Multiple Scenarios】Whether you're working, studying, writing, typing, gaming, this keyboard and mouse rest combo is an essential accessory to add comfort and support to your hands and wrists. It’s also a great gift for men, women, family, friend, coworker, gamer, teacher, etc.
Use audio and cover as navigation constraints
A map route is only a geometric plan. Gunfire, footsteps, exposed ground and blocked entrances can make the shortest line a poor choice. Keep the map’s hazard layer available during preparation, then use sound and cover to choose which side of a landmark to approach. If you must detour, preserve the landmark chain: reach a known secondary feature first, then re-establish your bearing.
A practical learning plan for one map at a time
Community players commonly recommend external maps, landmarks, the compass and repeated practice instead of attempting to memorize an entire location in one session. That is player experience rather than an official guarantee, but it produces a sensible training progression.
Session 1: learn the skeleton
- Study the major spawns, the largest buildings or terrain features, and all exits shown for your faction.
- Run from one likely spawn area to the nearest large anchor.
- Continue to one primary extract and then repeat the route toward the backup extract.
- Ignore small loot rooms and minor stashes until the broad shape is familiar.
Session 2: add navigation cues
- Add roads, fences, rail lines, rivers, towers and elevation changes that distinguish similar-looking areas.
- Practice leaving an anchor in two different directions and returning to it.
- Use the compass for each major leg, then verify the result with a landmark rather than trusting the bearing alone.
Session 3: add objectives and hazards
- Enable quest locations, key areas, caches, bosses, transits and hazards only when they matter to your next raid.
- Connect each objective to the nearest anchor and to at least one extraction route.
- Rehearse a fallback when the primary path is blocked or the exit’s condition cannot be met.
Learning one map at a time prevents partial memories from different locations from blending together. Rehearse at least two viable extracts for the map and faction you are currently playing.
Independent reader supportYour contribution helps us test, update, and keep practical guides available for everyone.Choosing a navigation tool
| Tool | Strengths | Trade-offs | Best use |
|---|---|---|---|
| Browser interactive map | Flexible, detailed layers; easy to filter spawns, extracts, quests, loot, keys, caches, bosses, transits and hazards | Checking it during movement can distract from audio, cover and threats; freshness depends on the service | Pre-raid planning on a second monitor or desktop |
| Phone or tablet map app | Convenient second screen; some services offer saved or synced progress | Smaller display and slower consultation under pressure; app-specific features vary | Quick reference when a separate monitor is unavailable |
| EYE MK.2 compass | Lightweight in-game bearing tool; can be hotkeyed and kept in the special item slot | Does not identify your position, distance, route or extraction availability | Maintaining direction between confirmed landmarks |
| Memorized route | Fast and distraction-free once mastered | Fragile when spawn, faction, extraction conditions or map layout changes | Speeding up a route you have already verified with current raid information |
Freshness deserves its own check. Locations, extraction rules and layouts can change with updates or wipes. Before relying on a route learned previously, compare the current map, confirm the map orientation and use O in the raid.
Do these 3 things before closing this tab:
1Scan for outdated or missing drivers - takes under a minute2Repair Windows errors before they cause bigger problems3Fix the driver behind crashes, sound loss and screen glitchesCommon navigation failures and fixes
“I have a compass, but I still do not know where I am.”
The compass only supplies azimuth. Stop moving, identify a major visible feature, and match it to the external map. Use the compass after you have a landmark, not instead of one.
Also popular on Amazon

- 【No Drill Mounted】Cable management tray can be assembled in as little as 3 minutes or less-simply. Side clips easily clampe the edge of desk, pass through the holes on the sides, and secure excess cables with baskets. Desk cable management supports inward or outward installation to meet your needs in different scenarios, and provides you with great convenience when collecting and organizing wires.
- 【Rubber Pad Protects Desk】Wire organizer under desk built-in soft rubber pads on the clamp protect your desk from scratches, so you will not damage your furniture or office.
- 【Sturdy and Beautiful】Cord management under desk is made of high-quality carbon steel and holds about 15 lbs. The wire basket has 2 holes on each side of the tray to enable your cables to pass freely. Cable baskets are suitable for desk thickness use from 0.4" to 2.4".
- 【Space Saving & Keep Organized】Desk cable management tray holds all your power cords, outlet strips, USB hubs and computer transformers hidden from your feet, and the data cables will not enter the vacuum cleaner to keep your desk clean and tidy. Desk wire organizer is also suitable for use in the kitchen and outdoors.
- 【Reduce Safety Risks】Cable tray under desk keeps all plugs away from your kids, no more worry about tripping. Using 2 holes wire tray saves extra space, helps you easily cabling and wire protection. The mesh design is not easy to accumulate dust, but avoids safety accidents caused by messy wires.
“The extract I memorized is not listed.”
Extraction availability depends on spawn and faction. Double-tap O, select an exit that is listed for this raid, and rebuild the route from your nearest confirmed anchor.
“The map route points the wrong way.”
Check whether the external map and your compass use the same north orientation. Then verify that you identified the correct building, road or shoreline. An orientation mismatch or a mistaken anchor can produce the same symptom.
“The map is too cluttered to read.”
Hide loot, keys, caches and other optional layers. Keep only spawns, extracts, major landmarks, quests and hazards until you know the route. Add one layer at a time as your objectives require it.
Recommended Free Tools
“I get lost after a detour.”
Do not continue on an unverified bearing for a long distance. Return to the last confirmed landmark, find a secondary feature that appears on the map, and resume the checkpoint loop from there.
“A conditional extract appears usable, but I cannot activate it.”
Review the exit’s listed requirement and look for its in-world signal, such as lamps, a spotlight or green smoke. Some exits can require money, an item, a PMC/Scav partner or a single-use condition; availability on the O screen does not remove those activation requirements.
The most reliable routine
Before deployment, open a current interactive map, filter it to the layers you need, orient it to north and choose two possible extraction zones. In the raid, double-tap O, identify the first large anchor, and use the EYE MK.2 to set the bearing for the next checkpoint. Move landmark to landmark, verify each leg with a second visual cue, and replan from the last confirmed feature whenever the scene disagrees with the map.
This combination is more robust than any single substitute for GPS. The external map supplies context, the compass supplies direction, the landmarks supply position and the extraction screen supplies raid-specific choices.

