
An Arduino-controlled photogrammetry scanner automates the camera’s view of an object: a motorized turntable rotates it through repeatable positions, and a camera captures photographs for separate photogrammetry software to combine into a 3D model. Arduino coordinates motion and, in some builds, the camera trigger; it does not reconstruct the model.
How an Arduino photogrammetry scanner works
- Place the object on a turntable. The object must remain stable as the platform rotates.
- Move it between views. A controller drives a stepper motor and its driver to rotate the platform by set increments or according to another programmed pattern.
- Capture photographs. The camera may be triggered automatically, or capture may be handled through a phone workflow or manually. In a stop-and-shoot setup, the controller can pause after each movement so the object settles before exposure.
- Reconstruct the model separately. Photogrammetry software analyzes the photographs and combines them into a 3D model. The Arduino is not the image-processing system.
One documented Uno build turns the platform by 10 degrees per photo, pauses for settling, and triggers a Nikon D3200 with an infrared LED. That is a specific project configuration, not a universal capture recipe. Arduino Blog’s Uno scanner project describes that arrangement.
What the example builds show
There is no single standard design. The projects use different controllers, motors, capture approaches, and optional controls.
| Example | Documented approach | What to take from it |
|---|---|---|
| Arduino Uno scanner | Stepper-driven rotation in 10-degree increments, a pause for settling, and an infrared LED triggering a Nikon D3200. Arduino Blog | A stop-and-shoot workflow can coordinate repeatable positions with a camera trigger, but the cited infrared setup is camera-specific. |
| ESP32 turntable | A project with multiple rotation modes and camera-control options. Arduino Project Hub | Modes, buttons, displays, wireless control, or manual capture can be incorporated in project-specific ways; check the project documentation for its exact implementation. |
| Nano rig | A project configuration using two bipolar stepper motors. Instructables | More than one motor arrangement is possible, but motor count alone does not establish capacity or scan quality. |
| AAScan phone-based alternative | An Arduino Uno, ULN2003 driver board, 3D-printed turntable parts, and an Android phone workflow; the Arduino Blog reports approximately 180 images captured automatically for this project. Arduino Blog’s AAScan feature | The reported image count is specific to AAScan, not a universal requirement or evidence of a particular reconstruction quality. |
Choose the camera and capture method first
Camera control is a compatibility question, not an assumed feature of every Arduino rig. The documented infrared trigger is paired with a Nikon D3200; it should not be treated as a generic DSLR trigger. A broader rig overview describes capture with either a DSLR or smartphone, but the exact triggering method depends on the equipment and workflow. The photogrammetry rig overview provides that broader context.
Crashes, No Sound, or Screen Glitches?
Random freezes, missing sound and display glitches usually trace back to one bad driver. Find and replace yours safely.Free scan · under a minutePC Slower Than It Used to Be?
A free scan shows the junk files, broken settings and background clutter dragging Windows down - then fixes them in one click.Free scan · Windows 10 & 11#1 Best Overall

- Fingerprint Sensor: FPM12 optical fingerprint reader module for Arduino Mega2560 and UNO R3
- LCD Display: Dedicated 1024 x 768 resolution TFT LCD screen for easy operation
- Compact Size: Slim 6mm x 6mm form factor with built-in power and I2C interface
- Fast and Accurate: Optical fingerprint recognition with high accuracy and speed
- Easy to Use: Plug-and-play module with detailed instructions and software library
Before building around automatic capture, verify that the exact camera or phone can be triggered in the intended way. If compatible automation is unavailable, a turntable can still support a workflow where the operator captures images manually or uses a separate phone process. The ESP32 project illustrates that camera-control options vary by implementation; AAScan is a distinct Android-phone workflow.
Search phrasing such as “Best Way to Automate Sony ZV-E10 Capture with an Arduino-Controlled Turntable?” identifies a real compatibility question, but does not establish that any particular trigger works with that camera. Reader discussion phrasing is not a substitute for checking the camera’s supported remote-control options.
Rank #2
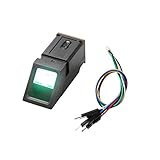
- It's an Optical Fingerprint Reader Sensor, green light.
- It is composed of software and hardware such as optical fingerprint sensor, high-speed DSP processor, high-performance fingerprint comparison algorithm, and large-capacity Flash chip.
- Simple usage: The fingerprint sensor module can work with any microcontroller with serial port.
- Function: It has stable performance and complete functions, and has various functions such as fingerprint collection, fingerprint registration, fingerprint comparison, and fingerprint search.
- Application: Fingerprint door locks, safes, finance and other security fields; identification in access control systems, industrial computers, POS machines, attendance, driving trainingand other fields; fingerprint payment, software management, authorization and other management fields.
Plan the hardware around the object and mechanics
A stepper motor and suitable driver are central to the cited turntable designs. Other parts may include an Arduino-compatible board, power supply, platform hardware, and camera-specific trigger. There is no universal bill of materials in the documented examples: match the motor, driver, board, power, and mechanical assembly to the chosen design.
- Object size and stability: choose a platform that can carry the object without wobbling enough to undermine repeatable views. The project pages demonstrate rotating platforms but do not provide controlled load-capacity or accuracy comparisons.
- Motor and driver: select components that suit the platform’s mechanical load and the controller design. A part used in one project is not automatically suitable for another.
- Rotation pattern: examples include fixed 10-degree increments, selectable step counts, and continuous rotation. A stationary pause before exposure is useful when the chosen camera and subject need it, but no one interval is established as best for every setup.
- Camera trigger: infrared, another remote mechanism, phone automation, and manual capture have different compatibility requirements. Confirm the method for the exact camera or phone.
- Image-processing workflow: identify the separate software process that will turn the photographs into a model. The project sources do not establish a universally best package or capture setting.
What this kind of scanner can—and cannot—promise
Repeatable rotation and coordinated photographs can reduce the manual work of repositioning an object between views. The available project descriptions do not establish a shared accuracy target, tested maximum object size, controlled comparison, or guaranteed model quality. Results depend on the specific mechanical build, camera and capture workflow, photographs, and reconstruction process; the cited pages do not quantify those factors across designs.
What’s actually slowing this PC down?
Pick the symptom - the matching free tool is one click away.
Rank #3

- TURN CODE INTO REAL-WORLD RESULTS — Follow 22+ guided lessons to make LEDs blink, read temperature and distance, move servo and stepper motors, control an LCD and respond to joystick or IR input; ideal for a family weekend build, homeschool unit, coding club or STEM classroom
- MORE PROJECT VARIETY IN ONE ORGANIZED KIT — Includes the UNO R3 controller, LCD1602 with pre-soldered header, breadboard power module, ultrasonic and DHT11 sensors, joystick, IR receiver and remote, SG90 servo, stepper motor, relay, DC motor, fan blade, displays, LEDs, buttons, resistors and jumper wires
- START WITHOUT SOLDERING — Plug-in modules, a solderless breadboard and the pre-soldered LCD help beginners focus on wiring, code and testing; the illustrated component list makes it easier to find each part and move from one lesson to the next
- LEARN THE LOGIC, THEN CREATE YOUR OWN — Use Arduino IDE and the included example code to understand digital input and output, analog sensing, timing, motor control and display functions, then change thresholds, speeds and sequences for alarms, environmental monitors, reaction games and motion projects
- CLEAR SETUP SUPPORT FOR FIRST-TIME BUILDERS — Download the latest tutorial and code, select the UNO board and correct computer port, check component polarity and breadboard rows, and keep power-module input at 9V or below; younger learners should work with an experienced adult
These projects are useful as examples of possible architectures, not proof that every configuration is maintained, independently tested, or suitable for a particular object or camera. Check current component and software compatibility against the documentation for the exact parts and tools you plan to use.
Quick Recap
Best Value

- 30+ Guided Electronics Projects: Start with LEDs and build toward LCD1602 displays, RFID access, motion detection, distance sensing, motor control and environmental monitoring for STEM learning, coding clubs, classrooms and hobby projects
- 200+ Components Across 63 Types: Includes an ELEGOO UNO R3 controller, LCD1602, RC522 RFID, RTC, HC-SR501 PIR sensor, ultrasonic sensor, DHT11, GY-521, MAX7219, keypad, joystick, relay, SG90 servo, stepper motor, breadboard and more
- Begin Without Soldering: Pre-soldered modules, a solderless breadboard, organized storage case and small-parts box reduce setup time and help beginners move from lesson to lesson while keeping LEDs, ICs, wires and sensors easy to find
- Learn, Modify and Create: Program the ELEGOO UNO R3 board with Arduino IDE using the included PDF tutorial and example code, then adjust sensor thresholds, timing, display text and motor behavior to turn guided lessons into original projects
- Flexible Power and Project Setup: Includes a 9 V, 1 A power supply, breadboard power module, 9 V battery and USB cable to support controller, breadboard and module experiments without sourcing basic setup accessories separately
Rank #4
![Arduino Starter Kit R4 [K000007_R4] – Learn Electronics and Coding with the UNO R4 WiFi Board, 13 Guided Projects in a Printed Book + Growing Resources Online, Official Certification Voucher](https://m.media-amazon.com/images/I/51mjbAi4hGL._SL160_.jpg)
- LEARN ELECTRONICS AND CODING FROM SCRATCH: Start your maker journey or enhance classroom learning with the Arduino Starter Kit R4 – no prior experience required. Includes a printed project book and all components for 13 hands-on tutorials, as well as access to a growing repository of projects that will be added over time.
- POWERED BY THE ARDUINO UNO R4 WIFI BOARD: Discover modern connectivity and performance with the Arduino UNO R4 WiFi, featuring built-in Wi-Fi and Bluetooth and full compatibility with the Arduino ecosystem.
- CERTIFICATION VOUCHER INCLUDED: Once you’ve mastered sensors, motors, displays, and logic through the projects, take the official Arduino Fundamentals certification exam with the voucher that comes with your kit.
- BONUS DIGITAL RESOURCES: Register your kit online to unlock extra projects, multilingual lessons (Italian, German, French), and exclusive online content designed by the Arduino team.
- DESIGNED FOR LEARNING AND TEACHING: Ideal for classrooms, labs, or self-learners. Combine hands-on experiments with clear explanations and an AI coding assistant to support you as you grow.
Product prices and availability are accurate as of the date/time indicated and are subject to change. Any price and availability information displayed on Amazon at the time of purchase will apply.

