
To set up a Google Pixel, charge your new and old phones, connect to reliable Wi-Fi, and keep the old phone’s screen-lock PIN handy. Turn on the Pixel, follow its prompts for SIM or eSIM and Google Account sign-in, then transfer data from the old phone or restore a backup. Once setup is complete, use the Home screen and Settings to tailor the wallpaper, layout, display, and controls. Transfer options and menus vary by model, Android version, and location.
Before you turn on the Pixel
Gather the items you may need:
- Your previous phone, charged and available to unlock.
- A strong Wi-Fi connection and the previous phone’s screen-lock PIN.
- A USB-C cable for data transfer if you prefer a wired connection or Wi-Fi is weak. Check that the cable fits both phones; wireless transfer is also supported.
- A SIM tool only if you plan to insert a physical SIM.
Google says most phones running Android 5.0 or later and iPhones running iOS 8.0 or later can use automatic transfer, though the process and results vary by device. Pixel 10 and later phones sold in the US do not have a physical SIM slot, so follow the eSIM prompts on those models rather than looking for a SIM tray. See Google’s Pixel setup preparation guide.
Back up the old phone and check what is included
Before moving data, make a backup on the old phone. On a Pixel, review Settings > Google services > Backup > Backup details to see what the device reports as included. Device backup is distinct from data synced separately to services such as Google Photos or Contacts. Some third-party app data, including WhatsApp chat history, may require a backup within that app. Google explains these distinctions in its Pixel backup and restore guide.
Set up the Pixel and choose a transfer route
Turn on the phone and follow the on-screen setup wizard. It guides you through connectivity, SIM or eSIM, account sign-in, transfer or restore, and Pixel features. A Google Account is needed to download apps, use some features, or transfer data later, even if you skip copying data during initial setup.
Quick wins for a faster PC:
Scan for outdated or missing drivers - takes under a minuteDriver Scan →Clear out junk files and repair common Windows errorsFree Scan →#1 Best Overall

- [Compatible with Google Pixel 10/Pixel 10 Pro 6.3 inch] Only compatible with Google Pixel 10/Pixel 10 Pro phone 6.3 inch (Not for Pixel 10 Pro XL 6.8 inch). Precise cutouts for easy access to all ports, buttons, sensors and cameras. Sensitive buttons with good response, are easy to press.
- [Magnetic Designed for Google Pixel 10/Pixel 10 Pro 6.3 inch ] Built-in magnet ring aligns perfectly and locks into place making wireless charging faster and easier than ever. This Google Pixel 10/Pixel 10 Pro case will not fall off no matter how it rotates with super adsorption capacity.
- [Thorough Camera & Screen Protection for Google Pixel 10/Pixel 10 Pro 6.3 inch] 1.5mm raised lips over screen and 1.5mm raised lips over camera relieves over this Google Pixel 10/Pixel 10 Pro case, impacts and protects the phone screen and camera against drop damage, cracks and scratches. Reinforced corner effectively absorb bumps from any angle drop.
- [Zero Fingerprints] SPIDERCASE translucent matte Google Pixel 10/Pixel 10 Pro case with a smart Nano Oleophobic Coating design that prevents fingerprints, watermarks, oil, and dust, comfortable and clean.
- [Shock Protection] Passing military drop tests up, your device is effectively protected from violent impacts and drops
Transfer directly from an available Android phone
On Pixel 8 and later, Google documents pairing the phones with a QR code and copying data over Wi-Fi, by cable, or using both. Keep the old phone unlocked and follow the prompts on both devices. You can choose which data categories to copy; inspect the selection rather than assuming every app and setting will move. Most data types transfer, but data held in apps specific to another manufacturer may not. Some categories also differ between Pixel-to-Pixel and other-Android transfers—for example, Google’s transfer guide does not mark recordings and Home screen layout as transferring from another Android phone in the same way as from a Pixel.
For a previous iPhone, use Google’s device-transfer instructions and follow the iPhone-specific prompts. The Android transfer categories should not be treated as a promise about what will move from iOS.
Rank #2
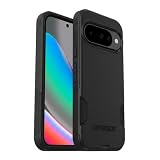
- Perfect Fit for Google Pixel 10 & Pixel 10 Pro (Only - Not Compatible with Pixel 10 Pro XL): Precision-engineered for the Google Pixel 10 & 10 Pro, this OtterBox case offers a flawless fit. It not only preserves your phone's sleek design but also ensures unparalleled protection against everyday hazards.
- Rugged Multi-Layer Defense: Featuring dual-layer construction with a rigid shell and internal rubber layer, our case exceeds 3X military drop standards (MIL-STD-810G 516.6), crafted from over 35% recycled plastic for eco-conscious resilience.
- Secure Grip, Streamlined Protection: Rely on the OtterBox legacy with Commuter Series—total protection with rubber-gripped edges for a secure hold. It's a slim, easy-to-install case providing durable quality and a precise fit for hassle-free defense
- Wireless Charging Compatible: Its slim profile is pocket-friendly, offering protection and ease for your on-the-go lifestyle
- Trusted OtterBox Quality: With OtterBox, you're not just buying a case; you're investing in peace of mind.
Restore from a Google Account backup
If the old phone is unavailable but a backup exists, choose the cloud restore option during setup and select the available data to restore. Google says the cloud restore flow supports restoring from one previous device. Changing the source device requires resetting the Pixel, which erases its data; check the current on-device prompts before taking that step. See Google’s cloud-backup transfer instructions.
If you skipped transfer during setup
Pixel 9 and later have a documented option to transfer data after setup through Android Switch, from another device or a backup. On earlier models, Google describes using a “Finish setting up” notification or Settings prompt soon after initial setup. After a longer delay, a factory reset may be required, and it erases data on the Pixel. Check the guidance for your model before resetting; see Google’s transfer guide and cloud restore guide.
Do these 3 things before closing this tab:
1Repair Windows errors before they cause bigger problems2Fix the driver behind crashes, sound loss and screen glitches3Clear out junk files and repair common Windows errorsRank #3

- Strong Magnetic Attraction: Powerful built-in magnets, easier place-and-go wireless charging and compatible with Pixelsnap
- Compatibility: Compatible with Google Pixel 10/10 Pro 6.3 inch; precise cutouts for easy access to all ports, buttons, sensors and cameras, soft and sensitive buttons with good response, are easy to press
- Matte Translucent Back: Features a flexible TPU frame and a matte coating on the hard PC back to provide you with a premium touch and excellent grip, while the entire matte back coating perfectly blocks smudges, fingerprints and even scratches
- Shock Protection: Passing military drop tests up to 10 feet, your device is effectively protected from violent impacts and drops
- HD Tempered Glass Screen Protector: 0.33mm thin with 99% clarity and oleophobic coating.Features edge-to-edge coverage,bubble-free installation kit and 9H hardness against scratches
Choose between direct transfer and cloud restore
| Consideration | Direct transfer | Cloud restore |
|---|---|---|
| What you need | The old phone available, charged, and able to pair. | An existing Google Account backup. |
| Connection | Wi-Fi, cable, or both on supported Pixel models. | Internet access to restore the backup. |
| Selection | Choose from the categories offered during transfer. | Choose from the data available in the backup. |
| Important distinction | Some data varies by source phone; manufacturer-specific app data may not transfer. | Separately synced data and app-specific backups may not be part of the device backup. |
| After setup | Pixel 9 and later have a documented Android Switch route; earlier models have different completion options. | Google documents restore during setup; check current prompts for the available route. |
Customize the Home screen and wallpaper
Set wallpaper, colors, icons, and layout
Press and hold an empty area of the Home screen, then tap Wallpapers & style. Choose a personal photo or a preset image, and select the Home screen or lock screen when the option is offered. You can also adjust color palettes and the Home screen grid. Google’s current guidance includes icon styling and theme packs, but theme availability can depend on software updates and location. See Google’s Pixel wallpaper and style guide.
Add apps, folders, and widgets
- Drag an app onto the Home screen to place it there; press and hold an app to view available shortcuts.
- Open the Home screen’s Widgets menu to add a widget. When resize handles appear around it, drag them to adjust its size.
- Drag one app onto another to create a folder.
Some Home screen instructions require Android 14 or later. For current steps, see Google’s guide to apps, shortcuts, and widgets.
Rank #4
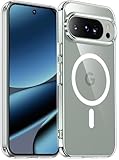
- [Compatible] Only compatible with Google Pixel 10/Pixel 10 Pro phone. Precise cutouts for easy access to all ports, buttons, sensors and cameras. Sensitive buttons with good response, are easy to press.
- [Magnetic Designed] Built-in magnet ring aligns perfectly and locks into place making wireless charging faster and easier than ever. This Google Pixel 10/Pixel 10 Pro case will not fall off no matter how it rotates with super adsorption capacity.
- [Thorough Camera & Screen Protection] 1.5mm raised lips over screen and 1.5mm raised lips over camera relieves over this Google Pixel 10/Pixel 10 Pro case, impacts and protects the phone screen and camera against drop damage, cracks and scratches. Reinforced corner effectively absorb bumps from any angle drop.
- [Zero Fingerprints] SPIDERCASE translucent matte Google Pixel 10/Pixel 10 Pro case with a smart Nano Oleophobic Coating design that prevents fingerprints, watermarks, oil, and dust, comfortable and clean.
- [Shock Protection] Passing military drop tests up, your device is effectively protected from violent impacts and drops
Adjust the display and accessibility settings
Open Settings > Display & touch to find brightness, text and display size, screen rotation, screen timeout, color and theme, and other options. Availability varies by Pixel model and software version. Google’s cited guidance describes Adaptive brightness as on by default. Smooth Display can use more battery and may be disabled in Battery Saver, so consider that trade-off if you prioritize battery life. Avoid assuming a feature mentioned for one model is available on every Pixel.
Simple View is an accessibility option that can be selected during setup or later through Accessibility settings. To find model-specific display options and current labels, consult Google’s Pixel display settings guide.
Free tools Windows power users keep installed
One-click scans. No signup required.
Best Value

- Perfect Fit for Google Pixel 9 & 9 Pro: Precision-engineered for the Google Pixel 9 & 9 Pro, this OtterBox case offers a flawless fit. It not only preserves your phone's sleek design but also ensures unparalleled protection against everyday hazards.
- Rugged Multi-Layer Defense: Featuring dual-layer construction with a rigid shell and internal rubber layer, our case exceeds 3X military drop standards (MIL-STD-810G 516.6), crafted from over 35% recycled plastic for eco-conscious resilience.
- Secure Grip, Streamlined Protection: Rely on the OtterBox legacy with Commuter Series—total protection with rubber-gripped edges for a secure hold. It's a slim, easy-to-install case providing durable quality and a precise fit for hassle-free defense
- Wireless Charging Compatible: Its slim profile is pocket-friendly, offering protection and ease for your on-the-go lifestyle
- Trusted OtterBox Quality: With OtterBox, you're not just buying a case; you're investing in peace of mind. Our limited warranty covers material and workmanship defects.
Make Quick Settings and the lock screen work for you
Arrange Quick Settings
Swipe down once from the top of the screen to see the first controls; swipe down again to open the full Quick Settings panel. Tap Edit to add, remove, or rearrange controls you use often. Google documents these steps for Android 11 and later; the exact panel can vary by version. See Google’s Quick Settings guide.
Choose lock screen options
Look in Wallpapers & style for the lock screen appearance options your Pixel offers. Google’s customization index links to separate lock screen guidance, but the available controls and menu labels differ across Pixel generations and software versions. Start with the current options on your device or Google’s Pixel wallpaper and style guidance.
Quick Recap
Product prices and availability are accurate as of the date/time indicated and are subject to change. Any price and availability information displayed on Amazon at the time of purchase will apply.

