
Do these 3 things before closing this tab:
1Fix the driver behind crashes, sound loss and screen glitches2Clear out junk files and repair common Windows errors3Scan for outdated or missing drivers - takes under a minuteiTechGuides is reader-supported. When you buy through links on our site, we may earn an affiliate commission. As an Amazon Associate I earn from qualifying purchases. Learn more
Removing keycaps without tools is usually safe on small, standard mechanical-keyboard keys: disconnect the keyboard, grip the cap on opposite sides, and lift straight up evenly with your fingers. Do not use the same method automatically on laptop, chiclet, membrane, low-profile, or proprietary keyboards, where clips and scissor mechanisms can break.
The important distinction is not whether a keycap looks removable; it is what mechanism sits beneath the cap. A standard mechanical keycap normally fits over a switch stem. A laptop keycap may be held by a fragile X-shaped scissor assembly, while a larger key on either type of keyboard may also connect to stabilizer hardware.
Key takeaways
- Small keycaps on many standard mechanical keyboards can be removed with fingers by lifting vertically and evenly.
- A thin, smooth plastic edge is a safer fallback than a knife, screwdriver, scissors, or other metal tool.
- Spacebar, Shift, Enter, Backspace, and other wide keys may use stabilizer wires or clips, so they should not be treated like ordinary letter keys.
- Laptop and chiclet keyboards commonly use fragile scissor mechanisms and require model-specific instructions rather than generic mechanical-keyboard techniques.
- A keycap puller removes the plastic cap; a switch puller is a different tool, and removing a switch may require additional work or soldering.
What are you actually removing?
A keycap is the removable plastic piece your finger presses. The keycap is not the switch, the stabilizer, or the electrical contact beneath it.
| Part | What it does | Why it matters during removal |
|---|---|---|
| Keycap | Provides the labeled, touchable surface of a key | Often removable on a standard mechanical keyboard |
| Mechanical switch | Registers the key press and provides the switch stem | Must remain seated; do not pull it by pulling the cap |
| Stabilizer | Keeps wide keys level when pressed away from the center | May use a wire, inserts, clips, or auxiliary supports |
| Scissor mechanism | Supports many laptop and chiclet keycaps | Fragile retaining clips can break if the cap is twisted or forced |
| Membrane or rubber dome | Provides the pressure and contact layer in many non-mechanical keyboards | Generic mechanical-keycap instructions may not apply |
A keycap puller and a switch puller are also different. Corsair explains that fingers or a thin plastic tool may be enough for some keycaps, while removing hot-swappable switches requires a proper switch puller. A soldered switch requires disassembly and soldering work rather than simply lifting the keycap. See Corsair’s explanation of keycap and switch removal for that distinction.
Popular on Amazon
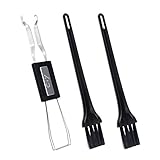
- MUST HAVE: This compact high quality wire style keycap puller is a necessary tool for any mechanical keyboard owner.
- HIGH QUALITY STEEL: Wires on the puller can bend outward to fit onto mechanical keycaps. It can holds up to 3 keys to speed up key removal Compact, high quality construction.
- HIGH COMPATIBILITY: FIT for most mechanical keyboards including Cherry MX, Alps, and Topre switches. Do not use on "scissor" type switches.
- ANTI-STATIC BRUSH: Temperature resistant, lightweight and portable, easy to carry and use, keep your electronic devices clean, prolong electronic devices service life.
- MULTIPURPOSE CLEANING TOOLS: Best for cleaning keyboard, computer, laptop, screen, printer and electronic devices.
Which keyboards are suitable for removing keycaps without tools?
Removing keycaps without tools is most suitable for a standard mechanical keyboard with separate, relatively tall caps and visible gaps between neighboring keys. The method is less predictable as the keyboard becomes flatter, more compact, or more proprietary.
| Keyboard type | General suitability | Recommended approach |
|---|---|---|
| Standard mechanical | Generally suitable for small keys | Start with fingers; lift straight up |
| Hot-swappable mechanical | Keycaps are usually suitable; switches are a separate matter | Remove only the cap unless you have the correct switch-removal equipment |
| Low-profile mechanical | Model-specific | Check the manual before using a puller or improvised edge |
| Membrane or basic office keyboard | Varies widely | Confirm the model’s construction before applying force |
| Laptop or chiclet | High risk with generic instructions | Use exact model-specific reseating or repair guidance |
| MacBook | Model-specific and particularly sensitive | Follow Apple’s guidance for the exact model; do not assume a mechanical-keyboard method applies |
Useful clues for a likely removable mechanical keycap include a mechanical, hot-swappable, or custom-keyboard description; a separate, taller plastic cap; a visible gap around the key; and no visible X-shaped scissor bracket flexing beneath the cap. “Gaming keyboard” alone is not proof that every keycap is removable or mechanically interchangeable.
If the keyboard is a laptop, chiclet, low-profile, or proprietary design, identify the exact model before starting. Dell’s guidance describes laptop keys as assemblies that can include the cap, an X-shaped scissor mechanism, a rubber dome, retaining clips, and stabilizer bars; force or incorrect alignment can damage those parts. Read Dell’s laptop keycap reseating guidance instead of assuming the standard mechanical procedure applies.
What’s actually slowing this PC down?
Pick the symptom - the matching free tool is one click away.
What should you do before removing a keycap?
Preparation reduces the chance of losing caps, confusing the layout, or pulling the wrong component.
- Disconnect the keyboard. Turn off a wired keyboard by unplugging it. Switch off a wireless keyboard or remove its batteries if practical.
- Clear and light the work area. Use a clean, flat surface where a small stabilizer insert or keycap cannot easily disappear.
- Photograph the layout. Take a clear overhead photograph before removing multiple keys. An iFixit Logitech mechanical-key guide also recommends using a photograph as a reassembly reference.
- Begin with a small ordinary key. A, S, D, or F is a better test than the spacebar, Shift, Enter, Backspace, or another wide key.
- Prepare a container. Place removed keycaps in a bowl or labeled container, and keep caps organized by row if you are removing many.
Removing one small key to inspect the mechanism is safer than immediately stripping every keycap. If the first small key does not behave like a cap on a standard switch stem, stop and identify the keyboard model.
How do you remove a standard mechanical keycap with your fingers?
For a small, non-stabilized key on a suitable mechanical keyboard, fingers are the preferred no-tool method because fingers are less likely than a sharp object to scratch the plate or slip into the switch.
- Place the keyboard flat. Keep the board from sliding while you work.
- Grip opposite sides of the cap. Use the thumb and fingertip of one hand, or use both hands if the cap is tight. Grip the plastic cap itself rather than the switch housing.
- Lift slowly and vertically. Apply even upward pressure. Do not twist, rock aggressively, or lift one corner far above the other.
- Watch the switch. Stop immediately if the switch housing begins to rise with the keycap, or if the cap tilts sharply rather than releasing.
- Inspect the underside. Look for the cap’s stem socket, cracks, loose pieces, stabilizer attachments, or anything unusual before cleaning or replacing the cap.
The decisive movement is a controlled vertical lift, not levering from one corner. The iFixit Keychron keycap replacement guide similarly shows gripping beneath the cap and pulling vertically when using a puller.
The Tool Desk
Outbyte Driver Updater FREEScan for outdated or missing drivers - takes under a minuteDriver Scan →Outbyte PC Repair FREERepair Windows errors before they cause bigger problemsFix Now →Also popular on Amazon
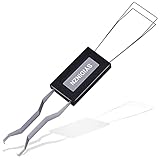
- ● | 2 IN 1 CREATIVE DESIGN | - The keycap puller has a plastic handle with two steel loops to catch and pull keys, it is not only a keycap puller but also a switch puller.
- ● | HIGH QUALITY MATERIAL | - The keycap puller is made of high quality stainless steel and plastic, the compact wire style keycap puller is a necessary tool for any mechanical keyboard owner.
- ● | WIDE COMPATIBILITY | - The keycap puller is compatible for most mechanical keyboards including Cherry MX, Alps, and Topre switches. Do not use on "scissor" type switches.
- ● | EASY TO USE | - Wires on the puller could bend outward to fit onto keycaps. Design and realization of the dual-purpose key pull and axle pull. It is very convenient for removing keycap.
- ● | GREAT KEYCAP REMOVER | - The keycaps and mechanical shafts can be removed more quickly and safely, the keycap puller is a necessary tools for cleaning and repairing mechanical keyboards.
A normally seated cap may feel snug. Snug is not the same as stuck: use gradual, even pressure, but do not escalate to a sharp tool simply because the first attempt does not work.
What plastic substitute can you use if your fingers cannot grip the cap?
A thin, smooth, non-metallic plastic edge can help lift a tight mechanical keycap, but the edge must touch the cap and must not be inserted deeply into the switch or plate.
- Choose a thin plastic opening pick, guitar pick, or similarly smooth and flexible plastic edge.
- Slide the edge only slightly beneath one side of the keycap.
- Lift gently just enough to create a small gap.
- Move to the opposite side and repeat, rather than raising one side all the way.
- Finish the removal with your fingers once the cap is loose.
Corsair identifies fingers and a thin plastic tool as possible alternatives to a dedicated keycap puller. A credit card should not be treated as universally safe: card thickness and flexibility vary, and a thick or stiff card can slip, scrape the board, or put pressure on the wrong part.
Keep the plastic edge shallow. The plastic tool should contact the underside edge of the keycap, not the switch housing, printed circuit board, plate, or neighboring keys.
Recommended Free Tools
Are paper clips safe substitutes for a keycap puller?
A carefully formed wire loop can remove some standard mechanical keycaps, but a paper clip is an emergency-only substitute with more risk than fingers or smooth plastic.
- Use clean, smooth, thin wire rather than a sharp or heavily corroded clip.
- Bend the wire into two opposing loops or hooks that can grip opposite sides of the cap.
- Round or cover sharp ends where possible.
- Check that the wire will not scrape the plate, catch the switch, or contact nearby components.
- Pull evenly and vertically from both sides.
A bare unfolded paper clip is not universally safe. Poorly shaped wire can scratch the keyboard, dig into the cap, slip into the switch, or apply force unevenly. Do not use a knife, razor blade, metal screwdriver, scissors, or pliers gripping the visible top of the cap. HP recommends wire or plastic pullers and cautions against metal tools to help prevent scratches; its mechanical-keyboard cleaning guidance provides that safety context.
Why should you avoid one-sided prying?
One-sided prying concentrates force on a corner, which can crack brittle plastic, bend a stabilizer, or push a tool into the switch. Even a tool that successfully removes a cap may have caused hidden damage.
Also popular on Amazon

- FAST SWITCH REMOVAL, LESS WASTED TIME: The semi-auto design helps align with switch latches and pull switches straight upward with better control, making repetitive removal faster during keyboard cleaning, modding, switch replacement, and lubing. Based on KEMOVE K68 testing, the P10 can help save about 15–20 minutes compared with ordinary pullers.
- FINGER-FRIENDLY AND EASY TO USE: No need to keep pinching thin metal clamps with your fingertips. The KEMOVE P10 helps reduce hand strain and makes switch removal easier for beginners, women, hobbyists, and frequent keyboard modders.
- HELPS PROTECT SWITCHES AND KEYBOARDS: The stable vertical pull-up design helps reduce twisting, slipping, and uneven force during removal, helping lower the risk of scratched plates, bent clips, or damaged switch housings. Built with 304 stainless steel and manganese steel for long-term use.
- WIDE SWITCH AND KEYCAP COMPATIBILITY: Designed for most MX-style hot-swappable switches with similar latch mechanisms, including Gateron, Akko, CHERRY MX, Kailh, EPOMAKER, AULA, Glorious, OUTEMU, and more. The keycap puller works with 1U to 6.25U+ keycaps for easy keycap removal.
- PRACTICAL GIFT FOR KEYBOARD LOVERS: A useful 2-in-1 switch and keycap puller for men, women, teens, gamers, custom keyboard builders, and mechanical keyboard fans who enjoy cleaning, modding, lubing, and maintaining mechanical keyboards.
How do you remove the spacebar and other large keys?
The spacebar, Shift, Enter, Backspace, Tab, and sometimes the zero or plus key may use stabilizers, so large keys require slower and more even lifting than letter keys.
PC Slower Than It Used to Be?
A free scan shows the junk files, broken settings and background clutter dragging Windows down - then fixes them in one click.Free scan · Windows 10 & 11Outdated Drivers Are Slowing You Down
One free scan finds every outdated or missing driver and matches the right update for your exact hardware.Free scan · exact hardware match- Remove nearby small caps if they block access. Adjacent caps can make it easier to see both ends of the large cap.
- Grip near both ends. Use a balanced grip instead of pulling from the center or one corner.
- Lift gradually. Keep both ends moving upward together.
- Pause if one end rises first. Inspect for a stabilizer wire, insert, clip, or hook before continuing.
- Photograph the arrangement. Record the stabilizer orientation before the cap comes completely free.
There is no single universal removal direction for every stabilized key because manufacturers use different wire and insert arrangements. If a large cap rises at an extreme angle, stop rather than yanking the low side free.
| Symptom while lifting | Likely concern | Action |
|---|---|---|
| Both ends rise together | Normal controlled release may be occurring | Continue slowly and inspect after removal |
| One end rises sharply | Stabilizer remains engaged or is catching | Stop, lower the cap slightly, and inspect |
| Wire or insert stays on the board | Stabilizer hardware has separated from the cap | Photograph it and do not bend it randomly |
| Switch housing begins to lift | Switch may be loose or the wrong part is being pulled | Stop immediately and reassess |
How do you reinstall a keycap correctly?
Reinstall a small mechanical keycap by aligning the cap’s stem socket with the switch stem and pressing straight down gently; reinstall a stabilized key only after its stabilizer hardware is correctly seated.
- Check the cap. Confirm that the keycap, stem socket, stabilizer inserts, and clips are not cracked or missing.
- Seat the stabilizer first. For a wide key, confirm both inserts and the wire are in their retaining positions.
- Align all contact points. A stabilized cap must align with the central switch stem and the stabilizer points at the same time.
- Press evenly. Apply gentle downward pressure across the cap. Do not force a tilted cap into place.
- Test the movement. Press the key at the left, center, and right. The cap should sit level, move without binding, and return normally.
- Test registration. Reconnect or power the keyboard and confirm that the key registers normally.
For laptop-style keys, the procedure is different. Dell instructs users to hook the stabilizer bar into the clips on the underside of larger laptop keycaps before aligning and pressing the cap into place. A broken scissor clip, missing rubber dome, or cracked retainer is not fixed by repeatedly snapping the cap down; it may require a replacement mechanism or keyboard repair.
What changes for laptop, chiclet, membrane, and MacBook keyboards?
Laptop, chiclet, membrane, and MacBook keyboards should not automatically receive the standard mechanical-keyboard treatment because the cap may be attached to a fragile retaining mechanism rather than a simple switch stem.
Laptop and chiclet keyboards
Many laptop keys use an X-shaped scissor mechanism over a rubber dome. A cap can detach while the scissor assembly remains on the keyboard, or the scissor assembly can detach with the cap. Identify the exact laptop model and determine which parts are still present before attempting reseating.
- Do not pry aggressively under a laptop cap.
- Do not press down on a cap when the scissor bracket is misaligned.
- Do not assume that a mechanical-keycap puller fits the laptop mechanism.
- Stop if clips are cracked, the rubber dome is missing, or the retainer is damaged.
Dell’s model-specific instructions are a useful example of why laptop keys need separate handling. The Dell support procedure addresses the cap, scissor mechanism, rubber dome, retaining clips, and stabilizer bar rather than treating the key as a simple plug-on cap.
Also popular on Amazon
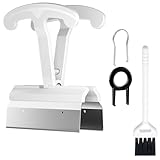
- CLEAN A FULL KEYBOARD IN MINUTES: 4-Key Synchronous Pulling Structure Remove 4 keycaps simultaneously with one pull. Compared to traditional single-wire pullers, this 4-arm synchronous design significantly reduces repetition, letting you clear a full 104-key keyboard in a fraction of the time for regular cleaning, modding, and maintenance routines
- GENTLE REMOVAL DESIGNED TO MINIMIZE CONTACT DAMAGE: While no puller can guarantee zero marks under all conditions, the smooth contact finish and precision clamping structure are designed to minimize the risk of scratching keycap surfaces and legends during normal use, particularly when used with steady, controlled force
- COMFORTABLE GRIP HANDLE FOR EXTENDED KEYBOARD MAINTENANCE: The curved handle is crafted from polycarbonate, shaped to fit naturally in your palm for a more comfortable hold during keyboard cleaning and modding sessions. For best results and longest tool life, apply steady moderate force rather than excessive pressure when pulling keycaps
- STAINLESS STEEL PULLING ARMS FOR RELIABLE REPEATED USE: The pulling arms are constructed from 420 high carbon stainless steel, offering structural integrity for long-term use. The polycarbonate handle is designed for regular keyboard maintenance under normal operating conditions. To maximize tool lifespan, avoid applying excessive lateral or twisting force during keycap removal
- UNIVERSAL COMPATIBILITY WITH MAINSTREAM KEYBOARD LAYOUTS: Optimized clamping width accommodates standard to spacebar-sized keycaps (1U6.25U), compatible with MX-style mechanical and hot-swappable keyboards across 60% / 65% / 75% / TKL 87-key / Full-size 104-key layouts. Suitable for daily keyboard cleaning, switch swapping, and custom build modifications
Membrane and office keyboards
Some membrane and basic office keyboard caps may lift off, but construction varies. The presence of a removable-looking cap does not prove that a compatible mechanical switch stem is underneath. Consult the manufacturer’s instructions, especially before removing a large key.
Low-profile mechanical keyboards
Low-profile mechanical keyboards are model-specific. Tight spacing can make ordinary wire pullers or improvised tools difficult to fit, and proprietary stems or retaining features may not match standard caps. Use the manufacturer’s manual or repair guide before removing more than one test key.
MacBook keyboards
Do not generalize the mechanical-keyboard procedure to a MacBook. Apple’s current cleaning guidance for supported MacBook and MacBook Pro generations emphasizes compressed air for unresponsive or abnormal keys and includes model-specific limitations. Follow Apple’s MacBook keyboard cleaning instructions for the exact computer instead of casually prying off a cap.
What should you do when keycap removal goes wrong?
The safest recovery step is usually to stop applying force, preserve the original arrangement, and identify the mechanism before trying again.
| Problem | Possible cause | Recovery |
|---|---|---|
| The cap will not move | Non-removable design, tight fit, stabilizer engagement, or wrong grip | Stop; test a small key, identify the model, and find the manufacturer’s guide |
| The switch comes up with the cap | Loose switch or pulling the wrong component | Stop immediately; do not keep pulling the switch |
| The keycap cracks | Brittle plastic, excessive force, or corner levering | Inspect the stem and cap; replace only with a compatible cap |
| A stabilizer wire comes loose | Wide key lifted unevenly or wire disengaged from a clip | Photograph the original position and reseat the wire in its retaining clips |
| The reinstalled key feels uneven | Misaligned stem, debris, bent wire, missing insert, or wrong cap | Remove only if safe, check every attachment point, and test across the full width |
| The key no longer registers | Dislodged switch, damaged socket, disconnected keyboard, or pre-existing fault | Reconnect and test; stop further disassembly if the switch or board was disturbed |
| A laptop key remains mushy or dead | Displaced rubber dome or damaged scissor mechanism | Use model-specific repair guidance; replacement may be necessary |
If a stabilizer wire comes loose, do not bend it back randomly. Use the photograph to identify the original orientation, locate the retaining clips, and reinstall the wire before pressing the cap down. If the mechanism is broken rather than detached, repeated snapping attempts can worsen the damage.
Removing a cap normally should not stop a mechanical switch from registering. If registration fails after the cap was removed, check whether the switch was dislodged, whether the keyboard is fully connected, and whether the problem existed beforehand. Do not confuse a cap problem with switch or socket damage.
Quick wins for a faster PC:
Scan for outdated or missing drivers - takes under a minuteDriver Scan →Clear out junk files and repair common Windows errorsFree Scan →Fix the driver behind crashes, sound loss and screen glitchesFind Drivers →How should you clean the keyboard after removing the caps?
Clean keycaps separately from the keyboard, and keep moisture away from the switch openings and electronics.
Also popular on Amazon

- [One puller, two functions] Gateron Twins tool has both switch puller and keycap puller in one tool.
- [Material] The housing is made by PC material.
- [Rectangular designed] The Twins tool using rectangular designed which is more flexible to use.
- [Easy to hold, easy to pull] After pulling out the switch and keycap the tool still hold them,Prevent the switch and keycap from falling off and getting lost.
- [Flexibility] Ergonomics design Press one key, pops out easily. Gently press to pop out the switch and keycap that are held by tool
- Place removed caps in a container so they do not get lost.
- Clean caps with a soft cloth or mild soap and water only when the material and manufacturer guidance permit it.
- Dry every cap completely before reinstalling it.
- Use a soft brush or air blower to remove loose debris from the keyboard surface.
- Do not spray liquid under a cap, especially while the keyboard is powered.
- Use isopropyl alcohol only when appropriate for the keyboard’s materials and only with the device disconnected.
For MacBook keyboards, Apple’s model-specific compressed-air procedure takes priority over generic mechanical-keyboard cleaning advice. HP’s mechanical-keyboard maintenance guidance discusses cleaning after keycap removal, but suggested maintenance intervals are recommendations rather than universal requirements.
When is buying a keycap puller worth it?
A dedicated keycap puller is usually unnecessary for one easy-to-remove mechanical key, but it becomes worthwhile when several caps are tight, a full cleaning is planned, or repeated uneven finger pulls would be tiring.
| Situation | Best choice | Reason |
|---|---|---|
| One small standard mechanical cap | Fingers | No additional equipment is needed |
| One tight mechanical cap | Smooth plastic edge or dedicated puller | Provides controlled access without sharp metal |
| Many standard mechanical caps | Wire keycap puller | Opposite-side loops distribute force and reduce prying |
| Full cleaning or keycap replacement project | Dedicated puller or maintenance kit | More suitable for repeated work than improvised tools |
| Laptop, MacBook, or proprietary low-profile keyboard | Model-specific instructions or service | A generic mechanical puller may damage the retaining mechanism |
| Switch replacement | Switch puller and possibly soldering equipment | A keycap puller cannot remove a switch |
A wire-style puller is more controlled for repeated mechanical-keyboard work because two loops grip opposite sides and lift without prying. iFixit describes that design as distributing the pull across both sides. A single puller is generally more appropriate than a full service kit for someone removing one keycap; a broader kit is intended for readers doing more extensive maintenance.
Free tools Windows power users keep installed
One-click scans. No signup required.
Some keyboards also include a model-specific workaround. Logitech documents keyboard feet designed to act as separate keycap and switch pullers on the Logitech G512 X. That feature should not be assumed to exist on other Logitech models or on unrelated keyboards; consult the Logitech support instructions for the exact model.
Final safety checklist
- Disconnect or switch off the keyboard before working.
- Identify the keyboard mechanism before applying force.
- Test a small, ordinary key before attempting a large stabilized key.
- Grip the cap on opposite sides and lift vertically and evenly.
- Use only a shallow, smooth plastic edge if fingers are insufficient.
- Avoid knives, razor blades, screwdrivers, scissors, pliers, twisting, and forceful one-sided prying.
- Stop if the switch housing rises, the cap tilts sharply, or a stabilizer catches.
- Photograph stabilizer arrangements before removing wide keys.
- Keep cleaned keycaps completely dry before reinstalling them.
- Test level movement and key registration after replacement.
- Use model-specific guidance or professional repair when clips, scissor mechanisms, rubber domes, switches, or sockets are damaged.
Frequently Asked Questions
Can you remove mechanical keycaps without a keycap puller?
Yes, many small keycaps on standard mechanical keyboards can be removed with your fingers by gripping opposite sides and lifting straight up evenly. The method does not automatically apply to laptop, chiclet, membrane, low-profile, or proprietary keyboards.
Can I use a credit card to remove a keycap?
A thin, smooth plastic edge may help with a tight standard mechanical keycap, but a credit card is not universally safe because cards vary in thickness and stiffness. Insert the edge only slightly, contact the keycap rather than the switch, and stop if the tool slips or the cap tilts.
Why should I not remove a laptop keycap like a mechanical keycap?
Many laptop and chiclet keyboards use fragile X-shaped scissor mechanisms, retaining clips, and rubber domes rather than a simple switch stem. Generic vertical pulling or prying can break those parts, so the exact laptop model’s repair instructions should be followed.
What is the difference between a keycap puller and a switch puller?
A keycap puller removes the plastic cap from the top of a keyboard switch. A switch puller removes a switch from a hot-swappable keyboard, and a soldered switch requires disassembly and soldering work; a keycap puller cannot perform those tasks.
The Bottom Line
For one small key on a standard mechanical keyboard, your fingers are often the safest no-tool solution: grip opposite sides, lift straight up, and stop at the first sign of resistance that looks abnormal. Treat wide stabilized keys and all laptop, chiclet, membrane, low-profile, and proprietary keyboards as separate cases. When the mechanism is uncertain, the manufacturer’s instructions are safer than forcing the cap.

