
The Tool Desk
Outbyte PC Repair FREERepair Windows errors before they cause bigger problemsFix Now →Outbyte Driver Updater FREEScan for outdated or missing drivers - takes under a minuteDriver Scan →iTechGuides is reader-supported. When you buy through links on our site, we may earn an affiliate commission. As an Amazon Associate I earn from qualifying purchases. Learn more
For most desktop CPUs, the best way to apply thermal paste is to place a small center dot—about rice-grain to pea-sized—on the CPU’s integrated heat spreader, lower the cooler straight down, and tighten its hardware evenly in a diagonal pattern. The cooler’s pressure should spread the paste.
That method is the reliable default for a conventional CPU, but processor geometry matters. AMD AM5 and large Threadripper packages may need model-specific multi-dot or X-style coverage, while direct-die and exposed-die applications require separate guidance.
Key takeaways
- For a conventional desktop CPU with an integrated heat spreader, a small center dot—roughly rice-grain to pea-sized—is the best default.
- The cooler’s mounting pressure should spread the paste; manually spreading it is usually unnecessary and can make the layer less consistent.
- Even, gradual tightening in a diagonal or X pattern matters more than winning an argument about paste shapes.
- AMD AM5 CPUs are a geometry-specific exception: Noctua recommends four small corner dots plus one larger center dot for its AM5 instructions.
- Clean and replace thermal paste whenever the cooler is removed; do not apply fresh paste over old paste.
What is the best way to apply thermal paste?
For most desktop CPUs, the best way to apply thermal paste is to place a small center dot—about rice-grain to pea-sized—on the CPU’s integrated heat spreader, lower the cooler straight down, and tighten its hardware evenly in a diagonal pattern. The cooler’s pressure should spread the paste.
Free tools Windows power users keep installed
One-click scans. No signup required.
This center-dot method is the best general-purpose choice because it is simple, repeatable, and minimizes handling. It is not a universal rule for every processor: AMD AM5, Threadripper, direct-die systems, and unusually shaped packages may need a different application pattern.
Popular on Amazon

- CONSISTENT QUALITY: Our thermal paste packaging design has evolved over time, but the formula has remained the same, ensuring reliable performance.
- EXCELLENT PERFORMANCE: ARCTIC MX-4 thermal paste is made of carbon microparticles, guaranteeing extremely high thermal conductivity. This ensures that heat from the CPU/GPU is dissipated quickly & efficiently
- SAFE APPLICATION: The MX-4 is metal-free and non-electrical conductive which eliminates any risks of causing short circuit, adding more protection to the CPU and VGA cards
- HIGH DURABILITY: In contrast to metal and silicon thermal compound, the MX-4 does not compromise over time. Once applied, you do not need to apply it again as it will last at least for 8 years
- EASY TO APPLY: With an ideal consistency, the MX-4 is very easy to use, even for beginners
Use a reputable CPU thermal paste or thermal compound unless the cooler already has thermal interface material (TIM) pre-applied. Intel’s guidance says pre-applied TIM needs no additional paste; adding another layer can make the interface worse rather than better. See Intel’s thermal-paste application guidance before deviating from the cooler or processor manufacturer’s instructions.
What do you need before applying thermal paste?
You need a compatible cooler, suitable thermal paste, and a clean CPU heat spreader and cooler base. You do not need a spatula for the normal center-dot method.
- Thermal paste: Use the paste supplied with the cooler or a reputable replacement. For example, ARCTIC describes its MX-6 as non-electrically-conductive and lists 2-g, 4-g, and 8-g sizes, but those manufacturer specifications do not make the product automatically better than every other reputable paste. Read ARCTIC’s MX-6 application and product information for that compound’s instructions.
- Isopropyl alcohol: Use it to remove old TIM. Intel specifically recommends isopropyl alcohol for cleaning.
- Lint-free or anti-static wipers: These help remove residue without leaving fibers on the contact surfaces.
- Cooler mounting hardware: Confirm that the correct backplate, brackets, screws, and standoffs are installed for the CPU socket.
- Optional AM5 paste guard: An AM5 thermal-paste guard can reduce paste accumulation in the cut-outs around an AM5 heat spreader, but it is not required for a successful installation.
For old-paste removal, isopropyl alcohol and lint-free electronics wipes are task-enabling supplies rather than mandatory purchases for a first installation where both surfaces are already clean. Intel’s TIM removal and application instructions cover the cleaning process.
What’s actually slowing this PC down?
Pick the symptom - the matching free tool is one click away.
How do you apply thermal paste step by step?
- Check whether paste is already applied. Inspect the cooler’s cold plate. If the cooler has a factory-applied gray or black TIM patch, do not add a second layer. Remove the cooler’s protective film only when the cooler instructions tell you to do so.
- Turn off and unplug the computer. Disconnect the power supply and give the system time to cool if it has been running. Follow safe handling practices around the motherboard and processor socket.
- Clean both surfaces if necessary. If the CPU heat spreader or cooler base has old paste, dampen a lint-free wipe with isopropyl alcohol and remove the compound completely. Allow both surfaces to dry. Never put new paste on top of used paste.
- Place one small dot in the center. On a typical desktop CPU with a conventional rectangular IHS, apply approximately a grain-of-rice to pea-sized amount. The exact volume depends on the paste’s viscosity and the size of the heat spreader, so the goal is a thin, complete interface—not a tall blob.
- Lower the cooler straight down. Position the cooler over the CPU and bring the cold plate vertically onto the paste. Use light, steady top-down pressure while starting the mounting hardware. Avoid sliding or twisting the cooler across the CPU, because movement can redistribute the paste unpredictably and introduce air pockets.
- Start every screw before tightening. If the cooler uses multiple screws, thread each screw a few turns so the cooler remains aligned.
- Tighten gradually in a diagonal or X pattern. Alternate between opposing screws, making several small passes instead of fully tightening one corner first. This distributes mounting pressure more evenly. Follow the cooler manufacturer’s torque or stop instructions where provided.
- Complete the connections and inspection. Connect the CPU fan to the correct motherboard header. Connect the pump and radiator fans as specified for a liquid cooler. Check that the cooler is firm, the mounting hardware is fully secured, no protective film remains on the cold plate, and no conspicuous paste has reached the motherboard.
Intel’s official procedure recommends a small central amount and letting the cooler’s pressure distribute the compound rather than manually spreading it. The official Intel application guide is the relevant reference for a standard Intel desktop IHS-to-cooler installation.
Which thermal-paste pattern should you use?
Use a small center dot for an ordinary desktop CPU, but change the pattern when the processor’s package or heat-producing area makes a single central dot poor at covering the cooler’s contact area.
Also popular on Amazon

- WELL PROVEN QUALITY: The design of our thermal paste packagings has changed several times, the formula of the composition has remained unchanged, so our MX pastes have stood for high quality
- EXCELLENT PERFORMANCE: ARCTIC MX-4 thermal paste is made of carbon microparticles, guaranteeing extremely high thermal conductivity. This ensures that heat from the CPU/GPU is dissipated quickly & efficiently
- SAFE APPLICATION: The MX-4 is metal-free and non-electrical conductive which eliminates any risks of causing short circuit, adding more protection to the CPU and VGA cards
- 100 % ORIGINAL THROUGH AUTHENTICITY CHECK: Through our Authenticity Check, it is possible to verify the authenticity of every single product
- EASY TO APPLY: With an ideal consistency, the MX-4 is very easy to use, even for beginners, Spatula incl.
| CPU or situation | Recommended starting pattern | Important qualification |
|---|---|---|
| Typical desktop CPU with a conventional IHS | One small center dot | Let cooler pressure spread it; use an amount roughly between a grain of rice and a pea. |
| AMD AM5 | Four small corner dots plus one larger center dot | Noctua’s AM5 instructions specify approximately four 2-mm dots and one 3–4-mm center dot; follow the exact paste and cooler instructions where they differ. |
| AMD Threadripper or another very large package | A larger multi-dot or X-style pattern, or the manufacturer’s specified pattern | The goal is coverage across the relevant cooler cold-plate area, not reuse of a normal desktop CPU’s center-dot quantity. |
| Elongated or newer Intel package | Use the exact CPU and cooler documentation | A central application may remain appropriate, but some package shapes may benefit from a model-specific center-plus-corner arrangement. |
| Direct-die, delidded, GPU, or console hardware | Use application guidance specific to that exposed die and cooler | Do not apply ordinary IHS guidance blindly; die location, contact geometry, mounting pressure, and contamination risks are different. |
How should thermal paste be applied to an AMD AM5 CPU?
For AMD AM5, use the AM5-specific five-dot arrangement when the paste and cooler instructions support it: four small dots near the corners and one larger dot in the center. Noctua’s AM5 application instructions specify four approximately 2-mm corner dots and one approximately 3–4-mm central dot, and advise against manually spreading the paste before mounting the cooler.
AM5 heat spreaders have edge cut-outs. An optional AM5 thermal-paste guard can help limit accumulation in those cut-outs, but the guard is an accessory for cleaner application, not a required component or a substitute for using the correct amount.
Do these 3 things before closing this tab:
1Repair Windows errors before they cause bigger problems2Fix the driver behind crashes, sound loss and screen glitches3Clear out junk files and repair common Windows errorsHow should thermal paste be applied to Threadripper?
Threadripper requires enough compound to cover the larger relevant contact area, so do not copy the small center dot used for an ordinary desktop CPU. Follow the processor or cooler manufacturer’s diagram, or use a larger multi-dot or X-style pattern that reaches the heat-producing regions without creating a thick excess layer.
In its Threadripper testing, GamersNexus found that complete relevant cold-plate coverage mattered more than a single universally correct shape. The testing found that an X, five dots, or a central blob could work when enough—but not excessive—paste reached the required area.
Is spreading thermal paste with a card or spatula better?
Manual spreading is usually not better for a standard desktop CPU. A cooler’s mounting pressure is designed to distribute a suitable amount of paste, while a spatula can make the layer thickness inconsistent or introduce air pockets.
Also popular on Amazon

- SAFETY APPLICATION: BSFF is metal-free and non-conductive, which eliminates any risk of short circuit and adds more protection to the CPU and VGA card.
- BETTER THAN LIQUID METAL: It is made of carbon microparticles, guaranteeing extremely high thermal conductivity. This ensures that heat from the CPU/GPU is dissipated quickly & efficiently.
- HIGH DURABILITY: BSFF thermal paste Edition formula has excellent component heat dissipation performance and has the stability to push the system to the limit.
- EXCELLENT PERFORMANCE: In contrast to metal and silicon thermal conductive adhesives, BSFF thermal paste will not compromise over time. After applying, you do not need to apply again because it will last at least 5 years.
- EASY TO APPLY: BSFF thermal paste has ideal consistency and is very easy to use even for beginners
Pattern comparisons do not establish one winning shape for every processor, cooler, paste, and mounting system. Puget Systems found that an X pattern gave the best coverage in its particular test setup while a center dot was close in temperature; Puget Systems’ comparison should therefore be read as a test of that setup, not a universal law.
Windows Errors? Fix Them Before They Spread
Repair common Windows errors and clear accumulated junk for a smoother, more stable PC - no reinstall needed.Free scan · no reinstallCrashes, No Sound, or Screen Glitches?
Random freezes, missing sound and display glitches usually trace back to one bad driver. Find and replace yours safely.Free scan · under a minuteThe practical priority order is more useful than a debate over shapes: use enough paste to cover the relevant contact area, avoid excess, seat the cooler correctly, and apply mounting pressure evenly.
How much thermal paste is enough?
Enough thermal paste fills microscopic surface imperfections between the CPU’s integrated heat spreader and the cooler’s cold plate without creating an unnecessarily thick layer. A conventional desktop CPU generally needs a small center dot, approximately rice-grain to pea-sized.
| Application | Too little paste | Too much paste | Correct objective |
|---|---|---|---|
| Normal desktop IHS | Uncovered regions and air gaps may remain. | A thicker bond line may form and paste may squeeze out around the edges. | A thin, continuous interface after cooler pressure is applied. |
| Large workstation package | Important areas of the cooler contact surface may not receive compound. | Excess can still reduce consistency and create contamination. | Coverage of the relevant cold-plate area without flooding the package. |
Too much paste is not a harmless performance upgrade. Intel warns against both insufficient and excessive TIM, and comparative testing from GamersNexus examined the effect of excessive paste quantity. Thermal paste is a thin interface material, not structural filler for a loose, warped, incompatible, or badly seated cooler.
What should you do if you remove the CPU cooler?
If you remove the CPU cooler after it has been mounted, clean the old paste from the CPU and cooler and apply fresh paste before reinstalling the cooler. Do not rely on the old compressed layer, and do not add new paste on top of it.
Also popular on Amazon
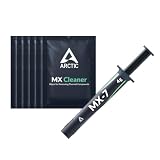
- NEXT-LEVEL THERMAL PERFORMANCE: MX-7 features a performance-optimized, dense, and highly viscous consistency. Its high filler content ensures exceptional heat transfer
- LONG-TERM STABILITY: High cohesion prevents pump-out, dry-out, or bleeding even under repeated thermal cycles, ensuring long-lasting and consistent performance without the need for frequent reapplication
- PERFECT APPLICATION: MX-7 cannot be spread manually by design. Its low adhesion allows the paste to distribute naturally under cooler pressure, forming a thin bond line without trapping air bubbles
- SAFE FOR ALL DEVICES: MX-7 is electrically non-conductive and non-capacitive, making it completely safe for CPUs, GPUs, laptops, consoles, and other, no risk of short circuits or electrical discharge
- INCLUDES MX CLEANER: Thoroughly removes old thermal paste and prepares contact surfaces for optimal performance before applying new thermal compound.
Intel’s support guidance, updated January 30, 2025, recommends replacing TIM when reinstalling the processor or heatsink. Routine replacement does not need to follow a rigid annual calendar: Intel’s consumer guidance says reapplication is generally needed only every few years, while cooler removal or a temperature increase associated with degraded paste is a practical reason to replace it.
Independent reader supportYour contribution helps us test, update, and keep practical guides available for everyone.Why are CPU temperatures high after applying thermal paste?
High temperatures after a paste installation are more often caused by mounting, cooling, or configuration problems than by choosing a slightly different reasonable paste pattern.
- Check cooler contact and mounting. Confirm that the cold plate sits flat, every screw or retention point is engaged, and the cooler is not loose or obstructed.
- Check for protective film. A plastic shipping film left on the cooler’s contact plate can severely interfere with heat transfer.
- Check the fan or pump. Verify that the CPU fan spins and that a liquid-cooler pump and radiator fans are connected to the headers required by the cooler documentation.
- Check airflow. Confirm that case fans are operating, vents are not blocked, and dust is not restricting the heatsink or radiator.
- Check the paste interface. If the cooler was removed or the paste was applied over old residue, clean both surfaces and reinstall with fresh compound.
- Check CPU settings and workload. Compare temperatures under the same workload and confirm that unusually aggressive power, voltage, or performance settings are not the cause.
- Reconsider the cooler match. Paste cannot compensate for a cooler that is incompatible with the socket, undersized for the processor, or incorrectly installed.
Do not infer a precise temperature improvement from changing a dot into an X unless the comparison controls the CPU, cooler, paste, ambient temperature, mounting pressure, workload, and measurement method. Reasonable patterns can all perform well when quantity, coverage, and mounting are correct.
Can thermal paste damage a motherboard?
Non-electrically-conductive paste reduces the risk of an electrical short, but no paste should be treated as incapable of causing problems. Excess material can contaminate nearby components, and spills, mechanical errors, incorrect cooler installation, or other conductive products can create separate risks.
Recommended Free Tools
Apply paste carefully, keep it on the intended contact surfaces, and inspect the motherboard before powering on the system. If a substantial amount has reached the socket or surrounding components, stop and clean it according to the paste and hardware manufacturer’s guidance rather than spreading the contamination.
Also popular on Amazon

- NEXT-LEVEL THERMAL PERFORMANCE: MX-7 features a performance-optimized, dense, and highly viscous consistency. Its high filler content ensures exceptional heat transfer
- LONG-TERM STABILITY: High cohesion prevents pump-out, dry-out, or bleeding even under repeated thermal cycles, ensuring long-lasting and consistent performance without the need for frequent reapplication
- PERFECT APPLICATION: MX-7 cannot be spread manually by design. Its low adhesion allows the paste to distribute naturally under cooler pressure, forming a thin bond line without trapping air bubbles
- SAFE FOR ALL DEVICES: MX-7 is electrically non-conductive and non-capacitive, making it completely safe for CPUs, GPUs, laptops, consoles, and other, no risk of short circuits or electrical discharge
- EFFORTLESS CLEANING WITH MX CLEANER: Removes old thermal paste thoroughly, preparing contact surfaces for optimal performance. Also available as a convenient bundle with MX-7
Practical checklist
- Read the CPU, cooler, and paste instructions before applying anything.
- Confirm whether the cooler already has factory-applied TIM.
- Remove all old paste with isopropyl alcohol and a lint-free wiper.
- Use a small center dot for a conventional desktop IHS.
- Use the model-specific pattern for AM5, Threadripper, or another unusual package.
- Lower the cooler straight down without sliding it around.
- Start all mounting screws, then tighten them gradually in a diagonal pattern.
- Connect the fan or pump and remove any protective film before testing.
- Apply fresh paste whenever the mounted cooler is removed.
Bottom line
The best way to apply thermal paste is the simplest method that gives the CPU’s active area reliable coverage without excess. For most desktop CPUs, use a small center dot and let the cooler spread it. For AM5, Threadripper, or other unusual geometries, follow the model-specific instructions. Correct quantity, flat cooler contact, and even mounting pressure matter more than a universal claim that one pattern always wins.
Frequently Asked Questions
How much thermal paste should I apply?
For a typical desktop CPU, apply one small center dot of thermal paste in the middle of the integrated heat spreader. A rice-grain- to pea-sized amount is a reasonable starting point; the cooler’s pressure should spread the paste when mounted straight down.
What is the best thermal-paste pattern for AMD AM5?
For AMD AM5, Noctua’s AM5 instructions recommend four small approximately 2-mm corner dots and one approximately 3–4-mm center dot. An AM5 paste guard is optional and helps limit paste entering the heat-spreader cut-outs.
Do I need to replace thermal paste after removing the cooler?
Yes. Remove the old thermal paste from both the CPU and cooler with isopropyl alcohol and a lint-free wiper, let the surfaces dry, and apply fresh paste before reinstalling the cooler. Do not add new paste over used paste.
Why is my CPU still running hot after applying thermal paste?
High temperatures after a paste installation can result from poor cooler mounting, a disconnected fan or pump, protective film left on the cooler, restricted airflow, incorrect CPU settings, or an incompatible cooler. Check those causes before blaming the paste pattern.

