
The Tool Desk
Outbyte PC Repair FREEClear out junk files and repair common Windows errorsFree Scan →Outbyte Driver Updater FREEScan for outdated or missing drivers - takes under a minuteDriver Scan →iTechGuides is reader-supported. When you buy through links on our site, we may earn an affiliate commission. As an Amazon Associate I earn from qualifying purchases. Learn more
Repairing broken plastic on a laptop is often possible when the damage is a small, accessible crack, but hinge mounts, detached threaded inserts, swollen cases, and fractured top cases usually need reinforcement, replacement parts, or professional service. Diagnose the cause before choosing adhesive: a stiff or misaligned hinge can break a freshly repaired shell again.
“Laptop casing” can mean several different components, and the correct repair depends on which component has failed and whether the plastic carries structural load. A loose bezel clip is a very different problem from a torn hinge boss hidden behind the display.
Key takeaways
- A small crack away from hinges, screw posts, batteries, and display components is often suitable for an inside-applied plastic-compatible two-part epoxy and reinforcement patch.
- A broken hinge mount, detached brass insert, missing screw boss, or top case that flexes when the lid opens is a structural failure; replacement or professional repair is often more reliable than adhesive alone.
- A laptop case separating without an impact can indicate a swollen battery, so do not press, clamp, heat, puncture, or glue the case back together.
- Use the exact laptop model and revision to find the service manual, replacement shell, bezel, or top-case assembly; model-free screw and disassembly instructions are unsafe.
- Test a repair gradually after full adhesive cure, checking hinge movement, display function, cable routing, ventilation, and case alignment before normal use.
What is the fastest way to decide whether laptop plastic can be repaired?
Inspect the damaged area while asking one question: does this plastic carry repeated load or protect a safety-critical component? A detached trim piece or hairline crack in a bottom cover may be a reasonable DIY repair. A hinge mount, screw boss, palm-rest mounting point, or display frame is structural and deserves a replacement-versus-repair decision rather than an automatic glue job.
| Damage | DIY suitability | Recommended approach | Stop and consider replacement or service when |
|---|---|---|---|
| Hairline crack away from hinges and screw posts | Usually suitable | Plastic-compatible two-part epoxy applied from the inside; add a thin patch if space allows | The crack continues to spread or the plastic flexes under normal use |
| Broken bezel clip or detached trim | Usually suitable | Minimal compatible adhesive or a replacement bezel | Adhesive could touch the LCD, cable, or future service area |
| Cracked bottom cover | Often suitable | Inside reinforcement, while leaving vents and screw posts clear | The battery is swollen, the cover no longer supports components, or a fan or cable will rub |
| Broken screw post or molded boss | Conditional | Rebuild and reinforce only when the surrounding plastic is healthy | The post secures a hinge, motherboard, battery, or other repeatedly loaded assembly |
| Detached brass hinge insert or torn hinge mount | Poor candidate for glue alone | Replace the shell or top case if available; use a reinforced rebuild only as a controlled temporary repair | The hinge is stiff, bent, misaligned, or pulling out of the shell |
| Cracked palm rest or top case | Depends on location | Repair accessible underside damage or replace the complete top-case assembly | The keyboard or touchpad is integrated, multiple mounting points are damaged, or the case affects hinge alignment |
| Separating case with no impact | Do not glue first | Stop and inspect for battery swelling; seek qualified service | Any bulging, heat damage, odor, smoke, or pressure from inside is present |
Which laptop casing component is broken?
Identify the shell section before ordering parts or following a repair guide. Laptop manufacturers and repair technicians commonly use the following labels, although terminology varies between brands.
Popular on Amazon
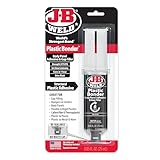
- Plasticbonder: Is A Quick-Set, 2 Part, Urethane Adhesive System That Provides Strong, Lasting Repairs And Works On Thermoset, Carbon Fiber Composites, Thermoplastics, Coated Metals, Concrete & More.
- Count On Us: For More Than 40 Years, Our Products Have Earned A Loyal Following From People Who Take Pride In Their Work. With Each Product We Innovate, We Continue To Provide The World'S Strongest Bond For Your Projects.
- Simple To Use: J-B Plasticbonder Has A 1:1 Mixing Ratio, Sets In 15 Minutes And Can Be Sanded After 30 Minutes. With A Tensile Strength Of 3770 Psi, Plasticbonder Cures To A Hard, Permanent Bond.
- Versatile And Dependable: Perfect For Indoor Or Outdoor Use, Epoxy & Adhesives, Plastic, Composite, Pvc, And More. Plastic Bonder Makes A Great Gap Filler And Dries Black In Color.
- A shell: the outer display lid or screen back cover.
- B shell: the display bezel surrounding the LCD panel.
- C shell: the palm rest, keyboard deck, or top-case assembly.
- D shell: the bottom cover.
- Hinge mounts: plastic bosses, brackets, or threaded inserts that secure the metal hinges.
- Clutch or hinge covers: narrow trim pieces covering the hinge barrels.
- Internal brackets: molded supports that may be hidden behind an apparently minor crack.
A visible bezel crack may be a symptom rather than the original failure. A hinge mount behind the display assembly can pull the bezel apart every time the lid opens. Similarly, a crack beside a palm rest may reflect a failed top-case mounting point rather than a purely cosmetic defect. Repair reports involving broken hinge supports and top-case cracking near the opening path illustrate why the hidden structure must be inspected.
Replacement parts may not be sold as bare plastic. A “top case” can include the keyboard, touchpad, power button, speakers, or other installed components. An exact-model parts check is essential because display size, keyboard layout, color, wireless antennas, connectors, and internal revisions can differ.
How can you tell whether the damage is cosmetic or structural?
Damage is probably cosmetic when the crack is away from hinges and screw posts, the lid opens squarely, the case does not flex, and the broken piece carries no load. Damage is structural when opening the laptop changes the shape or position of the shell.
Free tools Windows power users keep installed
One-click scans. No signup required.
Signs that usually support a DIY reinforcement
- A hairline crack in rigid plastic away from a hinge, battery, display cable, or motherboard mount.
- A broken clip that does not hold a loaded component.
- A small crack in a bottom cover with intact screw posts and clear ventilation.
- A detached clutch cover or trim piece.
- A bezel crack that does not press on or distort the LCD.
- Damage accessible from the inside without removing a fragile glued display.
Signs of a structural failure
- The screen opens unevenly, twists, creaks, binds, or requires unusual force.
- A hinge is pulling away from the shell.
- A brass insert or threaded screw boss has torn out.
- The palm rest rises when the screen is opened.
- The bezel repeatedly separates after being pressed back into place.
- A screw spins without tightening.
- The crack reaches a hinge, display cable route, battery, or motherboard mounting area.
- The case is separating without an impact.
Do not ignore unexplained separation. Microsoft’s Surface repair safety guidance treats a case that has separated or opened for a reason other than impact, along with burned, melted, or heat-damaged parts, as a condition requiring caution and escalation. The same safety principle is useful for other laptop brands: inspect for an internal battery problem before attempting to close the shell.
Why does laptop plastic break near a hinge?
Hinge-area plastic breaks because the shell is repeatedly absorbing the force required to open and close the display. A stiff hinge, bent hinge plate, loose fastener, detached insert, poor alignment, or trapped display cable can concentrate that force into a small plastic boss.
Repairing only the visible crack does not remove the underlying load. Community repair cases repeatedly identify molded hinge supports and threaded inserts as failure points; these reports are useful failure-mode evidence, not universal manufacturer instructions. A hinge insert repair that fails under repeated load is a warning against treating every hinge problem as a simple superglue repair.
Inspect the hinge before rebuilding the shell. If the hinge barrel is excessively stiff, the hinge plate is bent, or the hinge is misaligned, correct or replace the hinge according to the model-specific service procedure before loading a repaired housing. Do not arbitrarily loosen a hinge: hinge preload and adjustment differ by design, and careless changes can damage the display assembly.
Recommended Free Tools
Should you glue, reinforce, weld, or replace the plastic?
For most DIY users, a plastic-compatible two-part epoxy with an inside reinforcement patch is the most practical repair for a clean, noncritical crack. Adhesive selection remains application-dependent because laptop shells may be ABS, PC/ABS blends, or other plastics, and not every adhesive bonds equally well to every material.
| Repair situation | Preferred method | Important limitation |
|---|---|---|
| Clean crack in rigid ABS-like plastic | Two-part plastic epoxy from the inside | The repair may be bulky and may not match the exterior finish |
| Missing chunk or broken screw boss | Epoxy plus a shaped plastic, fiberglass, or metal reinforcement patch | Clearance, alignment, and screw depth must be verified before curing |
| Detached brass hinge insert | Replace the shell when possible | A rebuilt insert remains exposed to high repeated loads |
| Broken bezel clip | Replace the bezel or use minimal adhesive | Adhesive can obstruct LCD removal or press against the panel |
| Thin cosmetic trim | Compatible plastic adhesive or replacement trim | Solvent-based products can distort thin plastic |
| Cracked bottom cover | Inside epoxy reinforcement | Do not cover vents or trap heat |
| Plastic mount attached to an intact metal frame | Bond and reinforce the plastic only if the metal mounting plate is sound | Adhesive cannot restore missing or fractured metal |
J-B Weld’s manufacturer documentation lists Plastic Bonder products for materials including ABS and other plastics. Verify the exact product’s compatibility on an inconspicuous area or scrap from the same component before committing to the repair. No adhesive should be treated as a universal or automatically permanent solution.
Also popular on Amazon

- J-B Weld Plasticweld: A Hand Mixable Two Part Epoxy Putty Stick That Is Formulated To Repair And Rebuild Various Plastic Compounds And Surfaces. J-B Weld Plasticweld Is Designed For Diy Plastic Repairs On Abs, Pvc & Cpvc Pipes And Plastics, Auto Bumpers And More! Plasticweld Is Certified By The Nsf And Is Safe For Contact With Potable Water
- Cure And Set Time: After Kneading The Two Part Formula Together By Hand, Plasticweld Takes 25 Minutes To Set And Cures In 3 Hours. J-B Weld Plasticweld Set And Cure Color Is Off White
- Product Features And Strength: J-B Weld Plasticweld Has Lap Shear Strength Of 600 Psi. Plasticweld Can Withstand Continuous Temperatures Up To 250Of (121Oc) And Intermittent Temperatures Up To 300Of (148Oc) When Fully Cured. Plasticweld Does Not Shrink And Can Be Molded, Shaped, Sanded, Drilled And Cut
- Applications: Abs, Pvc & Cpvc Pipes And Plastics, Auto Bumpers And Trim, Vinyl Surfaces And Siding, Marine Repairs & Fiberglass Parts, Plastic Water Tanks, And Plumbing
- Repair and rebuild any rigid and semi-flexible plastic including ABS, PVC and CPVC
Ordinary instant glue can be reasonable for a low-load trim piece, but it is not a dependable default for a repeatedly loaded hinge mount. Thick adhesive blobs are also a poor repair strategy: they can stop the case from closing, interfere with hinge travel, touch the LCD, or prevent later disassembly.
Plastic welding is an advanced option rather than the default. Heat can warp a thin laptop shell, damage nearby electronics, discolor the finish, or ignite contaminants. Use plastic welding only when the material, temperature, access, and surrounding components are understood.
What’s actually slowing this PC down?
Pick the symptom - the matching free tool is one click away.
What should you do before opening the laptop?
Prepare the repair before removing a screw. A laptop casing procedure is model-specific, and a general online instruction cannot safely establish screw lengths, clip locations, battery sequence, cable routing, or display-removal requirements.
- Back up important data. A casing repair can accidentally damage the display, storage, motherboard, or power system.
- Shut the laptop down completely. Disconnect the charger and all peripherals.
- Photograph the exterior. Capture hinge alignment, bezel gaps, screw locations, and the original cable routes.
- Record the exact model and machine-type number. Do not rely only on a marketing family name such as “ThinkPad,” “Swift,” or “MacBook Air.”
- Find the exact service manual or disassembly guide. Apple’s model-specific repair manuals separate parts, tools, safety information, and procedures for particular MacBook models rather than providing one universal plastic-repair method.
- Set up a clean, well-lit, static-conscious workspace. Use a mat or containers to keep screws organized by location and length.
- Protect the display and motherboard. Keep adhesive, dust, loose fragments, and abrasive debris away from electronics.
- Disconnect the battery as soon as the service procedure permits. Do not work around exposed power circuitry with the charger connected.
Opening a laptop can affect warranty or accidental-damage coverage depending on the manufacturer, region, and cause of the failure. Check the applicable warranty terms before disassembly; do not assume that opening a device either always voids or never affects coverage.
Which tools and materials are useful?
Basic repairs need precision drivers, a plastic opening pick or spudger, tweezers, isopropyl alcohol where compatible, lint-free swabs, painter’s tape, eye protection, nitrile gloves, and a way to hold the shell in alignment while the adhesive cures.
Disassembly tools
- Precision Phillips, Torx, or manufacturer-specific drivers.
- Plastic opening picks and a non-marring spudger.
- Tweezers for small connectors and tape.
- Small labeled containers or a magnetic project mat for screws.
- A phone or camera for stage-by-stage photographs.
Repair supplies
- Two-part epoxy explicitly rated for the identified plastic.
- Optional epoxy putty for rebuilding missing noncritical material.
- A thin fiberglass, plastic, or metal reinforcement strip.
- Fine abrasive paper for lightly keying glossy surfaces.
- Disposable mixing surface and applicator.
- Low-tack tape, soft clamps, or a temporary fixture.
If you do not already own precision drivers and opening tools, the iFixit Pro Tech Toolkit is one commercial option listed for this type of electronics work. The product page showed a $79.95 price during the research pass; price and contents can change, and the kit does not replace the need for compatible adhesive or an exact replacement part.
Quick wins for a faster PC:
Fix the driver behind crashes, sound loss and screen glitchesFind Drivers →Clear out junk files and repair common Windows errorsFree Scan →Scan for outdated or missing drivers - takes under a minuteDriver Scan →How do you repair broken laptop plastic safely?
The following is a general method, not a substitute for the exact service manual. Stop if the damage involves a swollen battery, a fragile glued display, an unknown composite shell, or a hinge that is still applying abnormal force.
1. Diagnose before applying adhesive
With the laptop closed, check whether the lid sits squarely, whether the bezel is lifting, whether one hinge moves before the other, whether the base flexes, and whether any screw head or brass insert has pulled away. Check the display for lines, flicker, dead pixels, pressure marks, or other new symptoms.
Open the lid only as far as necessary. Do not repeatedly cycle a visibly failing hinge because each cycle can enlarge the crack or pull the mount farther out of the shell. Inspect the display cable for stretching, pinching, or damage near the hinge.
Also popular on Amazon

- Dries clear: Our Gorilla Tough epoxy resin dries clear for a clean finish and incredibly durable hold; perfect for household and automotive repairs
- 5 minute epoxy: This epoxy resin kit in just one applicator has a 5 minute set time, plenty for repositioning and adjusting
- Gap filling: Gorilla resin epoxy also acts as a gap filler, filling voids and bonding uneven or vertical surfaces
- Water resistant: Our clear epoxy resin withstands moderate exposure to water for extra durability
- Easy-to-use syringe: Gorilla Epoxy has separate barrels of epoxy resin and hardener to keep the epoxy from hardening; the syringes dispense evenly and include a cap for multiple uses
2. Find and correct the root cause
Check for a loose hinge fastener, stiff hinge barrel, bent hinge plate, separated plastic boss, detached threaded insert, trapped display cable, or swollen battery. A repaired shell exposed to the same abnormal hinge load is likely to fail again.
Windows Errors? Fix Them Before They Spread
Repair common Windows errors and clear accumulated junk for a smoother, more stable PC - no reinstall needed.Free scan · no reinstallOutdated Drivers Are Slowing You Down
One free scan finds every outdated or missing driver and matches the right update for your exact hardware.Free scan · exact hardware match3. Disassemble far enough to reach the rear
A durable repair usually bonds the inside of the shell rather than covering the visible crack. Depending on the model, access may require removing the bottom cover, battery connection, antennas, display cable, bezel, LCD panel, hinges, or top-case components.
Do not assume that the LCD must always be removed or that the LCD can always remain installed. A model-specific cover-removal guide may be relatively shallow, while a clutch-cover replacement procedure or manufacturer manual may require a different sequence and much deeper access.
4. Clean and prepare the plastic
- Remove loose fragments and old adhesive.
- Dry-fit the broken pieces and mark alignment with tape or pencil.
- Clean the bonding surfaces with an appropriate cleaner, commonly isopropyl alcohol where compatible.
- Allow the surfaces to dry fully.
- Lightly roughen glossy bonding surfaces.
- Shield cables, LCD surfaces, screw threads, and moving hinge areas with tape or a removable barrier.
Do not flood the shell with solvent. Some plastics soften, craze, discolor, or deform when exposed to aggressive cleaners.
5. Plan the reinforcement
Before mixing epoxy, confirm that the repaired case will close, every screw can reach its hole, and the reinforcement will clear the hinge, LCD, webcam, antennas, fan, battery, and cable routes. A thin patch bonded across healthy surrounding plastic generally distributes load better than a thick blob placed only over the original fracture.
Do these 3 things before closing this tab:
1Scan for outdated or missing drivers - takes under a minute2Clear out junk files and repair common Windows errors3Fix the driver behind crashes, sound loss and screen glitches6. Apply the adhesive
- Mix the two-part epoxy exactly as directed on its label.
- Apply a thin amount into the crack and across the prepared underside.
- Add a shaped reinforcement patch if there is sufficient clearance.
- Rebuild missing material in thin layers rather than one oversized mass.
- Keep adhesive away from hinge pivots, screw threads, connectors, vents, battery surfaces, and display edges.
- Clamp or tape the part in position without crushing the shell.
- Leave the repair undisturbed for the stated handling and full-cure period.
Do not use the laptop merely because the epoxy feels hard at the surface. The repair must reach the product’s stated cure condition before the hinge or screw post is loaded.
7. Reassemble without recreating the failure
- Seat and align the hinge before tightening its fasteners.
- Tighten screws evenly and only to the model’s specified torque when one is provided.
- Do not overtighten screws into plastic.
- Route the display cable exactly as it was originally routed.
- Verify that no reinforcement, tape, or epoxy enters a hinge’s moving path.
- Reconnect the battery according to the service procedure.
- Replace shielding, brackets, and grounding components.
- Check that no screw is too long for its hole.
8. Test progressively
- Test the laptop while it remains open and accessible.
- Verify the display, webcam, speakers, keyboard, touchpad, Wi-Fi, charging, and ports.
- Close and open the lid only a few degrees at first.
- Check for creaking, binding, uneven resistance, and case flex.
- Increase the opening angle gradually.
- Stop immediately if the bezel lifts, the hinge pulls, or the display image changes.
- Inspect the repair after a short period of use for whitening, movement, or new cracks.
How should you repair each common type of laptop casing damage?
Small cosmetic crack
Remove the bottom cover or bezel if necessary, clean and lightly roughen the inside, align the crack, and apply a thin epoxy bead with a small reinforcement patch. Keep the visible surface free of excess adhesive. This is the strongest candidate for a DIY repair when the surrounding plastic is intact.
Broken bezel or clutch cover
Replace the bezel or trim when the part is available and inexpensive. If the piece is merely detached, use minimal compatible adhesive in locations that do not touch the LCD or interfere with future display service. Inspect the hinge behind a bezel that is separating repeatedly; a bezel-only repair can conceal a structural failure.
Examples of bezel and hinge damage show why the surrounding structure matters, including bezel separation around a hinge area.
Also popular on Amazon

- J-B WELD PLASTICBONDER (Tan): A quick setting and multipurpose two part urethane adhesive & gap filling system that provides a strong and lasting bond to many plastic surfaces. J-B Weld PlasticBonder is great for DIY plastic repairs, filling dents, bumper repairs and more! J-B Weld PlasticBonder now comes in a syringe allowing for an easy 1:1 mix ratio. The unique syringe has a re-sealable cap that prevents drying out and leaking, allowing for multiple uses!
- CURE AND SET TIME: After mixing the two part formula with the included mixing tray and stir stick, PlasticBonder takes 15 minutes to set and 30 hours to cure. J-B Weld PlasticBonder set and cure color is tan
- STRENGTH: J-B Weld PlasticBonder has tensile strength of 3770 PSI.
- SURFACE APPLICATIONS: Thermoset & Carbon Fiber Composites, Thermoplastics and Coated Metals, Plastic & PVC, Concrete, Ceramic & Tile, Fiberglass, and Aluminum.
- DO IT YOURSELF: Big or small, you can DIY it with J-B Weld. Our heavy duty epoxy and adhesives repair & restore it right the first time. J-B Weld delivers superior performance, quality, and results for the World’s Strongest Bond.
Cracked bottom cover
Inside reinforcement can work if the battery is flat, the vents remain open, screw posts are intact, and the repaired area will not rub against a fan or cable. A cracked bottom cover that no longer supports the battery or motherboard should be replaced rather than patched.
Broken screw post
Rebuilding a noncritical screw post requires accurate alignment and enough healthy surrounding plastic for reinforcement. Test the screw length and clearance before the adhesive cures. Do not use a rebuilt post as a casual substitute for a hinge mount or motherboard support without understanding the loads involved.
Detached hinge insert or hinge mount
Replacement is normally the preferred solution because the insert and boss experience repeated torque. If replacement is unavailable, a carefully rebuilt and reinforced mount may restore function, but the result is less certain than a correct replacement housing. The hinge must move normally before the repair is considered complete.
Cracked palm rest or top case
Repair the underside only when the damage is localized and the surrounding mounting points remain sound. Replace the top-case assembly when multiple mounting points are fractured or when the keyboard or touchpad is integrated into the part. An Acer community repair discussion illustrates why some laptops make the complete palm-rest/top-case assembly more practical than separating an integrated keyboard; the construction is model-dependent.
Damaged display lid
A cracked A shell or display back cover should be replaced when the hinge anchors, display cable route, antenna channels, or LCD mounting points are affected. A cosmetic lid crack away from those areas may be reinforced from behind, but access often requires delicate display disassembly.
Independent reader supportYour contribution helps us test, update, and keep practical guides available for everyone.When is replacing the shell better than repairing it?
Replacement is usually the better choice when a hinge mount or threaded boss has failed, plastic is missing from a load-bearing area, a crack crosses multiple mounting points, the hinge is stiff or bent, or adhesive would obstruct a cable or LCD.
| Option | Reliability | Appearance | Complexity | Best fit |
|---|---|---|---|---|
| Adhesive-only repair | Low to moderate for low-load cracks; poor default for hinge mounts | Usually best on the inside, not necessarily invisible outside | Lowest | Cosmetic cracks and trim |
| Epoxy plus reinforcement | Moderate when healthy plastic and a normal hinge carry the load | Good if hidden inside | Moderate | Accessible cracks, selected bosses, and bottom covers |
| Replacement shell or top case | Usually highest when the exact part fits and the hinge is healthy | Cleanest result | Moderate to high | Major structural damage and missing plastic |
| Professional shell transfer | Depends on parts and technician, but reduces DIY handling risk | Usually clean | High for the owner, lower hands-on risk | Glued displays, valuable data, complex assemblies |
| Retire the laptop | Eliminates repair risk | Not applicable | Lowest repair complexity | When parts and labor approach the machine’s value |
Replacement housings can be difficult to source and may be sold only as expensive assemblies. Confirm the exact model, revision, display size, keyboard layout, color, connectors, and antenna arrangement before buying. An exact-model donor laptop can provide a compatible lid, bezel, or palm rest, but revisions and regional configurations still need checking.
What should you do if the case is separating without an impact?
Stop pressing the case together and treat unexplained separation as a possible battery emergency. Disconnect power if doing so is safe, move the laptop away from flammable materials, and seek qualified service. Do not puncture, compress, heat, or glue a potentially swollen battery.
Battery swelling can push apart a palm rest, keyboard, bottom cover, or display area. A cosmetic-looking crack is not safe to repair until the source of the pressure has been ruled out.
Also popular on Amazon

- J-B WELD PLASTICWELD: A quick setting and multipurpose two part epoxy that provides a strong and lasting bond on various plastic surfaces (Plastic & PVC, Fiberglass, Glass, ABS, Composites and Vinyl). J-B Weld PlasticWeld comes in a syringe allowing for an easy 1:1 mix ratio. The unique syringe has a re-sealable cap that prevents drying out and leaking, allowing for multiple uses!
- CURE AND SET TIME: After mixing the two part formula with the included mixing tray and stir stick, PlasticWeld takes 5 minutes to set and 1 hour to cure. J-B Weld PlasticWeld set and cure color is Translucent Yellow.
- STRENGTH: J-B Weld PlasticWeld has tensile strength of 3900 PSI.
- SURFACE APPLICATIONS: Plastic & PVC, Fiberglass, Glass, ABS, Composites and Vinyl.
- DO IT YOURSELF: Big or small, you can DIY it with J-B Weld. Our heavy duty epoxy and adhesives repair & restore it right the first time. J-B Weld delivers superior performance, quality, and results for the World’s Strongest Bond.
What are the common failed-repair symptoms?
| Symptom | Likely cause | What to do |
|---|---|---|
| The repaired crack returns | Stiff hinge, weak surrounding plastic, poor bonding, misalignment, or loading before full cure | Stop cycling the lid; inspect and correct the root cause before another repair |
| Epoxy will not adhere | Contamination, incompatible low-surface-energy plastic, glossy surface, excessive flex, expired adhesive, or incorrect mixing | Identify the plastic, clean and prepare a test area, and verify product compatibility |
| The case will not close | Excess adhesive or reinforcement, misplaced component, or incorrect alignment | Do not force it; reopen if safe and remove the obstruction after cure |
| The display changes when the lid moves | Pinched, stretched, or damaged display cable; hinge misalignment | Stop testing and inspect cable routing and hinge alignment |
| The bezel keeps separating | Hinge or display-cover pressure behind the bezel | Inspect the underlying hinge mount instead of adding more bezel adhesive |
| Fan noise or heat appears after repair | Blocked ventilation, displaced cable, or internal component contact | Power down and reopen the device; do not continue using it until clearances are restored |
When should you use a professional repair service?
Use a professional when the battery may be swollen, the display is cracked or shows pressure damage, the hinge is tearing through the display assembly, the repair requires removing a glued or fragile LCD, the shell is magnesium, carbon fiber, aluminum, or an unknown composite, or the laptop contains data you cannot risk losing.
A professional service can also make sense when transferring a motherboard, keyboard, touchpad, display, antennas, and other delicate parts into a replacement housing would cost less than the risk of a failed DIY repair. uBreakiFix by Asurion advertises free diagnostics, same-day service for many repairs, a low-price guarantee, a one-year limited warranty on most repairs, and more than 700 locations on its official service site. Those signals and actual availability vary by model and location; the service site does not establish one universal price for broken laptop plastic.
Ask the shop whether the quoted work is a cosmetic repair, a top-case replacement, a display-assembly replacement, or a hinge repair. A shop may recommend replacing a complete assembly when a cosmetic patch would be possible, while a patch may be inappropriate if the hinge or battery is the actual cause.
Final checklist before returning the laptop to normal use
- The hinge opens with normal, even resistance.
- The lid sits squarely and closes without force.
- The bezel does not lift during gentle movement.
- No display cable, antenna, fan, or battery is pinched.
- No adhesive touches moving parts, connectors, LCD surfaces, or vents.
- All vents are clear.
- All screws are accounted for and none is too long for its hole.
- The display, webcam, speakers, keyboard, touchpad, Wi-Fi, charging, and ports work.
- The repair has reached the adhesive manufacturer’s full-cure condition.
- The repair remains stable after gentle, limited opening and closing.
Frequently Asked Questions
Can you repair a cracked laptop case with epoxy?
Yes, a clean crack in accessible plastic can often be stabilized with plastic-compatible two-part epoxy and an underside reinforcement patch. Epoxy is not a universal fix for hinge mounts, detached inserts, swollen cases, or plastic that remains under abnormal load.
Is super glue good for a broken laptop hinge mount?
Super glue is generally unsuitable as the default repair for a repeatedly loaded laptop hinge mount. A replacement shell or top case is usually more reliable; a carefully reinforced rebuild is a more uncertain fallback when replacement is unavailable.
What does it mean when a laptop case separates without being dropped?
A laptop case that separates without impact may indicate a swollen internal battery. Stop pressing or gluing the case together, disconnect power if safe, and seek qualified service rather than continuing a cosmetic repair.
Should I replace the laptop top case instead of repairing it?
Replace the top case when hinge mounts, threaded bosses, multiple mounting points, or integrated keyboard and touchpad areas are damaged. Repair may be more practical for a localized, low-load crack when the surrounding plastic and hinge are healthy.
The Tool Desk
Outbyte Driver Updater FREEScan for outdated or missing drivers - takes under a minuteDriver Scan →Outbyte PC Repair FREEClear out junk files and repair common Windows errorsFree Scan →The Bottom Line
Repair accessible, low-load laptop plastic with compatible two-part epoxy and inside reinforcement when the surrounding structure is healthy. Treat hinge mounts, detached inserts, unexplained case separation, and damaged display assemblies as structural or safety problems: inspect the cause first, then choose an exact replacement part or qualified professional service.

