
iTechGuides is reader-supported. When you buy through links on our site, we may earn an affiliate commission. As an Amazon Associate I earn from qualifying purchases. Learn more
OBS Studio’s advanced microphone settings work best when each filter has one job: Noise Suppression reduces mild steady noise, a Noise Gate or Expander reduces sound between phrases, a Compressor controls volume changes, and a Limiter catches dangerous peaks. The correct settings depend on your microphone, room, gain, speaking style, and production—not on a universal preset.
OBS Studio’s advanced microphone settings work best when each filter has one job: Noise Suppression reduces mild, steady background noise; a Noise Gate or Expander reduces sound between phrases; a Compressor controls large volume changes; and a Limiter provides a final peak-safety ceiling.
There is no universal “best” preset. The right thresholds depend on microphone distance, room noise, speaking volume, microphone gain, and whether you are streaming conversation, gaming commentary, podcasting, or recording video. Use the values below as starting points, then calibrate while listening to a local recording.
Do these 3 things before closing this tab:
1Repair Windows errors before they cause bigger problems2Fix the driver behind crashes, sound loss and screen glitches3Clear out junk files and repair common Windows errorsOpen the microphone filters in OBS
- Open OBS Studio and select the microphone you want to adjust in the Audio Mixer.
- Click the microphone’s cogwheel.
- Select Filters.
- Click the + button to add an audio filter.
Filters can be attached to an audio device, source, or scene. For a microphone configured in the Audio Mixer, the cogwheel-and-Filters route is the usual starting point. Menu names and available filters can vary slightly between OBS releases.
Popular on Amazon

- 【PCM Recording and Automatic Noise Reduction】:This digital voice recorder is equipped with advanced dual noise reduction microphones and supports 1536 kbps PCM HD audio recording, ensuring crystal-clear sound capture in any environment. Recorder device with automatic noise reduction and voice-activated recording, the recorder only picks up the sound when there’s speech, reducing background noise,Excellent sound quality can meet the needs of students, journalists, music lovers and more people
- 【136GB Memory and Long Battery Life】Voice Recorder with Playback with 8GB built-in storage and includes a complimentary 128GB TF card, this digital voice recorder can hold up to 9775 hours of recordings in MP3 format or WAV format;Recorder for lectures with a built-in 1100mAh rechargeable lithium battery, this voice recorder can continuously record for up to 68 hours on a single charge, making it perfect for back-to-back meetings, interviews, or extended classroom sessions
- 【One Click Record and Save】: Our voice recorder supports one click recording and saving functions. Even when the product is in a powered-off state, simply push up the side recording button to immediately enter recording mode, and push down the recording button to save the recording. This allows for capturing as much information as possible.Easily transfer your recordings to your computer using the USB-C connection, allowing for fast and secure file management
- 【Easy-to-Use】This portable voice recorder is designed with a simple, user-friendly interface featuring a large, easy-to-read LCD screen. The voice-activated recording (VOR) feature makes hands-free operation a breeze. With one-touch recording, users can start or stop recording instantly, even during busy moments. A-B repeat function and password protection ensure that important segments are easily accessible and secure
- 【Portable and Durable Design】Designed with portability in mind, this lightweight screen recorder fits comfortably in your pocket or bag, weighing only 97 grams. Its sleek and durable metal casing ensures longevity and protection from everyday wear and tear. Whether you’re traveling, in the office, or attending a lecture, this compact recorder is always ready to capture clear, high-quality audio
Diagnose the problem before choosing a filter
| What you hear | Best first approach | What it cannot solve |
|---|---|---|
| A constant fan or computer noise | Noise Suppression, using the least aggressive setting that works | A very loud room or severe acoustic contamination |
| Noise only when you are silent | Noise Gate or Expander | Noise that continues while the gate or expander is open |
| Quiet words followed by very loud words | Compressor, followed by careful output-level adjustment | A badly positioned or over-amplified microphone |
| Sudden peaks, shouting, or clipping | Limiter as the final filter | Persistently excessive input gain |
| Keyboard, breathing, or mouth noise | Physical repositioning, an Expander, and possibly mild suppression | Sounds that are as loud as the voice and occupy the same recording |
Listen to the unprocessed microphone first. This tells you whether the main issue is steady noise, between-phrase noise, inconsistent speech volume, or clipping. It also prevents adding filters to solve a problem that should be fixed with microphone placement or gain.
A practical OBS filter chain
A useful teaching sequence is:
- Noise Suppression for mild, relatively steady background noise.
- Noise Gate or Expander for sound below the speech level.
- Compressor for inconsistent speech volume and occasional loud peaks.
- Limiter as the final protection against excessive peaks.
This is not a mandatory preset. In particular, an Expander is commonly placed after compression but before a Limiter in OBS’s guidance, while a Limiter should be last. The best order for a particular production can depend on the rest of the signal path, but the important rule is to understand what each filter is doing and test one change at a time.
Noise Suppression: reduce steady background noise
OBS calls this filter Noise Suppression; some tutorials refer to it as “noise removal.” It is intended for mild background or white noise, such as a computer fan. Start with the least aggressive setting that reduces the problem.
OBS documents these methods:
- RNNoise: generally higher quality, but more CPU-intensive.
- Speex: provides a configurable suppression-level control.
- NVIDIA Noise Removal: appears when the NVIDIA Broadcast SDK redistributable is installed. It is not universally available, and its appearance should not be treated as proof that every OBS user needs NVIDIA hardware.
Increase suppression only while the voice remains natural. Excessive processing can make speech sound watery, metallic, muffled, or artificial. If you hear those artifacts, reduce the suppression and address the source of the noise instead.
Noise Suppression cannot reliably rescue a loud room, a microphone beside a fan, or severe keyboard and household noise. Moving the microphone closer to your mouth, lowering its gain, turning away from the noise source, and improving the room are often more effective than adding stronger processing.
Noise Gate: silence the microphone between phrases
A Noise Gate closes the microphone when the input falls below a threshold. It is useful when you want near-silence between speech segments and your voice is consistently louder than the room noise. It does not remove background noise while you are talking: when the gate is open, that noise remains.
Noise Gate controls
- Close Threshold: below this level, the gate closes. Set it above the normal noise floor.
- Open Threshold: the input level required to open the gate. Set it slightly below the level of your voice.
- Attack: how quickly the gate opens after speech crosses the open threshold.
- Hold: how long the gate stays open after the signal falls below the threshold.
- Release: how quickly the gate closes after the hold period.
OBS’s documented defaults are a Close Threshold of −32 dB, Open Threshold of −26 dB, Attack of 25 ms, Hold of 200 ms, and Release of 150 ms. Treat these as software defaults, not as a guaranteed voice preset.
Quick wins for a faster PC:
Scan for outdated or missing drivers - takes under a minuteDriver Scan →Clear out junk files and repair common Windows errorsFree Scan →Fix the driver behind crashes, sound loss and screen glitchesFind Drivers →If quiet words or initial consonants disappear, lower the open threshold. If the ends of words sound chopped, increase hold or release. If the room opens and closes audibly around every syllable, the threshold may be too close to the voice level, the release may be too short, or an Expander may be a better choice.
Expander: a smoother alternative to a hard gate
An Expander reduces the level of signals below a threshold instead of cutting them off completely. This produces a more gradual transition than a gate and can be useful for computer fans, keyboard and mouse clicks, breathing, and unwanted mouth sounds.
Important Expander controls
- Ratio: controls how much the signal is reduced below the threshold. A ratio of 2:1 is a light starting point; higher ratios can approach gate-like behavior.
- Threshold: the level at which gain reduction stops. Sounds below it are reduced.
- Attack: how quickly the expander opens once the signal exceeds the threshold. OBS recommends starting around 5–10 ms.
- Release: how quickly it closes after the signal falls. OBS recommends starting around 50–120 ms.
- Detection: RMS averages the input over the last 10 ms and generally detects more smoothly; Peak reacts faster to level changes.
OBS typically places the Expander after compression or other effects but before the Limiter. That is useful guidance rather than an unbreakable rule for every custom chain. Use a conservative ratio first, then increase reduction only if the remaining room sound is distracting.
Also popular on Amazon

- 9800 Hours Audio Storage: The digital voice recorder offers an enormous capacity with an impressive 128GB TF card to expand the memory for storing up to 9800 hours of audio files (at 32kbps). A perfect tool for reliably storing worth of audio files, making it an excellent choice for professionals, works, journalists, and anyone who needs to record and store lectures, meetings, and interviews
- AI - Intelligent Noise Cancellation: Recorder with AI Intelligent Triple Noise Cancellation. Equipped with Triple Intelligent Digital Noise Reduction technology and intelligent AI DSP 4.0 chip, it automatically and optimally identifies ambient sounds for clearer vocals! The best partner for office and study~
- One Touch Recording: No complicated operation process, just turn on the switch with one touch to turn on the recording! It's very easy to use. It also comes with an instructional video and a concise user manual with clear step-by-step instructions.
- Voice Activation And USB-C Connection: The Digital Voice Recorder has a voice activation feature that automatically starts recording when sound is detected. It also comes with a convenient bundle that includes a clip-on microphone, headphones, OTG-C, OTG-Lighting, and a USB-C cable.The USB-C connection cable allows for quick transfer of recordings to a computer (MAC/PC) or its other mobile devices.
- Large Memory Storage And Long Battery Life: The digital voice activated recorder with playback,128GB RAM,can store up to 9800 hours (300 days) of audio recordings that are time and date stamps,the audio recorder can also be used as an MP3 player or USB flash drive. Its Built-in rechargeable battery supports up to 100 hours continuous recording and 100 hours of headphone playback on fully charge. Tips: When the battery power is low, the recording file will be automatically saved and the device shut down.
Noise Gate or Expander?
- Choose a Noise Gate when you want the microphone almost silent between phrases and your speech reliably sits above the noise.
- Choose an Expander when you want the room reduced more gradually and want to avoid an obvious on/off effect.
Neither filter can separate two sounds that are similarly loud and mixed together. If a keyboard click is as loud as your voice, the solution is usually positioning, quieter equipment, physical isolation, or editing—not a more extreme threshold.
Compressor: control loud and quiet speech
A Compressor reduces signals above a threshold. It is especially useful when the microphone is normally at a reasonable level but you sometimes shout, laugh, become excited during gameplay, or move closer to the microphone. Compression can make speech more consistent and reduce the chance that peaks exceed 0 dB and clip.
OBS’s documented default values are a 10:1 ratio, −18 dB threshold, 6 ms attack, 60 ms release, and 0 dB output gain. These are defaults, not a recommended voice preset.
Compressor controls
- Ratio: determines how strongly levels above the threshold are reduced. Higher ratios produce stronger control.
- Threshold: the level at which compression begins.
- Attack: how quickly full gain reduction is reached after the signal exceeds the threshold.
- Release: how quickly gain reduction returns to zero after the signal falls.
- Output Gain: can restore average loudness lost through compression, but also raises the overall signal and can cause clipping if used carelessly.
If compression sounds like pumping, reduce how aggressively it is working or adjust attack and release. If the voice is still jumping from very quiet to very loud, the threshold, ratio, microphone distance, and gain may all need attention. Compression does not fix a noisy recording; it can make background noise more noticeable by changing the level relationships.
Use sidechain compression to lower desktop audio
OBS also supports sidechain or ducking compression. Select the microphone as the sidechain source for desktop audio, and desktop audio can be reduced while you speak. OBS provides a starting example of 32:1 ratio, −36 dB threshold, 100 ms attack, 600 ms release, and 0 dB output gain, with the microphone as the sidechain source.
Those values are only a starting point. Adjust them to the game, music, and voice levels in your stream. Excessive ducking makes the game or music disappear; insufficient ducking leaves speech difficult to understand.
Limiter: the final peak-safety stage
A Limiter is a special type of compressor with a very fast attack and high ratio. It prevents the signal from exceeding a selected level and should be the last filter in the chain.
Use it as protection against an unexpected shout or transient—not as a substitute for sensible microphone gain, appropriate compression, or physical noise control. If the Limiter is constantly reducing the signal, the upstream level or dynamics need attention. Lower the microphone gain or revise the compressor rather than relying on permanent limiting.
Calibrate OBS microphone filters step by step
- Select the correct input. In OBS, confirm that the intended microphone is selected and that the Audio Mixer meter responds when you speak.
- Record the untreated signal. Speak normally, whisper, say a few consonant-heavy words, laugh or raise your voice, and remain silent for several seconds.
- Identify the dominant problem. Decide whether it is steady noise, noise between phrases, inconsistent volume, or clipping.
- Add one filter at a time. Start with Noise Suppression for mild steady noise, a Gate or Expander for between-phrase noise, a Compressor for dynamics, and a Limiter last.
- Use conservative settings first. Make the smallest adjustment that solves the problem. Avoid copying thresholds from another creator whose microphone, room, and gain are different.
- Test a local recording. OBS recommends testing settings before going live. Listen back through headphones or speakers rather than relying only on the live meter.
- Check natural speech. Listen for missing consonants, cut-off word endings, pumping, watery or metallic suppression, muffling, and sudden loudness changes.
- Recheck after changing microphone position or gain. Any change in distance, input level, room noise, or microphone orientation can make earlier thresholds unsuitable.
Physical setup still matters more than extreme processing
OBS filters process the audio that reaches the computer; they cannot undo every problem created before that point. Place the microphone close enough for a strong voice signal, but aim it away from fans and other noise sources. Reduce input gain if the microphone is over-amplifying the room, and avoid placing it directly on a vibrating desk.
Crashes, No Sound, or Screen Glitches?
Random freezes, missing sound and display glitches usually trace back to one bad driver. Find and replace yours safely.Free scan · under a minuteWindows Errors? Fix Them Before They Spread
Repair common Windows errors and clear accumulated junk for a smoother, more stable PC - no reinstall needed.Free scan · no reinstallIf your current microphone works and can be positioned properly, you do not need to buy a new one just to use OBS filters. If the physical input is the limiting factor, an optional USB microphone for streaming can provide a more suitable source for these filters. A microphone boom arm may help position the microphone closer to you and farther from a keyboard or desk vibration, while a microphone pop filter or foam windscreen can help with plosives, breath, and some mouth noise. These are optional setup aids, not OBS requirements, and the result depends on the room and technique rather than a particular brand or model.
Independent reader supportYour contribution helps us test, update, and keep practical guides available for everyone.Common mistakes and fixes
Using Noise Suppression to remove a loud room
Strong suppression often produces artificial speech without eliminating the underlying noise. Reduce the suppression, move the microphone, lower its gain, and address the fan or room source.
Also popular on Amazon
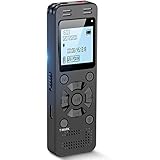
- Clear PCM Recording: Adopts upgraded noise cancelling microphone with professional recording chip. Capture 1536Kbps premium quality sound. Voice recorder with playback function, which is well designed for the users to easily access. Customer Service includes real life phone call from a specialist to give instructions on this high-quality recording device. We ensure your satisfaction on this product.
- 128GB Digital Recorder, Computers Compatible: stores 9296hours of recording, or 40,000songs, up to 54 hours of continuous recording with full battery. Recording can be pre-set into mp3 128kbps,192kbps, or wav 1536kbps format. A wonderful voice recording device for lectures, meetings, and conversations.
- Voice Activated Recorder: This recorder device can set voice decibels at 6 different levels. Regardless the level of the volume, with correct voice decibel level, this recorder will catch talking voice only, reduce blank and whispering snippet.
- Powerful Feature: Multi-usage as a voice recorder, an USB flash drive, and a Mp3 Player. Newly developed 4-folder storage(A/B/C/D) for file management make your recording and other files more organized. Many other helpful features like password protection, A-B repeat, auto record, bookmark, ideal recorder for lectures, meetings, speeches, and interviews.
- Fast File Download: V618 can easily transfer files onto computers. A rechargeable voice recorder that can be quickly recharged, suit for students, teachers, seniors, businesspeople, writers, and bloggers
Setting the Noise Gate open threshold too high
Quiet words, sentence beginnings, and consonants may vanish. Lower the open threshold slightly and test soft speech, not only normal-volume speech.
Expecting a gate to remove noise during speech
A gate is open while you speak. Use better positioning or mild suppression for noise that remains under the voice.
What’s actually slowing this PC down?
Pick the symptom - the matching free tool is one click away.
Putting the Limiter first
The Limiter is intended as the final safety stage. Place it last so later processing does not create new peaks beyond its ceiling.
Raising compressor output gain too far
Output gain can restore loudness after compression, but too much can push the signal into clipping or make the Limiter work constantly. Recheck the meter and recording after every gain change.
Changing several filters at once
You will not know which setting caused a watery voice, chopped words, pumping, or excessive loudness. Reset or bypass the chain, then add and test each filter separately.
OBS microphone filter checklist
- Microphone input selected and visible in the Audio Mixer.
- Untreated recording made before processing.
- Noise Suppression used only for mild, steady noise.
- Gate thresholds tested with quiet speech and word endings.
- Expander considered when a hard gate sounds unnatural.
- Compressor adjusted for actual speaking dynamics, not copied blindly.
- Limiter placed last and not reducing the signal constantly.
- Local recording reviewed before streaming or publishing.
- Microphone placement and gain corrected before adding extreme processing.
OBS Studio’s download page and filter behavior can change over time. If you publish version-specific instructions, verify the current release immediately before publication; otherwise, use the filter names and workflow above while allowing for minor release differences.
Recommended Free Tools
Frequently Asked Questions
What is the difference between Noise Suppression and a Noise Gate in OBS?
Noise Suppression is for mild, relatively steady background noise such as a computer fan. A Noise Gate closes the microphone when the signal falls below a threshold, so it primarily reduces noise between phrases. It does not remove noise while you are speaking.
Should I use an OBS Noise Gate or Expander?
Use a Noise Gate when you want near-silence between phrases and your voice is reliably louder than the noise. Use an Expander when you want a smoother reduction that does not create an obvious on/off effect.
What is the best OBS filter order for a microphone?
A practical starting sequence is Noise Suppression, Gate or Expander, Compressor, and Limiter. However, this is not a universal preset. Add only the filters that solve an audible problem, and test them with your microphone and room.
Should a Limiter always be working in OBS?
No. If the Limiter is constantly reducing the microphone signal, lower the input gain or revise the compressor and upstream levels. A Limiter is a final safety stage, not a replacement for correct gain staging.
Free tools Windows power users keep installed
One-click scans. No signup required.
The Bottom Line
Start with the problem, not a preset: use mild Noise Suppression for steady noise, a Gate or Expander for silence between phrases, a Compressor for uneven speech, and a Limiter last for peak protection. Calibrate one filter at a time in a local recording, and fix microphone placement or gain before relying on aggressive processing.

