
iTechGuides is reader-supported. When you buy through links on our site, we may earn an affiliate commission. As an Amazon Associate I earn from qualifying purchases. Learn more
To unlock a relic in Black Ops 7 Zombies, complete the map’s Main Quest requirement, perform that relic’s hidden side objective, enter the green Relic Portal, and finish its dedicated trial. The side objective and trial must be completed in one sitting because relic progress is not saved. Each first clear awards 1,000 XP and one GobbleGum.
There are 30 relics across five Round-Based maps. Relics are selectable Cursed-mode debuffs rather than permanent upgrades: Grim contributes one third of a Cursed Tier, Sinister contributes two thirds, and Wicked contributes one full tier. The route below lists every round gate, setup requirement, trial rule and conflict, then gives an efficient order for completing the collection.
How the relic system works
Every relic follows the same four-part loop:
- Meet the map and difficulty gate. This can include a minimum round, a Cursed Tier, a Main Quest completion or a specific item.
- Perform the hidden side objective. The exact trigger is different for every relic.
- Enter the green Relic Portal. It appears after the side objective is completed correctly.
- Clear the relic trial. The trial has its own enemy waves and restrictions.
The side objective and trial are a single run of work. Leaving the match, failing the trigger or ending the session does not preserve partial relic progress. You can equip relics from a map only after that map’s Main Quest has been completed. Once inside a trial, equipped relic effects are switched off, so Cursed modifiers cannot be used to bypass the trial’s restrictions.
The first completion of each relic trial gives 1,000 XP and a GobbleGum. Replays are useful for practice, but the first-clear reward is the one tied to the unlock.
#1 Best Overall

- 【Strong Adsorption】The inspiration of the silicone phone suction case comes from the adhesive force of the octopus. Each suction cup phone mount is 3.15 inches long and 2.17 inches wide, with 24 independent suction cups providing a stronger and more stable suction force, so you don't have to worry about your phone falling during use.
- 【Back of Phone Suction Grip】Remove the adhesive film on the phone suction cup and stick it on the phone case. You can then fix the phone on any smooth surface, which is very convenient. (The phone suction cup cannot be removed and reused after being attached to the phone case. It is recommended to attach it to a regular phone case, not a valuable one.)
- 【Widely Used】Our non-slip silicone phone sticky grip mount attaches to almost any flat phone case and make it compatible with common mobile phones such as iPhone and Android.You can shoot, watch videos or video calls in the kitchen, gym, dance studio, bathroom and other places.
- 【Capture the Wonderful Picture】Whether you are a TikTok creator or just like to share videos and photos, this phone suction cup can help you hands-free capture wonderful videos and photos for sharing with friends.
- 【Note】You can fix the phone suction cup on a smooth surface such as a mirror or glass. If necessary, wipe the suction cup with a damp cloth to obtain stronger suction. Before releasing your hand, make sure the phone is firmly fixed. (Not applicable to rough walls, wooden surfaces, and other uneven surfaces)
Cursed tiers and what they unlock
| Relic type | Cursed Tier contribution | Progression benefit |
|---|---|---|
| Grim | One third of a tier | Three Grim relics complete one tier |
| Sinister | Two thirds of a tier | Two Sinister relics complete one tier |
| Wicked | One full tier | Immediately adds a complete tier |
| Tier I | — | Enables Golden Armor for 45,000 Essence |
| Tier II | — | Enables Ultra rarity |
| Tier III | — | Enables Pack-a-Punch IV for 100,000 Essence |
There is no benefit above Tier III. The costs listed for Golden Armor and Pack-a-Punch IV are Essence costs inside the game, not relic-unlock fees.
Before attempting a relic
- Finish the relevant map’s Main Quest if you intend to equip that map’s relics.
- Check the round and minimum Cursed Tier in the checklist below before starting the trigger.
- Bring every named weapon, Field Upgrade, tactical, lethal, perk or quest item. Several triggers fail if the wrong rarity, Pack-a-Punch level or damage type is used.
- Plan enough time to complete the portal trial in the same sitting. Timed trials and multi-wave restrictions leave little room for rebuilding a loadout.
- Write down exact kill counts, phone rounds, wall-buy weapons and sequence orders before beginning. A number of objectives are intentionally irreversible once started.
Ashes of the Damned: all 9 relics
Ashes has the largest group of relics. Its three Grim relics are the quickest way to establish Tier I, after which the Sinister and Wicked gates become practical.
| Relic | Tier and round gate | Side objective and required setup | Relic trial |
|---|---|---|---|
| Lawyer’s Pen (Grim) | Round 20 or later; any tier; Ashes Main Quest completed | Light three candles with Napalm Burst or Molotovs. | Four Shock Mimic waves locked to Vandorn Farm. |
| Dragon Wings (Grim) | Round 20 or later; any tier | Complete the Farm-side trigger. | Four waves in which power-ups damage the player. |
| Teddy Bear (Grim) | Round-20-or-later finish | Find nine dolls, then find the tenth on a round-20-or-later finish. Use the Necrofluid Gauntlet and Aether Shroud. | Each shot costs 100 Essence. |
| Vril Sphere (Sinister) | Round 40 or later; Tier I or higher | Use a jump pad and a Doppelghast. | Five Cosmodrome waves; nothing can be bought. |
| Samantha’s Drawing (Sinister) | Tier I or higher; Ray Gun equipped on round 40 or later | Feed Chompy one gun of each rarity. | Ammo Caches and Max Ammo power-ups are removed. |
| Focusing Stone (Sinister) | Round 40 or later; Tier I or higher | Perform the Zursa melee kill and complete the Legendary T.E.D.D. reward step. | Essence is held until the five-wave trial ends. |
| Bus (Wicked) | Round 60 or later; Tier II or higher | Complete a round without shooting or using melee. | Six waves; only Brain Rot zombies can kill enemies. |
| Dragon (Wicked) | Defeat the Ashes Main Quest boss on round 60 or later; Tier II or higher | Complete the boss requirement at the stated round and tier. | Explosives are the only permitted damage source. |
| Blood Vials (Wicked) | Tier II or higher | Answer five phones on rounds 20, 30, 40, 50 and 60. | Six waves with player damage reduced by half. |
How to handle Ashes’ unusual restrictions
Lawyer’s Pen and Dragon Wings are accessible at round 20 without a tier requirement, making them strong opening targets. Teddy Bear is also Grim, but its doll hunt and tenth-doll finish make it less convenient to combine with another trigger. Collect the nine dolls first, carry the Necrofluid Gauntlet and Aether Shroud, and do not finish below round 20.
For the Sinister relics, reach Tier I before attempting Vril Sphere, Samantha’s Drawing or Focusing Stone. Samantha’s Drawing is especially loadout-sensitive: the Ray Gun must be present at round 40 or later, and Chompy must receive one weapon from every rarity. Focusing Stone’s Essence hold means you should enter its five-wave trial with enough equipment already purchased.
Bus, Dragon and Blood Vials are Tier II, round-60 projects. Bus requires a no-shot/no-melee round before a trial where ordinary kills do not count; arrange Brain Rot conversions deliberately. Dragon is the most direct late-game gate because the Ashes Main Quest boss must be beaten at the required round. Blood Vials has five separate phone rounds, so mark each one as it is completed rather than trying to reconstruct the sequence later.
Rank #2

- SUPERIOR COMFORT — Unlike traditional circular ear buds, the design of EarPods is defined by the geometry of the ear. Which makes them more comfortable for more people than any other ear bud–style headphones.
- HIGH-QUALITY AUDIO — The speakers inside EarPods have been engineered to maximize sound output and minimize sound loss, which means you get high-quality audio.
- BUILT-IN REMOTE — EarPods with USB-C plug also include a built-in remote that lets you adjust the volume, control the playback of music and video, and answer or end calls with a pinch of the cord.
- COMPATIBILITY — Works with all devices that have a USB-C port.
- INTEGRATED MICROPHONE — A built-in microphone precisely captures your voice while you’re on the phone, taking a FaceTime call, or summoning Siri — so you’re always heard loud and clear.
Astra Malorum: all 6 relics
| Relic | Tier and round gate | Side objective and required setup | Relic trial |
|---|---|---|---|
| Gong (Grim) | Round 20 or later | Bring Tesla Storm and Dead Wire. | Electric damage only. |
| Seed (Grim) | Round 20 or later | Use the Common pistol and complete the exact kill count. | Only a Tier-1-Packed pistol may be used. |
| Spider Fang (Sinister) | Round 40 or later; Tier I or higher | Preserve the first O.S.C.A.R., use Wisp Tea, perform a melee kill and use Aether Shroud. | Perks are disabled. |
| Matryoshka Doll (Sinister) | Round 40 or later; Tier I or higher; Mars must be open | Use C4. | Enemies can die only while the Field Upgrade is active. |
| Golden Spork (Wicked) | Round 60 or later; Tier II or higher; Mars must be open | Bring a Mangler Cannon and a Monkey Bomb or Decoy. | Hip-fire only. |
| Civil Protector Head (Wicked) | Round 60 or later; Tier II or higher | Use Energy Mine and PhD Flopper. | Every zombie sprints for all six waves. |
Gong and Seed are efficient Grim targets for a new Tier I run. Seed’s Common-pistol requirement applies to the trigger, while the later trial changes the allowed weapon to a Tier-1-Packed pistol; prepare both stages rather than assuming the same weapon state carries through.
Spider Fang combines several precision requirements: do not kill the first O.S.C.A.R., bring Wisp Tea, use the melee kill and activate Aether Shroud. Because perks are disabled in the trial, do not rely on perk-based survivability. Matryoshka Doll requires Mars to be open and has a Field Upgrade damage condition, so charge the Field Upgrade before entering the portal. Golden Spork and Civil Protector Head are round-60, Tier-II objectives; Golden Spork’s hip-fire rule makes a Mangler Cannon and a Monkey Bomb or Decoy more valuable than a precision weapon.
PC Slower Than It Used to Be?
A free scan shows the junk files, broken settings and background clutter dragging Windows down - then fixes them in one click.Free scan · Windows 10 & 11Outdated Drivers Are Slowing You Down
One free scan finds every outdated or missing driver and matches the right update for your exact hardware.Free scan · exact hardware matchKowakujō: all 6 relics
| Relic | Tier and round gate | Side objective and required setup | Relic trial |
|---|---|---|---|
| Gramophone (Grim) | No additional round or tier gate stated | Complete the drumstick memory sequence. | Sniper rifles only. |
| Druid Stone (Grim) | Reach round 20 without taking damage | Complete the no-damage round requirement. | Damage is allowed only while overhealed. |
| Valkyrie Helmet (Sinister) | Tier I or higher; before round 40 | Complete the Nekomancer, upgraded Maneki-Neko and Neko Cafe steps. | Every reload hurts. |
| Film Reel (Sinister) | Tier I or higher; no round gate | Pack ten different guns. | Scorestreaks only. |
| Dragon Egg (Wicked) | Tier II or higher | Solve the murder, charge the Path of Sorrows and complete six objectives before the Nyxara fight. | Restrictions are imposed by the dedicated trial after the Nyxara-side sequence. |
| Mannequin Turret (Wicked) | Round 60 or later; Tier II or higher | Lose no Assault Wave flag. | Regeneration is disabled during the waves. |
Gramophone’s memory sequence is the entry-level Kowakujō trigger, but its trial permits sniper rifles only. Druid Stone is a precision survival challenge: reaching round 20 is not enough if you have taken damage, and the trial then permits damage only while overhealed.
Valkyrie Helmet must be completed before round 40 and requires the full Nekomancer, upgraded Maneki-Neko and Neko Cafe chain. Its trial punishes every reload, so use a weapon plan that minimizes magazine changes. Film Reel has no round gate, but packing ten different guns is the key preparation; the portal trial then allows Scorestreaks only.
Dragon Egg requires a long quest chain rather than a stated round threshold: solve the murder, charge the Path of Sorrows and finish six objectives before the Nyxara fight. Mannequin Turret is a late Tier-II objective tied to Assault Wave flags and a no-regeneration trial.
Rank #3

- Secure Hold: Our PopSockets adhesive phone grip gives your cell phone a secure, comfortable hold in hand to help prevent drops while texting, taking photos, or scrolling on the go. Designed to stick firmly to most phone cases and devices.
- Hands-Free Made Easy: Easily turn your PopSocket into a phone stand to prop up your phone anywhere, perfect for watching videos, video calls, or following recipes. A must-have phone holder that keeps your device secure and ready for anything.
- Compatibility: Works with all phones, tablets, and Kindles. Sticks best to smooth, hard plastic cases and may not adhere to silicone or textured cases. Easily swap your PopTop to change up your style.
- Black PopSockets: Simple, refined, and endlessly versatile. A timeless essential for any phone.
- Travel Must-Have for People On the Go: A must-have travel accessory for flights, flying, airports, air travel, airplanes, planes, international trips, cruises, and long travel days. Key gadget for your airport haul, travel accessories and must-haves.
Kowakujō conflict
Run Valkyrie Helmet and Mannequin Turret separately. Their triggers conflict, so attempting both in one match can invalidate one of the objectives even if the round and tier requirements are met.
Paradox Junction: all 3 relics
| Relic | Tier and round gate | Side objective and required setup | Relic trial |
|---|---|---|---|
| Rocket (Grim) | Round 20 or later; any tier | Use Brain Rot or a Psych Grenade and a D.A.W.G. | Enemies die only to their elemental weaknesses. |
| Summoning Key (Sinister) | Finish on round 40 or later; Tier I or higher | Use a grenade, a Rad-Hound and a deliberate down. | Five timed waves. |
| Mangler Helmet (Wicked) | Round 60 or later; Tier II or higher | Complete the knife trigger with Mister Peeks Field Upgrade and two box Peeks. | Six waves with no armor plates and half health. |
Rocket is a flexible Grim target because it accepts any tier once round 20 is reached, but the trial’s elemental-weakness rule means a general-purpose damage setup is unreliable. Summoning Key deliberately requires a down before its five timed waves; treat that down as part of the trigger rather than an accidental failure. Mangler Helmet is a late Tier-II run with two box Peeks and Mister Peeks Field Upgrade, followed by six waves that remove plates and halve health.
Totenreich: all 6 relics
| Relic | Tier and round gate | Side objective and required setup | Relic trial |
|---|---|---|---|
| Power Switch (Grim) | Any round; any tier | Scope four out-of-map deer-head statues, match their pelt positions, then throw a Combat Axe from fewest to most. | Three waves; traps are the only damage source. |
| Wrestler’s Belt (Grim) | Any round; any tier | Before picking up the Jötunn Star, take the hidden magazine. Record 50 kills with each of 17 wall-buys and with the Star. | Four waves; the weapon available changes after each wave. |
| Stuffed Elephant (Sinister) | Round 40; Tier I or higher | Buy no perks until round 40. | Four eggs and four HVTs under a three-minute clock. |
| Dancing Arnie (Sinister) | Fish trigger at 40 or later (the trigger window is recorded as 39+/41+); Tier I or higher | Prepare the pot, beer, Chilly Chunks, lobster, red fish and Jötunn Star. | Five waves; melee only. |
| Agarthan Device (Wicked) | Quest begins at round 15 or later; Tier II or higher | Play as Richtofen, collect three items and complete the castle chain. | Damage works only indoors. |
| Music Box (Wicked) | Round 60 or later; Tier II or higher | Get five critical kills from Tyr’s Head. | Six timed lockdowns. |
Power Switch is the least restrictive Totenreich gate, but its statue-and-axe sequence is order-sensitive: identify the pelt positions first, then throw from the statue with the fewest matching pelts to the one with the most. The trial permits traps as the sole damage source.
For Wrestler’s Belt, take the hidden magazine before picking up the Jötunn Star. Then log 50 kills with every one of the 17 wall-buy weapons and 50 with the Star. Its four-wave trial changes which weapon is available after each wave. This was recorded as the final relic solved on 16 October 2026.
Stuffed Elephant’s no-perk rule lasts until round 40, after which the trial gives only three minutes to handle four eggs and four high-value targets. Dancing Arnie has a fish trigger at 40 or later, with the documented trigger window expressed as 39+/41+; prepare the pot, beer, Chilly Chunks, lobster, red fish and Jötunn Star before committing. Its melee-only trial is separate from the preparation sequence.
Quick wins for a faster PC:
Clear out junk files and repair common Windows errorsFree Scan →Fix the driver behind crashes, sound loss and screen glitchesFind Drivers →Rank #4

- [360 ° Flexible Rotation Design] Comes with a rotatable lanyard ring that supports 360 ° free rotation, effectively solving the problem of twisted and tangled lanyards
- [Wide compatibility] The ultra-thin 0.02-inch design does not block the charging port at all, and both wired and wireless charging can be used directly without removing the pad. Compatible with most smartphones such as iPhone, compatible with various wristbands, lanyards, crossbody straps, and keychains
- [Durable and Portable Material] Premium rust-resistant stainless steel material with good flexibility, which not only avoids scratching the phone case, but also has excellent anti rust and anti fading performance
- [Multi scenario Practical] Paired with a lanyard or wristband, hands-free use can be achieved. The phone is within reach and not easily dropped, ideal for daily commuting and outdoor activities. Suitable for full coverage phone cases, does not support half coverage phone cases
- [Quality Service] If you find any damage or other issues with the product upon receipt, please contact us immediately. We will handle it quickly
Agarthan Device starts its quest at round 15 or later and requires Richtofen, three collected items and the castle chain. Inside its trial, damage works only indoors, so do not chase enemies into exterior areas. Music Box is a Tier-II, round-60 objective based on five critical kills from Tyr’s Head, followed by six timed lockdowns.
Totenreich conflict
Keep Dancing Arnie separate from any run where you are managing the Jötunn Star’s Chilly Chunks order. The two preparation sequences can conflict, so a clean dedicated run is safer than trying to combine them.
Independent reader supportYour contribution helps us test, update, and keep practical guides available for everyone.An efficient route through all 30 relics
- Start with three Grim relics on Ashes. Lawyer’s Pen and Dragon Wings are available from round 20 at any tier. Teddy Bear is another Grim option if you are prepared for the doll hunt, Necrofluid Gauntlet and Aether Shroud. Three Grim relics provide the first full Cursed Tier.
- Use Tier I for Sinister relics. Astra’s Spider Fang or Matryoshka Doll, Kowakujō’s Valkyrie Helmet or Film Reel, Totenreich’s Stuffed Elephant or Dancing Arnie, and Ashes’ Vril Sphere, Samantha’s Drawing or Focusing Stone all use Tier I gates. Choose the map whose required item set you already have.
- Add a Wicked relic to reach Tier II. Wicked relics contribute a full tier. Ashes’ Dragon, Astra’s Golden Spork or Civil Protector Head, Kowakujō’s Dragon Egg, Paradox Junction’s Mangler Helmet, or Totenreich’s Agarthan Device are possible next steps, subject to their map, round and quest requirements.
- Reserve round-60 runs for the late gates. Ashes’ Bus and Blood Vials, Astra’s Golden Spork and Civil Protector Head, Kowakujō’s Mannequin Turret, Paradox Junction’s Mangler Helmet and Totenreich’s Music Box require Tier II and round 60 or later. Dragon also requires the Ashes Main Quest boss at that round.
- Separate conflicting objectives. Do not pair Valkyrie Helmet with Mannequin Turret. Keep Dancing Arnie separate from the Jötunn Star’s Chilly Chunks order. Separating them costs a run but avoids losing a long trigger chain.
This route is not the only valid order. Power Switch, Wrestler’s Belt and Gramophone have no additional round-and-tier gate beyond their map requirements, while Rocket is available from round 20 at any tier. Use those flexible Grim relics when a specific map setup is more convenient.
What to do when a relic portal does not appear
Check the map quest and tier
Confirm that the map’s Main Quest has been completed and that the round and Cursed Tier match the relic’s gate. A correct side objective performed below the required round or tier will not produce the portal.
Recommended Free Tools
Recheck the exact item or damage condition
Common failure points include using a non-Common pistol for Seed, missing the Ray Gun requirement for Samantha’s Drawing, forgetting Mars for Matryoshka Doll or Golden Spork, using the wrong Field Upgrade, and attempting a trigger without the named quest character or item. Review the table before restarting the sequence.
Best Value
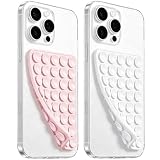
- 【PKYAA Double Sided Silicone Suction Phone Case Mount】PKYAA With Double Sided 40 Strong and Reliable individual suction cups, PKYAA provides a thicken and upgraded universal silicon suction mount for your phone.
- 【Friendly to Content Creators】If you are a content creator or an online influencer, you can create videos anywhere with this suction mount completely hands free with this silicone cell phone mount for cases.
- 【HANDS-FREE & Adhere to Mirrors】This Double Sided silicone suction phone case mount allows you to stick your phone to the mirror easily. No longer holding your phone in one hand to watch video tutorials while making up.
- 【Strong Grip on the Smooth Surface】You can easily hang your phone anywhere with a smooth surface. All you do is you clean off your phone and smooth surface. It is STURDY and it not only sticks to mirrors, it also sticks to windows, it sticks to refrigerators, tiles and other clean, flat surfaces.
- 【Press Down Firmly Every 30 Minutes】Use your palm or fingers to press the phone down firmly and check it's secure before letting go. Apply even pressure for a few seconds to allow the suction cup to adhere properly. To maintain the grip and prevent accidental falls, it's a good practice to periodically reapply pressure to the suction cup.
Assume partial progress was lost
Relic progress is not saved. If the portal fails after a mistake, leaving the match and trying to resume later will not restore the side objective. Start the trigger again in a fresh, properly prepared run.
Remember that the portal trial is independent
Relic effects are disabled inside the trial. Restrictions such as electric-only damage, hip-fire only, no perks, no plates, no regeneration or traps-only damage must be satisfied inside the portal even if the trigger outside it was completed with a different loadout.
What you get for collecting all 30
Current guides report that completing the full 30-relic collection unlocks the Best Friends animated camo, five GobbleGums—Perkaholic, Armor Gettin’, Gift Card, Near Death Experience and Wonderbar!—and 30,000 XP.
The cosmetic name is reported rather than confirmed in Activision’s official material located for this challenge. Check the in-game challenge tracker when the final relic is cleared; it is the authoritative place to verify whether the camo and reward bundle has been granted on your account.
How common is Cursed mode?
Activision reported in 2026 that 33% of Zombies players had tried Cursed at least once, while 41% of all Cursed matches were being played at Tier III difficulty. The official editorial team also wrote, “It’s been awesome to watch the community hunt for Relics across both of our current Round-Based Maps.” Those figures explain why Tier III routes and round-60 trials are common targets, but they do not change any individual relic’s gate.
Quick Recap
Product prices and availability are accurate as of the date/time indicated and are subject to change. Any price and availability information displayed on Amazon at the time of purchase will apply.

