
The Tool Desk
Outbyte Driver Updater FREEFix the driver behind crashes, sound loss and screen glitchesFind Drivers →Outbyte PC Repair FREEClear out junk files and repair common Windows errorsFree Scan →iTechGuides is reader-supported. When you buy through links on our site, we may earn an affiliate commission. As an Amazon Associate I earn from qualifying purchases. Learn more
Playing with friends? Godlike.Host runs hosted ARK: Survival Ascended servers from 10 data-center locations, with free DDoS protection.
To install mods on an ARK: Survival Ascended (ASA) server, add ASA-compatible CurseForge Project IDs to the server’s active-mods list, save, and restart. On a managed host, this is normally a control-panel task; on a self-hosted server, append -mods=ModId1,ModId2 to the startup command. Players then install or accept the required mods in ASA’s in-game Mods browser. The exact panel labels differ by provider, so treat the documented Nitrado workflow below as an example rather than a universal interface.
What do I need before adding ASA mods?
Prepare the server and the mod list before changing settings. The most important distinction is that Survival Ascended uses its own CurseForge projects. An ARK: Survival Evolved mod ID is not interchangeable with an ASA ID; Nitrado explicitly states that Evolved mods do not work on an Ascended server.
Recommended Free Tools
- Confirm that each project is marked for ARK: Survival Ascended, not only for ARK: Survival Evolved.
- Copy the numeric CurseForge Project ID from every mod’s project page. The project ID, not the display name or a URL slug, is what the server option accepts.
- Decide whether the server will run in Crossplay or PC-only mode. The platform mode can affect which players can join and which storage allowance your host applies.
- Have a maintenance window available. A save and restart are required before the server reloads a changed mod list.
Keep a plain-text copy of the IDs in the order you want them loaded. That makes it easier to remove one mod, restore a previous list, or compare the server configuration with a player’s required-mod prompt.
How do I add CurseForge mods to a managed ASA server?
On a managed server, the documented Nitrado process is: choose the platform mode, open the CurseForge Mods settings, enter Project IDs as a comma-separated list, save, and restart. Other hosts may use different names or menus, but the required values are the same.
Popular on Amazon
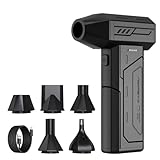
- Powerful Turbo Fan:CAGIWIRU Electric Air Duster have reached speed up to 130000RPM,Can efficient remove dust and debris.With LED light and Three Adjustable Speed to meet with different cleaning tasks.
- With Attached USB C Fasting Charging cable.Charing 3 hours,Enjoy up to 240 minutes of use on the lowest setting, For third speed can use for 25mins.with four charging options to meet with your needs.
- Wide Application: attached 5 different nozzles,making it suitable for a variety of scenes, such as car,pet, pc, keyboards, and other electronic devices. It also serves for office and home clean duster.
- Handy Design & Portable:Cordless air duster electric nozzle is Light weight and small size, design and comfortable to hold and space saving, convenient to carry around. You can put it in your room or inside the car without taking up space.
- Economical &Reusable: Built durable materials with a long-lasting battery,our CAGIWIRU air duster it's a sustainable alternative to disposable air cans.
1. Stop the server or open its management panel
Use the provider’s stop control if the host requires the server to be offline for configuration, or open the server’s settings panel if it supports editing while stopped automatically. Do not assume that a browser tab closing or a normal player logout saves the configuration; use the provider’s explicit save action.
2. Set Crossplay or PC-only mode
In the documented Nitrado interface, open General settings and select Crossplay or PC-only. Save the choice. If the platform mode changes, restart when the panel requests it before continuing, because the server may not apply the new mode until that restart.
What’s actually slowing this PC down?
Pick the symptom - the matching free tool is one click away.
3. Open the CurseForge mod settings
In Nitrado’s documented navigation, go to Settings → CurseForge Mods. A different provider might place this under Mods, Add-ons, or Game settings. Look for a field that identifies the active server mods rather than a field for a player’s local collection.
4. Find each ASA Project ID
Search the provider’s available-mod list, or open the mod’s CurseForge project page and copy its Project ID. Verify the game listed on the project is ASA. If a project offers both game editions, select the ASA project entry and copy that entry’s ID.
5. Enter the IDs in the active-mods field
Enter the IDs as one comma-separated string. For example:
MODID,MOD2ID,MOD3IDUse the exact format shown by the host. The documented Nitrado format has commas between IDs and no spaces. Do not add brackets, quotation marks, line breaks, mod names, or the full CurseForge URL. A single mistyped character can prevent a project from being recognized.
Outdated Drivers Are Slowing You Down
One free scan finds every outdated or missing driver and matches the right update for your exact hardware.Free scan · exact hardware matchWindows Errors? Fix Them Before They Spread
Repair common Windows errors and clear accumulated junk for a smoother, more stable PC - no reinstall needed.Free scan · no reinstall6. Save and restart
Click the panel’s save or apply button, then restart the server. The restart is the point at which ASA reloads the active-mods list. If you change the list later, repeat the same save-and-restart sequence rather than expecting a running session to discover the change.
Also popular on Amazon

- Screen Cleaner is Your Screen’s New Bestfriend! - EVEO is proud to present a screen cleaner that’s perfectly suited for your TV. Meet your new screen cleaner, computer screen cleaner, laptop cleaner, iPad cleaner, Macbook,tv cleaner or any other electronic device. Our screen cleaner spray and wipe along with the included plush microfiber cloth, easily removes dust, fingerprints & other smudges on the screen’s surface. Clean effectively for a streak-free screen
- Gentle on your Screens - Our screen cleaner spray and wipes is compatible to be used even for the most sensitive LCD, LED, CRT, and OLED screens in proper use. Be at ease knowing that this product is compatible with all the major brands: LG, SONY, Samsung, Sharp, iPad, iPhone, Android screens, Kindle, PC monitors - we’ve got you covered! Can be used as LCD screen cleaner, tv cleaner, smart tv screen cleaner, and more
- Premium Super Soft Plush Microfiber Cloth - Included in this efficient screen cleaning kit. This screen cleaner spray and wipe has our signature plush microfiber cloth specially designed to comply with screens and monitors and leave them streak-free. Has been shown to effectively absorbs stubborn stains, zero streaks, and no fiber shedding. Always use this together with our screen cleaner for the best results
- Easy-to-Use Screen Cleaner Kit + microfiber cleaning cloth - The EVEO Screen Cleaning Kit will easily be your new favorite tool when it comes to taking care of the things you love most, quick and easy solution for a streak-free screen. Simply screw on the sprayer gun on the screen cleaner bottle. Spray the cleaning liquid onto the microfiber cloth, then wipe the screen until desired cleanliness & shine is achieved.
- Quality Screen Care Kit Worth Purchasing - Enjoy a convenient Screen Cleaner anytime, anywhere you need it. Your satisfaction is our top priority. We stand behind the quality of our products and that’s why, you shouldn’t be worrying at all. We manufacture the Best Screen Cleaner. and can be used for laptop cleaning kit, laptop screen cleaner, tv screen cleaner for smart tv. MacBook screen cleaner, monitor cleaner or screen cleaner spray for electronic devices with microfiber cleaning cloth
7. Check the join experience
After the server is online, have a player locate it in ASA’s server browser. A modded server should advertise the required mods. A player who lacks one can use the join flow to install missing items, then retry the connection.
Where do I put ASA mod IDs?
For a managed server, put CurseForge Project IDs in the provider’s active-mods field, not in an INI file unless the provider specifically documents that method. For self-hosting, put the same IDs in the server startup option -mods=.
| Server type | Location | Required format |
|---|---|---|
| Managed host | Provider’s CurseForge or Mods panel, usually an “Active Mods” field | MODID,MOD2ID,MOD3ID |
| Self-hosted dedicated server | Startup command or launch script | -mods=ModId1,ModId2 |
The order you enter is the order the server receives. Keep the list stable while troubleshooting: changing several IDs and their order at once makes it difficult to identify which project caused a failure. If your host’s documentation shows a slightly different delimiter rule, follow that host’s rule rather than inserting spaces by habit.
How do I install mods on a self-hosted ASA dedicated server?
The ARK Official Community Wiki documents the -mods=<ModId1>[,<ModId2>...] command-line option. The values are CurseForge Mod Project IDs, and the wiki says the server updates those mods automatically when it starts with the option.
1. Confirm the operating-system requirement
ASA dedicated servers require Windows or a Windows-like environment according to the Official Community Wiki. Native Linux hosting is not supported. If your machine runs another operating system, you need a supported Windows-compatible arrangement before the launch command can work; the mod syntax itself does not remove that operating-system requirement.
2. Make a backup of the launch configuration
Copy the existing launch script or command before editing it. Preserve the executable, map name, and every option already used for networking, saves, and administration. Add the mod option without deleting unrelated arguments.
3. Append the mods option
Add the option to the same command that starts the dedicated server:
Also popular on Amazon

- 【Large size】:Measuring 800 x 300 mm/ 31. 5×12 inches, which is wider and taller than others. Large mouse pad can perfectly fit your keyboard and mouse of any size, and there is also ample space for peripherals such as phones, tablets, etc.
- 【LED backlight mouse pad】:Blade Hawks RGB mouse pad provides 7 static modes and 7 dynamic modes will give you the options you are looking for. Power-off memory function remembers the last lighting mode you selected. The super glow fiber Chroma will give you a colorful gaming setup that you want.
- 【Anti-slip rubber base】:Made from Natural rubber, this gaming mousepad will firmly grip your desktop, allowing you to enjoy the ultimate precision in the games you are most passionate about. It also comes with a texture that enhances this ability even further.
- 【Smooth and waterproof surface】: Micro-textured cloth surface, for extremely precise mouse control and a smooth movement. When liquid splashes on the gaming mouse pad, it forms water droplets and slides down. Will not delay your work or gameplay.
- 【Plug and play】: This mouse and keyboard pad is powered by USB, plug and play, no driver required. One button control light modes. Press one time to change the lighting mode, press twice to change the brightness, press and hold about 3 seconds turn ON/OFF.
-mods=ModId1,ModId2,ModId3Replace each example value with an ASA CurseForge Project ID. Keep the option as one argument. Do not put spaces after commas unless the launch syntax supplied by your environment explicitly requires them; the documented form is a continuous comma-separated list.
4. Start the server and allow the update pass
Launch the server normally. The wiki’s documentation says mods update automatically at startup when this option is present, so the first start after adding a project can take longer than a normal restart. Let that startup finish before deciding that a mod failed to load.
5. Verify the command on every restart
Because the list lives in your script or service definition, a later change to the executable, map, or launch wrapper can accidentally remove it. Keep the -mods= argument in the managed startup configuration and use the same ID spelling each time.
How do players install and activate ASA mods?
CurseForge support says ASA is not supported in the CurseForge desktop app; ASA mods are downloaded in-game. Players should use ASA’s own Mods menus rather than trying to install the server’s projects through the separate CurseForge application.
Free tools Windows power users keep installed
One-click scans. No signup required.
Install from the in-game browser
- Open ASA and select Mods list.
- Choose Browse mods.
- Find the required project and select Install.
- Open Mod settings and activate the installed mod.
The install step downloads the project to the client; activation makes it available to the game. A player can have a mod installed but still need to enable it in Mod settings.
Join a server that has required mods
When a player selects a modded server, the server browser displays its required mods. CurseForge’s support guidance says the player can click Join and use the prompt to install missing mods. After installation completes, the player can continue the join process instead of manually hunting for every project first.
Players should compare the displayed required list with their installed versions if a join attempt fails. The server and client need compatible ASA projects; an ASE-only project cannot be made compatible by installing a similarly named item.
Do these 3 things before closing this tab:
1Scan for outdated or missing drivers - takes under a minute2Clear out junk files and repair common Windows errors3Fix the driver behind crashes, sound loss and screen glitchesAlso popular on Amazon

- 【Softer and More Comfortable】Vaydeer wrist rest has unique diamond pattern, which is the combination of softness and aesthetics. The materials of wrist rest are improved into higher quality memory foam and covered with silky smooth lycra. The computer wrist rest makes you as comfortable and cushiony as like rest your wrists on clouds.
- 【Ergonomic Wrist Saver】The wrist rests for keyboard and mouse comes with a 17.32×3.15×0.83 inch keyboard wrist pad and a 5.94×3.15×0.83 inch mouse wrist support. Based on ergonomic design, the unique concave shape is the perfect fit for your wrist joints. The wrist rest pad fits most computer keyboards and laptops, improve hand and wrist posture, release your wrist and arm stress.
- 【Non-Slip Rubber Bottom】Featuring an anti-skid silicone base on the bottom, this wrist keyboard support stays firmly in place on your desk, preventing the padding from sliding around, ensuring stable and consistent wrist support during extended computer sessions.
- 【Better Experience & Pain Relief】Our keyboard arm rest is beneficial to alleviate the soreness caused by direct contact and friction between your arm and a hard desk surface, reducing the risk of wrist fatigue or carpal tunnel. The soft texture of memory foam can evenly distribute the pressure around your wrists and provide good support with just enough give.
- 【Helpful in Multiple Scenarios】Whether you're working, studying, writing, typing, gaming, this keyboard and mouse rest combo is an essential accessory to add comfort and support to your hands and wrists. It’s also a great gift for men, women, family, friend, coworker, gamer, teacher, etc.
How do I change settings for an ASA mod?
Only some mods expose server-editable settings. On Nitrado, the documented file path is arksa → ShooterGame → Saved → Config → WindowsServer → GameUserSettings.ini. Use the exact section and key names supplied by that mod’s author.
- Stop the server or use the host’s documented file editor.
- Open
arksa → ShooterGame → Saved → Config → WindowsServer → GameUserSettings.ini. - Paste only the settings documented for that specific mod, in the section the author names.
- Save the file without changing unrelated settings.
- Restart the server so ASA reads the updated configuration.
Nitrado cautions that not every mod supports editable settings. If a project provides no INI instructions, do not invent keys or copy settings from a different mod; an unknown entry may simply be ignored, or it may create a configuration problem that is harder to diagnose.
What is the difference between a managed and self-hosted ASA mod setup?
A managed host trades command-line control for a provider panel, while self-hosting gives you direct control of the launch command and files. The documented workflows differ in update responsibility, platform controls, operating-system requirements, and storage limits.
| Decision point | Managed server | Self-hosted server |
|---|---|---|
| How mods are added | Enter Project IDs in the provider’s CurseForge or Mods panel. | Add -mods=ModId1,ModId2 to the startup command. |
| Control style | Control-panel convenience; the host determines available fields and menus. | Command-line and file-level control over the launch configuration. |
| Updates | The provider’s panel and server restart apply the list; update behavior depends on that provider’s implementation. | The Official Community Wiki documents automatic mod updates when the server starts with -mods. |
| Platform mode | The documented panel offers Crossplay and PC-only choices in General settings. | You manage the platform and launch options in your own server environment. |
| INI access | Use the host’s file manager or editor; Nitrado documents the WindowsServer path above. | Access the server files directly in the supported Windows or Windows-like environment. |
| Operating system | The provider supplies the supported server environment. | You must provide Windows or a Windows-like environment; native Linux is not supported for ASA dedicated servers. |
| Storage policy | The provider may impose a plan or platform-specific mod allowance. | Capacity is determined by your disk and server environment, subject to the game and host system. |
Choose managed hosting when you want a graphical workflow and do not want to maintain the server environment. Choose self-hosting when you need direct access to launch arguments, files, and update timing and can maintain a supported Windows-based setup.
Quick wins for a faster PC:
Fix the driver behind crashes, sound loss and screen glitchesFind Drivers →Repair Windows errors before they cause bigger problemsFix Now →How much storage do ASA mods use on a hosted server?
Nitrado’s 2023 documentation lists different installed-mod allowances by platform mode. These are dated vendor figures, not a universal ASA limit, so check the current limits shown by your provider before building a large collection.
| Platform mode | Documented installed-mod allowance | Qualification |
|---|---|---|
| Crossplay | 20 GB | Nitrado figure published in 2023. |
| PC-only | 50 GB | Nitrado FAQ wording: “For PC-only servers, you can have up to 50 GB of mods installed.” Published in 2023. |
These figures describe installed mod storage on that provider, not a guaranteed allowance for every host or an estimate of how many projects you can run. A project’s download size, update history, and duplicated files can change the space it consumes, so leave room for updates rather than filling the allowance exactly.
Independent reader supportYour contribution helps us test, update, and keep practical guides available for everyone.Why are my ASA server mods not loading?
Work through the checks in order. Most failures come from using the wrong game’s ID, malformed comma syntax, an unsaved panel change, or a client that has not installed the server’s required projects.
Also popular on Amazon

- 【No Drill Mounted】Cable management tray can be assembled in as little as 3 minutes or less-simply. Side clips easily clampe the edge of desk, pass through the holes on the sides, and secure excess cables with baskets. Desk cable management supports inward or outward installation to meet your needs in different scenarios, and provides you with great convenience when collecting and organizing wires.
- 【Rubber Pad Protects Desk】Wire organizer under desk built-in soft rubber pads on the clamp protect your desk from scratches, so you will not damage your furniture or office.
- 【Sturdy and Beautiful】Cord management under desk is made of high-quality carbon steel and holds about 15 lbs. The wire basket has 2 holes on each side of the tray to enable your cables to pass freely. Cable baskets are suitable for desk thickness use from 0.4" to 2.4".
- 【Space Saving & Keep Organized】Desk cable management tray holds all your power cords, outlet strips, USB hubs and computer transformers hidden from your feet, and the data cables will not enter the vacuum cleaner to keep your desk clean and tidy. Desk wire organizer is also suitable for use in the kitchen and outdoors.
- 【Reduce Safety Risks】Cable tray under desk keeps all plugs away from your kids, no more worry about tripping. Using 2 holes wire tray saves extra space, helps you easily cabling and wire protection. The mesh design is not easy to accumulate dust, but avoids safety accidents caused by messy wires.
The server accepts the list but no mod appears
- Recheck every value against the ASA CurseForge project page. An ARK: Survival Evolved ID will not work on ASA.
- Confirm that the field contains Project IDs rather than names, URL slugs, or full links.
- Inspect commas and remove spaces or other accidental characters. The documented pattern is
MODID,MODID,MODID. - Save the panel and perform a full restart. A running server does not reload a changed list merely because the browser saved a draft.
A managed panel has no CurseForge Mods menu
The Nitrado menu path is one documented implementation, not a requirement imposed on every provider. Look for the host’s ASA-specific mod instructions or contact its support team for the equivalent active-mods field. Do not paste a Nitrado path or setting name into a different provider’s interface and assume it has the same behavior.
A player cannot join the server
- Have the player read the server browser’s required-mod list.
- Use the join prompt to install missing projects in ASA, then retry the connection.
- Compare the client’s installed projects with the server’s list and confirm that each is an ASA project.
- If the player installed a project through another application, repeat the installation through ASA’s in-game Mods browser; CurseForge support says the desktop app does not support ASA.
An INI setting has no effect
- Verify that the mod actually documents server-editable settings. Nitrado notes that some mods offer none.
- Check the exact path and section:
arksa → ShooterGame → Saved → Config → WindowsServer → GameUserSettings.inion the documented Nitrado setup. - Remove keys copied from another project and use only the author’s documented names and values.
- Save and restart after editing; the server must reload the file before the change can apply.
The self-hosted server starts without mods
- Inspect the actual startup command or service definition and confirm that
-mods=is present on the command that is really being executed. - Check that the argument contains ASA Project IDs separated by commas and is not split into unrelated shell arguments.
- Confirm the server is running in a supported Windows or Windows-like environment.
- Restart after correcting the command and allow the startup update process to complete.
What is a safe workflow for maintaining an ASA modded server?
Use a small, repeatable change process instead of editing a long list during a live session.
- Record the current active-mods string or startup command.
- Check the ASA project page and copy the new Project ID exactly.
- Add one project at a time, preserving the comma-separated syntax.
- Save the provider setting or launch script.
- Restart the server and allow its update step to finish.
- Join with a test client and confirm the server’s required-mod prompt matches the intended list.
- If something fails, remove the last ID, restore the previous configuration, and restart before testing another change.
This process separates an ID error from a mod interaction and gives you a known-good list to restore. Keep separate notes for the server list and any INI values, because installing a project and configuring its settings are different operations.
Which installation method should I use?
- Use a managed panel if you want to add IDs through a browser, let the provider maintain the server environment, and accept provider-specific controls and storage policies.
- Use self-hosting if you need direct launch-command control, can operate a supported Windows or Windows-like system, and are comfortable maintaining updates and files yourself.
- Use the in-game client workflow for every player installation. The separate CurseForge app is not the supported ASA installation path.
Regardless of the method, the reliable pattern is the same: ASA Project IDs, exact comma-separated syntax, a saved configuration, a restart, and a client whose required mods are installed and activated in ASA.
Frequently Asked Questions
Can I copy an ARK: Survival Evolved mod ID into an Ascended server?
No. The two games use different mod projects, and an Evolved ID is not a substitute for an ASA CurseForge Project ID. Select the ASA version of a project before copying its number.
Does every hosting company use a “CurseForge Mods” menu?
No. That menu path is documented for Nitrado and may not exist under the same name elsewhere. Look for your provider’s ASA-specific active-mods setting and follow its delimiter and restart instructions.
Why does a player still see a missing-mod prompt after installing the project?
Installing a project and activating it are separate client actions. In ASA, check Mod settings after installation, then return to the server join flow so the client can compare its active projects with the server’s required list.
Can I edit any ASA mod through GameUserSettings.ini?
No. Only projects that document server settings support that kind of change. Use the exact section and key supplied by the mod author; an undocumented entry is not guaranteed to be read.
Quick Recap
Product prices and availability are accurate as of the date/time indicated and are subject to change. Any price and availability information displayed on Amazon at the time of purchase will apply.

