
Quick wins for a faster PC:
Clear out junk files and repair common Windows errorsFree Scan →Fix the driver behind crashes, sound loss and screen glitchesFind Drivers →Repair Windows errors before they cause bigger problemsFix Now →iTechGuides is reader-supported. When you buy through links on our site, we may earn an affiliate commission. As an Amazon Associate I earn from qualifying purchases. Learn more
To fix a non-working mechanical keyboard key, first test the key in another app and on another computer, then check profiles, connections, the keycap, debris, and the switch. A hot-swappable keyboard may need only a compatible switch replacement; a soldered board, damaged socket, PCB, or liquid spill may require repair or replacement.
Do not begin by spraying cleaner into the switch or pulling it out. The same symptom can come from software remapping, wireless pairing, a broken keycap, a stabilizer, contamination, a failed switch, or board-level damage. Diagnose the failure in that order so you do not damage a working keyboard or void a useful warranty.
Key takeaways
- A key that fails in one application may be remapped, disabled, assigned to a macro, or affected by an application-specific setting rather than physically broken.
- Testing another USB port, bypassing a hub, and trying the keyboard on another computer separates many computer and connection problems from keyboard hardware faults.
- A hot-swappable keyboard can accept a compatible replacement switch without desoldering, but a soldered keyboard requires board access, desoldering, and soldering.
- If a known-good compatible switch also fails in the same position, inspect the socket, solder joint, PCB pad, trace, diode, controller, or liquid damage instead of repeatedly replacing switches.
- Optical, magnetic, low-profile, and proprietary switches are not automatically compatible with standard MX-style mechanical switches.
What does “not working” mean?
A non-working mechanical keyboard key can describe several different symptoms, and each symptom points toward a different diagnostic branch.
| Symptom | What it means | Likely areas to investigate |
|---|---|---|
| No input | The key never registers. | Profile, connection, switch, socket, PCB, diode, controller, or firmware |
| Intermittent input | The key works only at certain angles or with extra force. | Debris, worn contacts, bent switch pins, poor seating, socket, or solder joint |
| Double typing or chatter | One press produces multiple inputs. | Contaminated or worn switch contacts, firmware behavior, or software debounce |
| Stuck input | The keyboard continues registering the key after release. | Binding switch, contamination, firmware, macro, or software remap |
| Wrong input | The key produces another character or command. | Remapping, macro, function layer, keyboard layout, or application setting |
| Backlight only is dead | The key types normally but its light does not work. | LED, lighting setting, LED solder joint, or lighting circuit |
| Only one app is affected | The key works elsewhere. | Application shortcut, game binding, profile, macro, or input mode |
How should you test a non-working mechanical keyboard key first?
Start with software and connection checks before removing the keycap. Save your work and close applications that could react to accidental key presses, then follow this sequence:
Popular on Amazon

- This blue key switch has a transparent housing, suitable for LED backlighting, offers excellent tactile feedback, smoother, and will satisfy you with the classic crisp click sound.
- The mechanical keyboard switch is made of plastic shell, copper gasket, high-quality spring, the shaft core material is POM, waterproof, approximate lifespan of 50 million times of keystrokes, durable.
- Total stroke of blue switch: 4 mm; working stroke: 2.2±0.6 mm. Tip: Pins may be bent during shipment, but will not be affected the use after correction.
- Good compatibility, great for most mechanical keyboards, a strong sense of paragraphing, suitable for users pursuing feel and performance, and suitable for typists, enjoy the rhythm of work and games.
- Packaging: 10 PCS 3 pin keyboard dustproof switches.
- Open a plain text field and press the problem key.
- Test the key in a second application. If the key works in a text editor but not in a game, check the game’s key binding, input mode, function layer, and profile.
- Open the keyboard manufacturer’s configuration software. Check the active profile for a disabled key, remap, macro, media assignment, or function-layer setting.
- Restore the default assignment or select another onboard profile if the keyboard supports profiles.
- For a wired keyboard, disconnect it, wait briefly, and connect it directly to another USB port. Bypass USB hubs, docks, and unnecessary adapters.
- Inspect a detachable cable and replace it temporarily with a known-good compatible data cable. A charge-only cable cannot provide normal keyboard data.
- Test the keyboard on another computer.
- For a wireless keyboard, charge it or replace its batteries, reconnect the receiver, and confirm that the correct wireless profile is selected.
- For Bluetooth, forget the keyboard in the operating system and pair it again. Test wired mode if the keyboard supports wired operation.
Microsoft’s Windows troubleshooting guidance recommends reconnecting the device, trying another USB port, bypassing a hub, checking cables and power, cleaning around keys, and testing the device on another computer. Apple’s external-keyboard guidance likewise recommends reconnecting the keyboard, trying another port or Mac, and testing another keyboard to isolate the fault.
| Test result | Most useful conclusion | Next step |
|---|---|---|
| The key works in another application | The keyboard hardware may be fine. | Check the application binding, macro, profile, or keyboard layout. |
| The key works on another computer | The original computer, software, pairing, or profile is implicated. | Check operating-system settings, remapping utilities, drivers, and wireless pairing. |
| The key fails on every computer | The keyboard or its onboard firmware is more likely involved. | Inspect the keycap, switch, socket, and PCB after ruling out profiles and connection faults. |
| Every key is dead | This is probably not an isolated switch problem. | Investigate power, cable, receiver, Bluetooth, firmware, internal connections, and controller faults. |
| The key works wired but not wirelessly | The switch may be working. | Investigate battery, receiver, Bluetooth pairing, wireless profile, or firmware. |
Could a remap, macro, or firmware profile disable the key?
Yes. A configuration profile can disable a key, assign a macro, turn it into a media or function key, or map it to a different output. Open the keyboard’s official configuration application, select the active profile, and restore the key’s normal assignment before opening the case.
If the manufacturer documents a factory reset, follow the procedure for the exact model and revision. Reset shortcuts are not universal. For example, the Keychron K10 Max troubleshooting procedure identifies Fn + J + Z held for four seconds as that model’s reset method. Do not apply that shortcut to another Keychron keyboard or another brand.
Free tools Windows power users keep installed
One-click scans. No signup required.
Firmware can correct a profile or compatibility issue, but the wrong firmware, layout, model, revision, or connection mode can create a more serious failure. Use only the manufacturer’s support page for the exact keyboard. Logitech currently says its separate Firmware Update Tool is no longer supported or maintained and directs users toward Logi Options+ for supported devices; that instruction is specific to compatible Logitech products, not a general rule for every keyboard.
Check Logitech’s current keyboard-button support instructions when troubleshooting a Logitech model, and use the exact support software named for other manufacturers.
How do you remove and inspect the keycap?
Disconnect the keyboard or turn it off before removing the keycap. Photograph the key’s orientation, then use a wire keycap puller to pull straight upward with even force. A wire puller removes the cap from both sides instead of levering sideways against the switch; the iFixit Keycap Puller is designed for that purpose.
Large keys—including Space, Enter, Backspace, and Shift—may have stabilizer wires and clips. Remove those keycaps carefully and do not force them sideways. A detached stabilizer can make a key feel broken even when the electrical switch still works.
Also popular on Amazon
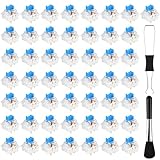
- Package Includes: You will get 50 Pcs blue keyboard switches in one bag! Each set of our mechanical switches comes with a switch puller and a convenient cleaning brush. This complete kit makes switch installation and future keyboard cleaning effortless
- Enhanced Durability: Engineered with dust-proof and waterproof construction, these switches provide superior protection. This defense significantly boosts your keyboard's longevity, ensuring consistent performance in any environment
- Authentic Tactile: Experience the satisfying rhythm of typing with a clear tactile bump and a crisp, audible click sound. The driving force offers powerful two-stage feedback, making it the perfect keystroke experience for typists and gamers
- Strong Visual: The transparent housing maximizes the brilliance of lighting for stunning visual effects. Featuring a standard 3-pin MX design, they are plug-and-play compatible with most hot-swappable keyboards and support profile keycaps
- Premium Materials: These clicky switches utilize a high-quality POM stem and a robust copper alloy spring. This premium material combination ensures consistent and satisfying keystrokes over an impressive lifespan of enough clicks
Inspect the removed keycap and exposed switch for:
- A cracked or broken keycap stem
- A keycap rubbing against a neighboring key
- A detached stabilizer insert or bent stabilizer wire
- A switch that sits lower, tilts, or is not flush with neighboring switches
- Hair, crumbs, dust, corrosion, or liquid residue
- A broken switch stem, housing, or retaining tab
Press the switch stem directly and compare its movement, sound, and resistance with an adjacent key. If the bare switch registers normally but the keycap does not, replace or realign the keycap rather than replacing the switch.
How do you clean a mechanical keyboard key safely?
Cleaning can remove dry debris and may help a sticky or gritty key, but cleaning cannot repair a broken electrical contact, damaged socket, lifted PCB pad, failed diode, or controller.
- Disconnect the keyboard or turn it off.
- Turn the keyboard upside down and gently shake or tap it to release loose particles.
- Use a soft brush around the exposed switch.
- Use short bursts of compressed air around the switch.
- Refit the keycap and test the key.
Keep the compressed-air can upright. Do not hold the can upside down or spray liquid propellant into the switch. Do not pour water, alcohol, contact cleaner, lubricant, or other liquid into the keyboard. iFixit’s keyboard troubleshooting coverage supports removing the keycap and clearing dust or crumbs, but indiscriminate liquid cleaners can migrate into the PCB, damage plastics, contaminate contacts, or create another fault.
If liquid was spilled, disconnect the keyboard immediately, stop repeated power tests, and let the keyboard remain disconnected. Document the spill if a warranty claim may be useful. Liquid damage can cause corrosion that is not fixed by compressed air; extensive contamination is a reason to consider professional inspection or replacement.
How can you tell whether the switch is bad?
A switch is more suspicious when the bare switch never registers, feels mechanically damaged, or the fault moves when the switch is moved to another compatible position. A switch is less likely to be the cause when the key works in another application, the problem disappears on another computer, or the bare switch registers while the keycap does not.
| Observation | More likely cause |
|---|---|
| The keycap does not press correctly, but the bare switch works. | Damaged, misaligned, or rubbing keycap |
| The switch feels sticky, gritty, or binds. | Debris, residue, or damaged switch |
| The switch is loose or sits above the plate. | Switch not fully seated or damaged retaining tabs |
| The bare switch never registers. | Failed switch, socket, solder joint, PCB, diode, controller, or firmware |
| A known-good compatible switch also fails in that position. | Socket, PCB, diode, controller, or software fault |
| The problem follows the switch when it is moved. | Failed switch |
| The key registers only when pressed hard or off-center. | Worn contact, bent pin, poor seating, or socket fault |
| The backlight is off but the key registers. | LED or lighting circuit, not necessarily the input switch |
If possible, use a keyboard input tester or the keyboard’s configuration software to confirm whether direct switch presses register. Mechanical feel alone cannot prove that the electrical contacts are working.
How do you replace a switch on a hot-swappable keyboard?
A hot-swappable keyboard has sockets that allow switches to be pulled from the plate without desoldering. “Mechanical” does not automatically mean “hot-swappable,” so check the manual, manufacturer’s product page, or service documentation before using a switch puller.
Confirm switch compatibility first
The replacement must match the keyboard’s mechanical and electrical design. Check all of the following:
The Tool Desk
Outbyte PC Repair FREEClear out junk files and repair common Windows errorsFree Scan →Outbyte Driver Updater FREEFix the driver behind crashes, sound loss and screen glitchesFind Drivers →Also popular on Amazon

- Value Set: Receive 50 pcs blue keyboard switches and 1 pc switch puller for a complete custom build or replacement. This generous keyboard switches is a perfect gift for mechanical keyboard enthusiasts
- Durable Construction: Built with high-quality acrylic, zinc alloy, and precision steel springs for long-lasting durability. These waterproof keyboard clicker modules provide stable performance over time
- Crisp Clicky & Tactile: Delivers satisfying clicky sound and tactile feedback for precise, accurate keystrokes. These mechanical keyboard switches offer a responsive typing experience ideal for office work
- Easy 3-Pin Installation: Features standard 3-pin MX-style compatibility for quick installation without complex tools. These versatile keyboard clickers upgrades fit most mechanical keyboard PCBs easily
- Enhanced LED Backlighting: Transparent housing perfectly matches and enhances LED backlit keyboard setups. These backlit-compatible keyboard switches allow vibrant light to shine through clearly
- Standard versus low-profile form factor
- Mechanical versus optical or magnetic operation
- Three-pin versus five-pin mounting
- Plate, PCB, and socket compatibility
- LED orientation and clearance
- Switch height and keycap compatibility
- Manufacturer-specific socket requirements
Do not assume that any Cherry-style or MX-style switch will work. Optical and Hall-effect or magnetic keyboards may require specific sensors, switches, firmware, or calibration, while proprietary and low-profile systems use different dimensions and electrical arrangements.
Replacement procedure
- Disconnect the keyboard and remove the keycap.
- Photograph the switch orientation.
- Use a proper switch puller to compress the switch’s retaining tabs.
- Pull the switch straight out without levering against the PCB.
- Inspect the switch pins and the hot-swap socket.
- Compare the replacement switch’s pins, mounting style, height, and technology with the original.
- Straighten only visibly bent pins; do not force misaligned pins into the socket.
- Align the replacement switch with the plate and socket.
- Press the switch straight down until it is flush and fully seated.
- Reconnect the keyboard and test the key before reinstalling the keycap.
- Reinstall the keycap in its original orientation.
A combined tool can be useful only after hot-swap support is confirmed. Keychron’s 2-in-1 switch and keycap puller is designed to grip switch latches as well as remove keycaps. A dedicated keycap puller is enough for inspection, but it cannot remove a switch from a hot-swap socket.
If a switch pin bends, remove the switch, straighten the pin carefully with fine tweezers or small pliers, and check that the pin is not cracked or detached. Never force a switch into a socket: a misaligned pin can damage the socket contact.
How do you replace a switch on a soldered keyboard?
A soldered keyboard requires case disassembly, PCB access, desoldering the original switch, and soldering a compatible replacement. Confirm the keyboard is not worth preserving under warranty before opening it, because warranty terms vary by manufacturer and jurisdiction.
Typical tools
- Soldering iron
- Desoldering pump or desoldering wick
- Flux
- Compatible replacement switch
- Small screwdrivers and a safe work surface
General repair sequence
- Disconnect the keyboard and photograph the exterior, cables, screws, stabilizers, and plate orientation.
- Open the case without pulling internal cables.
- Locate the problem switch’s solder joints on the PCB.
- Heat and remove solder from each joint.
- Remove the old switch from the plate.
- Install the replacement in the correct orientation.
- Solder the pins cleanly.
- Inspect for solder bridges, cold joints, lifted pads, and excess solder.
- Test the key before fully reassembling the case.
iFixit’s Logitech MX Mechanical guide shows a model-specific example of accessing the board, desoldering a defective key, and soldering in a replacement. The guide is not a universal disassembly procedure; case construction, switch technology, and PCB layout differ between keyboards.
Beginners should avoid starting with soldering when the keyboard is under warranty, uses proprietary optical or magnetic switches, has fragile pads, or has a large stabilized key whose actual problem has not been identified.
What if a replacement switch still does not work?
If a known-good, correctly compatible switch is properly seated and the same key position still fails, the fault is more likely in the socket, PCB, diode, controller, firmware, or liquid-damaged wiring than in the replacement switch.
Also popular on Amazon
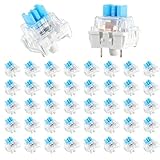
- 【Package Content】The package contains 50 pre-lubricated 3-pin onboard tactile switches, providing smooth actuation and crisp rebound, making it ideal for custom keyboards or upgrades
- 【Clear Housing Design】Featuring a transparent blue casing that perfectly complements the LED backlight, these key switches provide excellent tactile feedback, giving you a pleasant typing experience
- 【Quality Material】Made of plastic housing, copper washers, and high-quality springs, these blue switches are waterproof and dustproof, durable, and have a service life of up to 50 million cycles
- 【Wide Compatibility】Compatible with most keyboards, these keyboard clickers are ideal for users who value feel and performance, making them ideal for typists and gamers
- 【Factory-Precision Lubrication】Each keyboard switch is machine-lubricated to reduce friction and noise, ensuring smooth, consistent keystrokes and plug-and-play reliability for a superior typing experience
- Remove the replacement switch and inspect both pins.
- Compare the dead socket with a working socket.
- Look for a loose or torn hot-swap socket, cracked solder joint, lifted pad, corrosion, or damaged trace.
- Check whether several keys in a row, column, or nearby region also fail.
- Use a multimeter for continuity only if you understand keyboard matrix wiring and safe board probing.
Do not bridge random contacts or inject voltage into the PCB. A loose hot-swap socket may require desoldering and replacement. A lifted pad, broken trace, failed diode, or controller fault requires electronics repair or a replacement PCB, and liquid corrosion may extend beyond the individual key.
What’s actually slowing this PC down?
Pick the symptom - the matching free tool is one click away.
Multiple adjacent dead keys are especially important: the pattern can indicate a spilled-liquid region, matrix or trace fault, disconnected internal cable, firmware/profile corruption, or a board-level power problem. Replacing each switch blindly is poor diagnosis.
The Keychron K10 Max troubleshooting reference distinguishes a failed switch from bent socket pins, worn PCB contacts, and damaged sockets. That distinction applies as a diagnostic principle, not as a claim that every keyboard uses the same parts.
Which tool should you use?
Use the least expensive tool that matches the confirmed fault. A tool cannot compensate for an incorrect diagnosis or an incompatible switch.
| Task | Appropriate tool or part | When it makes sense |
|---|---|---|
| Remove one ordinary keycap | Wire keycap puller | Inspection, cleaning, or keycap replacement |
| Remove keycaps and hot-swap switches | Combined switch/keycap puller | Only after hot-swap support is confirmed |
| Clean several keyboards | Brush and keyboard cleaning kit | Repeated maintenance rather than one dusty key |
| Replace a confirmed failed switch | Compatible replacement switch | After testing confirms the switch and the board supports it |
| Repair a soldered switch or socket | Soldering iron, flux, desoldering pump or wick | Experienced users repairing a suitable out-of-warranty board |
| Compare switch feel | Switch tester | Choosing a feel or sound, not testing electrical registration |
The iFixit Keyboard Cleaning Kit was listed at $19.99 during the dossier’s August 16, 2026 research pass, while the iFixit Keycap Puller was listed at $6.95. Prices and availability can change. A switch tester is for comparing feel and sound; it is not an electronic tester unless the product specifically includes a connected PCB.
Do these 3 things before closing this tab:
1Clear out junk files and repair common Windows errors2Fix the driver behind crashes, sound loss and screen glitches3Repair Windows errors before they cause bigger problemsThe Keychron Kailh Switch Tester was listed at $14.99 for a 35-switch set during that research pass. The Keychron Switch Tester 100 Max Edition was listed at $59.99 and described as a non-functional tester without a PCB, so neither should be purchased as a way to prove that a keyboard switch electrically registers.
Independent reader supportYour contribution helps us test, update, and keep practical guides available for everyone.When should you claim the warranty, repair the board, or replace the keyboard?
Choose warranty service before DIY disassembly when the keyboard is covered and the fault is not clearly limited to a removable keycap or switch. Opening the case, desoldering, using incompatible firmware, and applying liquid cleaners can complicate a warranty claim; check the applicable manufacturer policy first.
Also popular on Amazon

- Value Pack: You'll receive 30pcs blue mechanical keyboard switches, ready for installation. The blue and white color scheme adds a stylish touch to your custom keyboard, making it a perfect gift for family and friends who love mechanical keyboards.
- Durable Construction: The mechanical keyboard switches are made of high-quality acrylic and zinc alloy, making them waterproof and dustproof for durability. The transparent housing perfectly matches the LED backlight and provides excellent tactile feedback and a pleasant click.
- Precise Performance: These 3-pin keyboard keys are compatible with most mechanical keyboards. Their precise actuation and comfortable feedback ensure every keystroke registers perfectly, ensuring a smoother, more stable, and more responsive typing experience even during long typing sessions.
- Enhanced Typing: Our blue key switch are ideal for everyday office document writing. The classic crisp click and tactile feedback, strong paragraph feel, and smooth performance enhance your typing rhythm, providing a comfortable and enjoyable experience.
- Perfect Gift: Our blue switch mechanical keyboard easily replace the original keyboard switches without complex tools or skills. They adapt to most standard keyboards on the market, making them an ideal choice for typists who value feel and accuracy.
| Situation | Best choice | Reason |
|---|---|---|
| Broken or loose keycap, working bare switch | Replace or reseat the keycap | Low-risk, isolated mechanical problem |
| Confirmed failed switch on a hot-swap board | Replace the compatible switch | No desoldering is required when the socket is healthy |
| Confirmed failed switch on a soldered board | Warranty, professional repair, or careful solder repair | Board access and soldering carry more risk |
| Replacement switch fails in the same position | Warranty or board-level diagnosis | The socket, PCB, diode, controller, or firmware may be at fault |
| Extensive liquid damage | Warranty assessment, professional inspection, or replacement | Corrosion may affect more than one component |
| Inexpensive proprietary keyboard with controller failure | Replacement may be more practical | Repair time and parts can exceed the keyboard’s value |
| Expensive, customized, or repairable keyboard | Professional or board-level repair | Preserving the keyboard may justify the additional work |
A full switch set is poor value for a single dead key until the board is confirmed hot-swappable and the switch is confirmed as the fault. Soldering equipment is similarly a secondary purchase: a professional-grade kit can make sense for an experienced repairer who will use it beyond one keyboard, not for a one-off repair on a low-cost board.
What temporary workarounds can you use?
A workaround restores access to the missing command but does not repair the keyboard.
Recommended Free Tools
- Use the Windows or macOS on-screen keyboard. Apple specifically documents the on-screen keyboard as a temporary option for external-keyboard problems.
- Remap the missing key to an unused key through the operating system or the keyboard’s official software.
- On a compatible hot-swap board, move a known-good switch from a less-used key to the failed position. This is useful for diagnosis and temporary use, but it leaves the other position without that switch.
- Use another keyboard until the warranty claim, replacement switch, or repair is complete.
Remapping cannot correct a failed switch, socket, PCB, or controller. It can also create confusing behavior in games or applications if the remapping utility is active only in certain profiles.
How do you avoid the most common repair mistakes?
- Do not assume every mechanical keyboard is hot-swappable.
- Do not use a reset shortcut copied from another model.
- Do not force a replacement switch with bent or incompatible pins.
- Do not spray contact cleaner, lubricant, water, or alcohol into the switch or PCB.
- Do not treat a dead backlight as proof that the input switch is dead.
- Do not replace several switches when multiple adjacent keys suggest a matrix, cable, liquid, or controller problem.
- Do not update firmware unless the file and procedure match the exact model, revision, layout, and connection mode.
- Do not open a keyboard before checking warranty value and documenting the problem.
Frequently Asked Questions
Can you fix a dead mechanical keyboard key without replacing the switch?
Yes. A dead key may be caused by a remap, wireless connection, loose keycap, stabilizer, debris, poor switch seating, bent pin, or firmware profile. If the bare switch still registers, replacing the keycap or correcting the configuration may be enough.
Are all mechanical keyboards hot-swappable?
No. A mechanical keyboard may use hot-swap sockets or soldered switches, and optical, magnetic, low-profile, and proprietary keyboards may use different systems. Check the exact model’s documentation before pulling a switch.
Can you use any MX-style switch as a replacement?
No. The replacement must match the keyboard’s form factor, mounting pins, plate and PCB, LED clearance, switch height, and electrical technology. Standard mechanical switches are not automatically compatible with optical, magnetic, low-profile, or proprietary keyboards.
Why does a new switch also fail in the same key position?
A correctly compatible, known-good switch that fails in the same position points more strongly to a damaged hot-swap socket, solder joint, PCB pad, trace, diode, controller, firmware state, or liquid corrosion. Inspect the board or seek warranty or professional repair instead of installing more switches.
Can compressed air fix a non-working mechanical keyboard key?
Compressed air may remove dry debris that makes a key sticky or intermittent, but it cannot repair a broken switch contact, damaged socket, PCB fault, diode, or controller. Keep the can upright and use short bursts without spraying liquid propellant into the keyboard.
The Bottom Line
Diagnose before replacing parts: test the key in multiple applications and on another computer, check profiles and connections, inspect the keycap and switch, and then use a known-good compatible switch if the keyboard is hot-swappable. If the replacement fails in the same position, stop treating the problem as a switch failure and consider warranty service, board repair, professional inspection, or replacement.

