
Recommended Free Tools
iTechGuides is reader-supported. When you buy through links on our site, we may earn an affiliate commission. As an Amazon Associate I earn from qualifying purchases. Learn more
On most HP desktops and notebooks, the boot-menu sequence is power on, tap Esc repeatedly, then press F9. Esc opens the HP Startup Menu; F9 opens Boot Device Options, where you choose a USB flash drive, internal disk, optical drive, or network entry when listed. Use F10 instead when you need full BIOS/UEFI Setup, such as changing a persistent boot order or loading firmware defaults. The exact keys and menu entries vary by model, so use the Startup Menu shown on your computer rather than assuming every HP system has identical options.
At a glance
| Option | What you need | Best for |
|---|---|---|
| Esc, then F9 (Boot Device Options) | Computer powered off; bootable device connected before startup | A one-time boot from USB, internal drive, optical drive, or network entry |
| Esc, then F10 (BIOS Setup) | Access to the startup keyboard | Persistent firmware settings, boot order, Secure Boot, and defaults |
| Esc (Startup Menu) | Immediate repeated key presses after pressing the power button | Choosing diagnostics, BIOS Setup, or another startup utility |
| Windows Advanced Startup | Windows still starts; Settings access | Opening UEFI Firmware Settings when hotkey timing is difficult |
What key opens the boot menu on an HP laptop?
Press Esc repeatedly immediately after pressing the power button. HP describes this as turning on the computer and immediately pressing Esc until the Startup Menu opens. From there, press F9 for the one-time boot-device list. On systems with an Fn-lock or special function-row behavior, you may need to hold Fn while pressing F9 or F10; follow the labels shown on your keyboard and the on-screen menu.
Shut the computer down completely first. Wait a few seconds, press the power button, and begin tapping Esc about once per second—do not hold it continuously. HP’s desktop and notebook instructions document Esc as the Startup Menu key and F10 as the BIOS Setup key (HP Support startup-menu guidance).
How do I open the HP one-time boot menu?
Open Startup Menu with Esc, then press F9. This changes the device for the current startup only; it does not permanently reorder the firmware’s boot priorities.
Popular on Amazon

- ✅For beginners, refer image-7, its a video boot instruction, and image-6 is "boot menu Hot Key list"
- ✅16-IN-1, 64GB Bootable USB Drive 3.2 , Can Run Linux On USB Drive Without Install, All Latest versions.
- ✅Including Windows 11 64Bit & Linux Mint 22.3 (Cinnamon)、Kali 2026.02、Ubuntu 26.04、Zorin Pro 18、Tails 7.8.1、Debian 13.5.0、Garuda 2026.03、Fedora Workstation 44、Manjaro 25.06、Pop!_OS 22.04、Solus 2026.04、Archcraft 26.05、Neon 2026.06、Fossapup 9.5、Sparkylinux 8.3, All ISO has been Tested
- ✅Supported UEFI and Legacy, Compatibility any PC/Laptop, Any boot issue only needs to disable "Secure Boot"
- ✅These Linux were all downloaded from official websites, and no malware is included.
- Shut down the HP computer.
- Connect the device you intend to use, such as a prepared USB flash drive, before turning the computer on.
- Press the power button and immediately tap Esc until Startup Menu appears.
- Press F9 for Boot Device Options.
- Use the arrow keys to highlight the listed device and press Enter.
The list can include an internal hard drive, USB storage, optical drive, or network source, but entries appear only when the firmware detects a usable device and the model supports that source. HP’s Boot Device Options procedure is documented here (HP Support: selecting a boot device).
How do I boot an HP computer from USB?
Insert a bootable USB flash drive before startup, open Esc then F9, select the USB entry, and press Enter. If the USB drive is absent from the list, the firmware has not recognized it as a bootable option, the drive was connected too late, or that model’s firmware settings restrict the format or boot mode.
- Prepare the USB with the operating-system or recovery media you are authorized to use.
- Power the HP computer off and plug the USB drive directly into a port.
- Power on, tap Esc, press F9, and look for the USB name or a generic USB-storage entry.
- Select it with the arrow keys and press Enter.
Boot-order or Secure Boot changes can trigger a BitLocker recovery-key request on the next start. Have the recovery key available before changing firmware settings; HP calls out this possibility in its boot-device instructions.
The Tool Desk
Outbyte PC Repair FREERepair Windows errors before they cause bigger problemsFix Now →Outbyte Driver Updater FREEFix the driver behind crashes, sound loss and screen glitchesFind Drivers →How do I get into HP BIOS or UEFI Setup?
Tap Esc after power-on, then press F10. F10 opens BIOS/UEFI Setup, where changes can persist across restarts. HP notes that the interface and available options differ by computer model, so menu names and locations may not match screenshots from another HP product (HP Support: BIOS and Startup Menu keys).
Also popular on Amazon
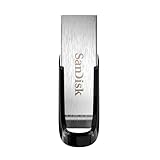
- High-speed USB 3.0 performance of up to 150MB/s(1) [(1) Write to drive up to 15x faster than standard USB 2.0 drives (4MB/s); varies by drive capacity. Up to 150MB/s read speed. USB 3.0 port required. Based on internal testing; performance may be lower depending on host device, usage conditions, and other factors; 1MB=1,000,000 bytes]
- Transfer a full-length movie in less than 30 seconds(2) [(2) Based on 1.2GB MPEG-4 video transfer with USB 3.0 host device. Results may vary based on host device, file attributes and other factors]
- Transfer to drive up to 15 times faster than standard USB 2.0 drives(1)
- Sleek, durable metal casing
- Easy-to-use password protection for your private files(3) [(3)Password protection uses 128-bit AES encryption and is supported by Windows 7, Windows 8, Windows 10, and Mac OS X v10.9 plus; Software download required for Mac, visit the SanDisk SecureAccess support page]
- Shut down the computer.
- Press the power button and repeatedly tap Esc until Startup Menu opens.
- Press F10 for BIOS Setup.
- Use the arrow keys or the controls shown by your firmware to review settings.
- When finished, choose the save-and-exit command only if you intentionally changed a setting.
Some HP models expose an alternate BIOS-access key such as F2 or F6, but those alternatives are model-dependent. Check the exact maintenance or user guide for your product if Esc and F10 do not produce the expected menu (HP Support: model-specific BIOS access).
How do I change the boot order permanently?
Use BIOS Setup (Esc, then F10), not F9. In Setup, locate a menu named Boot Options, Boot Order, or similar, move the desired entry using the displayed controls, then save and exit.
- Record the current order before changing it so you can restore it.
- Open BIOS Setup with Esc and F10.
- Find the boot-order list and place the required device ahead of other entries.
- Review Secure Boot and legacy/UEFI options only when your installation instructions specifically require it.
- Save changes and exit; allow the computer to restart, then verify the result.
Persistent boot-order edits can affect normal startup and may cause BitLocker to ask for recovery verification. Change only what the task requires and restore the original order afterward when a temporary change is all you needed.
How do I load BIOS defaults inside Setup?
Open BIOS Setup with F10, then use the firmware command for restoring defaults. Depending on the HP model, it may be labeled Load Setup Defaults, Restore Defaults, Apply Factory Defaults and Exit, or a similar phrase.
Also popular on Amazon
- High-speed USB 3.0 performance of up to 150MB/s(1) [(1) Write to drive up to 15x faster than standard USB 2.0 drives (4MB/s); varies by drive capacity. Up to 150MB/s read speed. USB 3.0 port required. Based on internal testing; performance may be lower depending on host device, usage conditions, and other factors; 1MB=1,000,000 bytes]
- Transfer a full-length movie in less than 30 seconds(2) [(2) Based on 1.2GB MPEG-4 video transfer with USB 3.0 host device. Results may vary based on host device, file attributes and other factors]
- Transfer to drive up to 15 times faster than standard USB 2.0 drives(1)
- Sleek, durable metal casing
- Easy-to-use password protection for your private files(3) [(3)Password protection uses 128-bit AES encryption and is supported by Windows 7, Windows 8, Windows 10, and Mac OS X v10.9+; Software download required for Mac, visit the SanDisk SecureAccess support page]
- Enter Setup and note any custom settings you must preserve, including boot order, virtualization, storage mode, or security options.
- Choose the defaults command shown by your firmware.
- Confirm the prompt, review the resulting settings, and save only if the defaults are appropriate.
- Restart and check that the operating system and required hardware still start normally.
There is no single universal label or layout across HP families. If a default reset would remove a setting required by your organization or disk configuration, cancel it and consult the model-specific documentation first.
How do I run HP hardware diagnostics from the Startup Menu?
Open the Startup Menu with Esc and choose the entry labeled System Diagnostics, Hardware Diagnostics, or similar if it is present. The diagnostic name, tests, and shortcut key vary by model; use the item displayed on your screen rather than forcing a key from another HP guide.
- Disconnect unnecessary external devices, leaving power connected.
- Press the power button, tap Esc, and wait for Startup Menu.
- Select the diagnostics option with the arrow keys and press Enter.
- Run the relevant component test, such as memory, storage, battery, or processor, and record any failure ID.
Diagnostics are separate from Boot Device Options: they test hardware and do not select an operating-system boot source. If no diagnostics entry appears, consult the support page for your exact product because commercial, consumer, desktop, and notebook firmware can expose different utilities.
What is the difference between F9 and F10 on an HP computer?
F9 is a temporary choice; F10 is persistent configuration. F9 opens the detected boot-device list for one startup. F10 opens BIOS/UEFI Setup, where boot order and other firmware settings can be changed and saved.
Also popular on Amazon

- Lightweight and convenient: Lexar JumpDrive A30E (USB Type-A) boasts a slim, portable design for easy device compatibility; lightweight at 7.41 g
- Transfer speeds up to 100 MB/s: 10x faster than standard USB 2.0 drives; Based on internal testing, performance may vary depending upon the host device, interface, and usage conditions
- Wide compatibility: Compatible with tablets, laptops, Macs, and traditional Type-A devices, no software installation required; Reliably stores photos, videos & files
- Compact: Features a push-button retractor and a lanyard loop for on-the-go use
- Enhanced security: Lexar DataShield protects files, easily creates a password-protected safe with auto-encryption; Files deleted from the safe are securely erased and can't be recovered
| Key | Menu | Typical use | Effect |
|---|---|---|---|
| Esc | Startup Menu | Gateway to boot options, Setup, and diagnostics | No setting changes by itself |
| F9 | Boot Device Options | Select USB, internal, optical, or network entry | One-time selection |
| F10 | BIOS/UEFI Setup | Boot order, security, defaults, and firmware configuration | Changes persist when saved |
| F2 or F6 on some models | Model-specific firmware utility or Setup path | Alternative access documented for certain HP computers | Depends on model |
What if Esc does not open the HP Startup Menu?
First confirm that you are pressing the key early enough: start tapping Esc immediately after the power button, before the HP logo disappears. If Windows starts, shut down and try again rather than restarting into a still-running session.
- Try a full shutdown: wait several seconds after power-off, then start again.
- Check the function row: if your keyboard uses media controls by default, try Fn+F9 or Fn+F10 after reaching Startup Menu.
- Use a wired keyboard: wireless keyboards may not be active early enough on some systems.
- Use Windows Advanced Startup: when Windows is available, open Settings > System > Recovery > Restart now, then choose Troubleshoot > Advanced options > UEFI Firmware settings > Restart. This hands control to firmware without relying on hotkey timing.
- Check model documentation: HP systems can use different keys and expose different menus; F2 or F6 may be documented for a particular model.
If the Startup Menu appears but F9 or F10 does nothing, use the exact on-screen key legend and confirm that the keyboard is responding. Do not repeatedly change unrelated BIOS settings while troubleshooting a key-access problem.
How should I avoid problems when changing HP boot settings?
Write down the original boot order and any security or storage settings before saving changes. Use F9 for a temporary boot whenever possible, and reserve F10 changes for tasks that genuinely require persistent configuration. Keep the BitLocker recovery key accessible, because HP warns that boot-order or Secure Boot changes can lead to a recovery prompt. Firmware options are model-specific, so stop and consult HP’s documentation if a setting has an unfamiliar name or could affect disk access.
Quick wins for a faster PC:
Clear out junk files and repair common Windows errorsFree Scan →Fix the driver behind crashes, sound loss and screen glitchesFind Drivers →Repair Windows errors before they cause bigger problemsFix Now →How we selected these procedures
The sequence prioritizes HP’s documented Startup Menu workflow, distinguishes one-time F9 selection from persistent F10 Setup, includes model-dependent alternatives, and covers the USB, diagnostics, defaults, and Windows recovery paths readers commonly need. Where HP’s interface varies, the instructions use the labels shown on the individual computer instead of presenting one model’s menu as universal.
Also popular on Amazon

- 1-Pack 128GB USB Flash Drive: Store, back up, and transfer photos, videos, music, documents, movies, manuals, and software with ease. Large-capacity portable storage for school, office, business, travel, and everyday use
- Plug and Play: No software installation required. Simply connect the USB flash drive to a USB port for quick access to your files. Ideal for file sharing, data storage, backup, and transferring digital content between devices
- Wide Compatibility: Compatible with Windows 11 / 10 / 8.1 / 8 / 7 / XP/ Vista / 2000 / ME / NT, Linux and Mac OS, and most USB-enabled devices. This USB drive works with desktop computers, laptops, TVs, car audio systems, speakers, and more. Supports USB 2.0 and is backward compatible with USB 1.1
- Portable Swivel Design: Features a 360° rotating metal cover that helps protect the USB connector when not in use. Built-in keyring loop allows easy attachment to keychains, backpacks, briefcases, or lanyards. Durable ABS plastic housing with LED activity indicator
- Tested for Quality: Each thumb drive undergoes quality testing and pre-formatting before shipment. Designed for dependable everyday use and convenient file storage across compatible devices
Frequently Asked Questions
Does pressing F9 permanently change my HP computer’s boot order?
No. F9 selects a device for that startup session and normally leaves the saved firmware order unchanged. Use F10 only when you deliberately need a persistent order change.
Why is my USB drive missing from Boot Device Options?
Connect the drive before powering on and verify that it contains bootable media. A drive can still be absent when the model, boot mode, or security settings do not accept that device format.
Can Windows open HP firmware settings without a startup key?
Yes. In Windows, use Settings > System > Recovery > Restart now, then Troubleshoot > Advanced options > UEFI Firmware settings > Restart. The computer reboots directly into firmware settings.
What’s actually slowing this PC down?
Pick the symptom - the matching free tool is one click away.
Will resetting BIOS defaults erase my files?
Loading firmware defaults changes configuration values; it does not itself format the storage drive. However, defaults can alter storage, security, or boot settings, so record your original values and confirm Windows still starts afterward.

