
Free tools Windows power users keep installed
One-click scans. No signup required.
iTechGuides is reader-supported. When you buy through links on our site, we may earn an affiliate commission. As an Amazon Associate I earn from qualifying purchases. Learn more
To activate a DIRECTV Genie Mini, connect it to the television, pair it with your home Genie or Genie 2, complete the on-screen setup, and then activate the pending receiver in your DIRECTV account. Wired Minis use a PIN generated by the main Genie DVR; Wireless Genie Minis use the wireless setup and Connect Now prompts. Replacement units follow the same basic sequence, with an additional location-replacement and equipment-return step.
What activation actually does
A Genie Mini is a client receiver. It relies on a Genie HD DVR or Genie 2 server in the home rather than operating as an entirely independent satellite receiver. Activation has two parts that must both succeed:
- Local pairing: the Mini is associated with a room and with the home Genie or Genie 2.
- Account activation: DIRECTV adds the receiver to your account so service can be authorized on that device.
A Mini can display setup screens before account activation, but normal viewing is not complete until the receiver is paired and activated. Keep the main Genie powered on while you perform the pairing steps.
Prepare before connecting the Mini
Gather the Mini, its power adapter, the remote, and the television you want to use. For the best picture and audio, DIRECTV identifies HDMI as the recommended connection for high-definition video and Dolby Digital audio. Use an HDMI cable long enough to reach without stressing the ports.
Popular on Amazon
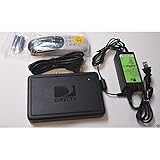
- This is Not a Wired Genie. This is a Wireless Genie add-on for you existing wireless Receiver.
- You must have a Wireless Bridge and (HR34 or HR44 or HR54 Genie Receiver to hookup this Client (Sold Separately))
- Do not self-install until you are an expert on satellite devices.
- Requires service upgrade from provider.
- Place the Mini where its ventilation openings are not blocked.
- Confirm that the television has an available HDMI input and that you know which input it is.
- Have access to the main Genie HD DVR if you are installing a wired client.
- Sign in credentials for the DIRECTV account are needed for online activation.
- If this is a replacement, keep the failed receiver available until you have transferred its cables and recorded any return instructions.
Do not disconnect the main Genie during setup. A wired Mini needs the Add Clients screen on that Genie to remain available while the PIN is entered.
Activate a wired Genie Mini with a Genie HD DVR
1. Connect the Mini to the television
- Connect the Mini’s HDMI output to an HDMI input on the television.
- Connect the Mini to power.
- Turn on the television and select the HDMI input used for the Mini.
- Press the Mini’s POWER button if it does not start automatically.
DIRECTV also documents a 10-pin Mini-DIN A/V connection for supported standard-definition, 1080i, or 720p installations. Connection support can vary by model and setup, so use HDMI when it is available and do not assume that every Mini or television supports every alternative connection.
2. Generate the pairing PIN on the main Genie
- Using the remote for the Genie HD DVR, open Menu.
- Choose Settings.
- Open Whole-Home.
- Select Manage Clients.
- Choose Add Clients.
- Write down the PIN shown on the screen.
Leave the Add Clients screen open. The PIN is used by the Mini during the pairing sequence, and leaving the screen in place avoids interrupting the registration process.
Quick wins for a faster PC:
Clear out junk files and repair common Windows errorsFree Scan →Fix the driver behind crashes, sound loss and screen glitchesFind Drivers →Repair Windows errors before they cause bigger problemsFix Now →3. Enter the PIN on the Mini
- Return to the television connected to the Mini.
- Choose Continue on the Mini’s setup screen.
- Enter the PIN displayed by the main Genie.
- Select Add a New Location.
- Enter a room name, such as Living Room or Bedroom.
- Choose whether to copy settings from the existing setup or use default settings.
The location name identifies the client in the Whole-Home equipment list. Choose a descriptive name if you have multiple Minis; it makes later replacement or troubleshooting easier.
Also popular on Amazon
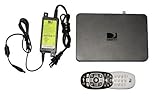
- Delivers stunning 2160p resolution with HDMI 2.0 and HDCP 2.2 compatibility for advanced video clarity.
- Sleek and unobtrusive, with approximate dimensions of 8″ W × 1.25″ H × 7″ L.
- Stream live TV, access your Genie DVR recordings, and enjoy on-demand content in multiple rooms without extra receivers.
- Pairs effortlessly with existing Genie DVR systems for a simplified setup.
- The small form factor allows discreet placement and minimal clutter.
4. Finish guide setup
When the Mini offers the choice, select Watch DIRECTV or Browse the Guide. Let the guide setup proceed, then change to a channel to verify that the receiver responds. If the channel does not change, check the HDMI input first, then verify that the Mini still shows as a client on the main Genie.
Activate the receiver in your DIRECTV account
Pairing the Mini locally does not replace account activation. Complete the online activation after the Mini has been connected and assigned a location.
- Sign in to your DIRECTV account.
- Open My equipment & services.
- Find the new receiver in Pending Receivers.
- Select Activate receiver.
- Follow the prompts to confirm the receiver and location.
After activation, return to the Mini and test live television and guide navigation. If the online activation process fails, DIRECTV’s instructions direct you to contact its support or activation line. Have the receiver available so support can identify the unit and the location you attempted to activate.
PC Slower Than It Used to Be?
A free scan shows the junk files, broken settings and background clutter dragging Windows down - then fixes them in one click.Free scan · Windows 10 & 11Crashes, No Sound, or Screen Glitches?
Random freezes, missing sound and display glitches usually trace back to one bad driver. Find and replace yours safely.Free scan · under a minuteSet up a Genie 2 or Wireless Genie Mini
Wireless Minis do not use the wired Add Clients PIN sequence in the same way. They use a wireless setup flow associated with the Genie 2 or the applicable home server.
Also popular on Amazon
- Does not require a coax connection, which allows you to view DIRECTV from anywhere in range
- Watch recorded shows on every TV client/HD receiver
- Record and delete shows from every connected TV/HD Receiver
- Supports 480i, 480p, 720p, 1080i and 1080p resolutions
- DIRECTV requires a 24 month (lease) commitment on all activated receivers
Wireless installation
- Connect the Wireless Genie Mini to the television with HDMI.
- Connect its power adapter.
- Turn on the television and select the correct HDMI input.
- Follow the wireless setup screens on the television.
- When prompted, choose Connect Now and follow the on-screen countdown or connection instructions.
During wireless pairing, the unit may show a flashing red LED or an intermittent gray screen. DIRECTV’s wireless setup material identifies those indicators as possible parts of the setup process. Do not treat either symptom alone as proof that the receiver has failed; first allow the on-screen wireless procedure to complete and check the connections if it does not advance.
Replacing a client through a Genie 2
When a Genie 2 replacement flow asks which location is being replaced:
- Select Replace A Location.
- Choose the client being removed.
- Confirm the replacement.
- Complete the wireless or on-screen setup for the new Mini.
- Activate the replacement receiver in the DIRECTV account.
Selecting the correct old location matters because the replacement needs to inherit the intended room assignment rather than creating an unrelated extra client.
Do these 3 things before closing this tab:
1Repair Windows errors before they cause bigger problems2Fix the driver behind crashes, sound loss and screen glitches3Clear out junk files and repair common Windows errorsWired and wireless setup compared
| Area | Wired Genie Mini | Wireless Genie Mini |
|---|---|---|
| Home server | Genie HD DVR with the Whole-Home client manager | Genie 2 or a compatible wireless Genie system |
| Television connection | HDMI recommended; supported installations may document a 10-pin Mini-DIN A/V connection | HDMI recommended for the television |
| Pairing path | On the main Genie: Menu > Settings > Whole-Home > Manage Clients > Add Clients, then enter the PIN on the Mini | Follow the wireless setup and select Connect Now when prompted |
| Room assignment | Select Add a New Location, name the room, then copy settings or use defaults | Use the replacement or wireless location prompts shown on screen |
| Common first checks | HDMI and power, correct PIN, and the Add Clients screen remaining open | HDMI and power, the Connect Now sequence, and wireless pairing status |
| Account step | In My equipment & services, open Pending Receivers and choose Activate receiver | |
Replace an existing Genie Mini without losing the location
A replacement should be treated as a controlled cable transfer rather than a fresh installation. This keeps the television connection and room assignment clear while you remove the failed unit.
Also popular on Amazon
- Also required to be activated as a "Leased Receiver" as per DirecTV policy change
- Requires A 2 YEAR extension of contract, monthly fees will apply by DirectTV
- Requires Genie Server HR54, HR44, HR34
- Supports 480i, 480p, 720p, 1080i and 1080p resolutions
- THIS IS NOT A 4K SUPPORTED CLIENT OR A WIRELESS CLIENT
- Turn off the old Mini and identify each connected cable.
- Move cables one at a time from the old Mini to the replacement.
- Leave the power cord connected to the old unit until the other cables have been transferred.
- Connect the replacement’s power cord last.
- Turn on the replacement. If it does not start automatically, press its POWER button.
- Complete the on-screen setup and select the appropriate replacement location if prompted.
- Activate the replacement under My equipment & services > Pending Receivers > Activate receiver.
- Follow DIRECTV’s return instructions for the failed receiver.
Moving one cable at a time reduces the chance of putting an HDMI, network, or power lead into the wrong port. Keep the old receiver until activation is complete and you have the return instructions; disposing of it prematurely can make the return process harder.
Program the DIRECTV remote
The receiver may prompt you to program the remote for the television or other equipment. Follow the on-screen directions when that prompt appears. If you skip it, use DIRECTV’s remote-programming guide for the remote model supplied with your system.
Remote programming is separate from receiver activation. A Mini can be correctly paired and authorized even if the remote still needs to be configured for television power, volume, or input control.
Verify that activation is complete
Use a short, repeatable check rather than relying only on the first picture that appears:
Also popular on Amazon

- Replacement power supply for DIRECTV HS17 receivers (Genie 2)
- Replaces all EPS17 power supplies such as EPS17RX-XX, EPS17R0-36 and EPS17R0-15
- Output: 25.2 V 2.86 A
- This device is more than just a power supply. What it does is built into its name – it inserts power into a satellite line that also carries signal. (Yes, a satellite dish needs power in order for it to work.)
- This particular DIRECTV power inserter allows one cable to feed a satellite dish or multiswitch.
- The television is on the HDMI input connected to the Mini.
- The Mini reaches live television without returning to the setup screen.
- Channel up, channel down, and direct channel entry respond.
- The guide opens and allows you to browse listings.
- The room name shown in the receiver or Whole-Home list matches the physical room.
- The receiver no longer appears as an unactivated item in Pending Receivers.
- Remote volume and power work if you completed remote programming.
If live television works but the receiver remains listed as pending, finish the account activation rather than repeating the physical wiring.
Independent reader supportYour contribution helps us test, update, and keep practical guides available for everyone.Troubleshooting a Mini that will not activate
No picture or “no signal” on the television
- Confirm that the Mini has power and press POWER if it did not start.
- Set the television to the exact HDMI input used by the Mini.
- Reseat both ends of the HDMI cable.
- If possible, try another HDMI input on the same television.
- Do not infer a receiver failure until power and input selection have been checked.
The wired Mini cannot accept the PIN
- On the main Genie, reopen Menu > Settings > Whole-Home > Manage Clients > Add Clients.
- Confirm that you are entering the current PIN shown on that screen.
- Leave the Add Clients page open while entering the PIN on the Mini.
- Make sure you selected Continue on the Mini before entering the PIN.
- After pairing, choose Add a New Location rather than treating the unit as an already registered room.
The wireless Mini shows a flashing red LED or gray-screen flicker
Those indicators can occur during wireless setup. Keep the Mini powered, follow the setup instructions, and use Connect Now when it appears. Check the HDMI and power connections if the setup does not progress. The official material does not promise a universal completion time, so avoid declaring the unit defective solely because the indicator persists briefly.
The Mini is paired but still not authorized
Open the DIRECTV account and check My equipment & services. A receiver awaiting account authorization should be under Pending Receivers. Select Activate receiver and complete the prompts. If online activation fails, contact DIRECTV support as directed by the activation instructions.
A replacement appears under the wrong room
For a Genie 2 replacement, return to the replacement flow and choose Replace A Location, then select the client being removed. Verify the room name before confirming. For a wired Genie HD DVR, repeat the Add Clients process and assign the intended location when prompted.
Connection choices and their limits
Why HDMI is the normal choice
HDMI carries the high-definition picture and the supported Dolby Digital audio path in one cable. It also avoids the resolution limitations of older analog connections. DIRECTV calls HDMI the recommended option for HD video and Dolby Digital audio.
When the 10-pin Mini-DIN connection may apply
DIRECTV documents a 10-pin Mini-DIN A/V connection for supported standard-definition, 1080i, or 720p setups. That documentation does not establish that every Genie Mini includes the port or that every television accepts the same cable, so check the exact receiver and television before choosing it.
Quick Recap
Activation checklist
- Mini connected to the television, preferably by HDMI.
- Power connected and television set to the correct input.
- Wired setup: main Genie opened to Menu > Settings > Whole-Home > Manage Clients > Add Clients.
- PIN entered on the Mini while the Add Clients screen remains open.
- Room added and settings copied or defaults selected.
- Wireless setup: Connect Now selected when prompted.
- Guide or live channel tested after setup.
- Account opened to My equipment & services > Pending Receivers > Activate receiver.
- Remote programmed if the receiver requested it.
- Replacement: old cables transferred one at a time, old power cord left until last, and return instructions followed.
Product prices and availability are accurate as of the date/time indicated and are subject to change. Any price and availability information displayed on Amazon at the time of purchase will apply.

