
Quick wins for a faster PC:
Clear out junk files and repair common Windows errorsFree Scan →Fix the driver behind crashes, sound loss and screen glitchesFind Drivers →iTechGuides is reader-supported. When you buy through links on our site, we may earn an affiliate commission. As an Amazon Associate I earn from qualifying purchases. Learn more
Start with the monitor’s native resolution, use the highest refresh rate your monitor, computer and cable can sustain reliably, and leave HDR off for ordinary SDR work unless the display and content clearly benefit from it. On Windows, these controls are per display in Settings > System > Display. On macOS, use Apple menu > System Settings > Displays, then choose Default or a scaled resolution. Correct settings depend on the monitor’s panel, GPU, port, adapter, operating-system version and workload—not on one universal preset.
The right starting settings
Connect the portable monitor, select it in your operating system’s display settings, and record its native resolution, supported refresh rates, input type and any HDR or color-profile modes listed by the manufacturer. Use the manufacturer-recommended mode first. A lower resolution can make text and images softer, while an unnecessarily high mode can exceed what the cable, adapter or computer can transmit.
- Resolution: native or manufacturer-recommended.
- Scaling: increase it until text is comfortable; do not lower resolution merely to enlarge interface elements.
- Refresh rate: the highest rate that remains stable without flicker, black screens or lost HDR.
- HDR: normally off for office apps and standard dynamic-range video; enable it for suitable HDR content after checking brightness balance.
- Brightness and color: match the room and workload, then use the intended color profile.
- Multi-display mode: Extend for extra workspace, Duplicate when both screens must show the same image.
Microsoft explains that each external display can have its own settings in Windows 11 (Microsoft Support). Apple describes Displays settings as the place to adjust resolution, brightness and display options on a Mac (Apple Support).
Before changing settings: identify the connection limits
A portable monitor can receive video through USB-C DisplayPort Alt Mode, Thunderbolt, HDMI or an adapter. The connector shape alone does not prove that it carries video: some USB-C ports provide charging or data only. Apple notes that an adapter must support the required display protocol; an inadequate cable or adapter can force a lower resolution or refresh rate, or leave the screen dark (Apple Support).
Popular on Amazon

- Portable Display Design: 15.6-inch Full HD portable anti-glare IPS display with an ultraslim and thin design, suitable for travel, on-the-go meetings, or business trips
- Versatile Kickstand: Kickstand design to prop the monitor up in either portrait or landscape mode easily
- Hybrid-Signal Connectivity: Features a hybrid-signal solution which supports power and video transmission, and enables compatibility with any laptop with a USB Type-C or Type A port
- Eye Care Technology: Features TV Rheinland-certified Flicker-free and Low Blue Light technologies to ensure a comfortable viewing experience
- USB-C Power Delivery: Convenient USB-C Power Delivery support allows for single-cable connection that provides both power and video signal transmission
Check the monitor
- Read the monitor’s manual or on-screen information for native resolution and supported refresh rates.
- Confirm whether USB-C supplies both display signal and power, or whether a second power connection is required.
- Check whether the monitor’s HDR mode, color gamut and refresh rate are available on every input. HDMI and USB-C may have different limits.
Check the computer and cable
- Verify that the computer’s USB-C port supports DisplayPort Alt Mode or Thunderbolt when using USB-C video.
- Use a cable rated for the required video protocol and bandwidth. A charge-only USB-C cable cannot carry a display signal.
- When an adapter is involved, confirm that it supports the target resolution, refresh rate, HDR and color format together—not just one of those features.
- If the portable monitor is bus-powered, connect the supplied power cable or a sufficiently powerful USB-C charger when the computer cannot provide enough power.
These checks prevent you from trying to fix a physical bandwidth or power limit with software settings.
Windows 11: set resolution, scaling and layout
- Connect the monitor and open Settings > System > Display.
- Under the display diagram, select the rectangle representing the portable monitor. Use Identify if you are unsure which screen is which.
- Open Display resolution and choose the option marked Recommended, which normally corresponds to the panel’s native mode. If the manufacturer specifies a different native mode, use that specification.
- Under Scale and layout, adjust Scale when text, icons or controls are too small. Keep the recommended resolution while changing scale so the panel does not resample unnecessarily.
- Drag the display rectangles to match the physical left-right or stacked arrangement, then apply the change.
Microsoft’s current instructions for per-display resolution and layout are at Microsoft Support. Windows may label a non-native mode as a warning; that mode can be useful for compatibility, but it generally sacrifices sharpness.
When to use a lower resolution
Choose a lower resolution only when the native mode is unavailable, the connection cannot sustain it, applications require a compatibility mode, or text remains unusably small after scaling. If a lower mode looks blurry, return to native resolution and increase Scale instead.
Windows Errors? Fix Them Before They Spread
Repair common Windows errors and clear accumulated junk for a smoother, more stable PC - no reinstall needed.Free scan · no reinstallCrashes, No Sound, or Screen Glitches?
Random freezes, missing sound and display glitches usually trace back to one bad driver. Find and replace yours safely.Free scan · under a minutemacOS: choose Default or a scaled mode
- Open Apple menu > System Settings > Displays.
- Select the portable monitor in the display list or diagram.
- Choose Default for Apple’s recommended balance of workspace and readability, or select a scaled resolution when you need larger text or more desktop space.
- Use Show all resolutions when the required manual mode is not visible. Select a mode that the monitor and connection can actually support.
- Open the arrangement controls to position displays and choose which one acts as the main display or whether the screens mirror each other.
Apple describes resolution as controlling the amount of detail shown and documents Default, scaled choices and Show all resolutions in its Displays guide (Apple Support). If a mode causes a blank screen, wait for macOS to revert or reconnect using a known-good mode, then choose a lower supported setting.
Also popular on Amazon

- 15.6" FHD IPS Anti-Glare Display: Enjoy crisp, vibrant visuals while working remotely from cafes or coworking spaces. This 15.6 inch portable monitor for laptop provides a flawless travel dual monitor setup without distracting screen reflections
- Single USB-C Connectivity: Declutter your desk instantly with seamless plug-and-play simplicity. A premium usb c portable monitor that delivers both power and video through one cable, creating a clean and efficient travel monitor setup
- 0.78kg Ultra-Slim Profile: Slip this monitor effortlessly into any standard backpack or briefcase for on-the-go freedom. At just 11.8mm thin, it is a lightweight travel monitor and portable screen for remote workers and digital nomads
- 360 Kickstand & Tripod Socket: Achieve the viewing angle you need on any hotel desk or kitchen table. Create an ergonomic dual monitor setup anywhere using the versatile kickstand or easily attach it to a standard portable monitor stand mount
- Auto-Rotate DisplayWidget Software: Read long documents or write code effortlessly without manually adjusting settings. Automatically switch between portrait and landscape modes on your portable screen for laptop to maximize your daily multitasking
Choose the highest stable refresh rate
Refresh rate is the number of times the display updates each second. A higher rate can make pointer movement and scrolling look smoother, but it does not improve a panel or connection that cannot sustain it. The monitor, computer GPU, cable, adapter and selected resolution must all support the combination.
Windows procedure
- In Settings > System > Display, select the portable monitor.
- Open Advanced display.
- Choose a refresh rate listed for that display. Start with the highest advertised rate, then test scrolling, video and normal use for several minutes.
- If you see flicker, intermittent black screens, signal drops or HDR disappearing, select the next lower rate. If necessary, lower resolution as well.
macOS procedure
- Open Apple menu > System Settings > Displays and select the monitor.
- Use the Refresh rate menu, if the Mac and display expose one.
- Choose the highest stable supported value, not simply the largest number shown by a utility.
Apple cautions that a rate that is too low can cause flicker, while a rate that is too high can produce a black screen because the display does not support it (Apple Support). Microsoft’s HDR troubleshooting also recommends reducing refresh rate or resolution when HDMI color output is incorrect (Microsoft Support).
Practical rate choices
- 60 Hz: the compatibility-first choice for office work, presentations and connections with uncertain bandwidth.
- 90–120 Hz: worthwhile for smoother scrolling, supported video and gaming when the complete signal path is stable.
- Any rate that flickers or blanks: not a usable setting, regardless of the specification on the box.
HDR: when to enable it and how to balance it
HDR is conditional, not an automatic quality upgrade. A portable monitor may accept an HDR signal while offering limited brightness or a mode that makes ordinary SDR applications look washed out. For documents, web pages and typical SDR video, begin with HDR disabled. Turn it on when the monitor supports HDR well and you are viewing HDR games or video.
What’s actually slowing this PC down?
Pick the symptom - the matching free tool is one click away.
Windows HDR workflow
- Open Settings > System > Display and select the portable monitor.
- Choose HDR (or Windows HD Color on some versions).
- Enable Use HDR only after confirming that the monitor, GPU and connection support it at the desired resolution and refresh rate.
- Adjust the SDR content brightness balance so normal desktop applications do not appear too dim or excessively bright while HDR is active.
- Install current WDDM graphics drivers. For eligible displays, run Windows HDR Calibration to tune peak brightness, detail in dark areas and color saturation.
Microsoft documents the HDR controls and troubleshooting at Microsoft Support and brightness, color and calibration options at Microsoft Support. If HDMI colors are wrong, first try a lower refresh rate or resolution, then check the cable and adapter.
Also popular on Amazon
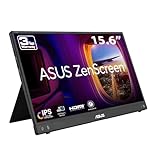
- 15.6" FHD IPS Anti-Glare Display: Backed by ASUS display expertise, enjoy crisp visuals working remotely from cafes. This 15.6 inch portable monitor for laptop provides a flawless travel dual monitor setup without distracting screen glare
- Dual USB-C & Mini-HDMI Ports: Trust ASUS engineering to connect any mobile workstation. With 15W power delivery, this versatile usb c portable monitor uses one cable for power and video to keep your travel monitor setup entirely clean
- 10mm Ultra-Slim & 0.9kg Profile: Built with premium ASUS durability, effortlessly slip this monitor into your travel bag. This lightweight travel monitor and portable screen serves digital nomads prioritizing on-the-go freedom
- Embedded Treatment Surface: Rely on ASUS health innovations with an ionic silver coating inhibiting 99.9% of bacteria. Feel secure using this hygienic external monitor for laptop in shared coworking spaces, cafes, or busy airports
- Fold-Out Kickstand & Tripod Socket: Featuring ASUS award-winning design, easily adjust your viewing angle. Create an ergonomic dual monitor setup on any hotel desk using the kickstand or seamlessly attach it to a portable monitor stand mount
macOS HDR workflow
When macOS exposes an HDR option for the connected monitor, enable it only for a display and workflow that support HDR. If desktop colors look inconsistent, return to the standard mode and select the monitor’s intended color profile. Available controls vary by Mac model, monitor and connection.
Brightness, color profiles and calibration
Set brightness for the room
There is no single brightness number that is correct for every portable monitor. Set it high enough that text is clear without forcing glare, then recheck it when moving between a dim room and bright daylight. Avoid judging color while the panel is at an extreme brightness setting.
Windows controls
Windows provides display brightness and color controls and, on eligible HDR displays, HDR calibration. Use the monitor’s intended picture or color mode first, then make small adjustments in Windows or the monitor’s own menu. The available controls depend on the display and graphics hardware (Microsoft Support).
Recommended Free Tools
macOS profiles and calibration
In System Settings > Displays, choose the monitor’s appropriate Color profile and use macOS calibration tools when necessary. Apple includes brightness and color-profile controls in its Displays guide (Apple Support).
Also popular on Amazon

- 15 6-inch Full HD (1920x1080) portable anti-glare IPS display with an ultra-slim and thin design for on-the-go client meetings
- Hybrid-signal solution supports power and video transmission and enables compatibility with any laptop with a USB Type-C or Type A port
- Auto-rotation Display allows your screen to automatically senses its orientation and switch the monitor between landscape and portrait modes
- Foldable lite smart case can be turned into a stand to prop the monitor up in either portrait or landscape mode
- ASUS Eye Care Technology features TÜV Rheinland-certified Flicker-free and Low Blue Light technologies to ensure a comfortable viewing experience
Color-critical work
For photography, design or video where color accuracy affects delivery, a hardware colorimeter is a reasonable advanced accessory. It measures the actual panel and creates a profile; it is not a universal requirement for office use. For general work, the factory profile, a moderate room-matched brightness and consistent viewing conditions are usually the practical baseline.
True Tone and Night Shift on Mac
On supported Macs, True Tone adapts color to ambient light. Apple says it can work with some external displays up to 32 inches when a compatible Mac laptop is open. Night Shift shifts the display warmer for low-light use, and Apple says True Tone and Night Shift can be used together (Apple Support). Disable these features when you need a fixed color reference.
Extend, mirror or use one screen
Windows display modes
Press Windows key + P or open the display settings to choose:
- PC screen only: use the built-in panel.
- Duplicate: show the same image on both screens, useful for presentations or demonstrations.
- Extend: create one larger desktop and move windows between displays.
- Second screen only: turn off the built-in panel while using the portable monitor.
After choosing Extend, align the display rectangles and select the screen that should be the main display. Microsoft documents these modes at Microsoft Support.
Also popular on Amazon

- 15.6" FHD IPS USB Type-C Portable Monitor: Features hybrid signal solution for compatibility with USB Type-C and Type-A sources (Note: DisplayLink driver needed for Type-A connection)
- Ultra-Portable Award-Winning Design: Weighs only 1.7 pounds and measures 0.3 inches slim to pair perfectly with ASUS laptops
- Smart Cover and Smart Pen Hole: Allow for landscape and portrait orientations easily with auto rotation functionality
- ASUS Eye Care Technology: TUV Rheinland-certified flicker-free backlighting and blue light filter minimizes eye fatigue during extended use
- Intuitive Display Settings: Easily toggle through advanced display settings with the ASUS DisplayWidget application
macOS display arrangement
In System Settings > Displays, use Arrange to position screens. Use the mirroring or Use as controls to mirror, extend or designate the main display. Match the diagram to the physical setup so the pointer crosses the correct edge.
Independent reader supportYour contribution helps us test, update, and keep practical guides available for everyone.Windows and macOS: what differs
| Decision | Windows | macOS |
|---|---|---|
| Per-display panel | Settings > System > Display; select a display in the diagram. | Apple menu > System Settings > Displays; select the monitor. |
| Scaling language | Percentage under Scale and layout. | Default or scaled resolution; Show all resolutions reveals manual choices. |
| Refresh rate | Advanced display lists rates for the selected monitor. | Refresh rate menu appears when supported by the Mac and display. |
| HDR and SDR balance | Use HDR and SDR content brightness controls; HDR Calibration is available for eligible displays. | Options vary by Mac, monitor and connection; use the supported display mode and profile. |
| Color management | Brightness, color and HDR calibration controls vary by hardware. | Color profiles and calibration controls are available in Displays. |
| Arrangement | PC screen only, Duplicate, Extend and Second screen only. | Arrange plus mirroring and Use as controls. |
| Connection limits | GPU, port, cable and adapter determine available modes. | Mac model, port, cable and adapter protocol determine available modes; unsupported combinations may fall back or show black. |
Neither platform can override a monitor, GPU or cable limitation. Treat the menus as a list of modes the complete hardware path has negotiated, not as proof that every listed combination is ideal.
Troubleshooting blurry, blank or low-refresh images
The image is blurry
- Return to the monitor’s native or Recommended resolution.
- Increase Windows Scale or choose a more readable macOS scaled mode instead of lowering resolution.
- Check that the cable and adapter support the selected mode.
- Disable unnecessary image-processing modes in the monitor’s on-screen menu and inspect text at normal viewing distance.
The screen is blank or says no signal
- Reseat both ends of the cable and select the correct input on the monitor.
- Confirm that the USB-C port supports DisplayPort Alt Mode or Thunderbolt; a charge/data-only port will not provide video.
- Remove the adapter or dock temporarily and test a direct, known-good connection.
- Provide separate power if the monitor is bus-powered and the computer cannot supply enough.
- Use a lower resolution or refresh rate. Apple warns that an unsupported high rate can make the screen black (Apple Support).
The refresh rate is stuck low
Check whether the current resolution, HDR mode, cable, adapter or dock consumes the available bandwidth. Test the monitor directly, select a lower resolution temporarily, and update graphics drivers on Windows. If the higher rate works only after lowering resolution or disabling HDR, the connection path—not the display menu—is the limiting factor.
Do these 3 things before closing this tab:
1Fix the driver behind crashes, sound loss and screen glitches2Clear out junk files and repair common Windows errors3Scan for outdated or missing drivers - takes under a minuteColors look wrong over HDMI
First reduce refresh rate or resolution as Microsoft recommends for HDMI color problems, then verify the monitor’s input mode, cable and adapter. Re-enable HDR only after standard-range color is correct (Microsoft Support).
The monitor disconnects when brightness rises
This symptom can indicate insufficient USB power rather than a resolution error. Use the monitor’s additional power input or a charger that meets its specification, and avoid relying on an unpowered hub while troubleshooting.
Example: interpreting a portable monitor specification
ASUS lists the ZenScreen MB16QHG as a 16-inch IPS portable monitor with 2560×1600 resolution, 120 Hz refresh, DisplayHDR 400, 100% DCI-P3 coverage, USB-C display-signal and power transmission, HDMI, an L-shaped kickstand and tripod support. These are manufacturer specifications; the product page does not state a publication year, and price and availability can change (ASUS product page).
Quick Recap
| Specification | What it means for setup |
|---|---|
| 2560×1600 native resolution | Start at this mode; use operating-system scaling for readability. |
| 120 Hz | Try 120 Hz only when the computer and cable sustain it at the selected resolution; otherwise step down. |
| DisplayHDR 400 | HDR is available as a supported mode, but suitability still depends on content, brightness and connection. |
| 100% DCI-P3 | A wide-gamut specification; select the intended profile and calibrate when color-critical accuracy matters. |
| USB-C signal and power | A compatible USB-C video port and cable are required; power limits may still require an additional source. |
| HDMI | Provides an alternate input, but the HDMI version and adapter path determine the available resolution, refresh and HDR combination. |
A repeatable setup checklist
- Identify the monitor’s native resolution, supported rates and HDR/color modes.
- Connect directly with a cable and port that support the required display protocol.
- Select the monitor in Windows Display settings or macOS Displays.
- Choose native/Recommended resolution, then adjust scale for comfortable text.
- Select the highest refresh rate that survives normal use without flicker or signal loss.
- Leave HDR off for ordinary SDR work; if enabled, tune SDR brightness and verify the image.
- Set room-appropriate brightness and the intended color profile.
- Choose Extend, Duplicate or a single-screen mode and arrange the displays physically.
- If anything is blurry, blank or limited, test the cable, adapter, power and a lower mode before changing more settings.
Product prices and availability are accurate as of the date/time indicated and are subject to change. Any price and availability information displayed on Amazon at the time of purchase will apply.
The Tool Desk
Outbyte PC Repair FREEClear out junk files and repair common Windows errorsFree Scan →Outbyte Driver Updater FREEFix the driver behind crashes, sound loss and screen glitchesFind Drivers →
