

What’s actually slowing this PC down?
Pick the symptom - the matching free tool is one click away.
iTechGuides is reader-supported. When you buy through links on our site, we may earn an affiliate commission. As an Amazon Associate I earn from qualifying purchases. Learn more
Simple tasks like creating, deleting, or renaming folders or files are everyday tasks. Learn how to perform these tasks on Windows 11 or Windows 10.
Create Files or Folders with File Explorer
To create a file or folder in File Explorer, right-click a space where you want the new item, point to New, and select the item type to create.
To create a folder, select Folder. Alternatively, if you need to create a new text file, select “Text Document.”
Quick wins for a faster PC:
Repair Windows errors before they cause bigger problemsFix Now →Scan for outdated or missing drivers - takes under a minuteDriver Scan →Clear out junk files and repair common Windows errorsFree Scan →
The item created will take the default name. For example, if you create a folder, its name will be “New Folder.”
#1 Best Overall

- Easily store and access 2TB to content on the go with the Seagate Portable Drive, a USB external hard drive
- Designed to work with Windows or Mac computers, this external hard drive makes backup a snap just drag and drop
- To get set up, connect the portable hard drive to a computer for automatic recognition no software required
- This USB drive provides plug and play simplicity with the included 18 inch USB 3.0 cable
- The available storage capacity may vary.
However, a new text file will have a default name of “New Text Document.”

Later, I will show you how to rename the item.
Beyond those two, you also have the option to create Shortcuts, Compressed (zipped) folders, or Bitmap image documents.
Also, depending on the apps installed on your PC, there will be options to create other item types. For example, on my Windows PC, I have Microsoft Office apps and Google Docs apps.
So, I have the option to create new Word, Excel, Google Docs, and Google Sheets documents.
Create Files or Folders with PowerShell
Creating a new item with PowerShell is faster than with File Explorer. The command you need to perform this everyday task is called New-Item.
Rank #2
- Easily store and access 4TB of content on the go with the Seagate Portable Drive, a USB external hard drive.Specific uses: Personal
- Designed to work with Windows or Mac computers, this external hard drive makes backup a snap just drag and drop
- To get set up, connect the portable hard drive to a computer for automatic recognition no software required
- This USB drive provides plug and play simplicity with the included 18 inch USB 3.0 cable
- The available storage capacity may vary.
All you need to create a new folder or file is to specify the path to create the item and the name of the item. In addition to those two, you must also specify the ItemType – File or Directory.
It is important to mention that when you create a file, you must include its extension. Here is a sample command that creates a folder called “papaya” and a text file with the same name on my desktop.
Do these 3 things before closing this tab:
1Scan for outdated or missing drivers - takes under a minute2Repair Windows errors before they cause bigger problems3Fix the driver behind crashes, sound loss and screen glitches$desktopPath = [environment]::GetFolderPath("desktop")
New-Item -Path $desktopPath -Name papaya -ItemType Directory
New-Item -Path $desktopPath -Name papaya.txt -ItemType File

Rename Files or Folders with File Explorer
Renaming a file or folder from File Explorer is as easy as right-clicking the item and selecting Rename. In this example, I will rename the “New folder” and “New Text Document” I created in the last section.
On Windows 11, when you right-click an item, it does not show the “Rename” option. Rather, it shows “Show more options”.

When you click “Show more options” it displays the Rename option.
Rank #3
- Easily store and access 1TB to content on the go with the Seagate Portable Drive, a USB external hard drive.Specific uses: Personal
- Designed to work with Windows or Mac computers, this external hard drive makes backup a snap just drag and drop. Reformatting may be required for Mac
- To get set up, connect the portable hard drive to a computer for automatic recognition no software required
- This USB drive provides plug and play simplicity with the included 18 inch USB 3.0 cable
- The available storage capacity may vary.

I have renamed the file and folder as “pencil.”
The Tool Desk
Outbyte Driver Updater FREEFix the driver behind crashes, sound loss and screen glitchesFind Drivers →Outbyte PC Repair FREEClear out junk files and repair common Windows errorsFree Scan →
Rename Files or Folders with PowerShell
To rename an item with PowerShell, you require the Rename-Item command. I could show you a single command that renames the file and folder I created earlier.
However, I would rather break it down so it is easy to understand.
Let’s start by returning the two items on my desktop with the Get-ChildItem command.
$desktopPath = [environment]::GetFolderPath("desktop")
Get-ChildItem -Path $desktopPath -Recurse -Include pencil*
The first command saves the path to my desktop to a variable. Meanwhile, the second command returns the two file and folder I created earlier.
Rank #4
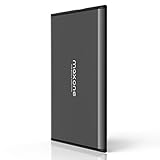
- Ultra Slim and Sturdy Metal Design: Merely 0.4 inch thick. All-Aluminum anti-scratch model delivers remarkable strength and durability, keeping this portable hard drive running cool and quiet.
- Compatibility: It is compatible with Microsoft Windows 7/8/10, and provides fast and stable performance for PC, Laptop.
- Improve PC Performance: Powered by USB 3.0 technology, this USB hard drive is much faster than - but still compatible with - USB 2.0 backup drive, allowing for super fast transfer speed at up to 5 Gbit/s.
- Plug and Play: This external drive is ready to use without external power supply or software installation needed. Ideal extra storage for your computer.
- What's Included: Portable external hard drive, 19-inch(48.26cm) USB 3.0 hard drive cable, user's manual, 3-Year manufacturer warranty with free technical support service.

In the next step, I will pipe the last command to the Rename-Item command. The name of this command makes it obvious that it renames items.
However, since the Get-ChildItem command returned two items – a file and a folder – I need a way to return one item at a time so I can rename it.
To do this, I will pipe the Get-ChildItem to Where-Object before pipping it to the Rename-Item. I needed the
The command below renames the folder and file I named “pencil” in the previous section to “panama”.
$desktopPath = [environment]::GetFolderPath("desktop")

(Get-ChildItem -Path $desktopPath -Recurse -Include pencil* | Where-Object {$_.PSIsContainer -eq $false}).FullName | Rename-Item -NewName panama.txt

(Get-ChildItem -Path $desktopPath -Recurse -Include pencil* | Where-Object {$_.PSIsContainer -eq $true}).FullName | Rename-Item -NewName panama
The second command renames the file while the third renames the folder. The trick is to use the $_.PSIsContainer property to return the file or folder.
Best Value

- 【Versatile Storage Expansion – For Gaming, Work & Everyday Use】 Running out of space on your PS5 or Xbox Series X/S? This external hard drive lets you store and play PS4 / Xbox One games directly, instantly freeing up your console’s internal storage for next‑gen titles. At the same time, it handles work file backups, media libraries, and cross‑device data transfers with ease. One drive, all your needs. *(Note: PS5 / Xbox Series X|S games cannot be run or stored directly from the external hard drive. However, by offloading your PS4 / Xbox One games, you can free up valuable space for newer titles.)*
- 【Patented Silicone Sleeve – Data Protection You Can Count On】 Worried about drops? We’ve got you covered. The patented built‑in silicone sleeve acts like a shock‑absorbing armor, cushioning your drive against bumps and falls. Whether it’s important work documents, precious family photos, or hard‑earned game saves, your data deserves this level of protection.
- 【Plug & Play, Compatible with Computers & Consoles】 No complicated setup—just plug in and go. Works seamlessly with Windows, Mac, and Linux computers, as well as PS4, PS5, Xbox One, and Xbox Series X/S. Process files at the office, back up data at home, or enjoy gaming in your downtime—one drive handles all your devices, simply and hassle‑free.
- 【USB 3.0 Ultra‑Fast Transfer – No More Waiting】 Tired of watching progress bars crawl? With USB 3.0 speeds up to 5Gbps, large files transfer in seconds. Whether you’re moving work documents, transferring hundreds of gigs of games, or backing up a year’s worth of photos, you get more done in less time.
- 【Sleek, Lightweight, and Ready to Go】 Weighing just 0.16 kg—lighter than a can of soda—this compact drive features a stylish mirror‑and‑frosted finish. Toss it in your bag and go, whether you’re heading to the office, visiting a friend for a gaming session, or giving a presentation on the road.
Additionally, since the Rename-Item command requires the full path to the item, I returned the FullName (the full path) property of the item.
To confirm that the items were renamed, see the result of the Get-ChildItem command in the screenshot below.

Delete Files or Folders with File Explorer
To delete a file or folder from File Explorer, right-click the item and select “Show more options”. After that, the Delete option will be displayed.
Delete Files or Folders with PowerShell
Deleting items with PowerShell is similar to renaming them. In the rename item section, I piped Get-ChildItem to Where-Object and then to Rename-Item.
To delete the item, instead of using Rename-Item, I’ll use Remove-Item.
$desktopPath = [environment]::GetFolderPath("desktop")

(Get-ChildItem -Path $desktopPath -Recurse -Include *panama* | Where-Object {$_.PSIsContainer -eq $false}).FullName | Remove-Item -Force

(Get-ChildItem -Path $desktopPath -Recurse -Include *panama* | Where-Object {$_.PSIsContainer -eq $true}).FullName | Remove-Item -Force
Conclusion
Creating, renaming, and deleting files and folders are common tasks. Whether you prefer performing this task via GUI or PowerShell, I hope you found my guide helpful.
Kindly let me know by responding to the “Was this page helpful?” question below. Before you go, why not check out our other Windows 11 how-to guides?


