
Starlink does not normally need to be aimed north, south, east, or west. Choose a mounting position with the clearest possible view of the sky, install the dish near vertical, and let the dish determine its operating angle. Supported motorized dishes level and tilt themselves; manually forcing one into a compass heading can damage the mechanism or prevent correct alignment.
The important placement question is not “Which direction should the dish face?” It is “Can the dish see a sufficiently large, unobstructed section of sky?”
Does Starlink need a compass heading?
No. The current general installation process does not ask you to select a user-facing compass direction. Starlink’s circular and rectangular installation guides instruct you to install the dish with a clear sky view and allow the hardware to determine its angle.
For supported motorized models, the dish automatically levels itself and then tilts toward the optimum satellite-coverage angle. That angle depends on the dish, your location, and the satellites available there. It is not a permanent “point north” or “point south” setting.
Free tools Windows power users keep installed
One-click scans. No signup required.
#1 Best Overall

- 【Compatible with Starlink Standard V3 / Gen3 / 4 / 4 X】Not compatible with Starlink Mini/Performance Gen 2/Performance Gen 3/Standard Actuated. Please verify your dish model before purchase.
- 【Aluminum Alloy Adapter Compatible with Starlink Standard 4 / 4 X / Gen3】 Unlike many plastic adapters, this aluminum alloy adapter offers greater durability, stronger support, and is less likely to crack or break over time.
- 【Adjustable Design】 For longer eaves, flip the pole for a better fit. The mount installs from either end, and the pole connected to the pipe adapter can rotate for angle adjustment. Tighten the screws to lock the position and optimize dish alignment.
- 【18-Inch Wall Mount for Starlink】 Works as a roof mount or pole mount. Includes two screw sets: expansion anchors for concrete/masonry and lag screws for wooden roofs.
- 【Accessories included】Aluminium Pipe Adapter x1,extension screws x6, self-tapping screw x4, short stainless steel screws x2, long stainless steel screws x1, support steel tubes x1, support base x1, wrench x1, drill bit x1, instruction manual x1
The common advice to point Starlink due north in the United States is therefore not the current general rule. References to a dish tilting slightly north or south describe automatic optimization by hemisphere, not a manual aiming instruction.
How should the dish be positioned?
Install the dish as close to vertical as the kit allows, with the mounting hardware stable and the antenna able to move or tilt as designed.
| Dish or guide | Placement instruction |
|---|---|
| Circular-kit dish | Install Starlink within 35 degrees of vertical, as stated in the Starlink Circular Kit Installation Guide. |
| Rectangular-kit dish | Install it as close to vertical as possible; do not manually point it toward a compass direction, per the Starlink Rectangular Kit Installation Guide. |
| Standard 4 | Complete installation in the Starlink App. If the app reports that the dish must be rotated, use its alignment tool. |
Do not twist a motorized dish by hand to make it face a preferred direction. If your model has an alignment prompt, follow that prompt in the app rather than treating the dish like a manually aimed satellite-TV antenna.
Use the Starlink App before choosing a mounting location
The best location is the one with the least obstruction, not necessarily the highest point or the side of the house that faces a particular compass direction.
What’s actually slowing this PC down?
Pick the symptom - the matching free tool is one click away.
- Open the Starlink App.
- On the home screen, select Check for Obstructions, if that option is shown. In another current app flow, the same tool is opened with FIND AN INSTALL LOCATION.
- Select your Starlink hardware when the app asks. This makes the scan use the appropriate field of view for the dish.
- Stand at the exact planned mounting location and height. Hold the phone as close as possible to the dish’s planned position and perspective.
- Follow the camera scan and inspect the entire view.
- Repeat the scan at other candidate locations, such as the roof, a pole, a post, or a ground-level position.
The wording can vary with the hardware, account, and app version, but both labels open the obstruction-location workflow. A scan from waist height is not a reliable substitute for a scan from a roof peak or pole where the dish will actually be installed.
Rank #2
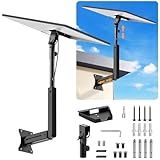
- ADJUSTABLE: Our starlink standard 4 mount features a retractable design with a support arm that telescopes up and down, back and forth, providing more versatility than a fixed length mount. Seamlessly compatible with your current Starlink Gen 3 mount, you'll enjoy an unobstructed view no matter where you place it
- HIGH QUALITY: Our Starlink Wall Mounts for Dishes is made of top-grade metal to ensure a long life and can withstand over 60 pounds of weight. And the starlink pole mount gen 3 comes with hidden cable holes to prevent damage to your cables, this thoughtful design not only enhances aesthetics but also protects the Starlink Gen 3 V4 from environmental wear and tear
- ANGLE ADJUSTMENT: Starlink 4x mount can be adjusted from 90-180° to ensure optimal reception of the signal. With its rustproof, windproof, and weatherproof properties, this starlink mount gen 3 ensures optimal performance in all conditions
- VERSATILITY: Our starlink v4 mount comes with two types of screws: expansion screws for concrete walls and lag screws for wood roofs. Suitable for a variety of walls such as wood, brick or concrete
- EASY INSTALLATION: This starlink wall mount standard 4 is simple to install. Simply drill the holes, secure the brackets, and plug directly into the Starlink Gen 3. This flexibility makes it an essential component for starlink mounts. The length of the mounting plate is 5.9 in/15cm, and the width is 5.11 in/13cm
How much sky must be clear?
Starlink installation guidance specifies a clear view from approximately 20 degrees above the horizon across 360 degrees of azimuth, according to its obstruction guidance. In practical terms, imagine a shallow dome around the dish: trees, rooflines, chimneys, walls, poles, and other structures should not intrude into that area.
For best performance, Starlink says the view should be 100% unobstructed. An obstruction does not have to block the entire sky to cause trouble. Even a small section of blocked sky can result in:
- brief service interruptions;
- dropped packets or active sessions;
- intermittent video calls or gaming problems; and
- lower average bandwidth.
Starlink can switch between satellites when one path is blocked. Those changes may happen many times per minute and can be difficult to notice, but they do not make trees or nearby structures harmless. If the available paths are blocked at the wrong time, the connection can still pause, as Starlink explains in its obstruction information.
Where should you install the dish?
A clear, stable location is more important than a particular facing direction. Consider these options in order:
- Roof or roof peak: often provides the widest view, but use the correct roof mount and weatherproof the cable entry.
- Post, pole, or pedestal: useful when trees, fences, or roof edges block a lower position.
- Open ground: acceptable when the site has a genuinely clear view and the base cannot be knocked over or buried by snow.
Avoid installing the dish immediately next to a wall, under a covered outdoor area, or beside another structure that blocks part of the sky. Raising the dish can help when an obstruction is close to ground level, but height alone does not fix trees or structures that still rise into the dish’s view. Starlink’s installation guidance recommends elevated placement when ground-level obstructions cannot be cleared.
Rank #3

- Designed for Starlink Gen 3 / Standard (V4): Compatible with Starlink Standard 4X/Gen 3 / V4 dish systems, providing a secure and stable pole mounting solution for RV, roof, outdoor, and remote installations
- Heavy-Duty & Wind Resistant: Made from premium weather-resistant aluminum alloy with an upgraded 70 mm extended socket design for a tighter grip, improved stability, and enhanced wind resistance in harsh outdoor environments
- Perfect for RV & Off-Grid Use: Ideal for RVs, vans, trailers, cabins, rooftops, and off-grid setups. Keeps your Starlink dish securely mounted during travel and in extreme weather conditions
- Quick & Secure Installation: Includes all necessary mounting hardware for fast setup on poles ranging from 25 mm (1 in) to 53 mm (2.1 in) in diameter. Designed for a firm, long-lasting fit with minimal effort
- Clean & Reliable Outdoor Setup: Engineered for durability and stable long-term performance. Supports clean cable routing for a more organized and professional outdoor installation
What if a small obstruction cannot be avoided?
Move the dish first if possible. A different side of the roof, a higher pole, or a position several metres away can make a substantial difference.
For Performance or Gen 2 wedge-mounted hardware, Starlink documents tilting the dish away from a minor obstruction. The Starlink guidance for this configuration describes wedge geometry of approximately 12 degrees on the lower side, 28 degrees on the upper side, and 20 degrees on the other two sides. This is configuration-specific guidance, not a universal instruction for every Starlink dish. Do not apply it by forcing a motorized dish into a different angle or by improvising a mount that leaves the antenna unstable.
Do these 3 things before closing this tab:
1Fix the driver behind crashes, sound loss and screen glitches2Repair Windows errors before they cause bigger problems3Scan for outdated or missing drivers - takes under a minuteStandard 4: use the alignment tool if the app asks
The Standard 4 installation guide puts alignment inside the Starlink App:
- Start the Starlink App’s installation process.
- Connect and complete the setup steps.
- Watch for an alignment alert.
- If the alert says the dish must be rotated, click the alert to use the alignment tool.
This is different from choosing a compass heading before installation. The app is responding to the installed hardware and telling you whether rotation is required for that particular setup. Follow the on-screen instruction rather than using a compass app.
Check the obstruction map after installation
The pre-install camera scan is useful, but the dish also builds an obstruction map from the satellite paths it actually encounters.
Rank #4

- Compatible with Starlink Standard 4/4X/Gen 3/V3 – Built for the Starlink Standard dish series with a secure steel mounting frame, giving your satellite dish stable support on roofs, exterior walls, eaves, cabins, garages, and outdoor setups while helping improve signal reception through better positioning.
- Tilts 0-180° for any roof angle – Base adjusts from flat to 180° tilt so you mount on slanted roofs, flats, attics or eaves with up to 4-inch overhang to dodge ground obstacles and grab the best elevation angle.
- Weathers storms with 2mm thick steel – 2mm wall tubing delivers rigid wind/quake resistance while sandblasted and baked paint coating amps up rust, UV, and harsh weather protection for years of outdoor reliability.
- Installs fast with included hardware – Comes with wood self-tapping screws and concrete expansion anchors for various walls like wood, brick, or concrete – grab a drill and screwdriver to set up in minutes without extra trips to the store.
- Lightweight yet bombproof at 3.31lb – Balanced 3.31lb design makes handling easy during install but the thick steel and dual adjustments lock everything solid once tightened to avoid wobbles.
After installation:
- Leave the dish operating in its final position.
- Allow time for it to learn the surrounding obstructions. Starlink says a complete map can take up to 12 hours on its installation-location help page; another Starlink help page says most obstructions are detected in less than a day.
- Open the Starlink App’s main menu.
- Select OBSTRUCTIONS.
- Inspect the map and note where blocked areas correspond to trees, roof edges, or other objects.
A thick clear band shown on the map is not necessarily a physical obstruction. Starlink identifies this as the geostationary exclusion zone, where it does not transmit or receive in order to avoid interference with geostationary satellites.
Recommended Free Tools
Why can an obstruction alert appear after months of normal service?
The dish continues learning the obstructions around it. Starlink says an alert can appear after long-term operation as the system improves its understanding of the surrounding satellite paths. The banner may later disappear as obstruction avoidance improves.
That does not necessarily mean the dish has moved or failed. Compare the alert with the map, recent tree growth, construction, new roof equipment, and seasonal changes. Snow-covered branches can also alter a previously acceptable view.
How to relocate the dish because of obstructions
If the map confirms that the current position is causing interruptions, do not start by rotating the dish toward a guessed heading.
- Open the app’s obstruction-location tool and scan the proposed new position.
- Move the dish using a suitable mount and keep it near vertical.
- Secure the mount and route the cable without sharp bends or pinch points.
- Unplug and reboot the dish after relocation, as Starlink’s relocation instructions specify.
- Allow the dish to reacquire service and rebuild its obstruction map.
Common placement mistakes
| Mistake | Better approach |
|---|---|
| Pointing due north because of an online setup guide | Install near vertical and let the dish or app determine the correct operating angle. |
| Scanning from a convenient spot rather than the planned mount | Hold the phone at the exact planned height and perspective. |
| Assuming a few trees cannot matter | Move or raise the dish until the app shows the clearest possible view. |
| Installing beside a wall or under an overhang | Use an open location with unobstructed sky above roughly 20 degrees elevation, per Starlink’s obstruction guidance. |
| Manually forcing a motorized dish | Use the Starlink App’s alignment tool when an alert appears. |
| Judging the connection immediately after moving it | Reboot it, then allow time for the obstruction map to populate. |
FAQ
Which direction should a Starlink dish face?
There is no universal user-selected compass direction. Install the dish near vertical in the clearest available location and let supported hardware automatically determine its operating angle.
Should Starlink face north in the United States?
No. “Point it due north” is not the current general installation rule. Use the Starlink App’s obstruction scan and alignment tool instead.
Best Value

- Wide Pole Compatibility: The Starlink Gen 3 pipe adapter fits poles with diameters ranging from 1.10″ (28mm) to 2.12″ (54mm). Its guided slot design ensures precise pole centering, delivering a secure and accurate installation.
- Premium Manganese Steel Construction for Starlink 4/4X/Gen 3 Pipe Adapter Crafted from high-quality manganese steel, this Starlink pole mount gen 3 boasts exceptional anti-deformation and impact-resistant performance, ensuring long-lasting durability even in harsh outdoor conditions. Perfect as a reliable Starlink pipe adapter, it stands up to daily use and keeps your Starlink Gen 3 secure on any mounting pole.
- Tool-Free Easy Installation for Starlink Mounts No need for extra tools—this XGMATT Starlink 4/4X/Gen 3 pipe adapter features a user-friendly design that allows quick setup on most standard poles. Whether you’re mounting on a roof, patio, or outdoor structure, the simple installation process makes it ideal for both DIY enthusiasts and beginners, fitting seamlessly with your Starlink mounting pole.
- Wide Compatibility for Starlink Gen3/V4/4X & Multi-Scenario Use Custom-made pipe adapter perfectly matches Starlink V3 standard dish, also fully compatible with Starlink 4 and 4X antennas. Flexible clamping structure fits most poles for all installation needs, including residential rooftops and RVs. It firmly holds your Starlink dish and delivers stable signal performance no matter where you install.
- Secure & Stable Support for Starlink Gen 3 Pole Mount Built with reliable locking structures, this Starlink pole adapter eliminates wobble and displacement to firmly fix your Gen 3 standard dish. It clamps tightly onto mounting poles even under strong winds and vibration, delivering steady installation and worry-free satellite internet use.
Can I rotate a motorized Starlink dish by hand?
No. Do not manually force a motorized dish. If the app displays an alignment alert, open it and use the built-in alignment tool.
How clear does the sky need to be for Starlink?
Starlink guidance calls for approximately 20 degrees of clear elevation above the horizon across 360 degrees of azimuth. A fully unobstructed view is best; trees and structures can cause interruptions even when service usually works.
Does Starlink work under trees?
It may connect, but trees can block satellite paths and cause brief outages, dropped sessions, and lower average bandwidth. Use the obstruction tool to find a less obstructed location.
Why does the obstruction map show a wide clear band?
The band may be Starlink’s geostationary exclusion zone, not a physical object. Starlink avoids transmitting or receiving through that zone to prevent interference with geostationary satellites.
The Bottom Line
Do not choose a Starlink dish direction with a compass. Choose the clearest site, scan it in the Starlink App from the dish’s actual planned height, install the dish near vertical, and let the hardware align itself. For Standard 4, use the app’s alignment alert and tool if one appears. If obstructions remain, elevate or relocate the dish rather than trying to compensate with a guessed north/south heading.
Quick Recap
Product prices and availability are accurate as of the date/time indicated and are subject to change. Any price and availability information displayed on Amazon at the time of purchase will apply.

