
Free tools Windows power users keep installed
One-click scans. No signup required.
A ReadyNAS Duo that will not boot or respond to Reset may have a failing disk, weak power adapter, corrupted system files, or a hardware fault. First identify whether it is a Duo v1 or v2: their boot-menu procedures differ. Most importantly, do not select Factory Reset/Factory Default if you need the files—the operation erases data and reformats the disks.
Before you try to reset the ReadyNAS
Stop if the disks contain the only copy of important files. A reset that sounds like a general repair may instead erase the volume. NETGEAR distinguishes OS reinstall from factory reset: OS reinstall is intended to reinstall firmware while preserving the data volume, though it resets some settings; factory reset erases data and reformats the disks. See NETGEAR’s Duo v1 boot-menu guidance and Duo v2 boot-menu guidance.
| # | Preview | Product | Price | |
|---|---|---|---|---|
| 1 |

|
Buffalo Replacement Spare Hard Drive 2TB for TeraStation Essentials (OP-HD2.0-2Y) | $167.99 | Buy on Amazon |
| 2 |
|
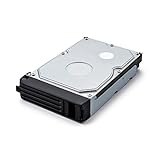
BUFFALO Replacement Spare Hard Drive 2TB for TeraStation 5400RH (OP-HD2.0H-3Y) | $229.99 | Buy on Amazon |
- Photograph the front-panel LEDs and note whether the fan starts, stays at full speed, or stops.
- If you remove disks, label them Bay 1 and Bay 2 and keep them in that order.
- Do not let a computer or another NAS initialize, format, repair, or rebuild the disks.
- If a disk clicks, repeatedly spins up and down, or disconnects, stop repeated power cycling; further attempts can worsen a failing drive.
Identify whether yours is a Duo v1 or Duo v2
Check the model label on the chassis. The typical families are RND2000v1 and RND2000v2; do not rely on the name “Duo” alone. The v1 uses RAIDiator 4.1, while the v2 uses RAIDiator 5.3, and their boot menus are different. NETGEAR’s legacy downloads page lists RAIDiator 4.1.16 for Duo/NV+/1100 and 5.3.13 for Duo v2/NV+ v2; these are legacy versions, not evidence that the products remain actively supported. See NETGEAR ReadyNAS downloads.
Use the symptoms to choose a diagnostic path
| What you see | What it may indicate | Next safe check |
|---|---|---|
| No LEDs, fan, or disk spin | Adapter, DC input, internal power circuitry, or mainboard failure | Check the adapter and outlet before considering a reset. |
| Power LED or fan, but no apparent boot | Disk preventing startup, firmware/system issue, or hardware fault | Record behavior, then try the diskless chassis test below. |
| Flashing power LED or fan at full speed | Possible disk/volume stall, firmware problem, or chassis fault; this symptom alone does not identify the cause | Do not assume a factory reset will fix it. Isolate power and disks first. |
| Disk-specific error light, repeated spin-up, or clicking | Possible failing disk or array problem | Stop if data matters; avoid repairs or rebuilds that write to the disks. |
| Unit starts but is absent from RAIDar | Network, DHCP, cabling, boot-stage, or firmware issue | Check Ethernet link and network path; absence from RAIDar alone does not prove the NAS is dead. |
| NAS appears in RAIDar but its web interface is unavailable | Network settings, service, or system-state issue | Try the OS reinstall path only after identifying the model and considering the settings it resets. |
| Boots with disks removed but hangs with them installed | Disk, disk-bay, or array/volume issue is more likely | Preserve bay order and assess the disks without initializing them. |
| Reset seems to do nothing | Wrong generation-specific procedure, button issue, or hardware failure | Follow the exact v1 or v2 sequence below; do not hold Reset for an arbitrary duration. |
Check power and remove variables
- Power the NAS off. Disconnect nonessential USB devices and network accessories.
- Connect the NAS directly to a known-good wall outlet.
- Verify the adapter’s output voltage, polarity, connector, and current rating against the original adapter or the NAS label. A plug that fits is not enough.
- Power on once and note the fan, disk sounds, LEDs, and Ethernet-link lights. LEDs lighting briefly does not establish that the adapter can supply enough current when disks spin up.
An aging adapter can start the fan or light LEDs, then fail under disk load. Do not substitute an adapter with uncertain polarity or insufficient current.
Do these 3 things before closing this tab:
1Clear out junk files and repair common Windows errors2Scan for outdated or missing drivers - takes under a minute3Repair Windows errors before they cause bigger problems#1 Best Overall
- Replacement 2 TB Hard Drive for TeraStation Essentials
- Direct replacement for : TS3420D0804S, TS3420R0804S, TS3430D0804S
- SATA 3 Gb/s
- Buffalo Manufacturer's 2-year warranty
Test the chassis with the disks removed
- Power the ReadyNAS off and unplug it.
- Remove both disks and label them Bay 1 and Bay 2. Handle them carefully and do not connect them to a computer that may offer to initialize them.
- Power on the empty chassis. Observe the fan, power and other LEDs, Ethernet link, and whether the front-panel buttons appear responsive.
- If possible, check whether the correct model’s boot menu can be reached, but do not select a destructive option.
| Result | What it suggests |
|---|---|
| No LEDs, fan, or link lights | Power adapter, DC input, internal power circuitry, or mainboard problem. |
| Fan and LEDs operate more normally without disks | A disk or the volume state may be blocking startup; this does not identify which disk or prove the data is recoverable. |
| Full-speed fan and no progress even when empty | Firmware, flash, memory, sensor, or mainboard trouble becomes more plausible. |
| Hangs with one disk but not the other | That disk, its metadata, or its bay deserves investigation; do not assume the other disk is a complete, usable copy. |
| Hangs with either disk or both disks | Could be array/volume corruption or a chassis fault under load. |
This is a diagnostic test, not a way to access files: without the disks, the NAS cannot mount its data volume.
Assess disks without writing to them
If the files matter, avoid filesystem repair, format or initialize prompts, and any suggested RAID rebuild until the array and disk condition are understood. A rebuild can stress the remaining disk and may complicate recovery if the wrong source is selected.
- Where possible, use read-oriented SMART inspection and note reallocated, pending, or uncorrectable sectors, spin-up failures, and identification errors.
- A USB-to-SATA adapter or dock may help inspect or image a disk, but it must reliably power a 3.5-inch drive. Do not accept an operating system’s offer to initialize or repair it.
- If a disk clicks, grinds, repeatedly disconnects, or returns serious read errors, stop testing and consider professional recovery or disk imaging before further use.
- A surviving member of a two-disk mirror may offer a recovery path, but it is not guaranteed. The result depends on RAID mode, filesystem, metadata, array state, and disk condition.
ReadyNAS documentation describes X-RAID/Flex-RAID for v1 and X-RAID2 for v2; do not assume every Duo has the same RAID layout. See the v1 hardware manual and v2 hardware manual.
ReadyNAS Duo v1: select OS reinstall carefully
For v1, NETGEAR’s boot-menu instructions use the rear Reset pinhole next to the USB port:
Quick wins for a faster PC:
Repair Windows errors before they cause bigger problemsFix Now →Fix the driver behind crashes, sound loss and screen glitchesFind Drivers →Clear out junk files and repair common Windows errorsFree Scan →- Power off the ReadyNAS.
- Press and hold the Reset pinhole with a straightened paper clip.
- While holding Reset, press and release Power.
- Keep holding Reset until all disk LEDs flash once, at about 5 seconds, then release. This selects OS reinstall.
NETGEAR describes OS reinstall as copying firmware from internal flash to the disks. It resets some settings, including network settings and the administrator password, but is distinct from factory reset. It is the less destructive recovery choice when system/configuration corruption is suspected and the data volume should be preserved; it is not risk-free with failing disks or a damaged array.
Do not mistake the next v1 LED flash for confirmation
For v1, continuing to hold Reset until the disk LEDs flash a second time—about 25 seconds after the first—selects factory reset. NETGEAR warns that factory reset erases data and restores factory settings. The v1 documentation describes a short disk test followed by a 10-minute period in which the unit can be shut down to avoid the destructive reset. Do not continue this sequence if you need the data. See the v1 hardware manual.
Other v1 boot modes are advanced options
The v1 menu also offers Skip volume check, TFTP boot, Tech support, USB boot, Memory test, and Disk test. NETGEAR lists approximate Power-button hold times of 5 seconds for Skip volume check, 10 for TFTP boot, 15 for Tech support, 20 for USB boot, and 25 for Memory test. These are not interchangeable with the Reset-pin sequence. NETGEAR cautions that skip-volume-check, TFTP, USB, and tech-support modes generally require appropriate technical guidance. Skipping a volume check can risk data loss; TFTP and USB modes address limited firmware cases, not failing power, disks, RAM, or mainboard.
Rank #2
- Replacement 2TB enterprise-grade hard drive for TeraStation 5400RH series
- Direct replacement for TS5400RH0804
- SATA 6 Gbps
- Buffalo Manufacturer's 3-year warranty
ReadyNAS Duo v2: use the LED boot menu
- Power off the unit.
- Press and hold the rear Reset button, then press Power to start it.
- Continue holding Reset until the Power, USB/backup, Disk 1, and Disk 2 indicators illuminate.
- Press Backup to cycle through the available boot modes and watch the LED selection.
- When the intended mode is indicated, press and release Reset to confirm.
| v2 mode | LED indicator |
|---|---|
| Normal | Power |
| Factory default | Disk 1 |
| OS reinstall | Disk 2 |
| Tech support | USB/backup |
| Skip volume check | Power + Disk 1 |
| Memory test | Power + Disk 2 |
| Disk test | Power + USB/backup |
Choose OS reinstall rather than Factory default when the goal is to address system/configuration corruption while preserving the data volume. NETGEAR says OS reinstall reinstalls firmware and resets some settings, including the administrator password; it does not affect the data volume in its recovery guidance. Failing disks or an already damaged array can still make any recovery operation risky. See NETGEAR’s OS reinstall recovery guidance.
The Tool Desk
Outbyte Driver Updater FREEScan for outdated or missing drivers - takes under a minuteDriver Scan →Outbyte PC Repair FREEClear out junk files and repair common Windows errorsFree Scan →Understand the v2 factory-default window
NETGEAR documents an approximately 5-minute short disk test, followed by a 10-minute timeout period while the unit waits for RAIDar; after that, factory-default processing begins. During the timeout, the unit can be powered off safely without data loss. Choosing factory default through RAIDar during that period starts it immediately. Once the process begins, it erases data and reformats the disks. These timings describe the documented v2 RAIDiator procedure, not a universal estimate for every boot failure.
If OS reinstall does not resolve startup
- Check whether the unit appears in RAIDar and whether its Ethernet link is active. A reset may have changed network settings, so verify the router’s DHCP clients and the cabling before concluding the NAS is dead.
- Confirm the selected mode and model generation. A wrong button sequence may leave the unit in Normal mode or select a different option.
- If the unit boots only with disks removed, return attention to the disks, bays, and array. Do not use firmware replacement as a substitute for disk diagnosis.
- Consider TFTP or USB firmware recovery only if the boot menu is accessible and firmware corruption is plausible. NETGEAR’s v1 instructions reserve these modes for technical-support direction; they will not fix a failing adapter, disk, memory, or board.
- If the boot menu cannot be reached even with disks removed and a verified power source, stop repeated power cycling and treat chassis hardware failure as a serious possibility.
Choose the next step based on the data
If the data is valuable and not backed up
- Keep the disks labeled in their original bays.
- Do not factory reset, initialize, format, repair, or rebuild.
- If a disk is mechanically noisy or unstable, stop testing and seek a recovery specialist experienced with Linux software RAID, ext-family filesystems, and legacy ReadyNAS arrays. Require approval before any destructive work.
If the data is backed up or disposable
After confirming the model, factory default may be appropriate to repurpose the NAS or clear its configuration. It erases and reformats the disks; do not select it as a diagnostic experiment.
If one disk appears to have failed
Do not immediately replace it and authorize a rebuild. Preserve both members, determine which disk has the best chance of containing the recoverable array state, and image or professionally assess the suspect disk if the files matter.
If the chassis appears to have failed
A compatible replacement adapter is reasonable only when its voltage, polarity, connector, and current rating match. If known-good power does not change the empty-chassis behavior, further spending on the legacy enclosure may not be worthwhile. Do not put the old disks into another NAS and accept setup prompts without first confirming migration compatibility and protecting the original array.
When to stop troubleshooting
- A disk clicks, grinds, or disappears during reads.
- The NAS repeatedly loses power as disks spin up.
- The only proposed next step is a factory reset, format, initialization, or rebuild and the data is not backed up.
- The boot menu cannot be reached with disks removed and a verified power source.
- You cannot tell which disk is the source, replacement, or original Bay 1/Bay 2 member.
ReadyNAS is an end-of-life product family. NETGEAR still lists legacy downloads, but a repaired Duo is best treated as data-recovery or short-term salvage equipment, not a modern supported storage platform. If the enclosure has failed, first secure the data; plan a replacement NAS and independent backup only after recovery or confirmed backup.
Quick Recap
Product prices and availability are accurate as of the date/time indicated and are subject to change. Any price and availability information displayed on Amazon at the time of purchase will apply.

