
The Tool Desk
Outbyte PC Repair FREEClear out junk files and repair common Windows errorsFree Scan →Outbyte Driver Updater FREEScan for outdated or missing drivers - takes under a minuteDriver Scan →iTechGuides is reader-supported. When you buy through links on our site, we may earn an affiliate commission. As an Amazon Associate I earn from qualifying purchases. Learn more
Modding a Casio W-800H with a countdown timer is possible on the documented compatible PCB: remove the solder bridge on jumper 0, labeled “Timer Disable,” and the existing module can expose a countdown mode. The change is unofficial, requires opening the watch, and can damage the PCB, LCD connections, case seal, or water resistance.
The W-800H does not receive new firmware during this modification. The documented procedure changes a configuration jumper on the existing circuit board. Because W-800H examples may use different boards or module revisions, identify the exact PCB and jumper layout before removing anything.
Key takeaways
- Jumper 0 is factory-shorted and is documented as “Timer Disable”; opening that jumper enables the countdown-timer mode on the compatible W-800H board.
- The preferred method is a fine-tip soldering iron and solder wick, not prying or scraping the PCB.
- Opening the W-800H exposes a plastic movement clamshell containing fragile LCD connectors, a white spacer, and tiny contact springs.
- Compatibility must be checked by PCB layout and jumper numbering because the documented modification does not prove that every W-800H variant uses the same board.
- After opening the case, the watch should not be assumed to retain its original water resistance unless the seal is properly inspected and the watch is pressure-tested.
What does the W-800H countdown-timer mod actually do?
The modification opens a factory configuration jumper that disables the timer. On the documented W-800H PCB, jumper 0 is labeled “Timer Disable”: the factory-shortened bridge keeps the countdown-timer mode hidden, while removing the bridge changes the module’s available modes.
The modification does not flash software, replace the module, alter the LCD, or add a separate timer circuit. The documented PCB appears to already contain the relevant timer capability and user-interface support. Ian Rees presents the shared-PCB explanation as an informed conclusion about Casio’s configuration approach, not as a manufacturing explanation officially confirmed by Casio. See the original W-800H timer-mod documentation for the jumper identification and procedure.
Popular on Amazon

- Impressive 10-Year Battery Life: Powered by a CR2025 battery, this watch delivers a decade of reliable performance, making it a low-maintenance timepiece for your daily life.
- 100-Meter Water Resistance: Built to handle your adventures, this watch is suitable for swimming, snorkeling, and other water activities.
- Versatile Timekeeping Features: Includes dual time, 1/100-second stopwatch, and a 24-hour countdown timer, perfect for sports, travel, and daily routines.
- LED Backlight with Afterglow: The LED backlight ensures clear visibility in low-light conditions, making it easy to check the time day or night.
- Multi-Function Alarm & Auto Calendar: Stay organized with an hourly time signal, multi-function alarm (including a snooze option), and a full auto-calendar preprogrammed until 2099.
The change is conceptually reversible: restoring a small solder bridge across jumper 0 should return the timer-disable configuration. Reversibility is not guaranteed after damage, however. A lifted pad, cut trace, or overheated PCB may require board-level repair and is much harder to undo than removing a solder bridge.
Is every Casio W-800H compatible?
No. The documented procedure applies to the W-800H PCB and jumper arrangement shown in the original project, but every W-800H-branded example should not be assumed to be identical.
Before opening the watch, verify the following:
- The case marking is W-800H, rather than a different Casio model with a similar appearance or name.
- The module or PCB markings, where visible, correspond to the documented configuration.
- The board contains a numbered jumper row arranged like the documented board.
- Jumper 0 can be identified unambiguously as the timer-disable jumper.
- The watch is genuine, intact, and working normally before modification.
Recent owner reports show that some W-800H examples may have different internal boards or module markings. Do not remove a bridge merely because its position matches a video, photograph, or another owner’s watch. The physical board layout and jumper numbering must match the documented configuration. Ian Rees also notes that other Casio watches may share a PCB family, but that possibility requires individual verification rather than a blanket compatibility claim. A more recent community report illustrates why board and module variation deserves attention: compare the internal layout before modifying a W-800H.
Should you modify the watch or buy a factory-timer model?
The right choice depends on whether the project itself matters. Modifying a W-800H is attractive when you already own the watch and want a practical electronics project. Buying a watch that officially includes a countdown timer is the safer choice when reliable timing, warranty coverage, and water resistance matter more than experimentation.
| Reader situation | Better choice | Reason |
|---|---|---|
| Experienced electronics hobbyist | Modify a compatible W-800H | Fine soldering equipment and magnification make jumper 0 removal more controlled. |
| Beginner without soldering tools | Buy a factory-timer watch | Scraping is a higher-risk substitute, and buying tools solely for this project may not be worthwhile. |
| Watch used for swimming or diving | Avoid opening the original watch | Opening the case makes water resistance uncertain unless the seal is inspected and the watch is professionally pressure-tested. |
| Collector or warranty-conscious owner | Keep the original unmodified or use a second unit | The modification is unofficial and opening the case may affect warranty coverage and condition. |
| Owner who also wants five alarms | Perform the timer mod first and treat the alarm change separately | Five alarms reportedly involve jumper 3; they are not automatically added by opening jumper 0. |
Hackaday’s coverage describes practical uses such as repeated-duration work, including a darkroom use case reported by a commenter. Those uses are owner experiences rather than independently verified testing. The project is best understood as a low-cost hardware hack, not necessarily the economically rational way to obtain a guaranteed countdown timer. Hackaday’s summary provides additional project context: Hackaday’s coverage of the W-800H countdown-timer modification.
What tools and precautions are needed?
The documented W-800H procedure uses small watch-disassembly tools and controlled solder work. Prepare the workspace before opening the case because the movement contains small parts that are easy to lose.
Tools
- Casio W-800H with a PCB that matches the documented configuration.
- Small Phillips screwdriver, approximately #00; a suitable JIS driver may fit better than a generic Phillips driver.
- Fine tweezers or an X-Acto-style tool for careful handling and separation.
- Fine-tip soldering iron.
- Fine solder wick and, if needed, a small amount of fine solder for restoration.
- Bright lighting and strong magnification, such as a loupe or inspection microscope.
- White cloth or tray to contain dropped parts.
- Small parts dish or magnetic dish for screws and springs.
The original project’s tool and disassembly notes identify the small screwdriver, fine tools, and soldering equipment used for the modification.
Before opening the case
- Photograph the front, back, and button layout of the working watch.
- Photograph the PCB orientation before lifting the movement or opening the clamshell.
- Confirm that the watch operates normally, including its display, buttons, alarm, stopwatch, time, and date functions.
- Inspect the case and gasket area for cracks, damage, or obvious seal problems.
- Have a suitable replacement battery available if the existing cell is weak.
- Accept that opening the watch may compromise water resistance and may affect any remaining warranty.
Remove the battery before manipulating the PCB. Avoid metal tools near exposed contacts while the battery is installed, and do not heat the board longer than necessary.
Which W-800H jumper enables the countdown timer?
Jumper 0 enables the documented countdown-timer mode when its solder bridge is opened. Do not confuse jumper 0 with the other numbered jumpers.
| Jumper | Effect when shorted | Factory state | Instruction for this mod |
|---|---|---|---|
| 0 | Timer disabled | Shorted | Open this bridge to expose the timer. |
| 1 | Unknown | Shorted | Do not alter for the timer modification. |
| 2 | Unknown | Shorted | Do not alter for the timer modification. |
| 3 | Five alarms | Open | Separate optional modification; leave unchanged here. |
| 4 | Unknown | Open | Do not experiment without reliable documentation. |
| 5 | Dual time disabled | Open | Separate optional modification; leave unchanged here. |
The jumper map comes from the original project documentation. Unknown jumper functions should remain untouched because their effects are not established here, and Ian Rees specifically noted uncertainty about whether some jumper settings could affect the piezo beeper. The jumper table is documented at Ian Rees’s W-800H extras page.
How do you open the W-800H safely?
Open the W-800H slowly and preserve the movement’s orientation; the dangerous part of the procedure is not removing the rear screws but separating the plastic movement clamshell without disturbing the display connections and contact springs.
Recommended Free Tools
- Remove the rear screws with the appropriate small screwdriver. Keep the screws together.
- Lift the case back carefully rather than twisting it against the gasket.
- Remove the battery as you would during a battery replacement.
- Lift or separate the movement only as far as necessary to reach the PCB.
- Identify the plastic movement clamshell before attempting to open it.
- Gently release the stamped-steel clips that hold the clamshell together.
- Open the clamshell like a book. Do not pull the halves sharply apart.
The PCB and battery holder remain on one side of the clamshell, while the LCD is on the other side in the documented construction. Tiny springs may sit in the battery-side half. The white plastic spacer and elastomeric LCD connectors must remain in their original positions and orientations.
The elastomeric connectors carry the display connection through pressure between the LCD and PCB. A displaced connector, missing spacer, dirty contact, or incompletely closed clamshell can cause a blank, partial, or intermittent display. The original documentation’s W-800H clamshell warnings are more important than a simple instruction to “remove the module.”
How do you remove jumper 0?
Remove jumper 0 by wicking away its solder bridge with a fine-tip iron, then inspect the two sides under magnification to confirm that they are electrically separated.
- With the battery removed, locate the numbered row of solder jumpers on the PCB.
- Compare the board directly with the documented layout and identify 0.
- Confirm that jumper 0 is the bridge labeled or mapped as Timer Disable.
- Place a small section of fine solder wick over the bridge.
- Briefly apply the fine-tip iron to the wick and bridge until the solder transfers into the wick.
- Lift the wick without dragging it across nearby pads or traces.
- Inspect jumper 0 under magnification. The two sides must no longer be joined by solder or loose solder debris.
- Do not remove jumpers 1, 2, 3, 4, or 5 as part of the countdown-timer procedure.
Use the minimum heat and contact time needed to remove the bridge. A large tip, excessive force, or prolonged heating can damage the pad. Loose solder can also create an unintended short between adjacent contacts, so inspect the work area before reinstalling the battery.
Quick wins for a faster PC:
Clear out junk files and repair common Windows errorsFree Scan →Fix the driver behind crashes, sound loss and screen glitchesFind Drivers →Repair Windows errors before they cause bigger problemsFix Now →Can you scrape the bridge away instead?
Some owners report carefully scraping the bridge away without a soldering iron, but scraping is an improvised and less controlled method. A sharp tool can gouge the PCB, sever a trace, or lift the pad, so solder wick is the preferred technique. Owner reports describing the scraping approach include one W-800H timer-mod discussion and another owner report.
How do you reassemble and test the modified watch?
Reassemble the W-800H by restoring every connector, spacer, spring, and clip before reinstalling the battery and case back; then verify the new timer and all existing functions.
- Return each elastomeric LCD connector to its original slot and orientation.
- Put the white plastic spacer back exactly as photographed.
- Confirm that every tiny metal contact spring is present and seated correctly.
- Close the movement clamshell carefully and engage the stamped-steel clips.
- Reinstall the battery in the correct orientation.
- Refit the movement and case back without pinching the gasket.
- Tighten the rear screws evenly and stop before over-tightening.
- Cycle through every available mode.
- Look for a countdown-timer mode in the mode sequence.
- Set a short duration and verify that the countdown starts, pauses, and resets.
- Check that the alarm or beep sounds and that the display remains stable.
- Confirm that time, date, stopwatch, and alarm functions still operate.
The original documentation says that a memory clear may be required according to the battery sticker, although the author reported that his watch continued working without clearing it. Treat a reset or memory clear as a model- and unit-dependent possibility, not a guaranteed step. Follow the instructions associated with the specific watch and battery replacement procedure if a reset is indicated.
Do not test water resistance by immediately swimming with the modified watch. A correctly seated gasket is necessary but does not prove that the case is water-resistant after opening.
Windows Errors? Fix Them Before They Spread
Repair common Windows errors and clear accumulated junk for a smoother, more stable PC - no reinstall needed.Free scan · no reinstallOutdated Drivers Are Slowing You Down
One free scan finds every outdated or missing driver and matches the right update for your exact hardware.Free scan · exact hardware matchAlso popular on Amazon
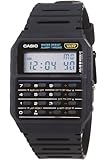
- 8-Digit Calculator; Constants for addition, subtraction, multiplication and division
- Water Resistant
- 1/100 second stopwatch; Measuring capacity: 23:59'59.99"; Measuring modes: Elapsed time, split time, 1st-2nd place times
- Auto Calendar (pre-programmed until the year 2079)
- Size of case/total weight; 42.0 x 33.0 x 7.0mm / 29g
What should you do if the timer does not appear?
If the countdown-timer mode is missing, first suspect an incorrect jumper, an incomplete separation, a different PCB revision, or a disturbed movement assembly rather than assuming the modification failed electronically.
- Remove the battery before further inspection.
- Use magnification to check whether jumper 0 is still partially bridged.
- Confirm that the board layout and jumper numbering match the documented configuration.
- Check that the PCB is seated in the correct clamshell half and orientation.
- Recheck the white spacer, elastomeric connectors, clips, and contact springs.
- Perform the manufacturer-indicated reset or memory clear if the unit’s battery instructions require it.
- If the board and pad are intact, restore jumper 0 with a small solder bridge if you decide to return to the factory configuration.
A timer that remains absent after these checks may indicate an incompatible board or module revision. Do not proceed to other jumpers as a troubleshooting shortcut.
Independent reader supportYour contribution helps us test, update, and keep practical guides available for everyone.How do you fix a blank or incomplete display?
A blank or incomplete display after reassembly usually points to a displaced LCD connector, missing spacer, poor contact pressure, an incompletely closed clamshell, or a battery-contact problem.
- Remove the battery.
- Reopen the clamshell without forcing the clips.
- Confirm that both elastomeric connectors are seated in their original slots.
- Confirm the white spacer’s orientation and position.
- Inspect contacts for dirt, solder debris, or displacement and clean them carefully with suitable electronics-cleaning materials.
- Check that the clamshell closes fully and applies even pressure.
- Reinstall the battery and test the display before fully tightening the case back.
Do not press hard on the LCD or scrape the elastomeric connectors. Excessive force can create a second problem while attempting to correct the first.
What if the watch loses all functions?
If the W-800H stops operating completely, remove the battery immediately and look for a missing spring, incorrect battery installation, solder debris, a shorted contact, or a damaged PCB pad or trace.
- Remove the battery and place it aside.
- Inspect the PCB for loose solder particles or an unintended bridge between contacts.
- Check every contact spring and confirm that no spring was lost during clamshell separation.
- Verify battery polarity and battery contact pressure.
- Inspect jumper 0 for a damaged or lifted pad.
- Restore the jumper only if the pad and surrounding trace remain intact.
Stop the repair if a pad or trace has lifted. Further probing or heating can make board-level repair more difficult.
What happens to water resistance after the modification?
After opening the W-800H, its original water resistance should be treated as uncertain. A gasket that looks correctly seated does not prove that the watch will withstand immersion.
Inspect the case seal during reassembly and avoid immersion unless the seal has been properly inspected and the watch has been pressure-tested. Readers who use the watch for swimming or diving should generally choose a factory-equipped alternative or have the resealed watch tested professionally.
What other W-800H jumper modifications are reported?
Other jumper settings have been reported, but they are separate from the countdown-timer procedure and should not be changed casually.
| Separate change | Reported jumper action | Relationship to timer mod |
|---|---|---|
| Five alarms | Short jumper 3 | Independent optional modification; jumper 3 remains open during the timer procedure. |
| Disable dual time | Short jumper 5 | Independent optional modification; it does not enable the countdown timer. |
| Unknown settings | Jumpers 1, 2, and 4 have undocumented effects in the supplied map | Leave unchanged; effects may include unwanted behavior such as possible beeper changes. |
The five-alarm and dual-time reports come from community documentation, including a reported jumper-mod discussion. Neither change should be bundled into the countdown-timer procedure unless the reader deliberately wants to experiment with a separate feature and is prepared to troubleshoot it independently.
Is the W-800H timer modification worth doing?
The modification is worthwhile for an experienced hobbyist who already owns a compatible W-800H, has magnification and fine soldering tools, and accepts the possibility of losing water resistance or damaging the watch. The modification preserves the original case, display, battery arrangement, and interface while adding a useful countdown function.
The modification is a poor choice for a beginner who simply needs a dependable timer, for a watch used in water, or for a collector who wants an untouched and warranty-conscious example. A factory-timer watch avoids the clamshell, LCD-connector, solder-pad, and seal risks.
Free tools Windows power users keep installed
One-click scans. No signup required.
Reported uses include cooking, exercise intervals, darkroom work, sailing, and other repeated-duration tasks. Hackaday’s discussion also mentions auto-repeating countdown behavior as an owner-use case, but timer behavior and alarm behavior should be tested on the individual module rather than treated as guaranteed across revisions.
The practical purchasing decision is simple: buy or use a fine-tip soldering iron, fine solder wick, and magnification if the project is the goal; choose a factory-equipped timer watch if reliability and water resistance are the goal. Current product prices and the best alternative Casio model vary by country and date and were not verified for this article.
Frequently Asked Questions
Does the Casio W-800H officially have a countdown timer?
The ordinary factory configuration is documented as lacking an exposed countdown-timer mode, while the compatible PCB can reportedly expose that mode after opening jumper 0. The modification is unofficial and is not established here as a Casio-supported feature.
Which jumper enables the W-800H countdown timer?
Jumper 0 enables the documented W-800H countdown-timer modification. Jumper 0 is factory-shorted and labeled “Timer Disable”; removing that solder bridge changes the available modes.
Do these 3 things before closing this tab:
1Clear out junk files and repair common Windows errors2Fix the driver behind crashes, sound loss and screen glitches3Repair Windows errors before they cause bigger problemsCan the W-800H timer modification be reversed?
The modification is conceptually reversible by restoring the solder bridge across jumper 0. A damaged pad or lifted PCB trace is not easily reversible, so restoration is straightforward only when the board remains intact.
Will the W-800H remain waterproof after the timer mod?
The W-800H should not be assumed to retain its original water resistance after the case is opened. The seal must be inspected and the watch should be pressure-tested before immersion.
The Bottom Line
The documented W-800H countdown-timer modification is to open jumper 0, not to alter firmware or experiment with the other jumpers. Verify the PCB first, use solder wick and magnification, protect the clamshell’s springs and LCD connectors, and treat water resistance as uncertain after opening. Modify a compatible spare or donor watch if the project matters; buy a factory-timer model if dependable everyday operation matters more.

