
Free tools Windows power users keep installed
One-click scans. No signup required.
Microsoft Word Mail Merge creates a personalized document for each record in a recipient list. Set up a main document, connect a data source, insert merge fields, preview the results, and finish the merge to create, print, or send the documents. You can use it for letters, labels, envelopes, directories, and bulk email.
Mail Merge is a desktop Word feature. Word for the web can preserve merge settings in a document created in desktop Word, but it cannot perform a merge or edit its settings. These instructions apply to Word for Microsoft 365, Word 2024, Word 2021, Word 2019, and Word 2016 on Windows and Mac; some command labels vary slightly by version and platform.
What you need before starting
A Mail Merge document has three parts:
| Part | Purpose | Example |
|---|---|---|
| Main document | Contains the shared wording, formatting, and merge fields | A form letter |
| Data source | Contains one row or record for each recipient | An Excel worksheet with customer details |
| Merge fields | Mark where Word should insert values from the data source | FirstName, OrderNumber, or PostalCode |
Common data sources include Excel spreadsheets, Access databases, Outlook contacts, text files, and lists created inside Word. For an Excel source, put the column headings in the first row and keep the mailing data on one worksheet. Word uses those headings as the available merge fields.
Prepare an Excel list for Mail Merge
A simple worksheet might look like this:
| FirstName | LastName | Address | City | PostalCode | |
|---|---|---|---|---|---|
| Megan | Lee | 18 Oak Street | Leeds | LS1 2AB | megan@example.com |
| David | Patel | 44 King Road | Bristol | BS1 4CD | david@example.com |
Use clear, unique headings such as FirstName and OrderNumber. Do not leave blank rows above the headings, and check that every intended recipient has the required information.
The Tool Desk
Outbyte Driver Updater FREEFix the driver behind crashes, sound loss and screen glitchesFind Drivers →Outbyte PC Repair FREEClear out junk files and repair common Windows errorsFree Scan →#1 Best Overall
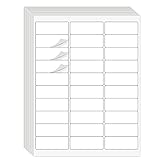
- Compatible with Laser/Inkjet Printing. Matte Surface Prevents Ink Smudges for Hassle-free Printing.
- Print Templates Available for Download in PDF and Microsoft Word Formats
- Great for bulk shipping and mailing, organizing boxes, bin labels, classroom organization & stickers, filing & organizing, and bottle labels.
- Surface(including the top is Similar to Writing Paper, You Can Write on It with a Pencil, Pen, Sharpie, etc.
- Label Size: 1" x 2-5/8", Sheet Size: 8.5" x 11". 30 sheets, 900 labels
Pay particular attention to postal codes, dates, currencies, and other values that Excel may interpret as numbers. A postal code such as 01234 can lose its leading zero if Excel stores it as a number. To preserve it, import the source file through Data > From Text/CSV, set the postal-code column to Text, and choose Load or Import. In Excel 2016, use Data > Get External Data > From Text; choose Delimited, select My data has headers, choose the delimiter, set the postal-code column to Text, and select Finish.
If a date, currency, or number merges incorrectly, correct the column’s data type or formatting in Excel. Formatting the value only in Word does not reliably fix the value Word imports.
Create batch letters with Mail Merge
- Open a blank Word document.
- Choose Mailings > Start Mail Merge > Letters.
- Type the text that should appear in every letter. Add the date, headings, signature, and any other common content before inserting personalized information.
- Choose Mailings > Select Recipients, then select a data source.
- Insert the recipient’s address, greeting, and other fields.
- Preview several records.
- Filter or sort the recipients if necessary.
- Finish the merge by creating an editable document, printing, or sending email.
1. Connect the recipient list
Select Mailings > Select Recipients and choose one of these options:
- Use an Existing List — selects an Excel workbook, Access database, or compatible file.
- Choose from Outlook Contacts — uses contacts from Outlook.
- Type a New List or Create a New List — creates the recipient list inside Word. The visible label depends on the Word version and platform.
After selecting an Excel workbook, Word may ask you to choose the worksheet or table containing the records. Select the sheet that has the headings and mailing data.
Recommended Free Tools
For another database type, choose Mailings > Select Recipients > Use an Existing List > New Source. Word opens the Data Connection Wizard.
2. Insert address and greeting fields
Place the cursor where the address should appear, then select Mailings > Address Block. Word treats Address Block as a collection of merge fields and lets you choose an address format. Use Preview Results in the dialog to check how the address will look.
For the salutation, select Mailings > Greeting Line. Choose a greeting format such as “Dear Megan” or “Dear Customer,” and use the preview controls to check records with and without a first name.
Rank #2

- These versatile rectangle labels are great for mailing and shipping, product labels, organization, identification, and much more
- Get a more reliable feed through your printer with printable label sheets featuring patented Sure Feed technology designed to reduce misalignments and printer jams
- Save time and effort with our Easy Peel with Pop-up Edge feature that pops up the edges of the label stickers for quick, hassle-free peeling
- Create personalized address labels using Avery Design & Print Online, which offers templates, designs, and easy-to-use tools for creating professional-quality labels
- Handwrite on labels for quick and easy personalization, or print clear text and crisp graphics with label paper optimized for inkjet printers to help prevent smearing or smudging
Address Block and Greeting Line are convenient, but they do not give you complete control over every line. To insert individual values, place the cursor at the required position and select Mailings > Insert Merge Field. Choose fields such as FirstName, LastName, OrderNumber, or DueDate.
Crashes, No Sound, or Screen Glitches?
Random freezes, missing sound and display glitches usually trace back to one bad driver. Find and replace yours safely.Free scan · under a minuteWindows Errors? Fix Them Before They Spread
Repair common Windows errors and clear accumulated junk for a smoother, more stable PC - no reinstall needed.Free scan · no reinstallIf the field you need is not shown, open the Insert Merge Field menu and choose Database Fields. If the merge-field commands are disabled, connect a recipient source first through Mailings > Select Recipients.
A manually assembled address could look like this in the main document: «FirstName» «LastName», followed by «Address» and then «City», «PostalCode».
These are fields, not ordinary text. Do not type the angle quotes yourself; insert the fields from Word’s Mailings tab.
3. Preview the personalized letters
Select Mailings > Preview Results. Word switches from field names to the values from the current record. Use the Next and Previous buttons to inspect different recipients.
Quick wins for a faster PC:
Repair Windows errors before they cause bigger problemsFix Now →Fix the driver behind crashes, sound loss and screen glitchesFind Drivers →Clear out junk files and repair common Windows errorsFree Scan →Check at least:
- Names with different lengths
- Addresses with missing or extra lines
- Records containing blank fields
- Dates, currency values, and postal codes
- Recipients near the beginning and end of the list
Previewing one record is not enough. A long company name or a missing optional field can expose a layout problem that is invisible in the first record.
4. Select, sort, or filter recipients
Choose Mailings > Filter Recipients to open the recipient list. Every record is selected by default. Clear the checkbox beside any recipient who should not receive the document.
Rank #3

- Address labels in White; ideal for mailings, shipping, and organizing
- Includes 30 labels per sheet, 100 sheets per pack, 3000 labels total
- Standard 8.5 x 11-inch letter-size sheets; compatible with laser and inkjet printers, compatible with 5160 template.
- Permanent-adhesive backing ensures secure placement
- Product Dimensions: 1 x 2-5/8 inches (W x L, per label)
You can also manage the list from this window:
| Task | Command | Use |
|---|---|---|
| Sort | Sort Records | Choose a field under Sort By, then choose ascending or descending order. Add a second field under Then By. |
| Filter | Filter Records | Choose a field, comparison, and value. Combine conditions with And or Or. |
| Find duplicates | Find Duplicates | Identify duplicate first-and-last-name records. Clearing one excludes that occurrence from the merge; it does not delete the source record. |
| Find a recipient | Find Recipient | Search all fields or a selected field and highlight matching records. |
Filtering comparisons are not case-sensitive. For example, MEGAN, Megan, and megan match equally.
5. Finish the merge
Choose Mailings > Finish & Merge. Word offers three main output choices:
- Edit Individual Documents — creates a new document containing the selected merged records. Choose this when you want to inspect or edit the finished letters before printing.
- Print Documents — sends the selected merged records directly to the printer.
- Send E-mail Messages — sends each record as an individual email when the document type is an email merge.
For printed letters, Edit Individual Documents is usually the safer choice. It gives you a final document to proofread and lets you correct an individual letter without changing the reusable main document.
Save and reuse a Mail Merge document
Save the main document after connecting the recipient list. Word preserves the connection to the mailing list. When you reopen the file, Word may ask whether you want to keep the connection; choose Yes if you want to use the linked data source.
Keep the Excel file in a stable location and avoid renaming, moving, or deleting its worksheet and column headings. If the source path changes, Word may ask you to locate the list again or may show missing fields.
Use conditional text with Mail Merge rules
Rules allow the same template to produce different wording for different records. Select Mailings > Rules to see options including If…Then…Else, Skip Record If, Next Record, Merge Record #, and Merge Sequence #.
Example: different wording for business customers
Suppose the data source has a CustomerType column containing Business or Personal. Place the cursor where the conditional sentence should appear and choose Mailings > Rules > If…Then…Else. Configure:
Rank #4

- White Half Sheet Shipping Labels White matte shipping labels for printing shipping and mailing information on packages and envelopes.
- Self Adhesive Mailing Labels Self adhesive labels intended for use on cardboard boxes, envelopes, and paper packaging.
- 2 Labels Per Sheet Format Each US Letter size sheet contains pre-scored half sheet labels.
- For Laser & Inkjet Printers Label paper compatible with laser and inkjet printers using standard paper settings.
- Common Shipping and Labeling Uses Suitable for shipping, mailing, package labeling, and general office labeling purposes.
- Field name: CustomerType
- Comparison: Equal to
- Compare to: Business
- Insert this text: the business wording
- Otherwise insert this text: the personal wording
For an is blank or is not blank comparison, leave Compare to empty.
Word represents an IF field with an expression, operator, comparison value, true text, and false text. When comparing text, put the comparison value in quotation marks. Put multiword true and false text in quotation marks as well. Supported operators include =, <>, >, <, >=, and <=. Press Alt+F9 to switch between field results and field codes.
Merge Record # displays a record’s position after sorting and filtering. Its field code is MERGEREC. The Next Record rule advances to the next data record without starting a new page; Word uses it in label tables to move from one label to the next.
Create labels, envelopes, directories, and emails
Labels
Choose Mailings > Start Mail Merge > Labels, select the label manufacturer and product number, and connect the recipient list. Insert the address fields in the first label, then select Update Labels so Word copies the layout and adds the required Next Record rules to the remaining labels. Preview the sheet before printing.
Envelopes
Choose Mailings > Start Mail Merge > Envelopes, select the envelope size, connect the recipient list, and insert the address fields in the delivery-address area. Preview and print a test envelope before running the full batch.
Directories and catalogs
For a catalog-style document containing many records in one file, choose Mailings > Start Mail Merge > Directory. Insert the fields and finish the merge into a new document. Unlike a letter merge, a directory combines multiple records into one document instead of creating one standalone document per recipient.
Bulk email
Choose Mailings > Start Mail Merge > E-mail Messages. The data source must contain an email-address column with a valid address for every intended recipient.
Best Value

- 🔹 High-Quality Printing & Universal Compatibility:Designed for both laser and inkjet printers, our matte-finish label sheets resist smudging and prevent paper jams. Enjoy crisp, smudge-free printing for addresses, barcodes, logos, and more!
- 🔹 Strong Permanent Adhesive Stays Put:Features all-weather adhesive that securely sticks to corrugated boxes, envelopes, glass, cards, and plastic surfaces. No peeling or lifting—even during rough shipping!
- 🔹 Bonus 12 Free Fragile Stickers Included:Get 200 half-sheet labels (2 labels per sheet) PLUS 12 free “Fragile” stickers (2x3 inches). Perfect for protecting delicate packages and adding a professional touch.
- 🔹 Peel, Stick & Save Time:Pre-cut and ready to use—no scissors, tape, or trimming needed. Streamline your shipping process with effortless peel-and-stick application.
- 🔹 More Than Just Shipping Labels:Great for DIY crafts, home and office organization, custom product stickers, garage sales, gift tags—unleash your creativity with any design!
- Connect the list through Mailings > Select Recipients.
- Write the message and insert personalized fields with Mailings > Insert Merge Field.
- Use Preview Results to check several messages.
- Choose Mailings > Finish & Merge > Send E-mail Messages.
- In To, select the email-address field.
- Enter the Subject line.
- Choose HTML or Plain text under Mail format.
- Choose All records, Current record, or a range under From and To.
Mail Merge sends an individual message to each address. It does not support CC, BCC, or attachments, although you can include links in the message. Email merging requires an installed MAPI-compatible email program. If you use Outlook contacts, Outlook must be the default email program and must be the same version as Word.
Independent reader supportYour contribution helps us test, update, and keep practical guides available for everyone.Common Mail Merge problems
| Problem | Likely cause | Fix |
|---|---|---|
| Merge fields are unavailable | No recipient list is connected | Choose Mailings > Select Recipients and connect or create a source. |
| Word displays field names instead of values | Preview is disabled | Select Mailings > Preview Results. |
| Postal-code zeroes disappear | Excel stored the code as a number | Import the source column as Text in Excel, then reconnect or refresh the source. |
| Dates or currency look wrong | Excel’s source type or formatting is unsuitable | Correct the column in Excel rather than relying on Word formatting. |
| A recipient is included unexpectedly | The record remains selected or matches a filter | Open Mailings > Filter Recipients and clear the record or adjust the filter. |
| One letter has an unwanted blank line | An optional field is empty | Rework the address layout or use an If…Then…Else rule for optional content. |
| Email sending is unavailable | No compatible MAPI email program is installed or configured | Install and configure a compatible desktop email program; for Outlook contacts, make Outlook the default and match its version to Word. |
| Word cannot find the data source later | The source was moved, renamed, or its headings changed | Restore the original path and headings, or reconnect the list through Select Recipients. |
FAQ
Can I use Mail Merge in Word for the web?
No. Word for the web preserves mail-merge settings in a document made with desktop Word, but it cannot run the merge or edit mail-merge settings. Use the desktop Word application.
What is the best data source for Mail Merge?
Excel is a practical choice for most batches. Put field headings in the first row, keep the list on one worksheet, and verify postal codes, dates, currency, and other typed values before connecting it to Word.
How do I merge only some recipients?
Choose Mailings > Filter Recipients. Clear the checkbox beside individual records, or use Filter Records to include only records matching selected conditions.
Do these 3 things before closing this tab:
1Scan for outdated or missing drivers - takes under a minute2Repair Windows errors before they cause bigger problems3Fix the driver behind crashes, sound loss and screen glitchesCan Mail Merge create one PDF per recipient?
The standard Finish & Merge options create an editable merged document or send the output to the printer. Word does not provide a standard one-click option in this menu for automatically saving each record as a separate PDF.
Can Mail Merge attach files to emails?
No. Word’s Mail Merge email function sends individual messages but does not support attachments, CC, or BCC. It can include links in the message.
Why does Word show «FirstName» instead of a person’s name?
The document is displaying merge fields rather than previewed results. Select Mailings > Preview Results to switch to the personalized values.
Does filtering delete records from my Excel file?
No. Filtering or clearing a recipient only excludes that record from the current merge. It does not delete the underlying source record.
The Bottom Line
For a reliable batch document, prepare and verify the source list first, connect it through Mailings > Select Recipients, insert fields instead of typing placeholders, preview several different records, and use Edit Individual Documents for a final proof before printing. Save the main document and keep its data source available if you plan to reuse the template.
Quick Recap
Product prices and availability are accurate as of the date/time indicated and are subject to change. Any price and availability information displayed on Amazon at the time of purchase will apply.

