
Windows 11 has several screenshot methods, and the right one depends on what you need to capture. Use Windows + Shift + S for a selected region, Windows + PrtScn to save the entire screen automatically, or Alt + PrtScn for only the active window.
This guide covers screenshots, delayed captures, text extraction, screen recording, Game Bar, keyboards without a Print Screen key, and common problems.
Windows 11 screenshot shortcuts at a glance
| What you want to capture | Shortcut | What happens | Default location |
|---|---|---|---|
| A selected area | Windows + Shift + S | Opens the Snipping Tool capture overlay | Clipboard; current versions may also auto-save to the Screenshots folder |
| The entire screen as a file | Windows + PrtScn | Captures the screen without opening the editor | Pictures\Screenshots |
| The active window | Alt + PrtScn | Copies the active window | Clipboard |
| The entire screen | PrtScn | Opens screen snipping or copies the screen, depending on your setting | Clipboard or Snipping Tool |
| A game or app | Windows + Alt + PrtScn | Captures the current game or app | Videos\Captures |
1. Capture part of the screen with Snipping Tool
This is a useful general-purpose method because you can capture a rectangle, freeform shape, window, or the entire screen.
- Press Windows + Shift + S.
- Choose a capture mode from the toolbar: Rectangle, Freeform, Window, or Full screen.
- For Rectangle or Freeform, click and drag around the content you want.
- For Window, select the window to capture.
- Full screen captures the whole display immediately.
The image is copied to the clipboard, and Windows displays a notification. Select that notification to open the capture in Snipping Tool, where you can edit, save, or share it.
Do these 3 things before closing this tab:
1Scan for outdated or missing drivers - takes under a minute2Repair Windows errors before they cause bigger problems3Fix the driver behind crashes, sound loss and screen glitches#1 Best Overall

- Computer mouse for easily navigating a computer interface; click, scroll, and more
- USB-A wired connection; if existing device only supports USB-C, an additional adapter will be required
- High-definition (1000 dpi) optical tracking ensures responsive cursor control for precise tracking and easy text selection
- 3 buttons offer effortless fingertip control
- Plug-and-go ready for instant use
Save the capture
In Snipping Tool, select Save as, or press Ctrl + S. You can also paste a clipboard capture into an app with Ctrl + V.
Current versions of Snipping Tool can automatically save captures in the Screenshots folder. To review or change this behavior, open Snipping Tool, select See More in the upper-right corner, then choose Settings.
2. Save a full-screen screenshot automatically
To capture every display area and save the image directly as a file, press Windows + PrtScn.
Find the PNG file in %USERPROFILE%\Pictures\Screenshots, or open File Explorer and go to Pictures > Screenshots. This shortcut does not open the Snipping Tool editor.
3. Capture the active window
Use this method when you want an application window rather than the whole desktop.
- Click the window you want to capture.
- Press Alt + PrtScn.
- Open Paint, Word, an email, or another image-capable app.
- Press Ctrl + V to paste the screenshot.
Alt + PrtScn copies the image to the clipboard; it does not create a file by itself.
Rank #2

- Compact Mouse: With a comfortable and contoured shape, this Logitech ambidextrous wireless mouse feels great in either right or left hand and is far superior to a touchpad
- Durable and Reliable: This USB wireless mouse features a line-by-line scroll wheel, up to 1 year of battery life (2) thanks to a smart sleep mode function, and comes with the included AA battery
- Universal Compatibility: Your Logitech mouse works with your Windows PC, Mac, or laptop, so no matter what type of computer you own today or buy tomorrow your mouse will be compatible
- Plug and Play Simplicity: Just plug in the tiny nano USB receiver and start working in seconds with a strong, reliable connection to your wireless computer mouse up to 33 feet / 10 m (5)
- Better than touchpad: Get more done by adding M185 to your laptop; according to a recent study, laptop users who chose this mouse over a touchpad were 50% more productive (3) and worked 30% faster (4)
4. Use the Print Screen key
The behavior of the unmodified PrtScn key varies in Windows 11. It may open the screen-snipping interface, or it may copy the entire screen to the clipboard.
To change the behavior, open Start > Settings > Accessibility > Keyboard and change Use the Print Screen button to open screen snipping. If this option is turned off, the key returns to clipboard-style behavior.
Quick wins for a faster PC:
Clear out junk files and repair common Windows errorsFree Scan →Scan for outdated or missing drivers - takes under a minuteDriver Scan →Repair Windows errors before they cause bigger problemsFix Now →Do not confuse these shortcuts:
- PrtScn may copy the screen or open screen snipping.
- Windows + PrtScn saves a full-screen file in Pictures\Screenshots.
- Windows + Shift + S opens the selection overlay.
5. Open Snipping Tool from the Start menu
- Select Start and type Snipping Tool.
- Select Snipping Tool in the search results.
- Choose Snipping mode.
- Select Rectangle, Window, Full screen, or Freeform.
- Select New and complete the capture.
Full-screen mode captures immediately. The other modes require you to select an area or window.
6. Take a delayed screenshot
A delay is useful for menus, tooltips, pop-up controls, or other elements that disappear when you start a capture. Snipping Tool supports delays from one to five seconds.
- Open Snipping Tool from Start.
- Select Delay.
- Choose a delay, such as 5 seconds.
- Select the required Snipping mode.
- Select New.
- Use the countdown to open the menu or position the element you want to capture.
7. Capture a menu that closes during snipping
For menus that disappear when the capture overlay appears, open Snipping Tool first, open the menu, and press Ctrl + PrtSc. Then select the required capture mode and capture the menu.
Microsoft documents this instruction in an earlier-version section, so the exact controls can differ between Windows 11 builds. If it does not work on your PC, use Snipping Tool’s Delay option instead.
What’s actually slowing this PC down?
Pick the symptom - the matching free tool is one click away.
Rank #3
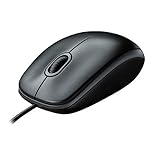
- A comfortable, ambidextrous shape feels good in either hand, so you feel more comfortable as you work-even at the end of the day
- With 800 dpi sensitivity, you'll get precise cursor control so you can edit documents and navigate the Web more efficiently
- Side-to-side scrolling plus zoom lets you instantly zoom in or out and scroll horizontally and vertically; perfect for working with spreadsheets and presentations.
- Zero setup with flexible connectivity means you just plug it into your USB or PS/2 port-it works right out of the box
- This mouse is built by Logitech-the mouse experts; it comes with the quality and design we've built into more than a billion mice, more than any other manufacturer
8. Edit and extract text from a screenshot
After opening a capture in Snipping Tool, you can use controls including Pen, Highlighter, Shapes, Eraser, Image crop, Text actions, Undo, Redo, Save as, and Share.
Extract text with OCR
- Open the screenshot in Snipping Tool.
- Select Text actions.
- Choose individual detected text, or select Copy all text.
- Paste the result into another app.
Snipping Tool can also offer Quick redact for detected email addresses and phone numbers. Microsoft states that text recognition is processed locally on the device.
Useful Snipping Tool shortcuts
| Shortcut | Action |
|---|---|
| Alt + M | Choose a snipping mode |
| Alt + N | Create a new snip using the last mode |
| Shift + Arrow keys | Move among snip types |
| Alt + D | Set a one-to-five-second delay |
| Ctrl + C | Copy the snip |
| Ctrl + S | Save the snip |
9. Screenshot a game or app with Xbox Game Bar
Xbox Game Bar is designed primarily for games and individual apps rather than ordinary Windows desktop captures.
- Open the game or app.
- Press Windows + Alt + Print Screen.
The screenshot is saved as a PNG file in %USERPROFILE%\Videos\Captures.
To open the Game Bar interface, press Windows + G. If it is disabled, search Windows Settings for xbox, select Enable Xbox Game Bar, and turn it on.
10. Record the screen in Windows 11
Snipping Tool can record a rectangular area as a video. Press Windows + Shift + R.
Rank #4

- Slim and Comfortable Design: The Lenovo 100 Wired USB Mouse boasts a slim grip full-size mouse with an ambidextrous design, ensuring a comfortable fit in your hand, whether you're left or right-handed.
- Built to Last: Rest assured about durability with the Lenovo 100 Wired USB Mouse. It's engineered for a 3 million clicks button life, delivering long-lasting performance that stands the test of time.
- Reliable Wired Connection: Enjoy an easy and reliable connection to your PC via a 1.7-meter USB-A cable. No need to worry about signal drop-offs or battery replacements; this mouse is always ready for action.
- Precision and Smooth Movement: The Lenovo 100 Wired USB Mouse offers precise movement with its 1000 DPI resolution and red optical sensor. Glide smoothly from window to window, ensuring accurate and efficient navigation.
- Plug-and-Play Convenience: This hassle-free mouse is designed for productivity. It features a straightforward plug-and-play connection to PCs with a USB-A cable, making it a practical choice for users seeking a reliable and efficient pointing device.
- Drag around the area you want to record.
- Select Start.
- Perform the actions you want to show.
- Select Stop.
- Save the recording or select Edit in Clipchamp.
Recordings are saved as MP4 files in the Screen Recordings subfolder of your Videos folder. You can also open Snipping Tool, select Record, choose New, select the recording area, and choose Start.
Record a game or app with Game Bar
For a game or app, press Windows + Alt + R to start or stop recording. Press Windows + Alt + M to turn the microphone on or off while recording. Game Bar saves MP4 recordings under %USERPROFILE%\Videos\Captures.
11. Take screenshots without a Print Screen key
On devices without a dedicated PrtScn key, Microsoft documents this alternative: Fn + Windows + Spacebar. The exact combination can vary by manufacturer and keyboard layout. You can also use Windows + Shift + S if that shortcut is available.
Surface devices
Microsoft also documents these Surface shortcuts:
- Windows + PrtScn or Windows + Snipping key saves to Pictures > Screenshots.
- Fn + Spacebar captures the active window to the clipboard.
- Fn + Alt + Spacebar captures the active window using the Surface keyboard shortcut.
- On supported Surface models, Power + Volume Up takes a screenshot. Microsoft notes that this does not work on Surface Laptop models.
12. Fix common Windows 11 screenshot problems
Print Screen opens the wrong interface
Go to Start > Settings > Accessibility > Keyboard and check Use the Print Screen button to open screen snipping. That setting controls whether PrtScn opens the overlay or copies the full screen.
The screenshot was copied but there is no file
Clipboard captures do not have to be saved as files. Paste the image with Ctrl + V, use Windows + PrtScn to save a file automatically, or open the capture notification in Snipping Tool and select Save as.
Snipping Tool is installed but does not work
- Open Start > Settings > Apps > Installed apps.
- Find Snipping Tool.
- Select the More button beside it.
- Select Advanced options.
- Select Repair.
- If that does not fix the problem, select Reset.
If Snipping Tool is missing, Microsoft says it can be obtained through the Microsoft Store.
Recommended Free Tools
Best Value

- 【Plug and Play for Home/Office/School】The wireless computer mouse features 2.4GHz connectivity, delivering a stable, interference-free connection up to 32ft. Designed for 𝐦𝐞𝐝𝐢𝐮𝐦 𝐭𝐨 𝐥𝐚𝐫𝐠𝐞 𝐬𝐢𝐳𝐞𝐝 𝐡𝐚𝐧𝐝𝐬, it ensures comfortable use all day. Simply plug in the USB-A receiver for instant pairing—no drivers needed. 📌📌 If the mouse isn’t suitable, place the USB receiver in the battery compartment and return both.
- 【3 Levels Adjustable DPI】This travel USB mouse offers 3 adjustable DPI settings (800, 1200, 1600), allowing you to customize sensitivity for precise design work. Effortlessly switch to match your task and elevate your productivity. 📌 Please remove the film at the bottom of the mouse before use.
- 【Effortless Browsing】Equipped with forward and backward buttons, this computer mice streamlines your workflow, making it easy to navigate through web pages and files with a simple click. 📌Side button does not work on Mac.
- 【Visible Indicator Light】 The pc mouse features a visual indicator for DPI levels and low battery alerts. The red light flashes once for 800 DPI, twice for 1200 DPI, and three times for 1600 DPI. When the battery level is below 10%, the light flashes red until the mouse is completely out of power.
- 【Click to Wake】With smart sleep mode, it saves power by standby after 10 inactive minutes, just 2-3 clicks to wake. This efficient design delivers 3x longer battery life than motion-wake mice. Engineered for durability, its buttons and scroll wheel are tested for 10 million clicks, ensuring long-term reliability and consistent performance.
A UAC prompt is not captured
User Account Control consent and credential prompts normally appear on Windows’ secure desktop. Only Windows processes can access that desktop, so ordinary screenshot tools should not be expected to capture the prompt reliably. This is a security restriction rather than usually a Snipping Tool fault.
The instructions do not match your app
Older guides may mention controls such as Snipping Tools Options, Save Snip, Send Snip, or Edit with Paint 3D. Current Windows 11 versions use labels such as Snipping mode, New, Record, Text actions, Save as, See More, and Settings.
Windows 11 features that are not available on every PC
On a Windows 11 Copilot+ PC, Snipping Tool may include Perfect Screenshot, which adjusts the capture area around prominent on-screen content, and a Color picker for reading exact screen colors. These are Copilot+ PC features, not standard features on every Windows 11 computer.
FAQ
Where are screenshots saved in Windows 11?
Screenshots taken with Windows + PrtScn are saved in %USERPROFILE%\Pictures\Screenshots. Xbox Game Bar screenshots are saved in %USERPROFILE%\Videos\Captures. Captures made with Windows + Shift + S are copied to the clipboard and may also be automatically saved by current Snipping Tool versions.
Free tools Windows power users keep installed
One-click scans. No signup required.
Why does Print Screen open Snipping Tool instead of taking a screenshot?
Windows 11 can assign the PrtScn key to screen snipping. Change Start > Settings > Accessibility > Keyboard > Use the Print Screen button to open screen snipping. Turn the option off to restore full-screen clipboard copying.
What is the quickest way to screenshot part of the screen?
Press Windows + Shift + S, choose Rectangle, Freeform, Window, or Full screen, and make the capture. The result is copied to the clipboard.
Can Snipping Tool record video?
Yes. Press Windows + Shift + R, select a rectangular area, choose Start, and select Stop when finished. The recording is saved as an MP4 file.
How do I screenshot only one window?
Click the window to make it active, press Alt + PrtScn, and paste the result with Ctrl + V. This method copies the image rather than saving it automatically.
The Bottom Line
For most Windows 11 screenshots, press Windows + Shift + S and select the area you need. Use Windows + PrtScn when you want a full-screen file immediately, and Alt + PrtScn when you only need the active window.
Quick Recap
Product prices and availability are accurate as of the date/time indicated and are subject to change. Any price and availability information displayed on Amazon at the time of purchase will apply.

