
To control a DMX-capable LED spotlight with an Arduino, send DMX data through an RS-485 interface, connect the interface’s DMX output to the spotlight’s DMX input, and set the fixture to DMX mode with a known start address. Then send values that match the channel chart for that exact spotlight and its selected operating mode. DMX carries control data; power the spotlight separately according to its manufacturer’s instructions.
Choose a DMX interface that works with your Arduino
An Arduino’s ordinary logic pins are not a DMX output by themselves. DMX uses an RS-485 electrical interface, so you need a compatible shield or transceiver between the board and the fixture. The ArduinoDMX project describes a MAX485-family transceiver option and uses ArduinoRS485 in its examples; Adafruit documents its own DMX shield setup. See ArduinoDMX: DMX-Examples and Adafruit’s DMX shield board setup.
| Interface option | When it fits | What to verify |
|---|---|---|
| DMX shield | A convenient choice when the shield supports your Arduino board and DMX transmission. | Use that shield’s own pin, jumper, connector, and library instructions. For example, Adafruit’s guide describes its shield’s jumper positions and recommends an Uno or Metro 328; those settings are not universal. |
| MAX485-family RS-485 transceiver | A DIY wired interface when your selected board and library support the required serial and control-pin arrangement. | Follow the circuit and library documentation. The ArduinoDMX materials include a 120-ohm resistor for RS-485 termination; termination requirements depend on the equipment and bus topology. |
| Grove-DMX512 adapter | A fit for a project using the Grove ecosystem and its supported connection arrangement. | Seeed identifies this adapter as SN75176-based and an EIA-485 interface; confirm its connection and software compatibility for your board. |
Before choosing, check the board and library compatibility, whether the interface is configured to transmit, the pin or jumper arrangement, the connector type, and the termination guidance for your setup. A product name containing “DMX” does not establish that it works with every Arduino.
Connect the Arduino, interface, and spotlight
Exact wiring depends on the Arduino board and interface. In a non-shield circuit, the Arduino’s serial transmit signal must reach the RS-485 transceiver’s driver input. Use the wiring diagram for your particular board and transceiver rather than copying pin numbers from another setup.
Recommended Free Tools
#1 Best Overall
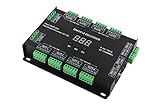
- Automatically adapts to input voltages between DC5-24V. Power loss memory. Incorrect wiring protection at DMX port.
- Input standard DMX512 signal; 3-digit display shows DMX address.Incorrect wiring protection at DMX port.
- 32 channel outputs; linear dimming, flicker-free outputs.
- DMX512 signal presence indicator.14 color changing modes and 10 speeds in test mode.
- Set up the interface: Install the sender library that supports your board and interface. The ArduinoDMX examples use ArduinoRS485 with an RS-485 transceiver. Check the project’s supported-board notes before wiring or compiling.
- Configure any shield jumpers: Follow the shield manufacturer’s board-specific guide. For its shield, Adafruit’s guide lists EN off, Mode on, TX-IO and RX-10, and recommends mounting it on an Uno or Metro 328. Do not apply those settings to a different shield.
- Connect DMX data: Run the interface’s DMX output to the first fixture’s DMX input using a cable and connector arrangement supported by the equipment.
- Chain additional fixtures if needed: Where supported, connect the first fixture’s DMX output to the next fixture’s DMX input. Check connector pinouts and documentation when mixing three-pin and five-pin equipment; the HWHardsoft DMX512 demo is one example involving an RS485 shield and DMX LED Mini Spot.
- Power the fixture separately: The DMX connection carries control data, not the spotlight’s LED load power. Follow the fixture manufacturer’s power requirements.
Set the spotlight’s DMX mode and start address
Put the spotlight into DMX512 control mode using its controls or menu, then assign its DMX start address. The start address tells the fixture where to read its control values in the incoming data stream. The fixture’s chosen channel mode determines which functions those values control. Use the manual for the exact model and mode; there is no safe universal channel map for all LED spotlights. Seeed’s Grove-DMX512 instructions, for example, tell users to set the example light to DMX mode.
Build values from the fixture’s channel chart
Read the fixture manual’s channel chart and match your Arduino’s transmitted values to the start address and selected mode. Begin with one documented function, such as the master dimmer, confirm the spotlight responds as expected, and then add color, strobe, or effect channels described by that chart.
Rank #2

- Disco ball spotlight, High quality 15W RGBW LED bead, make the light brighter including 6 colour (Red, Green, Blue, White, JR, JG).
- Spotlight with 2 Control Mode: Remote Control / DMX 512, Remote Control RGBW Color selection and Sound Activated; DMX 512 Control RGBW Color Sound Activated RGBW mixed color, strobe and dimming. Simply rotate the lens and adjust the installation distance to customize the spot size.
- Upgraded Design: Adopting high-quality ABS for better protection of lighting fixtures, safe and reliable. The built-in heat sink ensures efficient cooling without noise.
- Pin spot for mirror ball is very suitable for DJ performances, bars, clubs, stages, courtyards, gardens, courtyards, indoor and outdoor use, as well as for lighting museum exhibits.
- Disco ball spotlight Plug and play, easy to operate, and user-friendly. Small and lightweight, easy to carry. Mirror Ball Spotlight can have a maximum lifespan of up to 5000h.
A July 2, 2019 Arduino Forum post describes an eight-channel option for one four-color RGB spotlight: total dimming, strobe, function or mode, speed, then individual red, green, blue, and white dimming. That example is specific to the fixture and mode discussed in the forum post; do not treat it as the layout for another spotlight.
Quick Recap
Best Value

- Impressive Light Effect: SHEHDS LED Par COB create a great wash effect with smooth mixing and vibrant colors. It can decorate your romantic wedding, increase atmosphere in our Show.
- More Powerful, Low Heat: COB(Chip on Board Technology) for this led stage lighting is low power consumption and a longer lifespan--can be up to 60000 hours. Built-in quiet fan for cooling, bright for a small room/space.
- ✔Remote Control, Easy to use: Compact and light weight for this strobe light, easy to set up and operate with the remote control--Sound activated, Strobe effects, Static Color like Red, Green, Blue.
- ✔Multiple modes option: 7 channels DMX, Support Voice-activated / Auto / DMX / Master-slave modes. Sound sensitivity and changing speed can be adjusted automatically according to the music. A remote control can control these functions.
- Various Decorative Scenes: The DJ event uplight is perfect spotlight for interior decoration, such as christmas, halloween, thanksgiving, parties, weddings, concerts, KTV, clubs, bars, houses, trees, ponds, swimming pools, dj lighting stage lighting etc.
Rank #4

- Moving DJ lights new design: All modes of the light can be easily controlled by remote, bring your party more choices and more fun.
- High Output Moving Head Light: Color Effect has 8 patterns, 8 colors, half color effect and color rotation speed. (lighting changing speed can be controlled).
- Smart XY-Axis Movement & Auto Reset: 540° X-axis (2.11°/step) and 210° Y-axis (1.05°/step) with micro-adjustments (0.008° accuracy) ensure pinpoint positioning and fluid transitions, enhancing stage professionalism.
- Professional DMX512 & Multi-Control Modes: Features 4 modes (DMX512, Sound-Activated, Master/Slave, Auto) with 9/11CH channels for synchronized lighting effects. Ideal for stages, clubs, and home parties, offering seamless integration with professional setups.
- Easy to use: Can be easily fixed in DJ light stand or wherever you want with flexible mounting bracket. ideal for DJ disco shows, birthday prites, weddings, club shows.
Rank #3
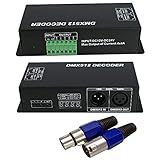
- Adopts advanced computer control IC chip, can receive the international DMX-512 standard digital control signals and converted into PWM controller signal to control the LED
- Can be controlled by the DMX Console, and can connected with numbers of DMX Decoder to expand the outputs to realize all kinds of changing shows.
- Can be used as the synchronous controller to controlled the LED in synchronous.
- Adopt the digital tube to show the address number, no longer need to go complex calculation of the address like dip switch.
- Input voltage: DC12~24V. Output current: ≤4A/CH
Troubleshoot a spotlight that does not respond as expected
- No response: Verify that the fixture is in DMX mode, the start address is the one you intend to use, and the cable runs from the controller’s DMX output to the fixture’s DMX input.
- The wrong function changes: Check the fixture’s selected channel mode and channel chart, then make sure your transmitted values correspond to that map.
- The sketch will not compile or transmit: Confirm that the sender library supports your specific Arduino board and that its serial pins are available and configured as required.
- A shield behaves differently from its guide: Recheck the actual shield’s pin and jumper configuration. On some setups, configurable TX/RX routing helps avoid conflicts with board upload serial connections.
- Questions about termination or a longer run: Follow the interface and DMX equipment manufacturers’ guidance for your bus topology. The ArduinoDMX materials list a 120-ohm termination resistor, but that does not establish identical termination needs for every setup.
Product prices and availability are accurate as of the date/time indicated and are subject to change. Any price and availability information displayed on Amazon at the time of purchase will apply.

