Do you want to keep an eye on the CPU temperature in your Windows 11 PC? You can use one of the 3 methods shared in this guide to check CPU temp in Windows 11.
Option 1: Check CPU Temp with the Core Temp App
Core Temp is a free CPU temperature monitoring software developed by Arthur Liberman. Although a tiny program, Core Temp helps you monitor the processor temperature and other vital CPU information in your Windows PC.
Follow the steps below to install and use this app to check CPU temp in Windows 11:
Step 1: Install the Core Temp App
Follow the steps below to install and use Core Temp to check CPU temperature in Windows 11.
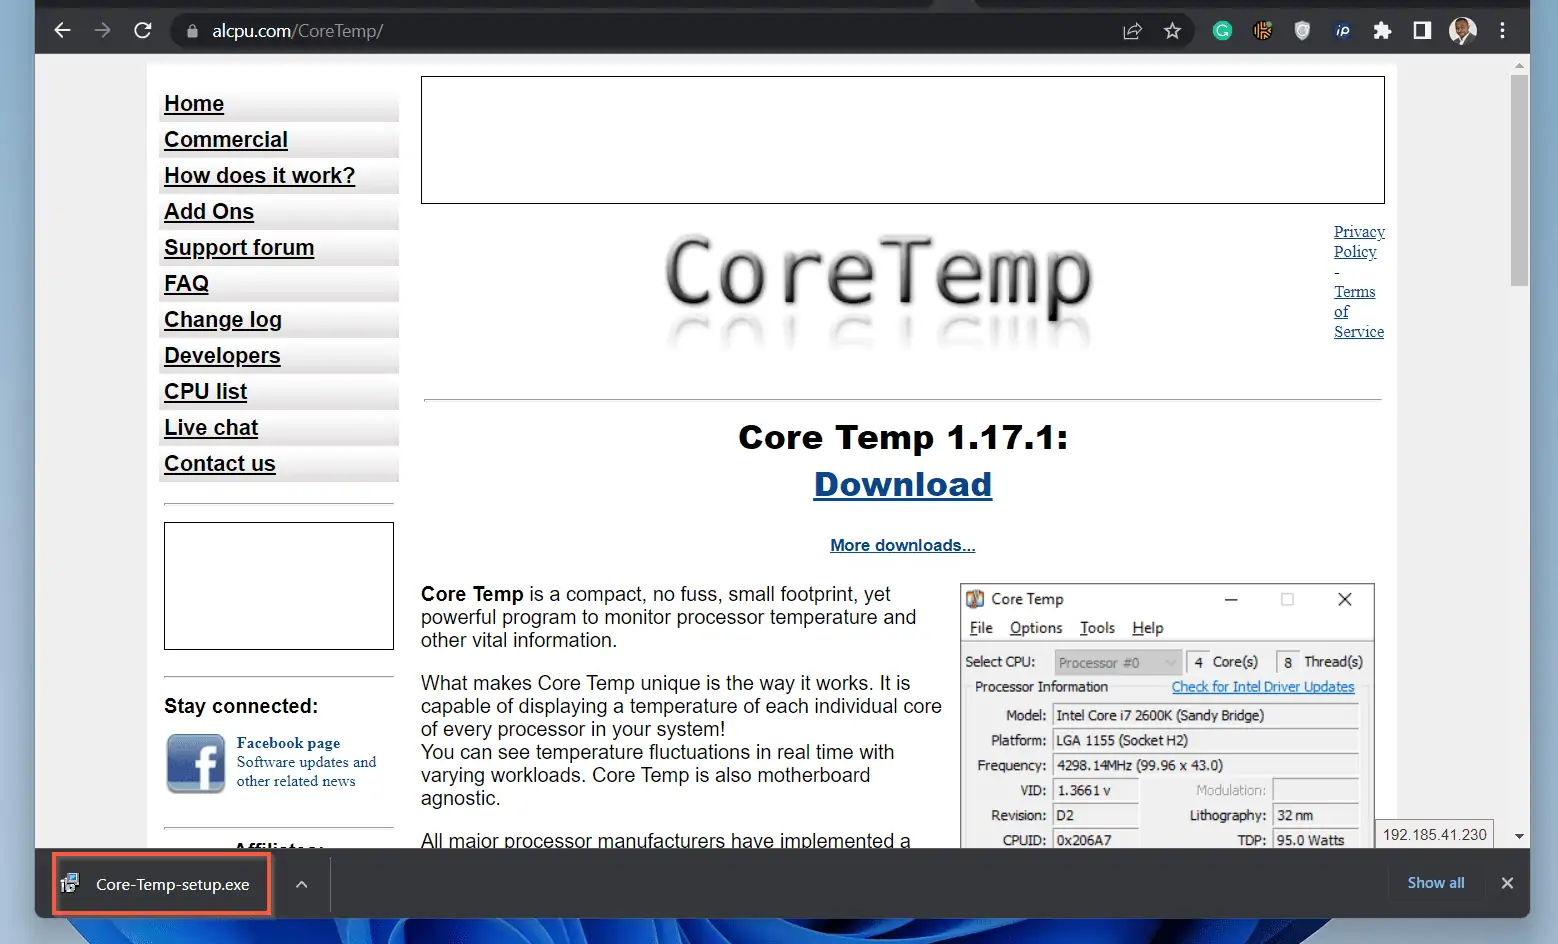
- Visit the Core Temp download site. Then, to download the latest version of the software, click the Download link. In the second step below, you’ll install the application.
- If you downloaded the file with Google Chrome or Microsoft Edge, it would be displayed at the bottom left of the browser. To install the app, click on the file.
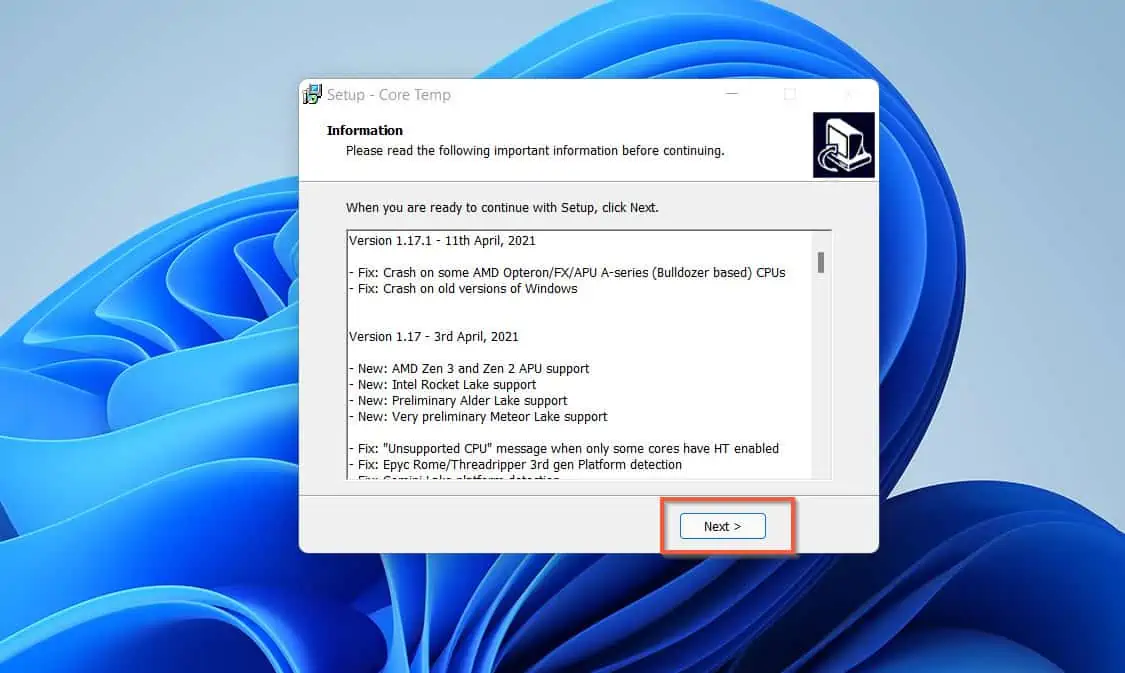
- Windows 11 will display the User Account Control window; click Yes. Then, on the first page of the installation wizard, click Next.
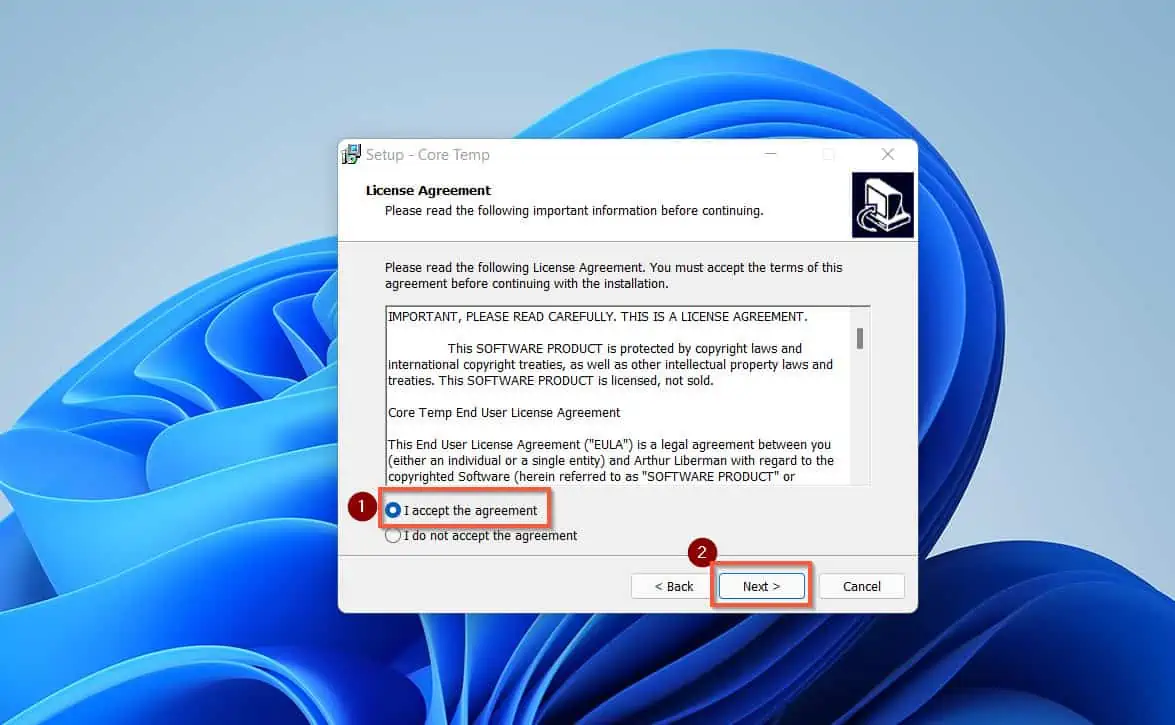
The Licence Agreement page will be displayed.
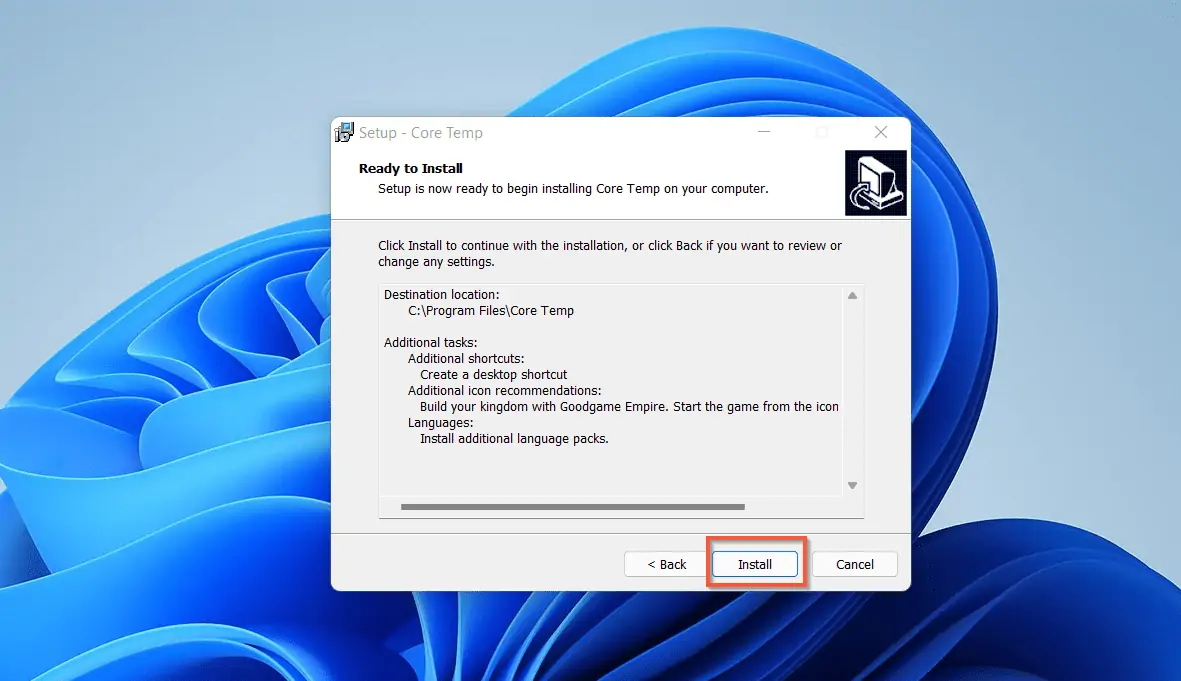
- Accept the Licence Agreement, then click Next. In the next two pages of the Wizard, simply click Next. Then, finally, click Install.
Wait for the app to install, then proceed to step 5 below.
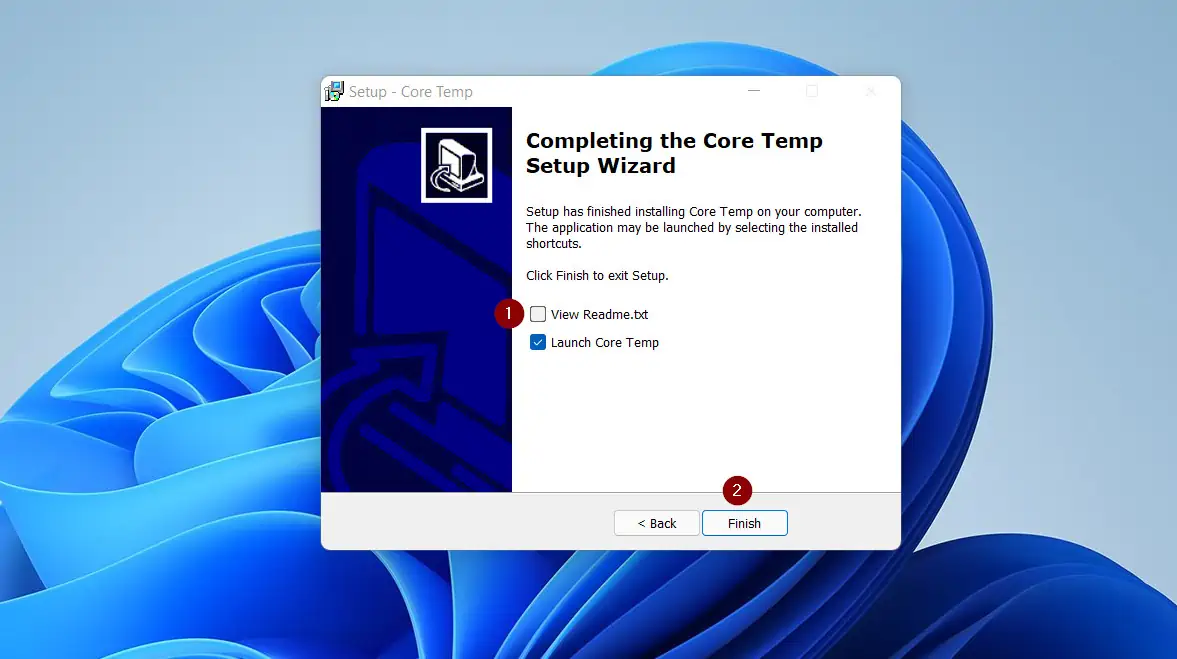
- When the application finishes installing, click Next. Then, to launch the application and check CPU temp in Windows 11, uncheck the View Readme.txt checkbox.
Finally, click Finish.
The application will launch and display on the top left of your desktop. You can drag it to the middle of your desktop.
Step 2: Use the Core Temp App to Check CPU Temp
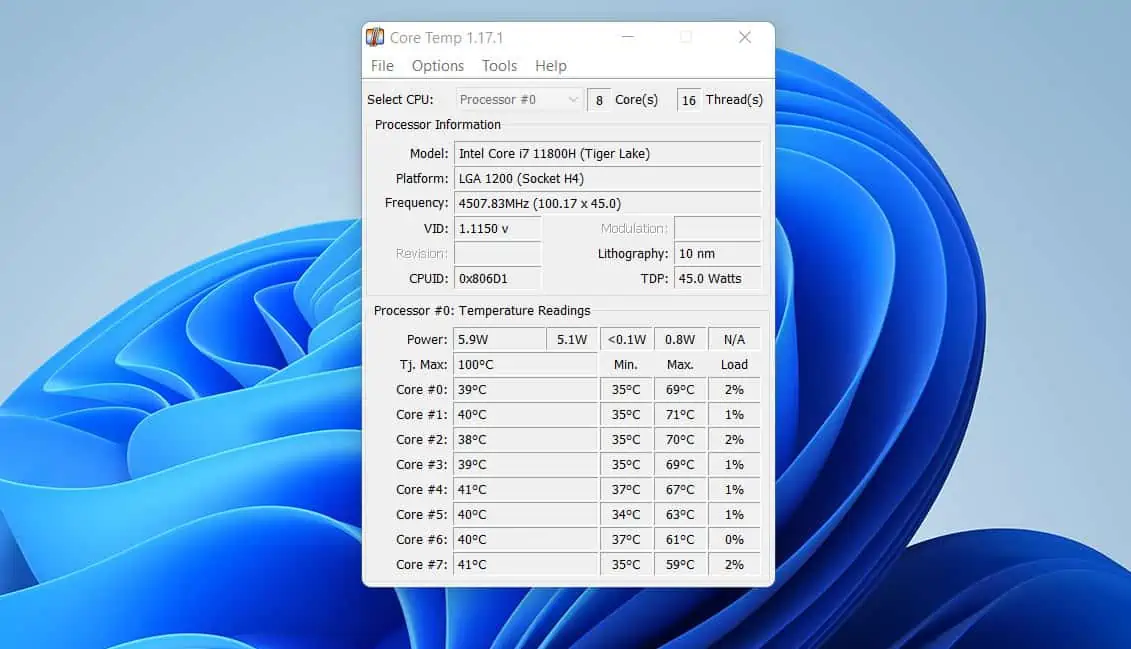
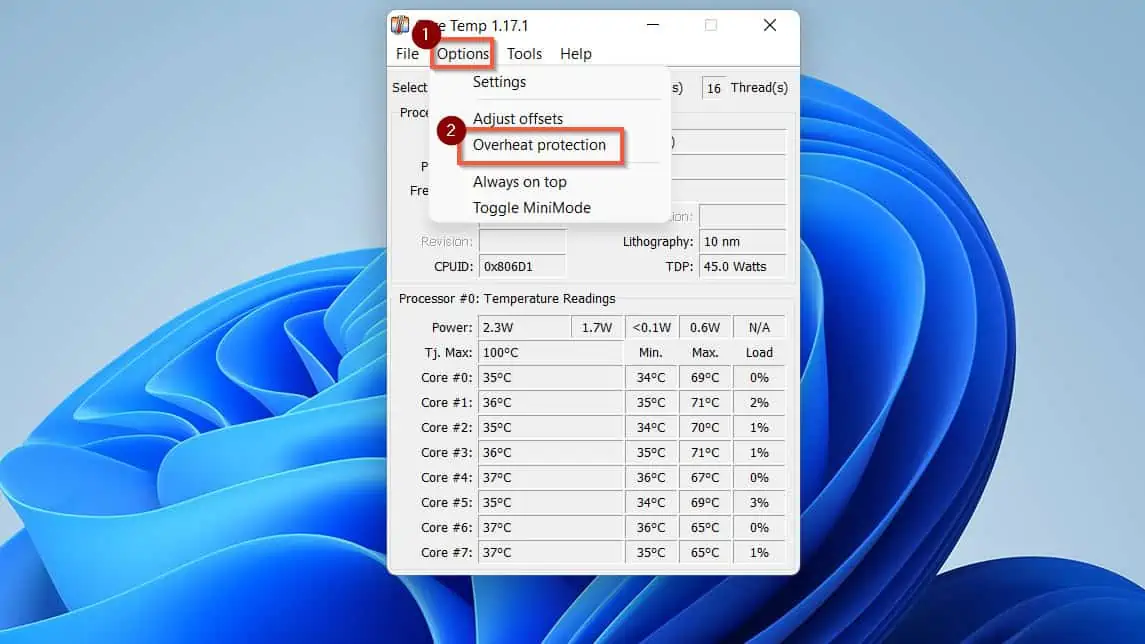
Once the Core Temp app opens, it displays the temperature of all the CPU cores of the processor in your computer. In my case, the processor on my laptop has 8 CPU cores.
As you can see from the screenshot below, the Core Temp app has displayed the temperature of all the 8 CPU cores. It is important to note that the first core is labeled #0, and the last core is #7.
In addition to displaying the CPU temp, Core Temp also displays some vital information about the CPU in your Windows 11 PC. For example, the app displays the number of CPU cores (1).
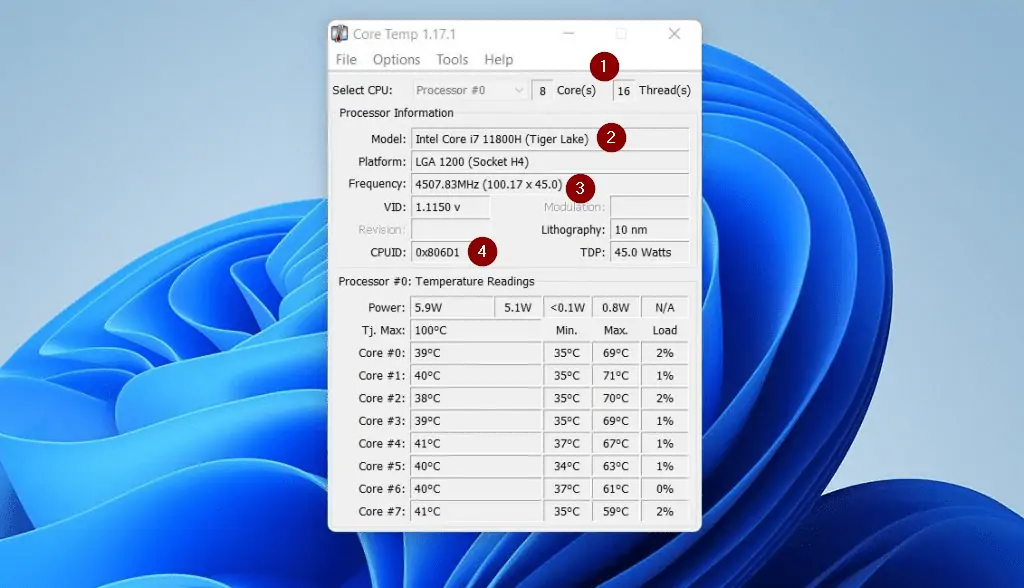
In addition to displaying the number of cores, the app also displays the model of the CPU (2). Not only that, but you also get to see the frequency and the CPUID of the processor (3 and 4, respectively).
There is more useful information this tool offers. However, I like to mention the one I feel is the most relevant – the Overheat protection.
You can use this feature to enable notifications if the CPU temperature in your Windows 11 PC starts overheating.
To enable Overheat protection, follow the steps below:
- Hover over Options. Then, from the displayed options, click Overheat protection.
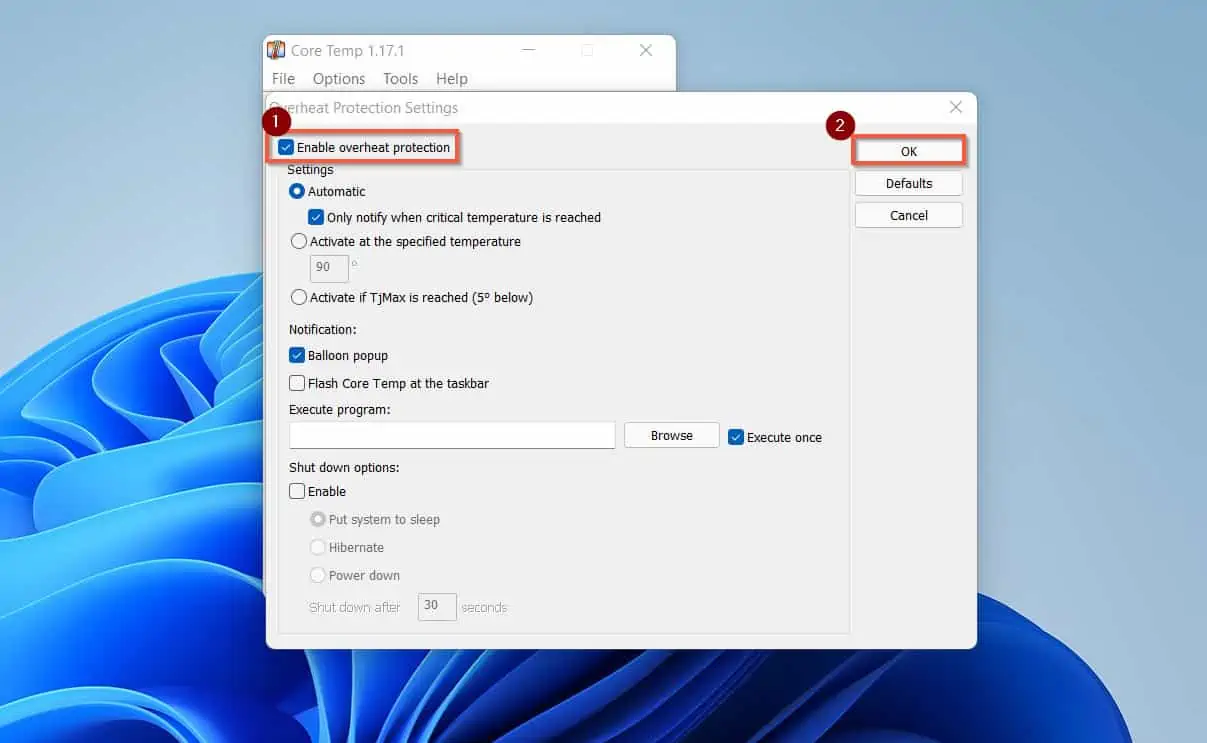
- When Overheat protection settings open, check the enable overheat protection checkbox. I recommend you use the Automatic option.
When you’re done, on the top right, click OK.
Option 2: Check CPU Temp with the Open Hardware Monitor App
Another software you can use to check CPU temp in Windows 11 is the Open Hardware Monitor App. Michael Möller developed this tool.
In terms of installation, there is a difference between the Open Hardware Monitor and the Core Temp apps. While you need to install the Core Temp app, you do not need to install the Open Hardware Monitor.
To use the Open Hardware Monitor app to check CPU temperature in Windows, follow the steps in this section.
Step 1: Download the Open Hardware Monitor App
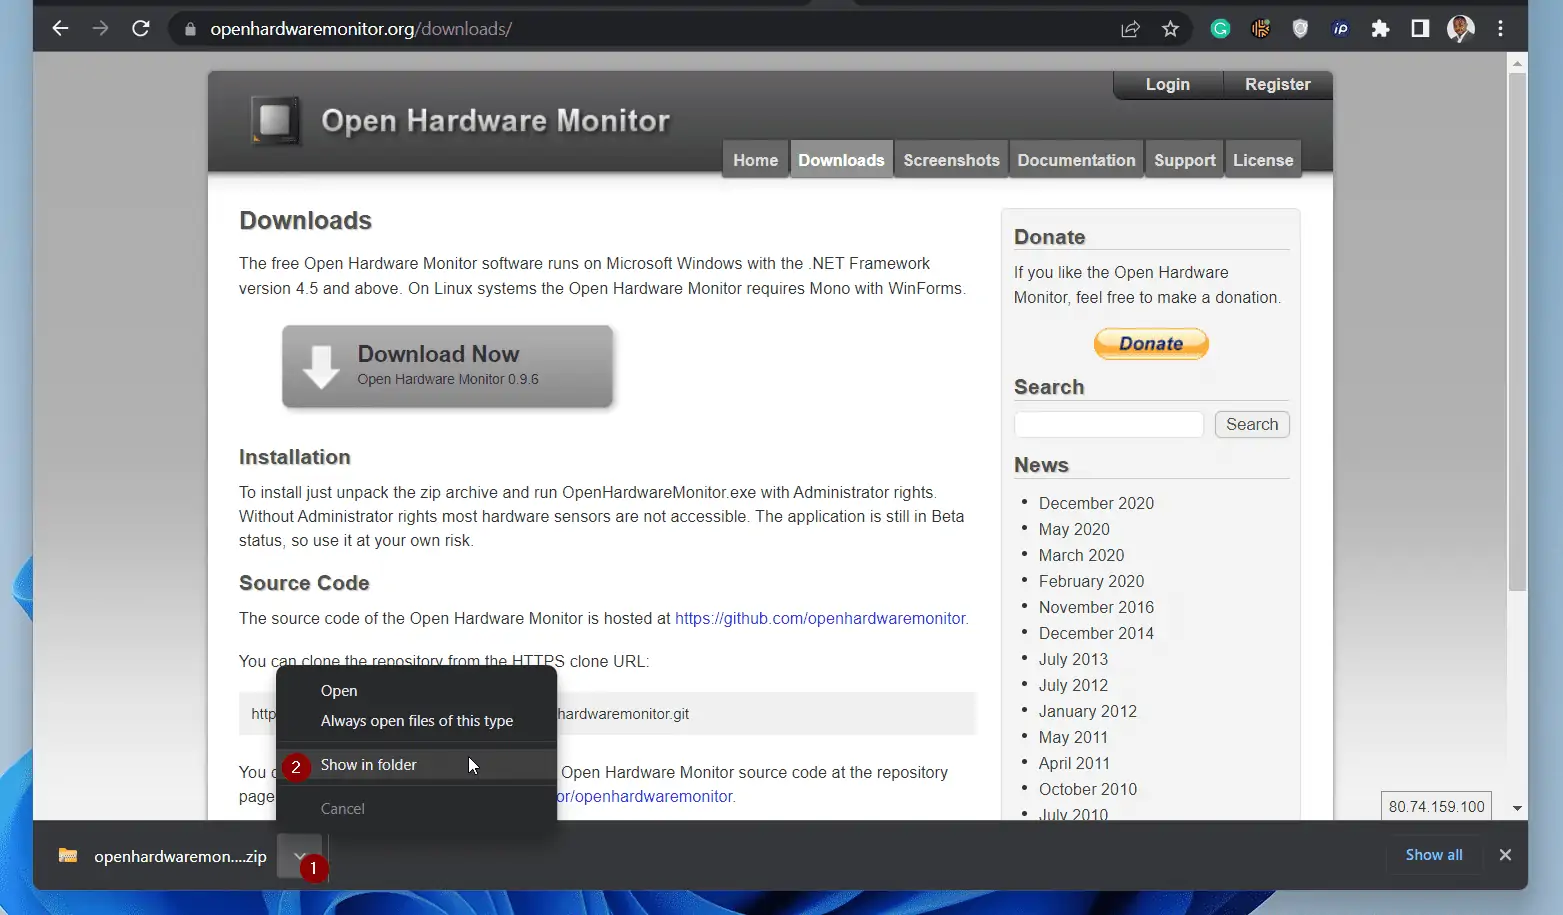
- Open openhardwaremonitor.org from a browser on your PC to download the Open Hardware Monitor.
- Then, when the page opens, click the download button. A zipped file will be downloaded.
In step 3, you’ll unzip the file and install the application.
- If you downloaded the file with Google Chrome or Microsoft Edge, the file will be displayed at the bottom left of the browser.
Open the zipped file, click the arrow beside it, then click Show in folder.
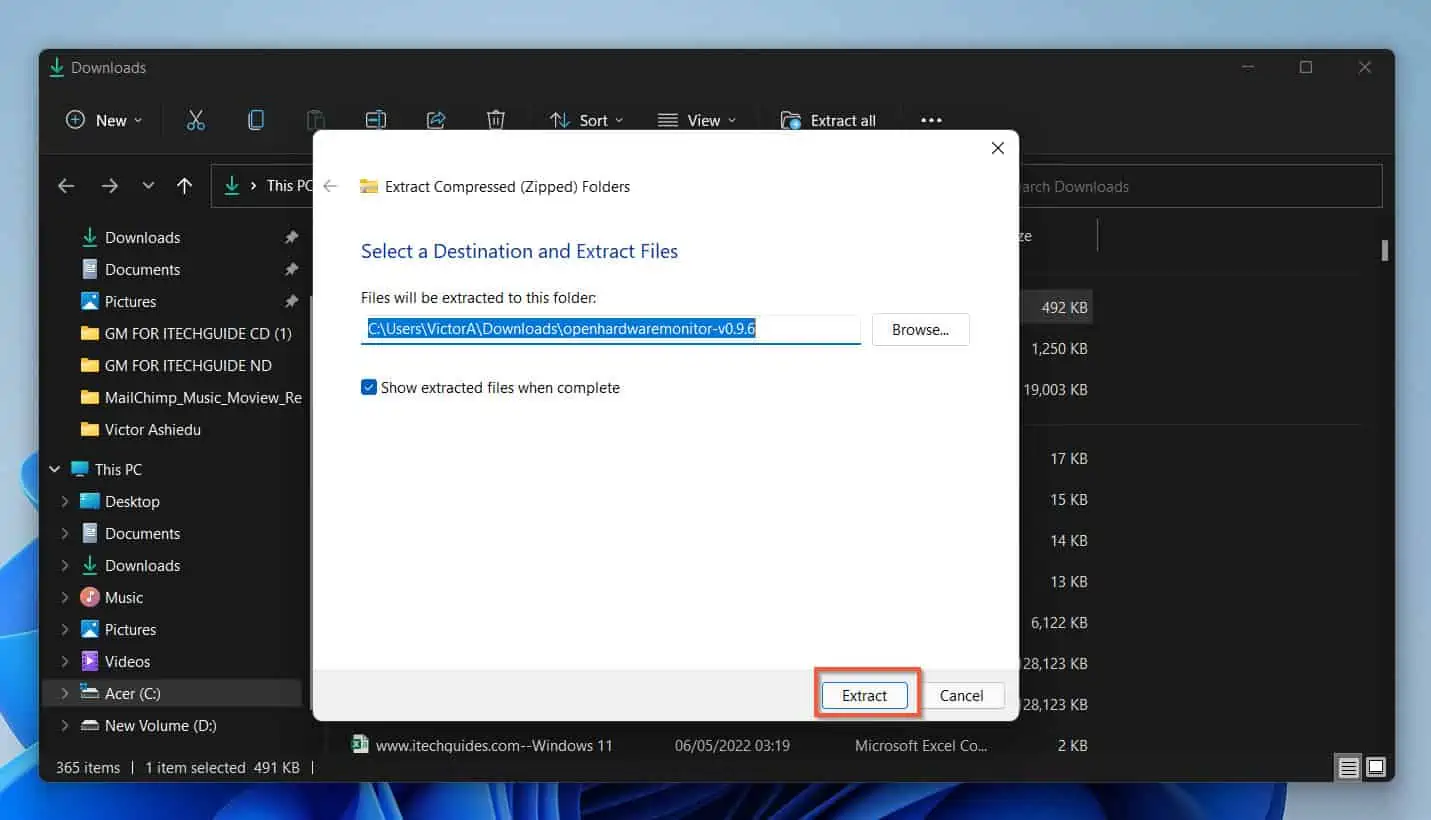
- Next, unzip the file – right-click it, then click Extract All…

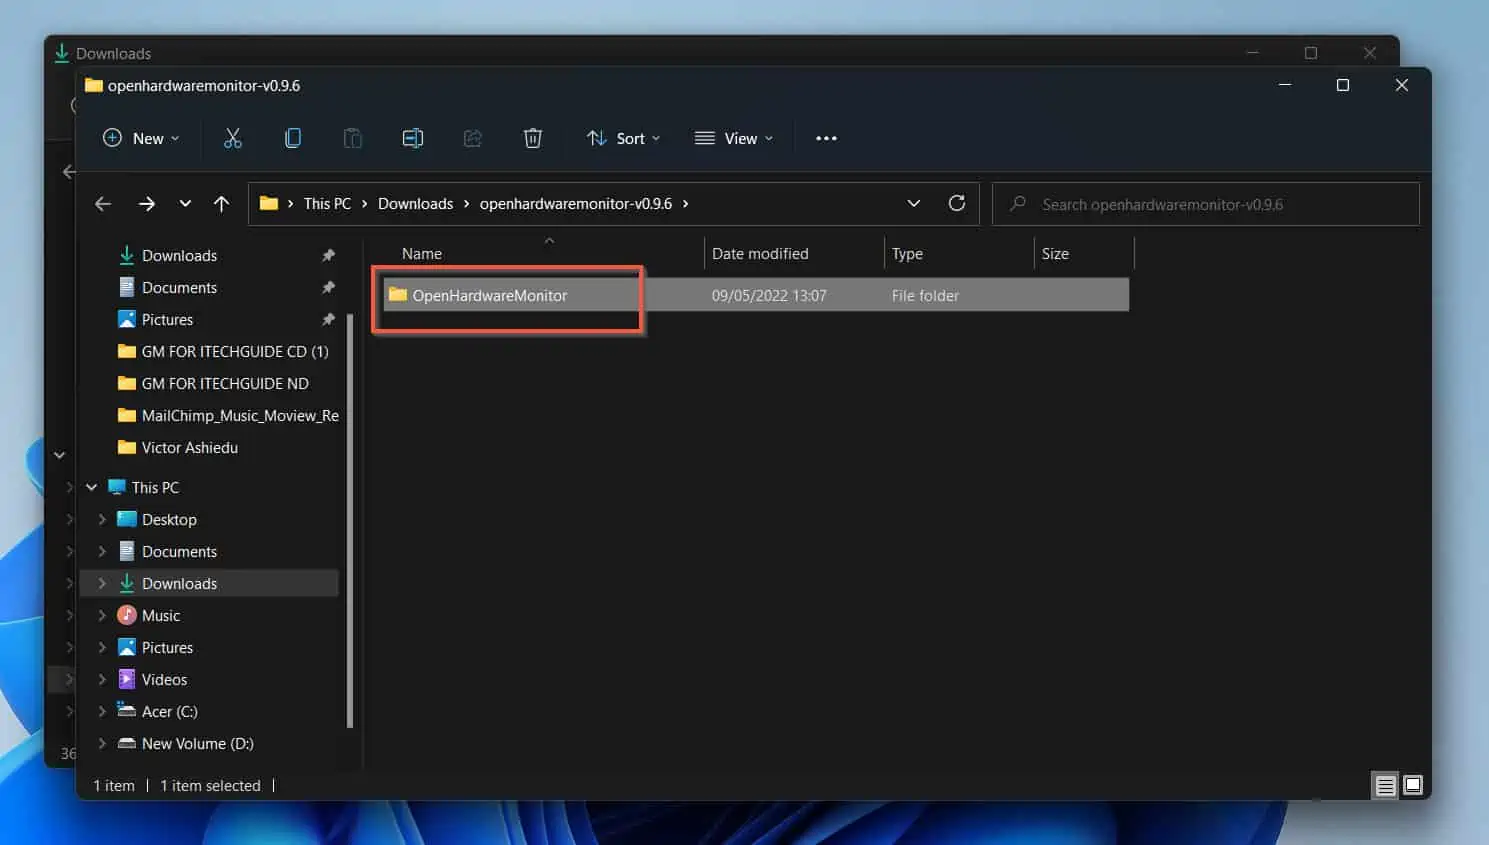
- Finally, click Extract. The zipped file will extract into a folder with the same name, then open.
- Open the folder. Then, double-click the OpenHardwareMonitor file – see the second screenshot below. Windows 11 will display a User Account Control window, click Yes.
The Open Hardware Monitor app will launch – see the third screenshot below.
Step 2: Use the Open Hardware Monitor App to Check CPU Temp
Earlier I mentioned that there is a difference between this app and the Core Temp in terms of installation. Apart from this difference, there is also a difference in terms of how the apps display CPU information, including temperature.
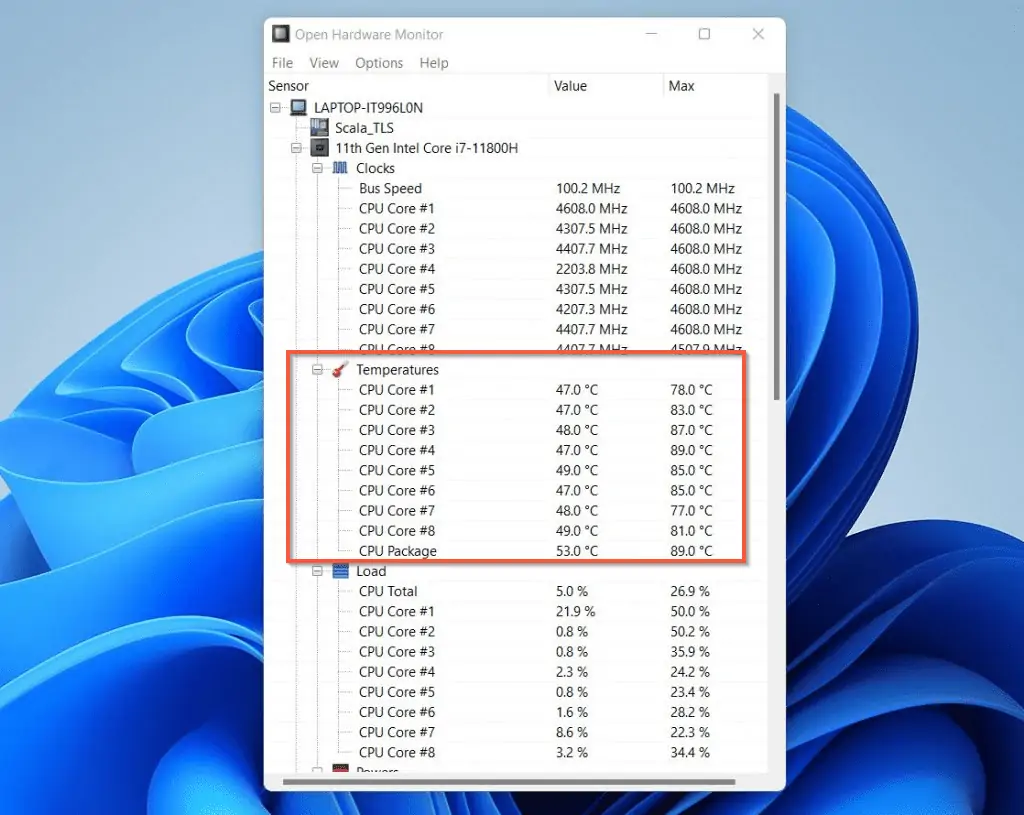
Instead of displaying all other CPU information individually, then display the temp, this app displays information under Clocks, Temperature and Loads.
Obviously, our interest in this article is the CPU temp.
There is yet another difference between this app and the one discussed in the first section. While the Core Temp app provides the option to set Overheat protection, Open Hardware Monitor does not.
Option 3: Check CPU Temp with PowerShell
If you’re a Windows SysAdmin, PowerShell is your go-to tool to manage and automate Windows tasks.
Unfortunately, there is no ready PowerShell Cmdlet to check CPU temp in Windows, including Windows 11.
The good news is that the OpenHardwareMonitor tool we discussed in the last section has a PowerShell module called OpenHardwareMonitor.
To install this module and use it to check CPU temp in Windows 11 via PowerShell, follow the steps below:
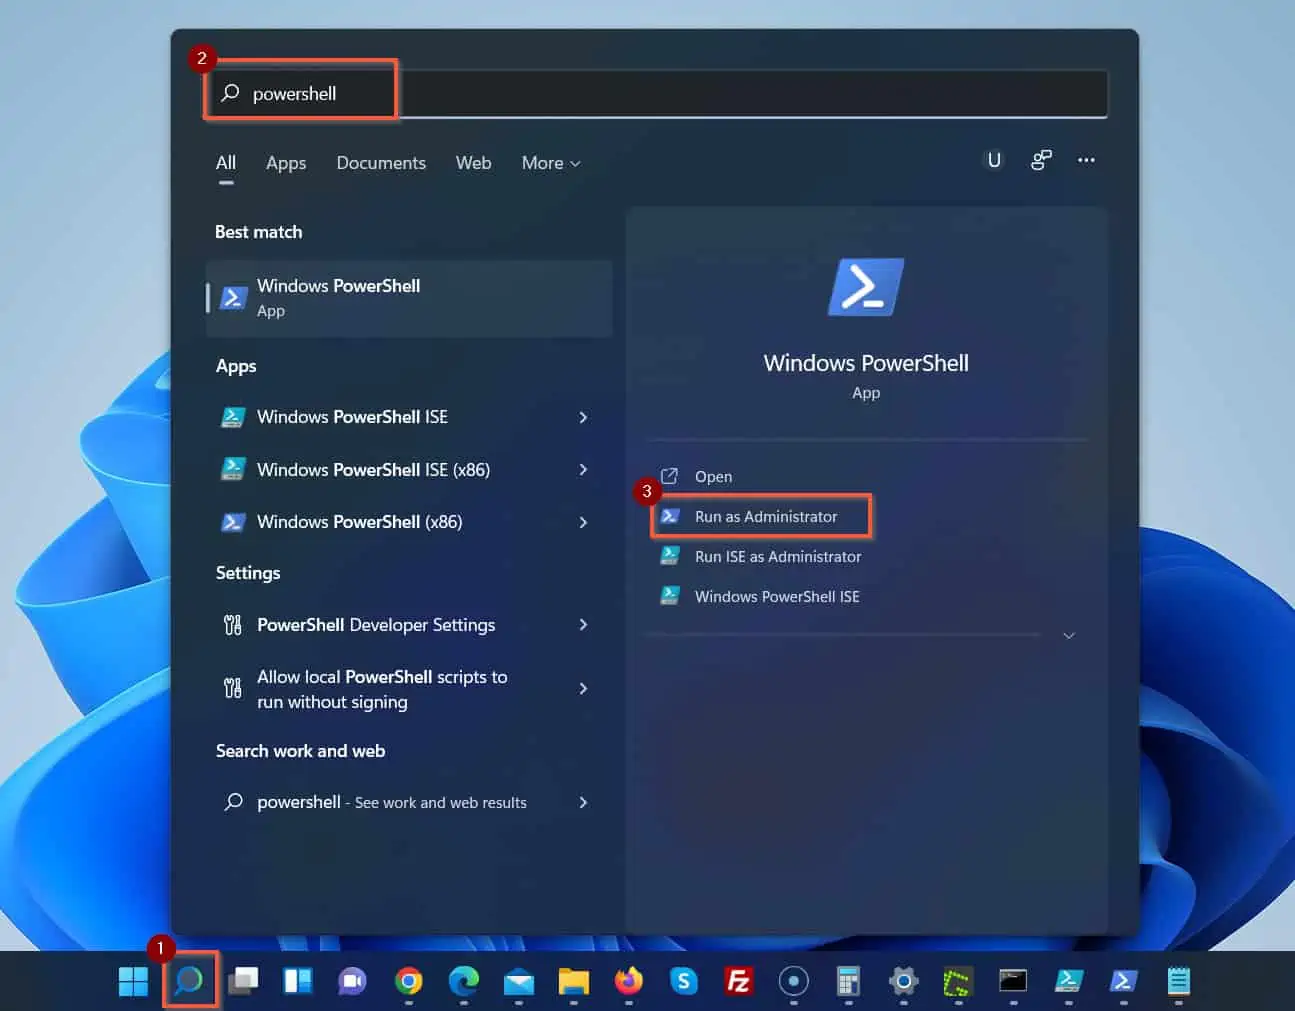
- Open Windows 11 search tool and search powershell. Search will return and select Windows PowerShell.
In the details pane of the search result, click Run as Administrator.
Windows 11 will display the User Account Control dialogue. Select Yes – PowerShell will open.
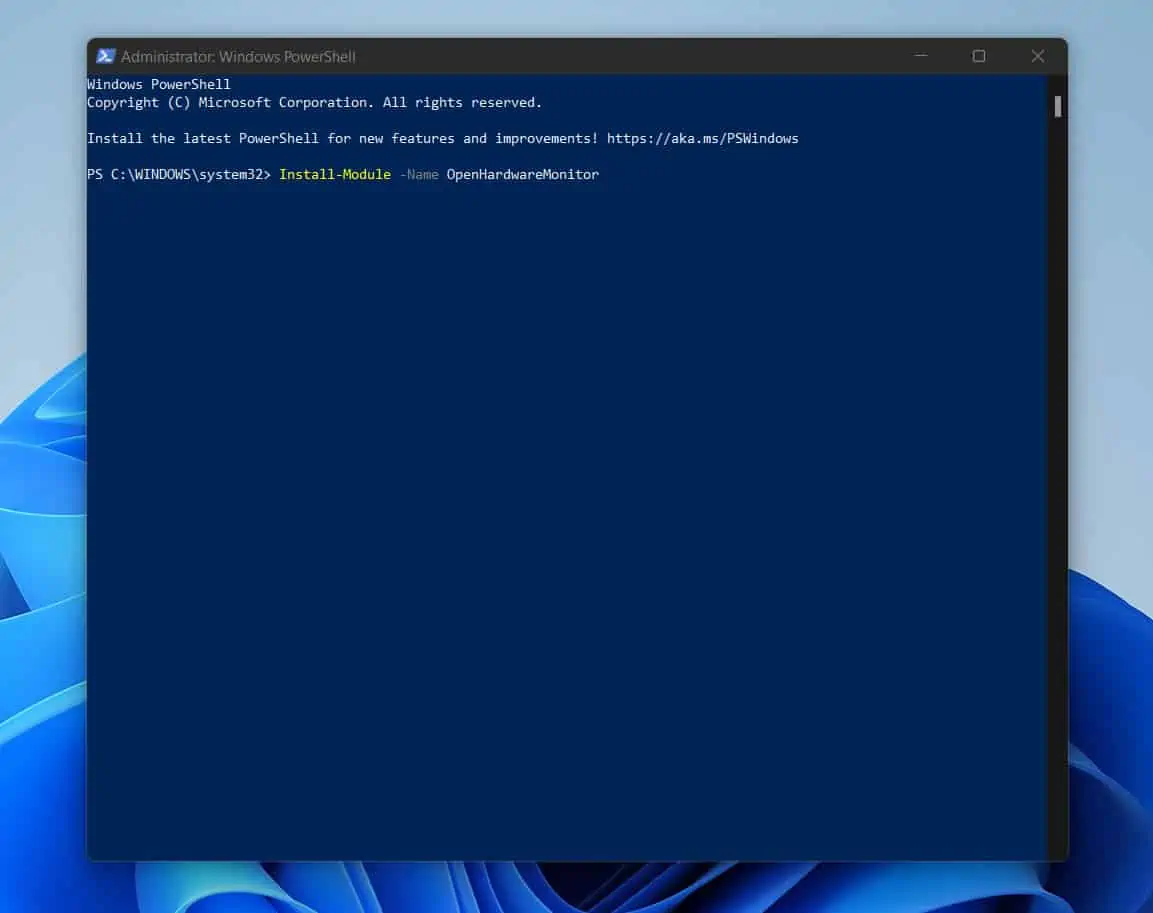
- Then, copy and paste the command below and press the Enter key at the PowerShell prompt.
Install-Module -Name OpenHardwareMonitor
When you run the above command, PowerShell may return the message requesting you to permit it to install the NuGet provider. Enter Y at the prompt and press the enter key.
Then, wait for the NuGet provider to install.
When PowerShell completes the installation of the NuGet provider, the PowerShell prompt will blink for a while. The reason for this is that your computer is downloading the OpenHardwareMonitor module.
When the module is downloaded, PowerShell will return. Proceed to step 3 below.
- Finally, copy and paste the command below to check CPU temp in Windows 11 with the OpenHardwareMonitor PowerShell module. Then, press the Enter key to execute the command.
Measure-CPUTemperature
Frequently Asked Questions
Yes, you can check CPU temp in Windows 10. Use our step-by-step guide – How to Check CPU Temperature on Windows 10.
The easiest way to check CPU temp without downloading any software is to use PowerShell.
To do this, first, open PowerShell as administrator. Then, run the following commands, one after the other:
Install-Module -Name OpenHardwareMonitor
Measure-CPUTemperature
For a PC not running any apps (in an idle state), the normal CPU temperature is between 30 to 40 degrees Celcius (or 86 to 104 degrees Fahrenheit).
However, for a PC running essential apps, the CPU should operate between 65 to 70 degrees Celcius (150 and 160 degrees Fahrenheit).
There could be so many reasons why the CPU temp in your Windows 11 PC may become too high. For example, if you have too many apps open at the same time, the CPU temp may rise.
However, if the CPU temp in your PC is always high, it may be a sign of a Malware infection.
Generally, this will depend on the game. However, as a rule of thumb, your CPU temp should operate between 61 and 73 degrees Celcius (142 and 164 degrees Fahrenheit) while gaming.
Sometimes, it could go higher, but your PC may overheat if the CPU temperature constantly exceeds 80 degrees Celcius (176 degrees Fahrenheit).
Conclusion
It is a great idea to keep an eye on the CPU temperature of your Windows 11 PC. This is particularly required if you use your PC for processor-intensive tasks like video editing or gaming.
You can use common tools like Core Temp or Open Hardware Monitor to check the CPU temp in your Windows 11 PC. Moreover, Windows SysAdmins can also use the OpenHardwareMonitor PowerShell module to check CPU temperature.
I hope you found this Itechguide helpful. If you found this article helpful, we would like to hear from you.
Kindly spare 2 minutes to share your experience with our community using the comments form at the bottom of this page.
Alternatively, you can respond to the “Was this page helpful?” question below.
Finally, for more Windows 11 Itechguides, visit our Windows 11 How-To page. You may also find our Windows 10 How-To guides helpful.


