
You can build and run an Edge Impulse model on the Himax WE-I Plus EVB by collecting sensor data, training an impulse in Edge Impulse Studio, building the board’s deployment firmware, and flashing it with the Edge Impulse CLI. The board supports camera, microphone, and accelerometer experiments, so choose the input that matches the task before collecting examples.
What you need
- A Himax WE-I Plus EVB and a USB connection to your computer. Edge Impulse’s original announcement points to SparkFun as a source for the board; check current stock and availability directly at Edge Impulse’s WE-I Plus announcement.
- An Edge Impulse account and Studio project.
- Node.js 16 or newer for the CLI installation described by the Edge Impulse CLI repository.
- The Edge Impulse CLI, including its Himax flashing utility,
himax-flash-tool. - A trained impulse in Studio before you deploy.
Check the board’s current release instructions for the required cable, operating-system setup, driver, and board-revision details. The available documentation does not establish one universal set of requirements for every computer and board revision.
How the WE-I Plus fits an Edge Impulse project
The WE-I Plus EVB is an Edge Impulse-supported embedded AI target. Its HX6537-A combines an ARC EM9D DSP running at 400 MHz with 2 MB of internal SRAM and 2 MB of flash. The board has a monochrome camera, microphone, and accelerometer, making it suitable for image, audio, voice, and motion projects, as described in Edge Impulse’s announcement.
Edge Impulse’s hardware catalog lists the target as “Himax WE-I Plus (HX6537-A | ARC DSP 400MHz)” and describes supported hardware as providing data-collection and inferencing firmware. See the Himax WE-I Plus hardware documentation for the current target information.
#1 Best Overall
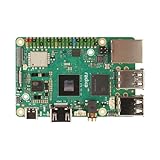
- POWERFUL COMPUTING: Advanced single board computer featuring high-speed LPDDR5 memory for superior processing capabilities and edge AI computing performance
- CONNECTIVITY: Multiple USB ports, HDMI output, and Ethernet connectivity provide versatile interface options for various applications
- COMPACT DESIGN: Space-efficient circuit board layout integrates powerful computing components in a single compact form factor
- DEVELOPMENT READY: Ideal platform for edge AI development, programming, and prototyping with comprehensive hardware interfaces
- EXPANDABILITY: Features multiple GPIO pins and standard connectors enabling extensive hardware expansion possibilities
Set up the board and collect sensor data
- Install the CLI. With Node.js 16 or newer installed, run
npm install -g edge-impulse-cli. The CLI repository also identifieshimax-flash-toolas the board-specific flashing utility: github.com/edgeimpulse/edge-impulse-cli. - Connect the supported firmware to Studio. Attach the board to the computer and use the board’s supported Edge Impulse firmware with Studio’s device and data-acquisition flow. See the Himax hardware documentation for target setup details.
- Choose the relevant sensor and record representative examples. Use the camera for image classification or object detection, microphone for sound or voice recognition, and accelerometer for motion events. Edge Impulse outlines these project paths in its WE-I Plus announcement.
For a custom sensor source or host-side preprocessing, Edge Impulse also accepts acquisition data in its signed JSON or CBOR format, supports the data forwarder, and allows direct uploads of CSV, JPG, PNG, and WAV files. The data acquisition documentation explains these alternatives.
Train an impulse in Studio
An impulse combines the incoming data window, a signal-processing block, and a learning block. Configure those components for your sensor and task, then review class balance and test data before building firmware. There is no single window size or model architecture established for every WE-I Plus project; choose them based on the signal and the distinction your model needs to learn.
Rank #2

- [High performance] Quad-core ARM SoC up to 1. 8GHz with 3GB RAM- The Tinker Edge R features the Rockchip RK3399Pro SoC and Mali - T764 GPU along with 2GB of Dual Channel LPDDR4 memory for system, 1 GB LPDDR3 memory for NPU and 16GB eMMC flash
- [Gigabit Class networking]Tinker Edge R features a high speed GB LAN port for true Gigabit Class networking throughput along with 3x USB3.2 Gen1 Type-A. It also features onboard Wi-Fi & Bluetooth for robust IoT & Network connectivity
- [Open-source]The board will come with fully open-source kernel and support for multiple APIs, including OpenGL, Vulkan, OpenCL, OpenVX, TensorFlow Lite, Android NN, and Caffe
- [HD Audio & UHD video support] It supports 192/24bit HD Audio playback with automatic Audio jack detection as well as accelerated HD & UHD ( 4K ) video playback and supports HDMI CEC for seamless power on & off configurations
- [WiKi]For more information please refer to the product description, any technical issues after purchase please contact with our tech-support team: click "WayPonDEV" and ask a question. Package Content: 1x Tinker Edge R (3GB+16G eMMC); 2x Wi-FiVBT antenna cable; 1x Stand offset(4xScrew+4xHex); 2x Camera MIPI Convert cable (22P to 15P); 1 x Shielding bag; 1 x Quick start guide
Build and flash the Himax firmware
- In Edge Impulse Studio, open the project’s Deployment tab.
- Select the built Himax WE-I firmware option and build the deployment.
- Follow the operating-system-specific flashing script generated for the build. The Himax deployment instructions describe this workflow.
- After flashing, run
edge-impulse-run-impulse --debugto preview live inference, as shown in the deployment instructions.
Keep the model and its input pipeline within the board’s available memory and account for the compiler and toolchain required by your deployment. The 2 MB SRAM and 2 MB flash figures describe the HX6537-A; they do not guarantee that any particular model will fit or meet a particular latency or power target.
Independent reader supportYour contribution helps us test, update, and keep practical guides available for everyone.When to use a custom firmware build
The integrated firmware and Studio deployment are the straightforward route for a first project. If you need to integrate the model into a larger application, export the impulse as a C++ library or adapt the standalone Himax example. That example documents both GNU ARC and DesignWare ARC MetaWare build routes, followed by flashing the resulting image: Edge Impulse’s standalone Himax example.
Quick wins for a faster PC:
Scan for outdated or missing drivers - takes under a minuteDriver Scan →Clear out junk files and repair common Windows errorsFree Scan →Rank #3

- Supports access to online large model platforms and includes Edge Impulse object detection demo for real-time multi-object recognition
- Equipped with Xtensa dual-core LX7 processor (up to 240MHz), 8MB PSRAM, 16MB Flash, and dual-mode WF + BT LE
- Dual-microphone array with noise reduction and echo cancellation for high-quality voice processing
- Integrated audio input and output module, supporting AI speech interaction and voice recognition applications
- Onboard camera interface (DVP) and SPI / QSPI display interface for image capture, recognition, and external display connection
Choose between the integrated and custom routes based on sensor source, model memory needs, compiler availability, and power or latency requirements. The cited sources do not provide an apples-to-apples benchmark against other boards, so they do not establish a universal speed, accuracy, or battery-life advantage.
Quick Recap
Rank #4
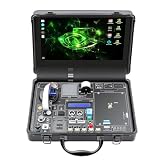
- 30-in-1 No-Solder Sensor Board, Plug and Play: Integrates 30 functional sensors including temperature & humidity, ultrasonic ranging, gas and motion sensors. Innovative common board design requires no soldering or complex wiring, and comes with a full set of accessories like 128G SD card, adapter board and acrylic mounting plates for zero-threshold experiments
- 8MP Gimbal Camera & Dual Servos for Professional Visual AI: The Starter Kit is equipped with an IMX219 8MP monocular camera and a dual-servo gimbal, supporting face and target tracking, and is ideal for AI edge computing scenarios such as intelligent monitoring, robot navigation, and automated recognition
- 38 Step-by-Step Python Tutorials, From Beginner to Practical Application: The Jetson Orin Nano Starter Kit comes with 38 well-designed Python tutorials progressing from basic programming to vision practice, covering all key knowledge of sensor control, embedded development and AI visual recognition for both beginners and advanced learners
- 11.6-inch IPS HD Screen & AI Voice Interaction System: Built-in 1366*768 resolution IPS screen eliminates the need for an external monitor, enabling one-device experimentation and visual feedback. The exclusive AI voice interaction system supports intelligent Q&A and voice command control for natural human-computer dialogue
- Rich Expansion Interfaces & Portable All-in-One Design: Features 2x I2C, 1x UART and 2 IO expansion interfaces to meet personalized experiment expansion needs; a custom carrying case integrates all components (11.81×7.87×3.94 inch), allowing AI experiments and demonstrations anytime and anywhere
Product prices and availability are accurate as of the date/time indicated and are subject to change. Any price and availability information displayed on Amazon at the time of purchase will apply.

