
Crashes, No Sound, or Screen Glitches?
Random freezes, missing sound and display glitches usually trace back to one bad driver. Find and replace yours safely.Free scan · under a minuteWindows Errors? Fix Them Before They Spread
Repair common Windows errors and clear accumulated junk for a smoother, more stable PC - no reinstall needed.Free scan · no reinstallFor a typical slow breadboard computer, start with a digital multimeter that has continuity and DC-voltage modes, plus a few small hand tools: a Phillips screwdriver, wire cutters, small needle-nose pliers or tweezers, and a wire stripper suited to the hookup wire. A logic probe can make digital signals easier to check, but it is optional; an oscilloscope is useful for waveform and timing problems, not a requirement for every beginner build. Soldering gear, a 5 V supply, and an EEPROM programmer depend on the design or kit.
What should be on the bench for a breadboard computer?
For Ben Eater’s 8-bit breadboard build, the recommended basics are a small #1 Phillips screwdriver for connecting the power supply, small wire cutters, small needle-nose pliers or good tweezers, and a stripper that works with 22 AWG wire. Add a basic multimeter. The project guide says soldering is not required for this build. These recommendations are specific to that project; follow the wire gauge and assembly instructions for the design you choose. Ben Eater’s tools guide
- Wire cutters and stripper: Prepare hookup wire cleanly and consistently.
- Small pliers or tweezers: Handle short wire ends and components in a crowded breadboard.
- Phillips screwdriver: Needed for the cited build’s power-supply connection.
- Multimeter: Check connections before power-on and voltages afterward.
Ben Eater also mentions a box cutter, X-ACTO knife, or small knife for separating breadboard power rails, and foam board as a convenient movable base. A design may not call for either, so treat them as project-specific conveniences rather than universal requirements. The guide emphasizes that reliable breadboards matter in a large build: loose or flaky contacts are difficult to trace.
Which test equipment do you actually need?
Digital multimeter: the first instrument to get
A basic digital multimeter with continuity and DC-voltage modes covers the most useful early checks in the cited projects. With power off, use continuity mode to confirm intended connections and check for unwanted shorts between neighboring nets. With power applied, use DC-voltage mode to verify the supply and relevant IC power pins. Follow the selected design’s own voltage targets; do not assume one project’s reading applies to another. RC2014’s multimeter troubleshooting guide
#1 Best Overall
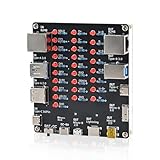
- 【VERIFY MULTIPLE CABLE TYPES】 Designed to help users check the connectivity of various common cables. This tester is compatible with several interface types, such as RJ45 (for networking), USB Type A, Type C, Micro B, Mini B, and Apple's Lightning connector, aiding in the identification of wiring issues.
- 【FLEXIBLE DUAL-POWER OPERATION】 Offers two ways to operate: use the onboard battery compartment for portability, or connect to a power adapter via the Type-C port for stationary use. The integrated power switch helps conserve energy.
- 【Transparent Acrylic Case – See How It Works】: Clear acrylic enclosure lets you visually inspect internal components and LED indicators, combining functional durability with a clean, modern look for labs, classrooms, or workbenches.
- 【Soldering Practice Assembly】: Pre-soldered PCB and clear layout make soldering approachable for students and hobbyists. Acrylic panels come with protective film to prevent scratches during shipping and assembly.
- 【DIY Soldering Project – Learn by Building】: Designed as a hands-on electronics soldering kit, this project helps users understand cable pinouts, signal paths, and real-world wiring logic. Ideal for STEM education, electronics practice, and maker learning.
For the RC2014, the guide says to check between ground and the 5 V rail and gives an expected reading of 4.8–5.1 V. That range is specific to the RC2014’s 5 V rail, not a general pass range for all homebrew computers.
Logic probe: a helpful optional shortcut
A logic probe can quickly show whether a digital point is static high, static low, or changing. Ben Eater describes one as handy but optional for the slow-running 8-bit build, where LEDs already expose many states. RC2014’s documented TTL logic probe can indicate oscillation, but it cannot tell you the signal’s frequency or identify two devices fighting by driving the same line high and low. That probe is for 5 V TTL signals only; using it at other voltages may damage it. RC2014’s TTL logic probe documentation
Rank #2

- 【Wide Application】STREBITO precision screwdriver set has 120 bits, complete with every driver bit you'll need to tackle any fix or DIY project. In addition, this PC tool kit comes with 22 accessories, such as magnetizer, magnetic mat, suction cup, spudger, cleaning brush, tweezers, etc. Whether you're a professional technician or a amateur, this essential electronics toolkit has what you need to repair all PC, iphone, laptop, PS5, switch, game controller, tablets, glasses, watch, etc
- 【Humanized Design】Our iphone repair tool kit has been designed with the professional in mind to maximize your repair capabilities. The screwdriver features a rubberized, ergonomic handle with swivel top, provides a comfort grip and smoothly spinning. Magnetic bit holder transmits magnetism through the bit, helping you handle small screws and parts. The blade can be extended for working in hard-to-reach areas. And flexible extension shaft is useful for removing screw in tight spots
- 【Magnetic Design】We put 2 magnetic tools in this computer repair tool kit that save your energy and time, make your fixing job easier. The 5.7 x 3.3" magnetic project mat can keep all tiny screws and parts organized, prevent from losing and messing up, make your repair work more efficient. Magnetizer demagnetizer tool helps strengthen the magnetism of the screw driver tips to grab screws, or weaken it to avoid damage to your sensitive electronics
- 【Organize & Portable】All screwdriver bits are stored in rubber bit holder which marked with type and size for fast recognizing. And the repair tools are held in a tear-resistant and shock-proof oxford bag, offering a whole protection and organized storage, no more worry about losing anything. The tool bag with nylon strap is light and handy, suit for your tool case, easy to carry out, or placed in the home, office, car, drawer and other places
- 【Lifetime Warranty】The precision bits are made of 60HRC Chromium-vanadium steel which is resist abrasion, oxidation and corrosion, sturdy and durable, ensure long time use. This computer screwdriver kit is covered by STREBITO lifetime warranty and 30 days money-back. If you have any issues with your phone repair tool kit, simply contact customer service for troubleshooting help, parts, replacement or refund. Buy the STREBITO electronic screwdriver set with confidence
Oscilloscope: for waveforms and timing, not every first build
An oscilloscope is useful when you need to see waveform shape, timing, or interactions that a meter or logic probe cannot show. It is not a blanket requirement: Ben Eater says the cited computer runs slowly enough that many debugging steps can be done with a multimeter or the built-in LEDs. The cited documentation does not establish one universal bandwidth, channel count, or price; those choices depend on the design’s clock and signals.
A regular multimeter may not read a multi-megahertz clock directly in a useful way. RC2014 describes a simple signal-tracer circuit for detecting activity with a DC meter and recommends an oscilloscope when one is available. A changing signal is not necessarily a correctly timed or correctly shaped signal, so choose the instrument according to the fault you need to distinguish.
Rank #3

- 【1】*** MUST see the 3rd pictures in listing that highlights the correct PCI slots to work ***. Using this kit wrongly on motherboard other PCIe port is not the reason of "Doesn't Work". Please make sure the motherboard has PCI slot before placing the order. The Large Desktop PC motherboard diagnostic card is NOT a PCIe card but a Standard PCI card. If the PC has PCIe express slots only, please see my other listing with the "V8 PCIe Diagnostic Kit" instead. ***DO NOT push the Wrong pins with excess force to avoid issue. MUST MAKE SURE PSU 4 / 6 / 8 pin power connector pins match and fit to the tester exact same 4, 6, 8 pins CORRECTLY although the PSU tester is fault tolerant and preventive.
- 【2】This starter kit comes with 1 large PCI test board and 1 small laptop test board for the old desktop PCs and old laptops diagnosis respectively. The large test board comes with【BIOS SPEAKER】to get the desktop PC motherboard Bios beep codes. The 【motherboard power switch cable】is nice to quick check the sticky or damaged PC motherboard power switch button and cable causing no power ON issue. The【the Anti Static Wrist Strap】is a plus to help discharge static during the PC repairs. The 【ATX PSU tester】in this kit is either Blue or Black Color with EXACT same features to quick test the 20/24 pins PC ATX PSUs.
- 【3】Nice starter kit for old computers no Power On / Auto Power OFF / no POST / no Display / no Boot ...etc. diagnosis. No need to swap Known Good Parts in the computer repairs. Save time and money!! All parts are packed well and stored neatly in a nice 【Portable Carrying Storage Case】. A overall great starter kit to add to our tool boxes! Great for computer class learning and old PCs quick troubleshooting needs as well.
- 【4】Please see the listing for the instruction PDFs. *****【On the listing page】, scroll down to after the "Product Information" table the "Product guides and documents" section, BOTH the pictorial "User Guide (PDF)" and the "User Manual (PDF)" are needed. *****. ***** Besides, please DO NOT discard the ITEM PACKING Included Paper Manual Note Printout since that also contains the complete Instruction folder info!!! *****
- 【5】Online Easy Guide and Pictorial Manuals to guide step by step with complete list of codes description. Downloadable manuals to stay updated. Welcome to conact if any question or need helps. Quality Genuine Computer Hardware Diagnostic Test Starter Kit with Free Lifetime Customer Service Supports from 29 years professional computer hardware work experienced seller.
How do you debug a computer that will not run?
Use a staged check rather than probing random pins. The order below follows RC2014’s multimeter troubleshooting approach; adapt the test points and expected values to your own schematic.
- Switch power off and check continuity. Confirm intended connections and look for shorts between adjacent nets.
- Apply power and verify the supply. Measure the rail using the ground point and expected range specified by the design.
- Check IC power pins. Confirm that chips receive the required supply voltage at their pins.
- Look for signal activity. Check clock, address, and data signals with suitable indicators or instruments. A meter may not reliably report a fast clock’s behavior.
- Inspect later-stage activity. If the basic signals are present, check device-select and serial-output activity where the design provides those signals.
For a soldered board, add a visual inspection before first power-on. RC2014 Mini II instructions call out solder bridges, dry joints, missed joints, component orientation, and chip seating. During troubleshooting, chips should be cool to the touch; remove power quickly if a chip becomes hot while the board will not boot. RC2014 Mini II documentation
Rank #4

- All-in-One Electronics & Coding Starter Kit: Learn the fundamentals of electronics, coding, and circuit design with the Horizon Uno board (Arduino-compatible), LEDs, sensors, and specialty components — everything you need to start building.
- Includes Step-by-Step Video Lessons: Gain lifetime access to a full online video course created by robotics engineers. Each lesson walks you through real-world projects, coding examples, and clear explanations designed for beginners. Each kit comes with a unique access code to access on our course website. The course includes lectures, labs, projects and problem sets.
- High-Quality Components for Reliable Learning: Each kit includes premium parts for accurate circuit performance — from durable resistors and sensors to jumper wires and LEDs — ensuring a frustration-free learning experience.
- Perfect for Students, Educators & Hobbyists: Ideal for classrooms, STEM programs, and self-learners. The Horizon Uno Kit makes it easy for beginners to grasp the fundamentals of electricity, coding logic, and microcontroller programming.
- Learn, Build & Innovate with Horizon Robotics Lab: Backed by an experienced team of engineers and educators, Horizon Robotics Lab is dedicated to making robotics and electronics education accessible, inspiring learners to build cool projects and bring ideas to life.
What changes between breadboard and soldered builds?
| Build style | What the workflow emphasizes | Tool implications |
|---|---|---|
| Breadboard | Reliable breadboards, correctly prepared wire, careful routing, and continuity checks. A slow build may expose useful states through LEDs. | Hand tools and a multimeter are central; a logic probe is optional. Ben Eater’s cited 8-bit build does not require soldering. |
| Soldered kit | Inspect joints and component orientation before power-on, and check chip seating. | Soldering tools and supplies are needed for assembly. The RC2014 Mini II’s single-board layout reduces component count and soldering compared with a modular equivalent, but offers less upgradability. |
Before choosing tools or buying a kit, check whether the design is breadboarded or soldered, whether it has built-in LEDs or other indicators, how fast it runs, what voltage and logic family it uses, and whether programming hardware is included.
Do you need a power supply or EEPROM programmer?
Some project kits require equipment beyond hand tools and test instruments. Ben Eater’s 6502 guide says builders need a 5 V power supply and an EEPROM programmer. It names the TL866II Plus and the later T48 as programmers used in the videos; it also recommends the clock module kit and an Arduino Mega for following all experiments and debugging. Ben Eater’s 6502 build guide
What’s actually slowing this PC down?
Pick the symptom - the matching free tool is one click away.
Best Value

- Complete Kit: Includes all necessary components for assembly, offering hands-on experience with electronic components and soldering
- Measurement Capabilities: Features comprehensive measurement functions for frequency , inductance and capacitance testing
- Educational Value: Provides practical experience in circuit assembly, component identification, and electronic testing procedures
- Step by Step Instruction: Step by step Instruction with text and pictures included in the package
- Enclosure Design: Includes transparent protective housing to ensure component safety and professional finish after assembly
The separate 6502 kit listing says its kit does not include the EEPROM programmer or 5 V power supply, while listing the computer components, breadboards, LEDs, jumper wires, and hookup wire as included. Kit contents can change, so check the current listing and the exact project revision before purchasing. Ben Eater’s 6502 kit listing
Quick Recap
A practical starting checklist
- For a breadboard design, gather small cutters, a wire stripper matched to the specified gauge, small pliers or tweezers, and any screwdriver the project calls for.
- Choose a multimeter with continuity and DC-voltage modes; use continuity only with power off.
- Use the design’s documented voltage targets for powered checks.
- Add a logic probe only if it suits the signal voltage and logic family you are testing.
- Buy soldering gear only if your chosen build requires soldered assembly.
- Check whether the kit includes the required supply, EEPROM programmer, and other project-specific modules.
Product prices and availability are accurate as of the date/time indicated and are subject to change. Any price and availability information displayed on Amazon at the time of purchase will apply.

