
iTechGuides is reader-supported. When you buy through links on our site, we may earn an affiliate commission. As an Amazon Associate I earn from qualifying purchases. Learn more
You can make an AR7778 play programmed MIDI sequences in two reported ways: electrically switch its keypad matrix with optocouplers, or use solenoids to press its keys. The direct-wired approach is documented in more detail, but neither project report is a complete, universally compatible build guide. Expect a limited, non-chromatic note set; the direct-wired build also requires soldering and cutting the calculator’s case.
Choose between electrical switching and physical key presses
Both approaches use a controller to trigger the calculator’s musical keys. The difference is where the key press happens: at the calculator’s electrical contacts, or mechanically at the buttons.
| Approach | How it triggers notes | Reported controller and hardware | Main trade-offs |
|---|---|---|---|
| Direct PCB injection | Optocouplers electrically connect the mapped keypad row and column traces to emulate key presses. | The April 2026 x86lucario project describes an Arduino Uno R3, optocouplers, and daisy-chained serial-in parallel-out (SIPO) shift registers. Its design uses 14 optocouplers per calculator. | Requires opening the calculator, mapping and soldering to its board, managing many connections, and modifying the case for wire clearance. In the reported build, each note has a fixed duration. |
| Physical key actuation | Solenoids push the calculator’s buttons. | A Hackster News report describes an Arduino Nano controlling solenoids through relays, with sequences programmed on the Nano. | Avoids wiring directly to the keypad matrix, but requires a mechanical arrangement that can reliably reach and press the keys. The report does not state actuator specifications or provide a repeatable build plan. |
The direct method has more implementation detail in its project account; the mechanical method is best treated as evidence that another architecture has been demonstrated, not as a parts-level tutorial.
Quick wins for a faster PC:
Fix the driver behind crashes, sound loss and screen glitchesFind Drivers →Repair Windows errors before they cause bigger problemsFix Now →Understand the calculator’s note and timing limits first
An AR7778 is not a conventional chromatic MIDI sound module. The April 2026 direct-build author reports that a calculator in piano mode plays 14 notes, skipping semitones, and that individual calculators can have frequency offsets. A separate AR7778 sampling project by evnchn describes a range of C4 through B6 with semitones excluded. These are claims from different project contexts, not a verified universal specification or a promise that every unit covers the same range. Check the actual calculator or calculators you plan to use.
#1 Best Overall
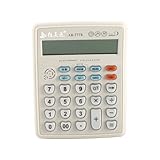
- 【Musical Function】: It is not only a calculator, but also a musical instrument, which can be used to play some simple music. "CE" Button can switch long, medium and short tone.
- 【Multi-Functions】: Support add, subtract, and divide calculation function, GT, M+, M-, MRC, etc. Support time, date, alarm, volume control function. Let you work fast and efficiently.
- 【How to Convert Electronic Piano】: First press the "AC" button, then press the "Time/Date" button twice to enter the musical function. Press the number key"1-9" and "+,-,x,÷,=", the calculator will make a sound.
- 【Large Display】: Electronic desktop calculator with 12-digits large LCD display. Tilted screen design, clear and easy to read. Ergonomic design, comfortable button. Powered by 2pcs AA batteries, easy to use.(Batteries are not included.)
- 【Wide Application】: The sound is clearer and brighter. choice for office, business, store, home using.
The direct-wired author also reports that a note lasts a fixed amount of time: holding the key longer does not extend the sound. The project reports do not establish velocity response, sustain control, or a complete chromatic keyboard. The April 2026 author compared multiple calculators to cover every note across two octaves, but that does not mean one unit provides a two-octave chromatic range.
How direct keypad-matrix control works
Map the contacts on your own calculator
The direct-build account describes the keypad as a row-column matrix. Pressing a key connects a row trace to a column trace. To identify the connection for each key, the author used a multimeter in continuity mode while pressing keys, then soldered wires to the corresponding board pads. The pictured pad map belongs to that author’s hardware; the account does not establish that all AR7778 revisions use the same board layout.
Rank #2

- 8‑DIGIT POCKET CALCULATOR – Compact calculator with an 8‑digit display, ideal for everyday calculations. Designed for simple and clear use at school, at home, or during homework sessions.
- PROTECTIVE COVER INCLUDED – Equipped with a practical protective cover that helps shield the calculator from scratches and dust, making it easy to carry safely in a school bag or pencil case.
- EASY‑TO‑READ DISPLAY – Clear screen and well‑spaced keys make calculations easy to read and enter. Suitable for learning basic math operations with confidence and independence.
- PEANUTS DESIGN – Featuring a PEANUTS design, this calculator adds a fun and recognizable touch to school supplies, making math activities more enjoyable for fans of this iconic universe.
- LEXIBOOK QUALITY - Loved by children, approved by parents. A renowned and certified toy brand, Lexibook offers smart, quality and safe products for a purchase you can trust.
For a conversion, treat continuity mapping as a per-unit identification task rather than copying a pinout. Work out which two contacts each musical key connects on your board, label your findings, and check the wiring before powering the modified calculator. The project account does not provide a universally verified schematic or a complete set of board-revision checks.
Use optocouplers to reproduce key presses
After mapping the contacts, the reported design uses an optocoupler for each calculator key it controls. The optocoupler acts as an electrically controlled switch across the appropriate row and column pair. This is the direct electrical alternative to attaching a mechanism to the outside of each button.
Rank #3

- SUPER VALUE: Designed for babies ages 6M+. This Pretend Toy Includes a Remote and a Cellphone. It's a Value Toy with Multifunction Design. The Toy Can Encourage Language Development, Cognitive Learning, and Hands-On Play.
- REAL FUNCTION: Remote Control features channel keys to imitate a TV Remote switching between different channels. Playing Realistic Sound Effects: Animal, Calculator, Music, Camera, and more! Batteries Required. Batteries Not Included.
- PREMIUM QUALITY: Super Durable. Easy to Use. Large Screen and buttons designed for small hands. Perfect for Holiday Toy Gifts, present, School Classroom Prize, Kids Intelligent Learning Toys, Kids Toy Remote and Phone, Kids Shower and more.
- SAFE FOR CHILDREN: Remote Control and Cell Phone Made of 100% Child Safe ABS Plastic.
- CUSTOMER SATISFACTION. Providing a great shopping experience is our main priority to our customers. Feel free to message us through “contact sellers” if products don't meet your expectations. The celebrations start at JOYIN!
The described build uses 14 optocouplers per calculator. That figure describes the project’s implementation, not a universal parts requirement for every possible AR7778 revision or conversion. The source does not identify exact optocoupler models, ratings, or a verified complete bill of materials, so component choices and the circuit must be checked against the hardware being built.
Translate MIDI events into controller actions
In the April 2026 account, a script reads note and timing events from a MIDI file and emits Arduino C++ playback code. The Arduino then controls the optocouplers. Because the build has many switches and limited Arduino pins, it uses daisy-chained SIPO shift registers to expand the number of outputs. The author describes serial communication to firmware that interprets incoming events as a potentially more elegant alternative; that is a suggested direction, not the method demonstrated in the reported build.
Rank #4
- Miniature Accessory: This 1/12 scale miniature calculator is a perfect decorative accessory for any dollhouse or miniature scene.
- Realistic Design: With its silver color and detailed buttons, this tiny calculator looks just like a real-life calculator in miniature form.
- Compact Size: Measuring approximately 0.5x0.7x0.2 inches, this miniature calculator is small yet intricately detailed.
- Easy to Display: Place this miniature calculator on a dollhouse desk, shelf, or any other suitable surface to add a touch of realism.
- Versatile Decor: Whether for a dollhouse, diorama, or miniature collection, this calculator accessory adds a charming touch of everyday life.
In practical terms, the conversion has two mappings to get right: which MIDI note should trigger which calculator key, and when the controller should switch that key. Since the calculator’s available notes are restricted and their frequencies can vary between units, confirm the mapping against the specific instrument rather than assuming that a standard MIDI note will have a particular pitch on every AR7778.
Windows Errors? Fix Them Before They Spread
Repair common Windows errors and clear accumulated junk for a smoother, more stable PC - no reinstall needed.Free scan · no reinstallCrashes, No Sound, or Screen Glitches?
Random freezes, missing sound and display glitches usually trace back to one bad driver. Find and replace yours safely.Free scan · under a minuteAccount for enclosure changes
The direct-wired author’s four-calculator build required cutting the back casing for wires to exit and removing plastic that supported the LCD to make room; the display was then taped to the case. This is an irreversible modification to that example build, not a required step for every design. Plan where wiring will fit before cutting, and recognize that opening and altering the enclosure changes the calculator from an unmodified portable device into a hardware project.
Best Value

- [Musical Function]: It is not only a calculator, but also a musical instrument, which can be used to play some simple music. "CE" Button can switch long, medium and short tone.
- [How to Convert Electronic Piano]: First press the "AC" button, then press the "Time/Date" button twice to enter the musical function. Press the number key"1-9" and "+,-,x,÷, =", the calculator will make a sound.
- [Multi Functions]: Support add, subtract, multiply and divide calculation function, GT, M+, M-, MRC, etc. Support time, date, alarm, volume control function. Let you work fast and efficiently.
- [Large Display]: Electronic desktop calculator with 12digits large LCD display. Tilted screen design, clear and easy to read. Ergonomic design, comfortable button. Powered by 2pcs AA batteries, easy to use.(Batteries are not included.)
- [Wide Application]: The sound is clearer and brighter. Suitable for office, business, store, home using.
What the solenoid approach changes
Hackster News reported that YouTuber igor30 used an Arduino Nano, relays, and solenoids to push AR7778 buttons, with musical sequences programmed on the Nano. The short report mentions performances of named tunes, but does not provide circuit diagrams, dimensions, actuator force or travel, electrical ratings, source code, or a reproducible parts list.
Physical actuation preserves the keypad’s own contact mechanism: the controller does not need to switch the board’s row-column pads directly. In exchange, the build must solve mechanical questions such as how to position an actuator over a key and how far and how firmly it should move. Those are design considerations implied by pressing physical buttons, not performance characteristics established by the report. The report is not enough to select a particular solenoid or relay or to reproduce the circuit safely.
What the project reports do—and do not—let you build
The direct account supplies a useful architecture: identify the keypad matrix, switch its contacts with optocouplers, expand controller outputs with shift registers, and generate Arduino playback code from MIDI events. It does not establish a universal board pinout, complete schematic, exact component models, or drop-in code for every calculator. The mechanical account confirms a different way to trigger keys but leaves more of the hardware design unspecified.
Do these 3 things before closing this tab:
1Fix the driver behind crashes, sound loss and screen glitches2Repair Windows errors before they cause bigger problems3Scan for outdated or missing drivers - takes under a minute- For the direct approach: plan for continuity testing, fine soldered connections, a controller such as the reported Arduino Uno R3, optocouplers, and potentially SIPO shift registers. Confirm each component and connection for your board; the project reports do not validate generic part selections.
- For the mechanical approach: the reported controller is an Arduino Nano, with relays and solenoids. The available report does not establish actuator dimensions, ratings, mounting details, or wiring.
- For either approach: verify the note-to-key mapping on the calculator you will use, and do not expect the reported work to supply a complete chromatic range or conventional MIDI articulation.
The AR7778 sampling project by evnchn is a separate browser-based sound-sampling effort, not another MIDI hardware-control circuit. It describes recording the calculator through a 3.5 mm cable connected to a sound-card microphone input after substantially lowering the recording level; that recording route should not be confused with either keypad-conversion method.
Quick Recap
Product prices and availability are accurate as of the date/time indicated and are subject to change. Any price and availability information displayed on Amazon at the time of purchase will apply.

