
Do these 3 things before closing this tab:
1Clear out junk files and repair common Windows errors2Scan for outdated or missing drivers - takes under a minute3Repair Windows errors before they cause bigger problemsThe right way to take a screenshot in Arch Linux depends on your desktop environment and whether your session is running X11 or Wayland. Start with your desktop’s built-in screenshot app or shortcut. For a terminal workflow, use maim or scrot on X11, and grim with slurp on wlroots Wayland compositors such as Sway or Hyprland. To copy an image instead of saving it, add the clipboard utility for your session: xclip on X11 or wl-clipboard on Wayland.
Choose a method for your desktop and session
There is no single Arch-wide screenshot shortcut that works in every setup. The fastest dependable choice is usually the capture tool integrated with your desktop environment. If you use a standalone window manager or want a scriptable command, first identify whether your current graphical session is X11 or Wayland; capture utilities are not interchangeable across those display systems.
| Your setup | Good starting point | Typical use |
|---|---|---|
| GNOME | PrintScreen or the system-menu camera icon | Interactive desktop capture |
| KDE Plasma | Spectacle | Desktop, window, rectangular or freehand-region capture |
| Xfce | xfce4-screenshooter |
GUI capture, with an optional keyboard shortcut |
| X11 window manager | maim or scrot |
Terminal commands and scripts |
| wlroots Wayland compositor | grim, often with slurp |
Whole-screen or selected-region capture |
If you are unsure about the session, check your desktop’s session selector or session settings at login. In a terminal, echo "$XDG_SESSION_TYPE" commonly prints x11 or wayland when the environment sets that variable. Treat the result as a clue, not a guarantee for every custom session. Do not use maim or scrot as though they were Wayland capture tools; choose a compositor-compatible method instead.
Take a screenshot in GNOME
Press PrintScreen, or open the camera icon in the system menu. GNOME’s built-in capture interface is the simplest starting point for an interactive screenshot. Depending on the GNOME version and configuration, the on-screen capture interface may present capture choices and controls; if the key does something unexpected, use the system menu or review your keyboard-shortcut settings.
Recommended Free Tools
#1 Best Overall

- Perfect for Employees and IT: Keyboard and mouse combo for work with slim design, laptop-style typing, and super fast scrolling for users, plus secure wireless connections and easy deployment for IT
- Enterprise Security: Logi Bolt wireless technology addresses security concerns with BLE; equipped with Secure Connections Only Mode; Logi Bolt receiver included
- Designed for Today’s Workforce: A business-grade, sleek, full-size Bluetooth keyboard and a contoured Bluetooth mouse bring upgraded design and comfort to the desktop
- Laptop-Style Typing Experience: The slim keyboard features low-profile keys with a subtle scoop for a familiar typing experience; ideal for touch typists
- SmartWheel Technology: The wireless mouse is designed for different work tasks, with precise line-by-line scrolling or super fast scrolling with a flick of the SmartWheel
Use the optional gnome-screenshot utility
If you prefer a command-line utility, install the gnome-screenshot package using your usual Arch package-management workflow. Its documented modes can capture the whole screen, a window or a user-defined area and save the result to a file. Consult the utility’s own help output for the precise flags available in the version installed on your system; this avoids relying on options that may differ between versions.
Use the built-in shortcut when you want an interactive capture with minimal setup. Choose the optional utility when a command or script is more useful than opening a graphical capture interface.
Take a screenshot in KDE Plasma
Launch Spectacle, KDE’s screenshot application. It supports full-desktop, single-window, rectangular-region and freehand-region capture. Choose the target that matches what you need, then save the capture from the application. Spectacle is the most direct option for Plasma users who want to choose a capture mode visually rather than assemble a shell pipeline.
If Spectacle is not installed in your particular setup, install the package named spectacle through your Arch package manager. You can also bind a keyboard shortcut to launch it if you want a quicker workflow; the exact shortcut configuration depends on your Plasma version and personal settings.
Quick wins for a faster PC:
Fix the driver behind crashes, sound loss and screen glitchesFind Drivers →Repair Windows errors before they cause bigger problemsFix Now →Scan for outdated or missing drivers - takes under a minuteDriver Scan →Take a screenshot in Xfce
Install xfce4-screenshooter if it is not already available, then launch it from your application menu or run it from a terminal. The manual documents full-screen capture and saving to a file. Available output formats depend on the pixbuf loaders installed on your system, so a format missing from the save dialog may reflect a missing loader rather than a screenshot failure.
Assign an Xfce keyboard shortcut
- Open Xfce Menu > Settings > Keyboard.
- Choose Application Shortcuts.
- Add the command
xfce4-screenshooterand press the key combination you want to bind. - Test the shortcut and confirm the screenshooter opens. If another action already uses that key combination, choose a different one.
The menu wording can vary slightly with Xfce releases. If the shortcut dialog asks for a command, use the executable name above; the capture destination and mode are then handled by the screenshooter.
Capture from an X11 window manager or terminal
For these commands, the display session must be X11 and the named utilities must be installed. Save the output in a directory you can write to. If a command reports that it cannot open the display, first confirm that it is running inside the active graphical session as the logged-in desktop user.
Rank #2

- The Q2 (Barebone version without switches and keycaps) is a fully customizable mechanical keyboard with a compact 65% layout. With a solid full aluminum frame, the Q2 Barebone is designed to be able to assemble easily for personalized premium typing comfort.
- QMK/VIA literally means endless possibilities for a fluid workflow. Simply connect the Q2 to your device with a cable, import the Q2 keymap JSON file into the VIA software, drag and drop your favorite keys or macro commands to remap any key you want on macOS, Windows, or Linux operating system. Check our user guide or user manual for more instructions.
- You can hot-swap the Q2 Barebone version with almost all of the 3pin and 5pin MX style mechanical switches on the market (including Cherry, Gateron, Kailh, Panda, etc.) without soldering required. The PCB-mounted screw-in stabilizer for “big keys” such as space bar, shift, enter, and delete are designed for less wobbliness.
- Double-Gasket design allows the Q2 to maintain its flexibility and improves overall typing sound. Added sound-absorbing and case foams inside to significantly reduce the sound resonance and noise between the metals. Each keyboard component could be reassembled easily, so you can customize it the way you want.
- The south-facing RGB is designed to better illuminate the keyboard backlight from the typist’s angle if non-backlight shine-through PBT keycaps (NOT included on the Q2 Barebone version) are installed. Note: Users need to buy switches and keycaps separately in order to type with the Q2 Barebone version.
Use maim for a full screen or selected region
Capture the screen to a PNG file:
maim screenshot.pngTo select a region interactively and save it:
maim --select screenshot.pngThe selection command waits for you to mark an area. If you cancel the selection, there may be no image to save. Select a region only after the command has started, and check the destination path if the file is not where you expected.
PC Slower Than It Used to Be?
A free scan shows the junk files, broken settings and background clutter dragging Windows down - then fixes them in one click.Free scan · Windows 10 & 11Crashes, No Sound, or Screen Glitches?
Random freezes, missing sound and display glitches usually trace back to one bad driver. Find and replace yours safely.Free scan · under a minuteCopy a selected X11 capture to the clipboard
Install xclip as well as maim, then run:
maim -s | xclip -selection clipboard -t image/png -iThis pipeline captures a selected region and sends PNG image data to the X11 clipboard. It does not create a screenshot file. Paste into an application that accepts images; a plain-text editor will not display the image contents.
Use scrot for delays or timestamped files
For a delayed capture with a thumbnail option:
scrot -t 20 -d 5To save a timestamped screenshot in a directory that already exists:
scrot ~/screenshots/%Y-%m-%d-%T-screenshot.pngCreate ~/screenshots first if necessary. The date and time pattern makes the filename vary from capture to capture, which helps avoid overwriting a prior image. For a root-window capture using ImageMagick instead, use:
import -window root ~/Pictures/$(date '+%Y%m%d-%H%M%S').pngThat command assumes ImageMagick’s import tool is installed and that the current session is X11. These terminal options are useful when a window manager has no integrated screenshot utility or when a repeatable command is preferable to a GUI.
Capture on Wayland with grim and slurp
For wlroots-based Wayland compositors such as Sway or Hyprland, grim captures the screen and slurp lets you select a region. Install the tools if needed. These commands are for Wayland compositor workflows; they are not replacements for X11 utilities in an X11 session.
Save the whole screen
grim screenshot.pngSelect a region and save it
slurp | grim -g - screenshot.pngslurp supplies the selected geometry to grim. If you cancel the selection, the pipeline has no valid region to capture. If the compositor rejects the request, confirm that both tools are being run within the active Wayland session and that the compositor supports the capture protocol used by grim.
Rank #3
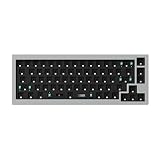
- The Q2 (Barebone version without switches and keycaps) is a fully customizable mechanical keyboard with a compact 65% layout. With a solid full aluminum frame, the Q2 Barebone is designed to be able to assemble easily for personalized premium typing comfort.
- QMK/VIA literally means endless possibilities for a fluid workflow. Simply connect the Q2 to your device with a cable, import the Q2 keymap JSON file into the VIA software, drag and drop your favorite keys or macro commands to remap any key you want on macOS, Windows, or Linux operating system. Check our user guide or user manual for more instructions.
- You can hot-swap the Q2 Barebone version with almost all of the 3pin and 5pin MX style mechanical switches on the market (including Cherry, Gateron, Kailh, Panda, etc.) without soldering required. The PCB-mounted screw-in stabilizer for “big keys” such as space bar, shift, enter, and delete are designed for less wobbliness.
- Double-Gasket design allows the Q2 to maintain its flexibility and improves overall typing sound. Added sound-absorbing and case foams inside to significantly reduce the sound resonance and noise between the metals. Each keyboard component could be reassembled easily, so you can customize it the way you want.
- The south-facing RGB is designed to better illuminate the keyboard backlight from the typist’s angle if non-backlight shine-through PBT keycaps (NOT included on the Q2 Barebone version) are installed. Note: Users need to buy switches and keycaps separately in order to type with the Q2 Barebone version.
Copy a selected region to the Wayland clipboard
Install wl-clipboard, which provides wl-copy, and run:
slurp | grim -g - - | wl-copyThe hyphen after the geometry argument tells grim to write image data to standard output; wl-copy places that data on the Wayland clipboard. This is a clipboard-only workflow, not a file save.
Save and copy the same capture
Use tee to write the PNG while passing the same image data to the clipboard:
slurp | grim -g - - | tee ~/Pictures/$(date +%s).png | wl-copyThe filename uses the current Unix timestamp. The ~/Pictures directory must exist and be writable. If you take multiple captures within the same second, a timestamp-based name can collide; use a different naming scheme if that matters for your workflow.
Capture a current window
A window capture requires the window’s geometry. The ArchWiki documents separate ways to obtain that geometry in Sway and Hyprland; the compositor-specific command is not identical between them. Once you have the geometry in the format grim -g accepts, pass it to grim. Do not assume that a generic Wayland command can discover the focused window across all compositors.
Choose where the screenshot goes
Decide whether you need a file, clipboard image or both before choosing a command. GUI tools are usually easiest when you want to inspect a capture or choose a destination interactively. A terminal command is convenient for repeatable captures, automation and keyboard bindings.
Free tools Windows power users keep installed
One-click scans. No signup required.
- File: give the capture utility a filename, such as
screenshot.png, or select a destination in the desktop application. - Clipboard on X11: pipe image data to
xclip. - Clipboard on Wayland: pipe image data to
wl-copy, provided bywl-clipboard. - Both file and clipboard on Wayland: place
teebetweengrimandwl-copy.
A successful clipboard command does not necessarily leave a file behind. Conversely, a saved file does not mean it has also been copied. If you need both outcomes, choose a workflow that explicitly does both.
Rank #4

- The Keychron K6 Pro is an innovative custom wireless mechanical keyboard advancing typing experience to a new level. QMK/Launcher allows anyone to customize any key and macro with ease. Together with an upgraded typing sound and feel, and our flexible hot-swppable feature, the K6 Pro is leveraging limitless possibilities with premium typing comfort.
- Program keys with Launcher- Anyone can master any keys, macro commands or combination keys through Launcher web app with ease. Simply connect the K6 Pro to your device with a cable, drag and drop your favorite keys or macros to remap any key you want on any system (macOS, Windows, or Linux). *Note: User can remap a key on wired mode only. Once it's done, the keymap will work on both wireless and wired modes.
- Hot-Swappable with MX mechanical switch - You can hot-swap the K6 Pro with almost all of the 3pin and 5pin MX mechanical switches on the market (including Cherry, Gateron, Kailh, Panda, etc.) without soldering required.
- Bluetooth 5.1 Wireless & Wired - Ready for multitasking. You can connect the K6 Pro with up to 3 devices wirelessly via its stable Broadcom Bluetooth 5.1 for seamless multitasking across your laptop, phone, and tablet. Switch among them swiftly, and it’s fully compatible with both Mac and Windows.
- The south-facing RGB is designed to better illuminate the keyboard backlight from the typist’s angle if non-backlight shine-through PBT keycaps (NOT included on the K6 Pro Barebone version) are installed. Note: Users need to buy switches and keycaps separately in order to type with the K6 Pro Barebone version.
Troubleshoot common screenshot problems
The shortcut does nothing or opens the wrong tool
Use your desktop’s screenshot application directly to determine whether capture works without the shortcut. In Xfce, check Menu > Settings > Keyboard > Application Shortcuts and verify the command and key binding. In GNOME or Plasma, review the keyboard-shortcut settings for a conflicting assignment or use the system menu or application launcher.
The terminal says a command is not found
The corresponding utility is not installed or is not available in the shell’s command path. Install the named package through Arch’s package manager, then retry: for example, maim for an X11 capture or grim for a wlroots Wayland capture. Clipboard commands also require their separate utility: xclip on X11 or wl-clipboard for wl-copy on Wayland.
The command runs but no image appears
Check the command’s output path and confirm that its parent directory exists and is writable. A relative filename such as screenshot.png is saved in the shell’s current working directory, which may not be your Pictures folder. For a region capture, complete the selection rather than cancelling it.
The Tool Desk
Outbyte PC Repair FREEClear out junk files and repair common Windows errorsFree Scan →Outbyte Driver Updater FREEScan for outdated or missing drivers - takes under a minuteDriver Scan →The clipboard is empty or the pasted result is not an image
Use the clipboard utility for the session you are actually running. The X11 pipeline uses xclip; the Wayland pipeline uses wl-copy. Confirm that the capture command produced image data and paste into an application with image-paste support. A text-only field cannot show a screenshot.
A capture command fails in Wayland
Check the session type and compositor before changing the command. maim, scrot and ImageMagick’s import -window root examples here are X11 workflows. For a wlroots Wayland compositor, use grim, adding slurp for region selection.
The screenshot format is unavailable in Xfce
xfce4-screenshooter’s supported formats depend on installed pixbuf loaders. Try a format already offered by the save dialog, or install the loader needed for the format you want.
Or skip the browser setup
ScreenshotNeo is for capturing webpages, not your Arch Linux desktop. If your actual task is to capture a public webpage, its API can return a screenshot or PDF from one GET request. For local desktop captures, use the methods above.
What’s actually slowing this PC down?
Pick the symptom - the matching free tool is one click away.
For API parameters and options, see the ScreenshotNeo documentation. This cURL example saves a webpage screenshot:
curl -G "https://api.screenshotneo.com/v1/shot" -d access_key=YOUR_API_KEY --data-urlencode url=https://stripe.com -o shot.webpScreenshotNeo can accept cookie or consent banners and remove more than 60 known consent platforms, newsletter popups and chat widgets before capture; each of those steps can be turned off. Bot checks, blank pages, timeouts, failed loads and cache hits are not billed, and responses identify the page verdict and billing status in headers. Its MCP server provides take_screenshot, get_page_info and capture_pdf tools for AI agents using Claude, Cursor or another MCP client. The free plan includes 1,000 screenshots per month with no card; paid plans start at $5 for 3,000 shots. Every feature is available on every plan.
Sign up for ScreenshotNeo’s free plan to try 1,000 screenshots a month without a card.
Quick Recap
Product prices and availability are accurate as of the date/time indicated and are subject to change. Any price and availability information displayed on Amazon at the time of purchase will apply.

