
What’s actually slowing this PC down?
Pick the symptom - the matching free tool is one click away.
iTechGuides is reader-supported. When you buy through links on our site, we may earn an affiliate commission. As an Amazon Associate I earn from qualifying purchases. Learn more
To storyboard a YouTube video, turn its outline or script into a sequence of rough frames or visual descriptions, one for each meaningful change in what viewers will see. Note the spoken beat, subject, framing, camera angle or movement, location, and any props, text, audio, or gear needed. You do not need drawing skills or a special app: the board only needs to help you plan and capture the footage.
Start with the promise of the video
Before drawing panels, write one sentence describing what viewers should understand or be able to do by the end. Then arrange the material into an opening, a middle that delivers the promise, and a close. Put demonstrations and supporting points in an order that makes sense to someone seeing the subject for the first time.


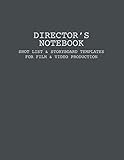

Think about the eventual edit while you plan. YouTube’s video editing tips recommend considering the opening, ending, key moments, camera positions, angles, movement, and B-roll during writing—not only after filming.
The Tool Desk
Outbyte PC Repair FREEClear out junk files and repair common Windows errorsFree Scan →Outbyte Driver Updater FREEFix the driver behind crashes, sound loss and screen glitchesFind Drivers →Break the script into visual beats
Make a new panel whenever the visual information changes in a meaningful way: the location, subject, evidence, action, or camera setup changes. A talking-head explanation may need only a few panels. A tutorial or product demonstration may need more to show each important action or detail. Do not make a separate panel for every sentence if the viewer would see essentially the same shot.
#1 Best Overall
If you do not have a full script, use an outline. A short phrase such as “show the finished result” or “close-up of the setting being changed” can be enough to plan a shot.
Plan what each panel needs to communicate
Draw a quick frame or describe it in words. Stick figures, boxes, arrows, and labels work if they make the intended shot clear to the person filming or editing. For each panel, record the details that will affect what you capture:
| Panel field | What to note |
|---|---|
| Script line or beat | What is said, shown, or demonstrated at this point? |
| Sketch or visual description | What should the viewer see? |
| Subject and focal point | What should attract attention? |
| Shot size, framing, and angle | How much of the subject or setting is visible, and from what viewpoint? |
| Camera movement | Is the camera still, panning, or zooming? |
| Location and background | Where will the shot happen, and what will appear behind the subject? |
| Audio, text, props, or B-roll | What supporting material, on-screen words, or sound must be captured? |
| Duration and setup | How long might the shot run, and what gear or help will it take? |
These are planning fields, not a mandatory form. Combine them for a simple solo shoot; keep them distinct when several people need to coordinate. The Canadian Heritage and Canadian Conservation Institute web-video guide includes storyboard and shot-list examples covering items such as location, shot type, movement, length, dialogue, action, subjects, and equipment or staff.
Crashes, No Sound, or Screen Glitches?
Random freezes, missing sound and display glitches usually trace back to one bad driver. Find and replace yours safely.Free scan · under a minuteWindows Errors? Fix Them Before They Spread
Repair common Windows errors and clear accumulated junk for a smoother, more stable PC - no reinstall needed.Free scan · no reinstallChoose framing for the information
Use a wide shot when viewers need to understand the setting, a medium shot to keep attention on a person, and a close-up when a small detail matters. These are options rather than a fixed sequence. Choose the view that makes the point easiest to understand. Add a camera move only when it helps reveal or follow something; a static shot may be clearer and easier to capture.
Turn the storyboard into a shootable plan
- Write the promise and structure. Define the viewer takeaway, then outline the opening, explanation or demonstration, and close.
- Mark visual changes. Divide the outline or script into beats when the subject, location, action, visual evidence, or camera setup changes.
- Specify each frame. Sketch or describe the subject, focal point, framing, angle, background, and movement.
- Add practical notes. Include dialogue or voice-over, approximate duration if useful, props, location, people, gear, sound or lighting needs, and any text or graphics.
- Build a shot list. Convert each planned panel into a shot you can capture. Group shots by location or subject when that reduces setup changes, even if the finished video will present them in a different order.
- Check the location and equipment. Confirm access and permissions, likely light and sound, camera settings, and that the camera, lights, and microphone work. Charge devices and prepare backup batteries or storage. YouTube’s filming tips also remind creators to respect privacy and avoid showing identifying personal details at home.
- Revise when reality calls for it. If a location, subject, or available setup makes a clearer shot possible, update the board. While editing, check whether you captured the planned opening, close, key moments, and any needed B-roll.
Choose paper or a digital storyboard
For a straightforward video, use a plain document or sheet of paper with the script or beat beside a sketch. Pencil makes revisions easy; a polished drawing is unnecessary. The Canadian production guide documents this script-and-sketch approach using ordinary materials.
If you already plan on an iPhone, Apple’s iMovie storyboard documentation describes premade templates for common video types. Each storyboard includes a flexible shot list to guide clips to capture, along with matching titles, transitions, and music; start a project through iMovie’s project flow. This is one documented option, not a requirement. Paper is quick to start and revise; digital planning may be easier to share, rearrange, or keep with project assets. The cited sources do not provide comparative tests of the formats, and no paid storyboard app is necessary.
Keep the board useful, not elaborate
- Make the image or description clear enough to identify the intended shot, not beautiful enough to display.
- Use more detail where mistakes would be costly or hard to fix, such as a one-time location, a close-up demonstration, or a shot requiring another person.
- Leave room for improvisation. The storyboard guides coverage; it does not require filming every shot exactly as first drawn.
- Use the shot list to catch omissions before filming. YouTube’s guidance supports planning to avoid forgotten shots and extra takes, but does not quantify a guaranteed time or cost saving.
Or let it run in the cloud
Storyboarding helps you prepare a video to film. If your separate goal is to keep uploaded videos looping as a YouTube live stream, StreamNeo is a cloud service for that job: upload a recording or build a playlist, add your YouTube stream key once, and go live. Nothing has to stay on at home; it streams the uploaded file as made, up to 4K 60fps, at one price per slot, and automatically recovers if YouTube drops the stream. The first day is free with no card. Monthly pricing is $9.99 per month. Learn more at StreamNeo, or start the free first day.
Quick wins for a faster PC:
Clear out junk files and repair common Windows errorsFree Scan →Scan for outdated or missing drivers - takes under a minuteDriver Scan →Quick Recap
Product prices and availability are accurate as of the date/time indicated and are subject to change. Any price and availability information displayed on Amazon at the time of purchase will apply.

