This Itechguide teaches you how to stop automatic updates on Windows 10. The guide covers steps for 2 methods to stop automatic updates on Windows 10.
Option 1: Stop Automatic Updates by Pausing Updates
Windows 10 is designed to force you to install updates. One way to stop the update installing automatically is to pause the updates for a limited period (maximum of 35 days).
For a more “permanent” method to stop updates from installing automatically, see method 2.
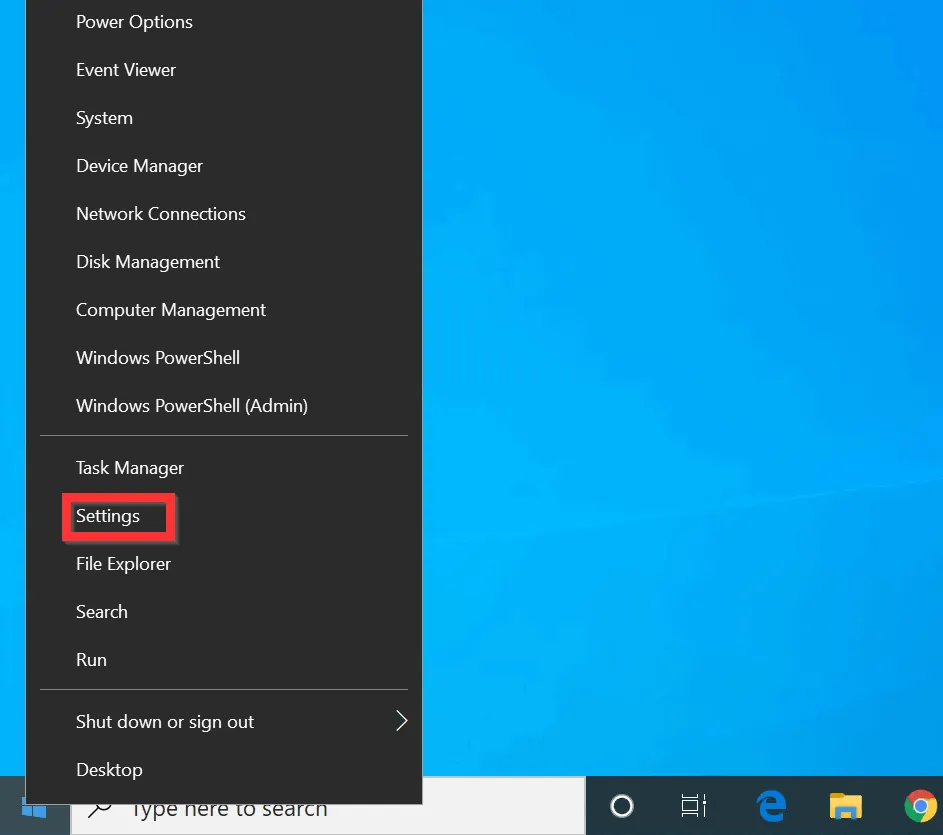
- Right-click the Windows 10 Start menu and click Settings.
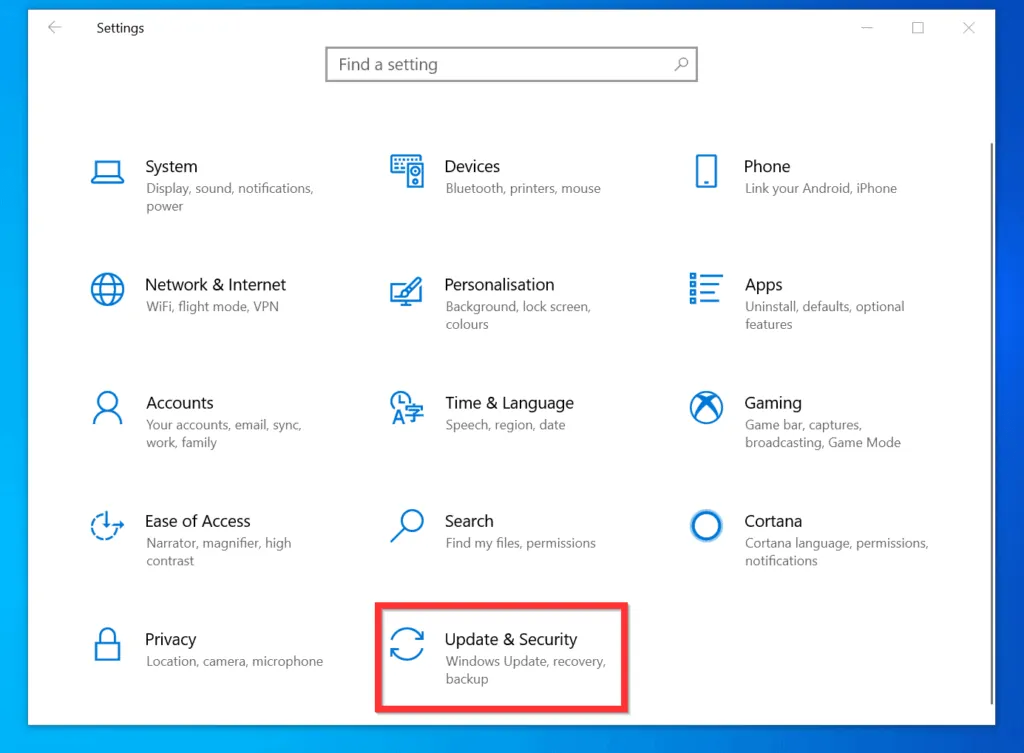
- On Windows Settings click Update & Security.
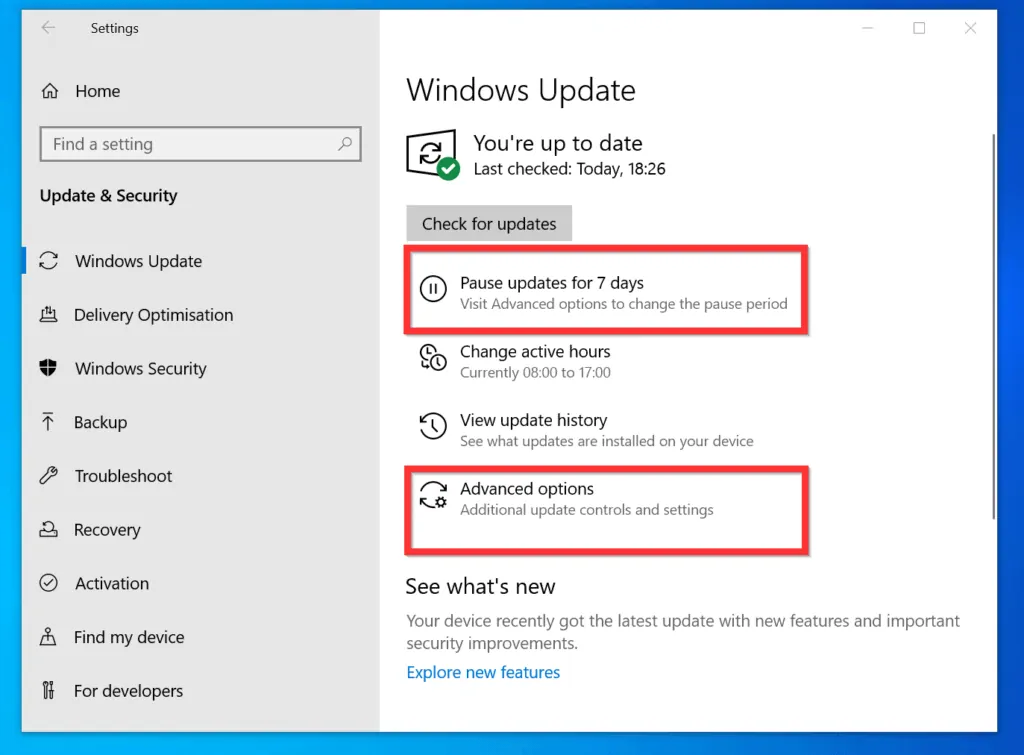
- When Windows Update opens, to stop automatic update for 7 days, click Pause updates for 7 days.
- Alternatively, to pause automatic updates for up to 35 days, click Advanced options.
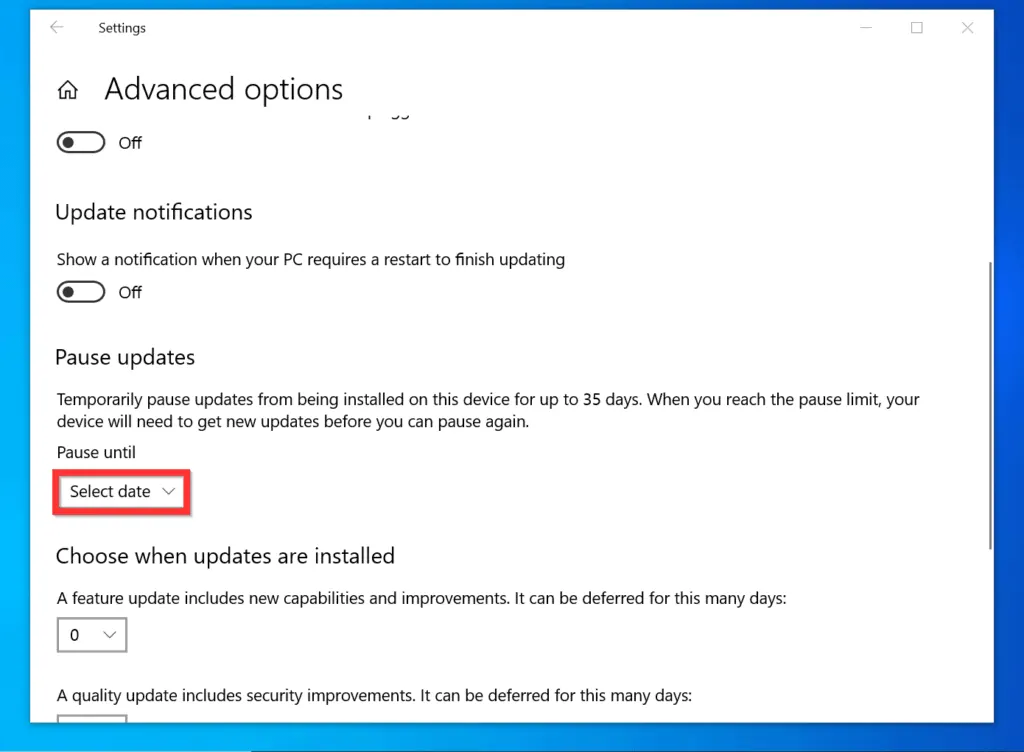
- On Advanced options, scroll down to Pause updates. Then, on the Pause until drop-down, click the Select date drop-down and select a date.
Option 2: Stop Automatic Updates by Enabling “Metered Connection”
A more “permanent” method to stop automatic updates is to configure the network that connects your PC to the internet as a metered connection. Here are the steps…
- Right-click the Windows 10 Start menu and click Settings.
- On Windows Settings click Network & Internet.

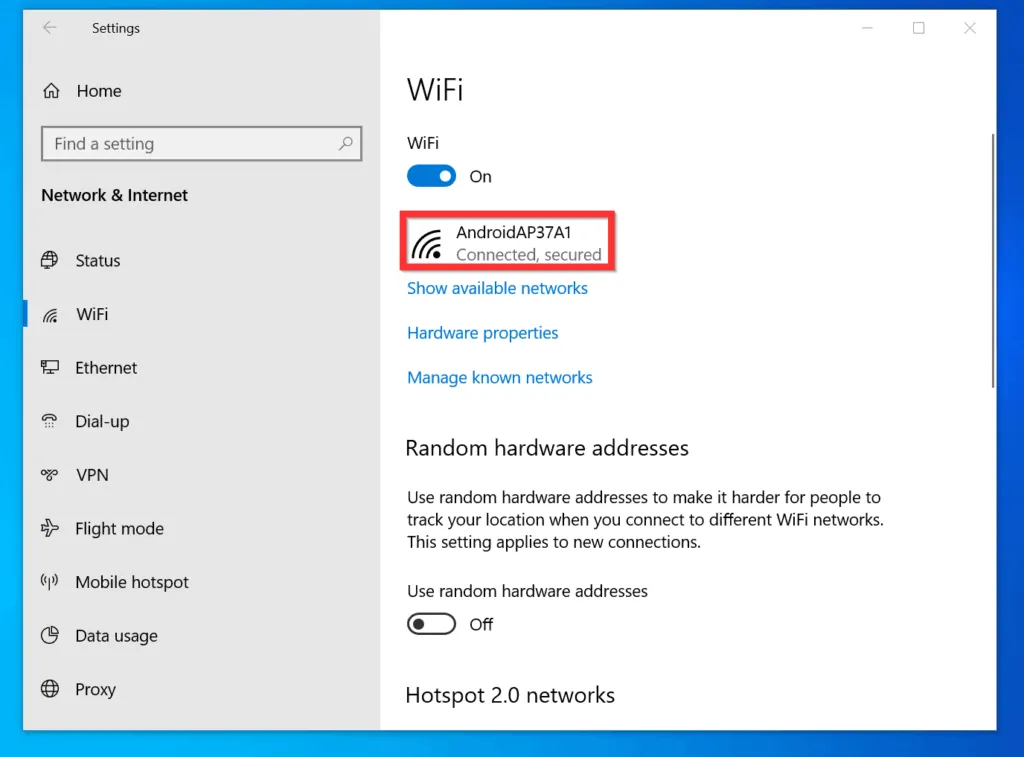
- On the left pane of Network Status, if you use Wifi to connect to the internet, click WiFi. Alternatively, if you connect to the internet with a LAN cable, click Ethernet.

- On the WiFi settings screen, click your WiFi connection.
- Finally, to stop automatic updates on Windows 10, scroll down to Metered connection and toggle the Set metered connection button from Off to On.


It is very easy to stop automatic updates on Windows 10! I hope you found this Itechguide helpful. I hope you found this Windows 10 guide helpful. If you found it helpful, click on “Yes” beside the “Was this page helpful” question below.
You may also express your thoughts and opinions by using the “Leave a Comment” form at the bottom of this page.
Finally, for more Windows 10 Itechguides, visit our Windows 10 How–To page.