This Itechguide teaches you how to change file type in Windows 10. The guide covers 2 steps to change file type in Windows 10.
Step 1: Show File Extension
Before you can change the file type of any file, you have to configure Windows 10 to show file extensions.
By default, Windows is configured to hide extensions for known file types. Here are the steps to change this…
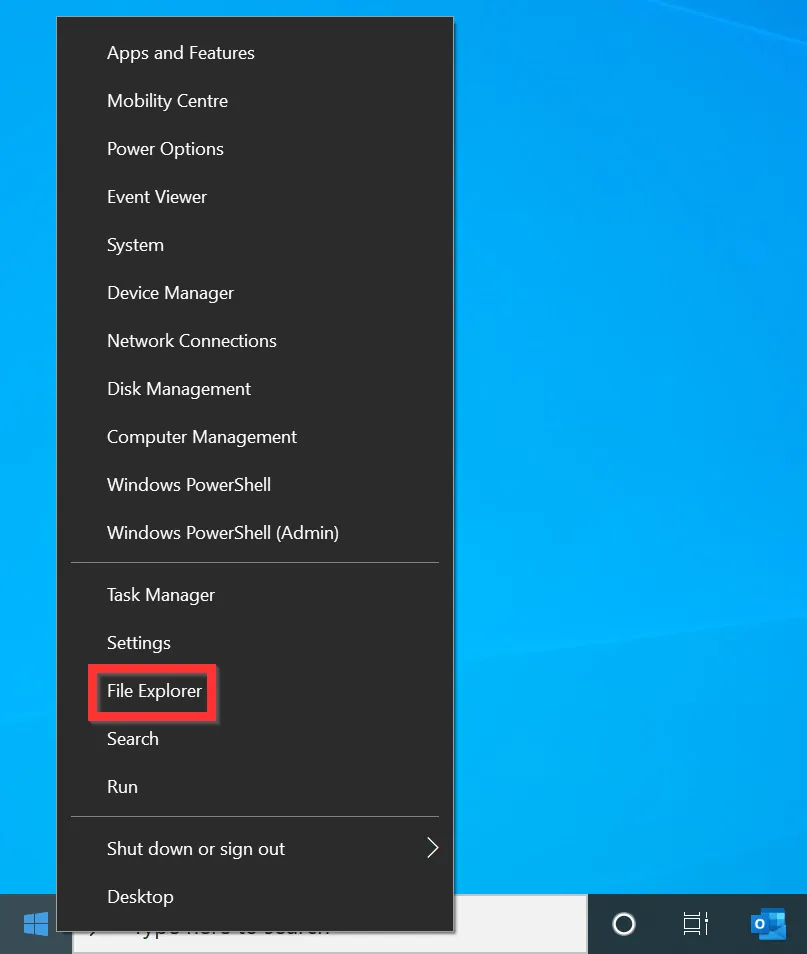
- Right-click Windows 10 Start menu and click File Explorer.
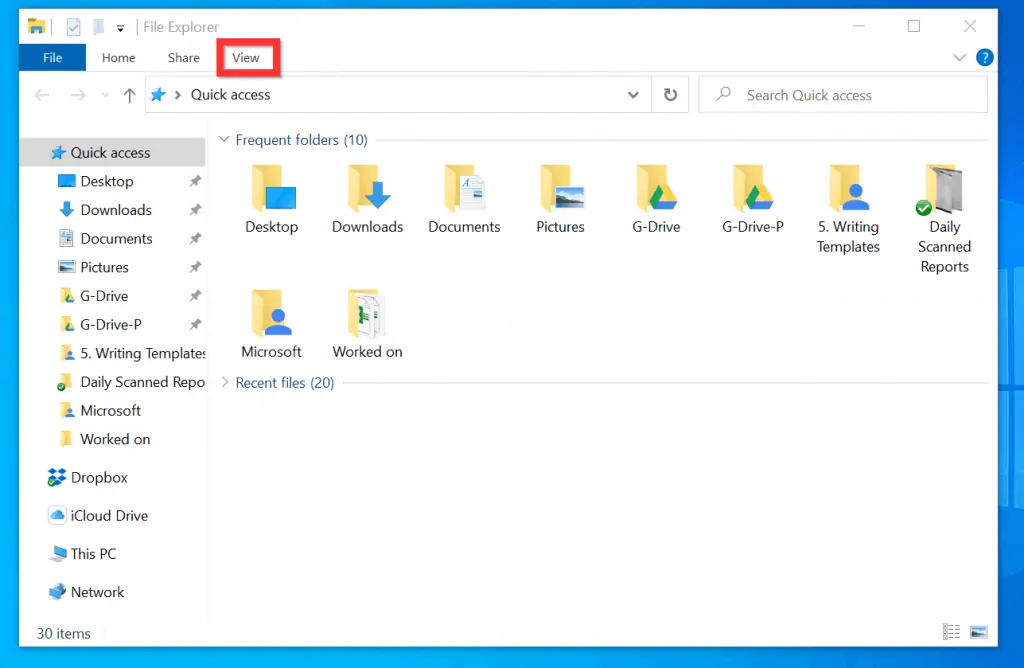
- When File Explorer opens, click the View tab to expand it.
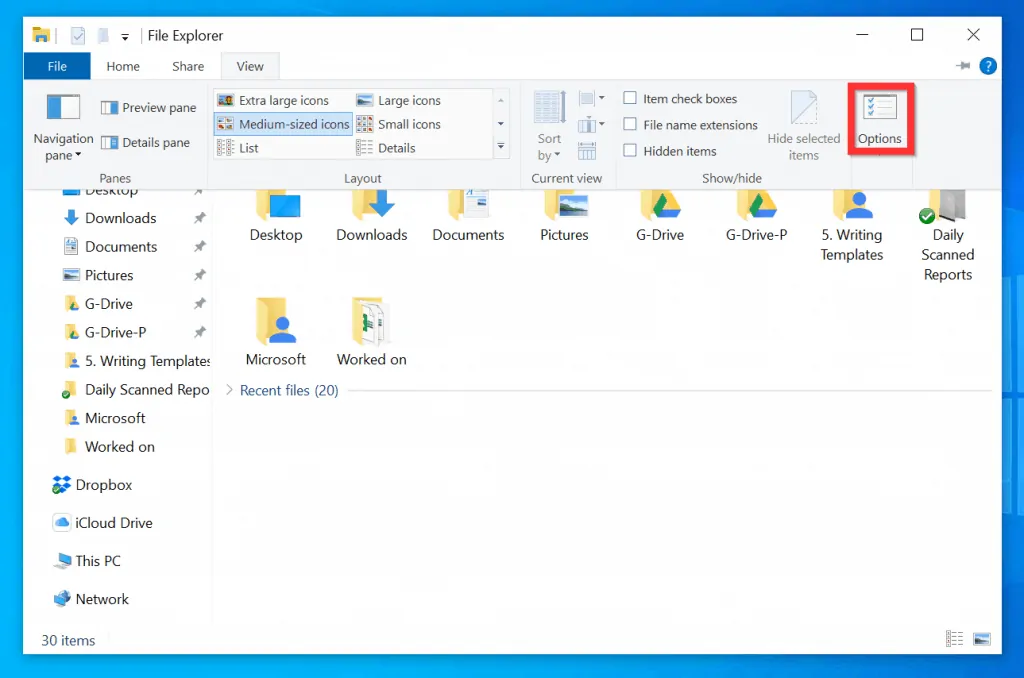
- Then, on the expanded View tab, click Options to open Folder Options.
- On the Folder Options window, click the View tab.
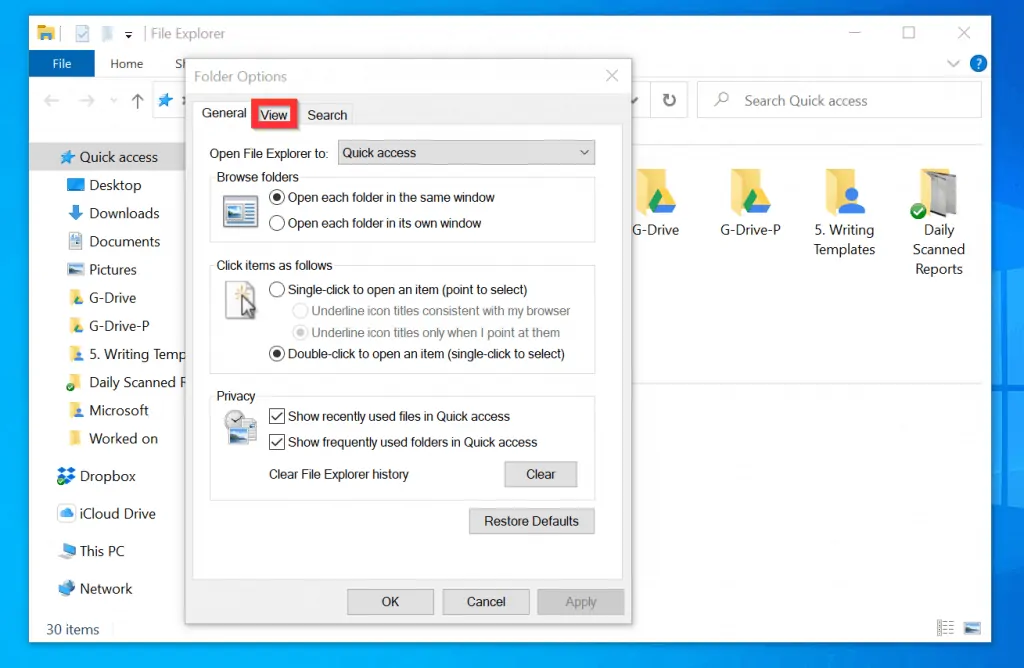
- Finally, on the Advanced settings section of Folder Options View tab, uncheck the Hide extensions for known file types checkbox.
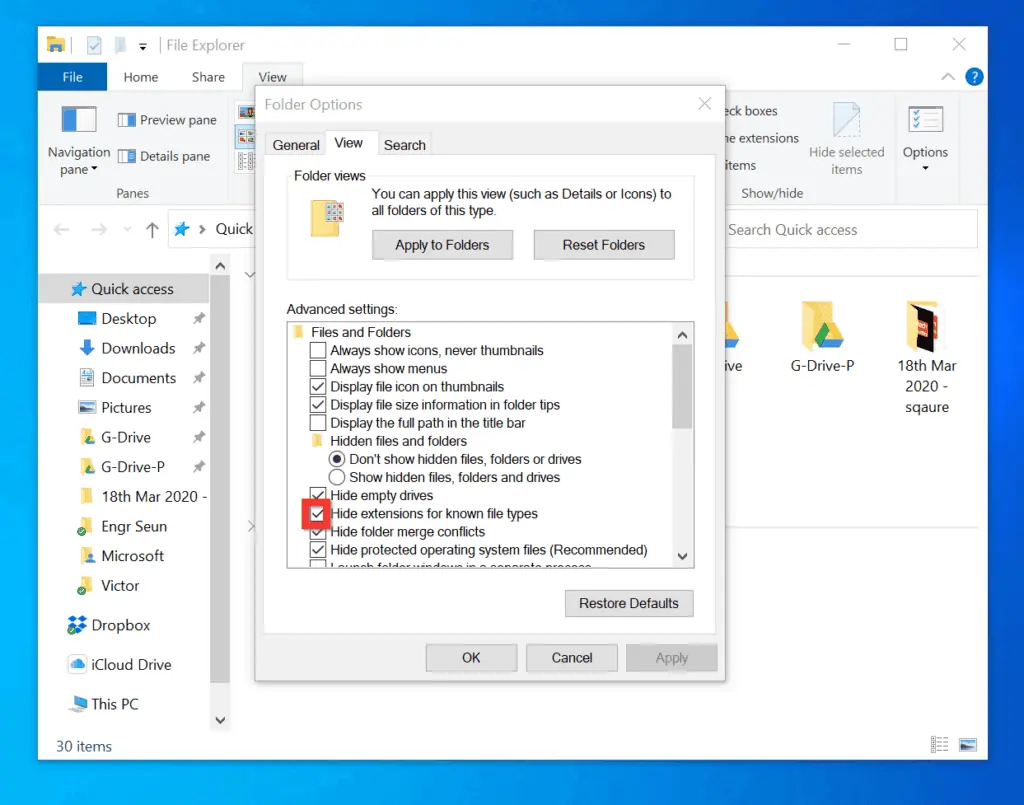
- After unchecking the Hide extensions for known file types checkbox, to save your changes, click OK.
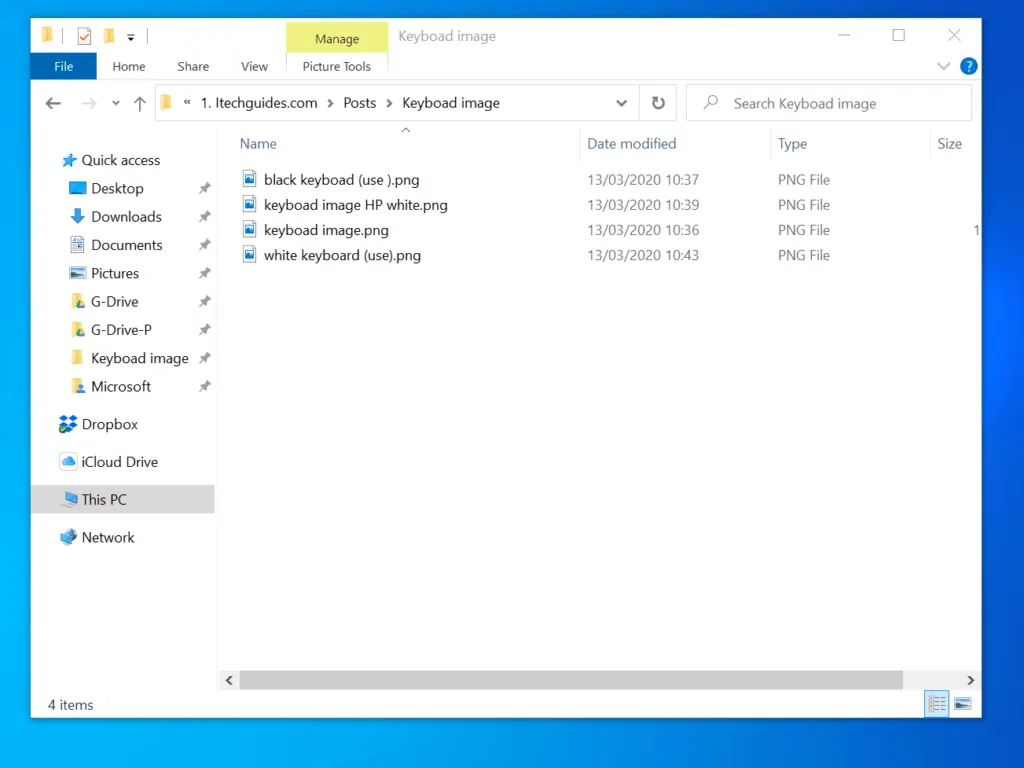
- When you unhide extensions of known file extensions, all files on your PC will now display their extensions. Use the steps in Step 2 below to change the file extension.
There are other methods to show file extensions.
Step 2: Change File Type
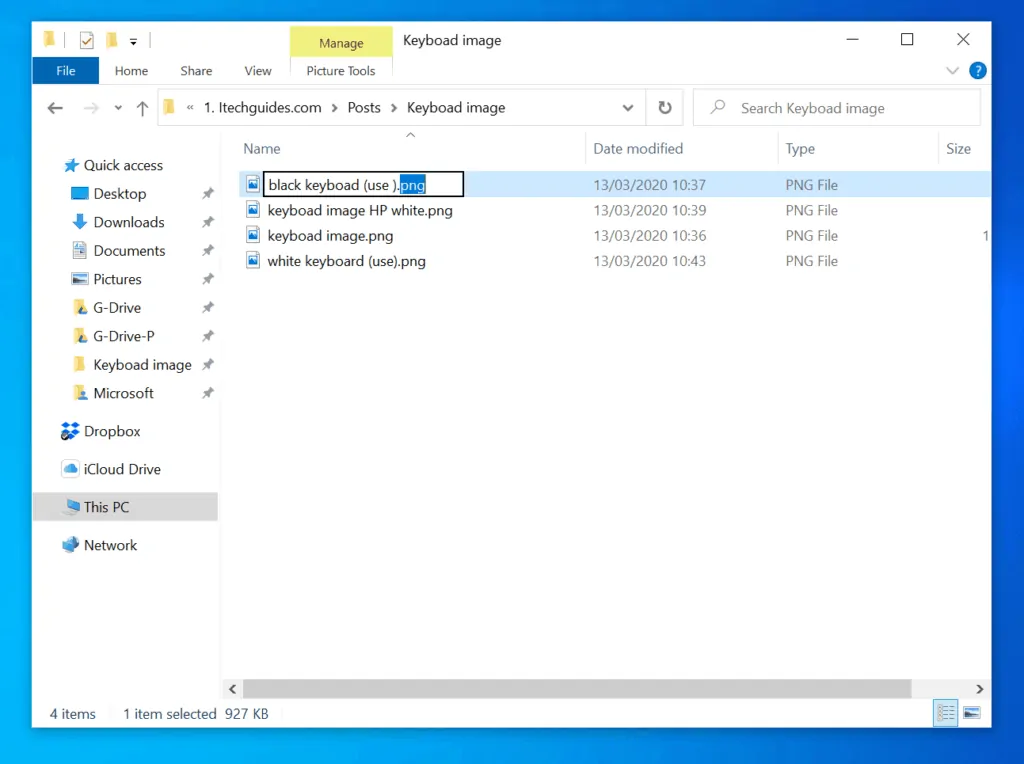
- Right-click the file you want to change the extension and select Rename.
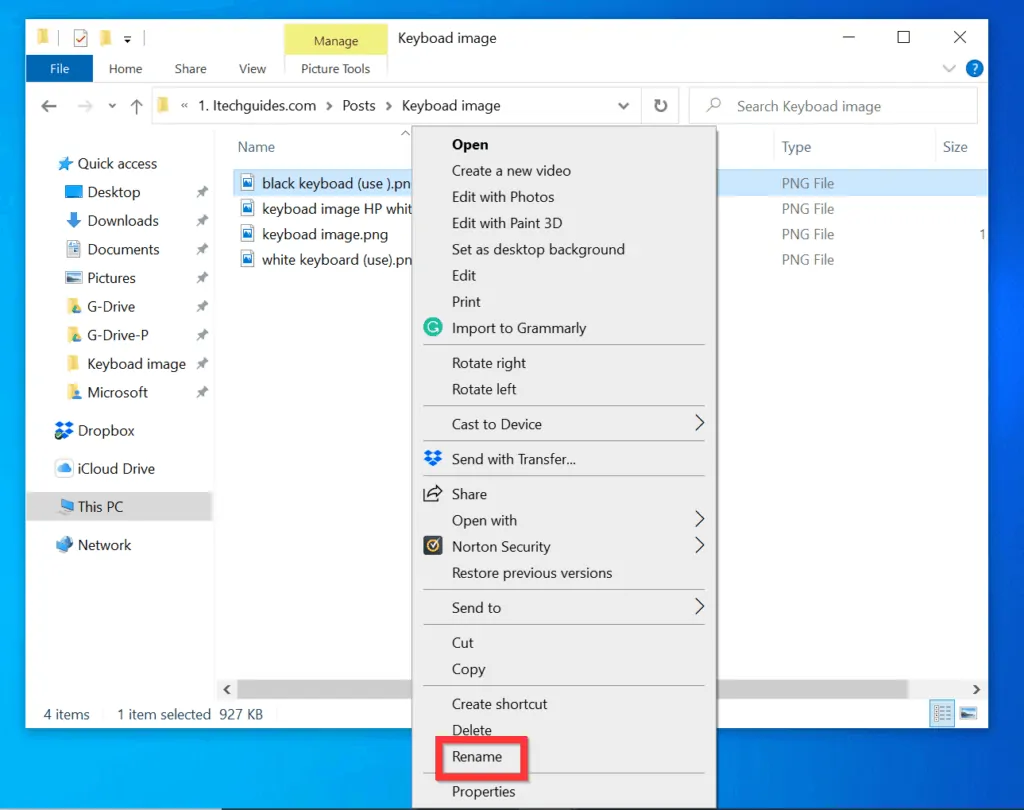
- When the file is highlighted for renaming, rename the extension – after the period (.).
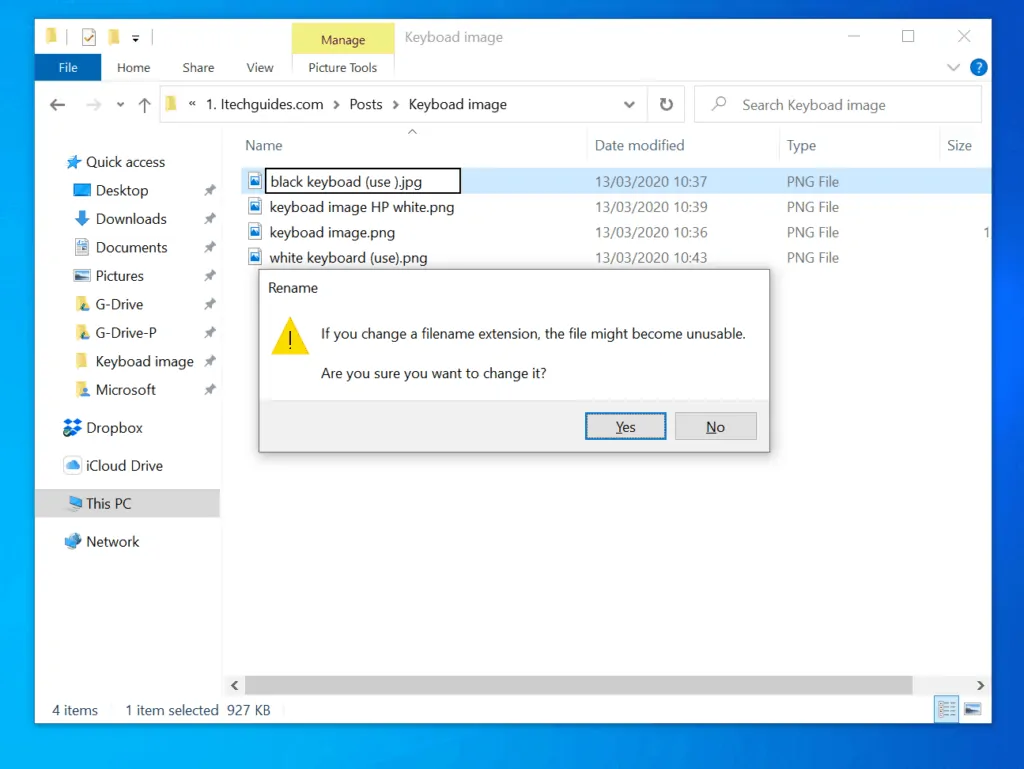
- For example, to change the .png file extension to .jpg, change png to jpg and press enter. You will receive a file extension change confirmation pop-up window.
- To confirm that you want to change the extension to the new extension, click Yes.
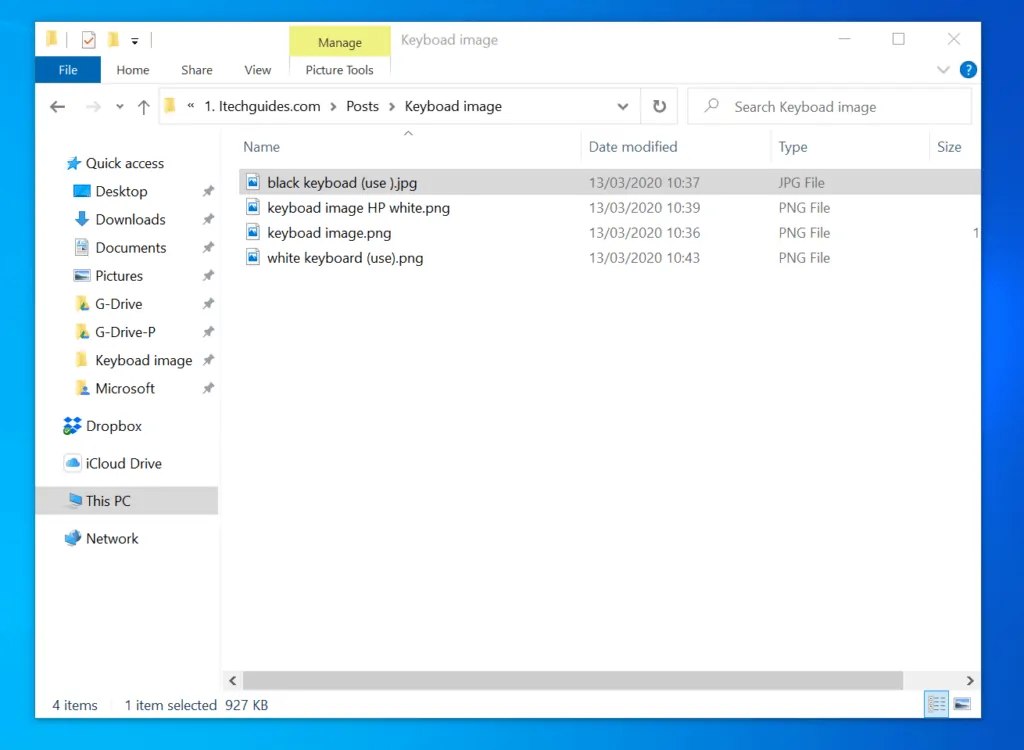
- The extension will change to the new extension.
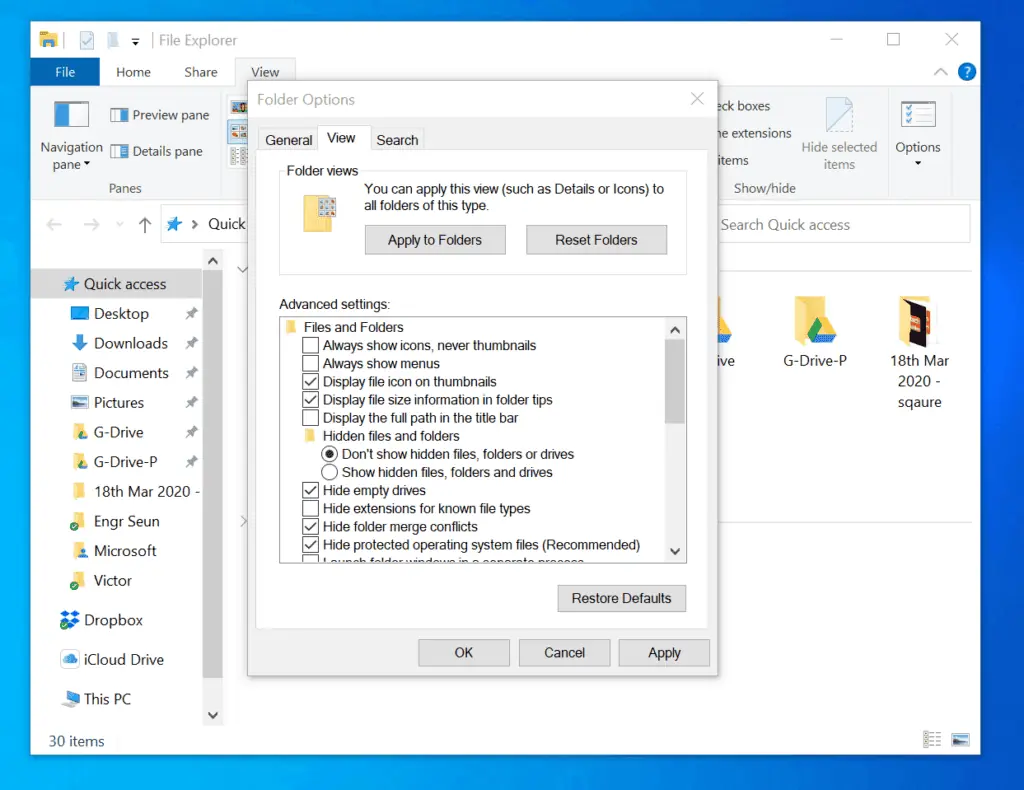
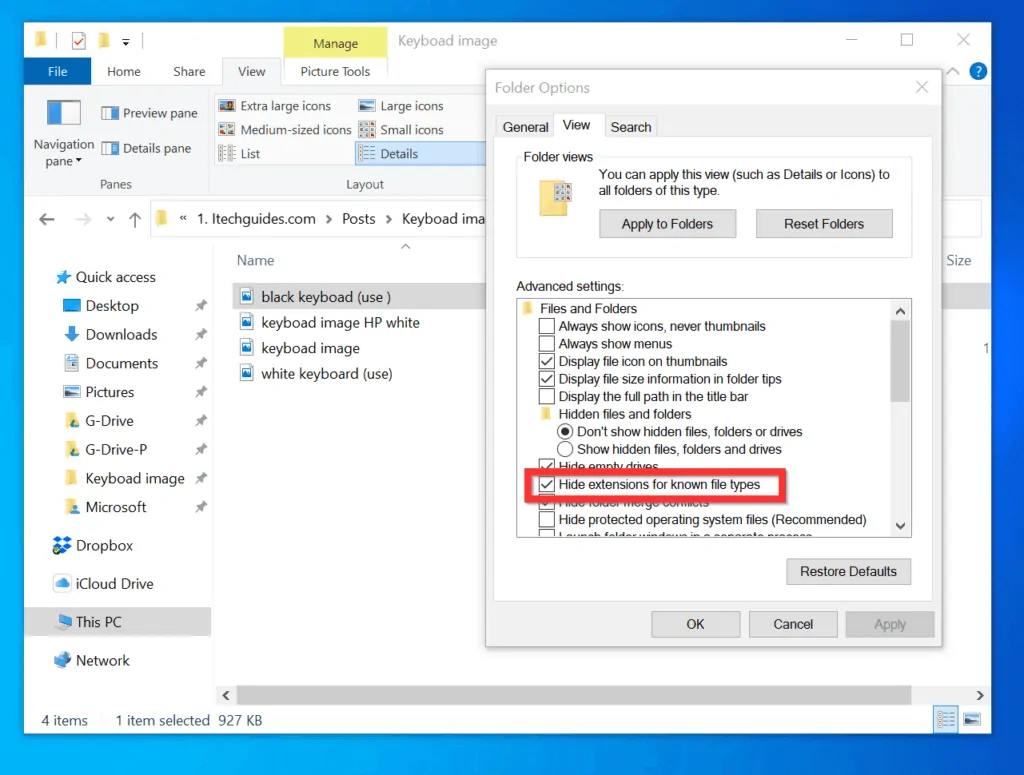
After changing the extension of the file, it is strongly recommended to use step 1 to configure your PC to Hide extensions for known file types – see the image below.
If you were able to change file type in your Windows 10 PC with the help of the steps in this guide, click on “Yes” beside the “Was this page helpful” question below.
You may also express your thoughts and opinions by using the “Leave a Comment” form at the bottom of this page.
Finally, for more Windows 10 Itechguides, visit our Windows 10 How-To page.


![How To Run Sysprep (Generalize) In Windows 10 [2 Methods]](https://www.itechguides.com/wp-content/uploads/2022/05/8-2.webp)