
iTechGuides is reader-supported. When you buy through links on our site, we may earn an affiliate commission. As an Amazon Associate I earn from qualifying purchases. Learn more
If your PlayStation character moves or your aim shifts while you leave the stick alone, try a console restart, a DualSense reset, a firmware check and careful external cleaning before opening the controller. If drift persists, the right repair depends on the model: a standard DualSense joystick replacement requires soldering, while the DualSense Edge has a user-replaceable stick module.
What stick drift is—and what may cause it
Stick drift is unwanted analog input registered while a thumbstick is untouched. A character may walk on its own, or the camera or aim may move without input. Potential causes include software or firmware issues, controller settings, debris, worn joystick parts or a circuit-board fault; the symptom alone does not identify which one is responsible.
In an analog stick, moving conductive contacts help translate stick position into an electrical reading. Wear can change those readings and produce unintended input. That is one possible explanation, not proof that a particular controller’s stick is worn. iFixit’s DualSense troubleshooting and repair information discusses possible causes and repair paths.
Try these checks before opening the controller
- Restart the console. Turn the PlayStation off and back on, then test the controller again. If you are using the controller with a computer, restart the computer instead.
- Reset a DualSense. Turn the controller over and find the small reset button on the back. Press and hold it with a paperclip or SIM-eject tool for at least five seconds. A reset clears controller settings, so you may need to pair it again. This instruction is for the DualSense; check the documentation for your specific controller before applying a reset procedure to another model. iFixit’s DualSense guide describes this reset.
- Check controller firmware. Connect the controller to the console by USB and check for a controller software update. The on-console menu path can change, so follow the current instructions shown by your PlayStation console or Sony support rather than relying on an old menu label. The procedure is described in iFixit’s DualSense troubleshooting guide.
- Clean the outside of the controller. Wipe the body with a damp cloth. For grime around the thumbstick dome, iFixit suggests using 90% isopropyl alcohol on a cotton swab. Keep liquid on the swab rather than pouring it into the controller, and do not treat this surface cleaning as a reason to open the device. iFixit’s guide describes the external-cleaning approach.
- Check whether input is still registering. If you can connect the controller to a computer, use a controller tester and observe the stick with your hands off it. Unwanted movement on the tester supports that the controller is sending input; retest after any repair. A tester can help confirm the symptom, but it cannot by itself identify the failed part.
Should you clean inside the controller?
Internal cleaning is a more invasive option, not the next step for every PlayStation controller. iFixit’s disassembly-based cleaning guide is specifically for DualSense V1. It calls for powering off and opening the controller, then using 99.8% isopropyl alcohol around the internal joystick components. The guide targets dirt or material that may cause unwanted movement; it does not repair a broken joystick or other internal fault.
#1 Best Overall

- Maintain your DualSense Edge wireless controller’s great performance with this replacement stick module.
Do not pour solvent into an assembled controller. Opening a controller carries a risk of damage, and the V1 procedure should not be assumed to apply to DualShock 4 or every DualSense revision. If you are not comfortable identifying your controller revision and handling its internals, stop at external cleaning and seek repair help.
Choose a repair based on your controller model
| Controller | Repair option | What to know |
|---|---|---|
| Standard DualSense | Replace the joystick assembly | The cited replacement procedure involves desoldering and requires intermediate soldering skills. iFixit rates its repair as difficult and estimates 1–4 hours for the guide; that is a guide estimate, not a guaranteed repair time. See the replacement guide. |
| DualSense Edge | Replace the stick module | Sony’s manual describes a user replacement procedure and says the replacement module is sold separately. Follow the manual’s handling instructions, including its cautions about static electricity and connectors. This replaceable module is not the same part or procedure as the soldered joystick assembly in the standard DualSense. Read the DualSense Edge manual. |
Standard DualSense: soldered joystick replacement
If a standard DualSense still drifts after basic troubleshooting, a worn joystick module is one possible cause. Replacing it is not a snap-in module swap: the cited guide requires desoldering and rates the repair as difficult. Use it only if you have the necessary tools and soldering experience, or have a qualified repairer do the work. A new joystick will not fix every cause of drift.
Rank #2

- Note: The analog joystick replacement work requires professional tool kit/repair devices(not included in our package) and good skills in desoldering and soldering. If you are not experienced with soldering, we recommend seeking professional assistance to ensure proper installation.After installation, use the Test Tool on our site to run stick calibration first before use. We also have an installation video on our listing for your reference.
- Upgraded Anti-Drift TMR Joystick Technology – Evolved from GuliKit's patented Hall Effect joystick, the more advanced TMR (Tunnel Magnetoresistance) thumb stick same works with contact-less magnetic field sensing mechanism to eliminate stick drift cause,while offers ultra-low power consumption, enhanced stability, drift-free long lasting durability, high-precision and silk-like smoothness.
- No Circuit Changes Required (Soldering Required) – Replace the original stick module with the enhanced TMR version to fix stick drift on DualSense / DualSense Edge controllers.
- Anti-Interference Structure –Unique structural design prevents interference from magnetic triggers on the joysticks.
- Premium Stick Caps – Includes 2 GuliKit KK Ring anti-friction stick knobs designed for enhanced gripping and comfort during extended play.
The replacement potentiometer assembly listed by iFixit is part IF460-017-1. Its product page lists compatibility with DualSense V1 (BDM-010) and V2 (BDM-020), and says soldering is required. Identify your controller’s revision and confirm compatibility before buying; that listing does not establish fit for every later revision. Check the part listing and compatibility details.
Quick wins for a faster PC:
Clear out junk files and repair common Windows errorsFree Scan →Fix the driver behind crashes, sound loss and screen glitchesFind Drivers →DualSense Edge: replaceable stick module
For a DualSense Edge, consult Sony’s manual for the user-replacement procedure and use the correct replacement module. The manual cautions about static electricity, connectors and safe handling. Do not follow a standard DualSense soldering guide for this repair: the Edge’s replaceable module is a different design.
Rank #3

- 【Compatible model】-- Replacement analog joystick compatible with PS5 Controller Only (NOT FIT for PS4 Xbox One Xbox One S/X Controller).
- 【What you get】Package include -- 6 x Joystick, 6 x 2K3 Ohm Potentiometer, 6 x Thumbstick Cap, 6 x Protective Ring, 2 x Thumbstick Grip, 27 x Screw, 1 x Metal Cross Screwdriver, 1 x Metal Tweezer, 1 x Metal Pry tool, 1 x Pry bar. (You also need a soldering tool which isn‘t included in the kit.)
- 【6 × 3D Analog Joystick】-- Ikpek joysticks replacement's model number is EL6 for PS5 Controller, and the Potentiometer is 2.3K ohm. Repair your worn-out, damaged, drift, blind spots, dead spots, can't center analog joystick . Quality Guarantee -- The joystick replacement was test before shipment. And it is made of high quality metal, ABS plastic material. Make it has longer working life and used more accurately.
- 【6 x 2K3 Ohm Potentiometer】Design for PS5 controller -- Solve Most Joystick Problem: Stick drift, stuttering, dead zones, creeping, blind spots, non centered.
- 【6 × Thumbstick Cap + 27 x Screw for PS5 Controller + 6 x Protective Ring】Thumbstick Caps -- Made of premium ABS material, enduring and practical. Ideal replacement for your broken or cracked controller thumbsticks. Screws -- Replacement of screws can better help you repair the controller. Protective Ring -- 0.1 Ultra-thin protective ring compatible with PS5, PS4, Switch, Xbox controller,it will protect controllers from wear and tear, avoid powder, extend the life of controller.
When to stop and seek repair help
If cleaning or a joystick replacement does not resolve drift, the problem may involve the circuit board or another internal fault. iFixit notes liquid damage as a common association with board problems and says board repair can require advanced skills. A qualified repair service is the safer choice if you lack electronics-repair experience or if the controller has signs of liquid damage. See iFixit’s troubleshooting information.
Before choosing paid repair or replacement, check Sony support for warranty terms and service options in your region. Coverage and service availability are regional matters; the guides cited here do not establish current warranty coverage for your controller.
Quick Recap
Best Value

- Custom designed joysticks to perfectly fit for PS5, for PS4, for PS4 Slim, for PS4 Pro controller. Work exactly like the original thumbsticks
- Unique replacement to add much more personality to your controller. The replacement thumb sticks will make your controller distinct when playing with friends, no more boring standard color
- Made of premium PC & TPE plastic material, durable and practical. Ideal replacement for your broken or cracked controller thumbsticks
- A variety of colours thumbsticks are available, you can combine eXtremeRate replacement accessories to customize your controller
- Easy to install, requires internal fitting, the screwdriver tool included can help you easily open the shell and install the gaming parts. Get the installation video guide by searching "eXtremeRate Thumbsticks for PS5" or "EiWmjR87CS4" on YouTube
Rank #4
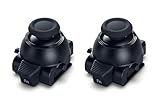
- Restore Pro-Level Joystick Accuracy Refresh your controller’s performance with a smooth, responsive module designed for precise movement.
- Ideal for anyone needing two stick modules for DualSense Edge, a refreshed PS 5 stick module, or a reliable upgrade for the PS 5 DualSense Edge stick module they already use.
- Say Goodbye to Drift & Dead Zones Built to fix drifting, stick drag, and unresponsive inputs, this replacement restores clean, accurate motion instantly.
- A perfect choice for gamers looking for two dependable PS5 analog stick replacement, an improved PS5 replacement joystick, or an upgraded DualSense Edge joystick replacement solution.
- Durable Design for Competitive Play Made with high-quality components to handle everyday gaming and intense sessions.
How to decide what to try next
- Identify the model and revision. Distinguish a standard DualSense from a DualSense Edge, and confirm the standard controller’s revision before sourcing a joystick part.
- Use the symptom response as a clue, not a diagnosis. Note whether a restart, reset, firmware check or external cleaning changed the drift. No change does not prove that the joystick is worn.
- Match the repair to the evidence and your skills. External cleaning is low-impact; internal cleaning is model-specific and invasive; standard DualSense joystick replacement involves soldering; Edge module replacement follows Sony’s user procedure.
- Check part compatibility and local repair options. Confirm the exact part fits your controller, then compare the cost and availability of a qualified local repair with the effort and risk of DIY work.
Product prices and availability are accurate as of the date/time indicated and are subject to change. Any price and availability information displayed on Amazon at the time of purchase will apply.
What’s actually slowing this PC down?
Pick the symptom - the matching free tool is one click away.

