
Quick wins for a faster PC:
Repair Windows errors before they cause bigger problemsFix Now →Fix the driver behind crashes, sound loss and screen glitchesFind Drivers →Clear out junk files and repair common Windows errorsFree Scan →iTechGuides is reader-supported. When you buy through links on our site, we may earn an affiliate commission. As an Amazon Associate I earn from qualifying purchases. Learn more
To set the time on a Samsung stove, use the procedure that matches its control panel. On many keypad models, press Clock or Clock/Setting, enter the time, then press Clock or START/SET to save. Smart Dial and touchscreen models use different menus, so check your exact model’s manual if the labels or steps do not match.
Identify your Samsung stove’s controls first
Look at the oven control panel before starting. It will usually have one of these layouts:
- Clock key and number pad: enter the hours and minutes with the number keys.
- Clock/Setting key and Up/Down buttons: adjust the time with the directional controls and confirm as prompted.
- Smart Dial: select a clock option from a menu, turn the dial to set the time, and push it to confirm.
- Touchscreen: open the date and time settings. Automatic setup and manual setup have different requirements.
Samsung’s general instructions cover many ranges, but the exact sequence and available settings vary by model and country. Its Canada clock-setting guide specifically cautions that settings may differ outside Canada.
Free tools Windows power users keep installed
One-click scans. No signup required.
Set the time on a keypad model
- Press Clock or Clock/Setting.
- If prompted, choose AM or PM.
- Enter the hours and minutes using the number pad.
- Press Clock or START/SET to save.
Some models may use only one of those confirmation keys. Samsung’s instructions for the NE63*631*S* family, for example, use Clock/Setting, number-pad entry, and Clock or START/SET to finish. Follow the labels and prompts on your appliance rather than assuming every keypad model behaves identically. See Samsung’s keypad and directional-control model guidance.
#1 Best Overall

- Samsung DE92-02588G Range Oven Main Control Board + Clock monitors the oven temperature and controls the oven heating functions in the range, and includes the digital display for the time and temperature settings
- Samsung DE92-02588G is a genuine Original Equipment Manufacturer (Authorized OEM) part. Compatible Brands: Samsung
- Samsung DE92-02588G is a perfect fit within various supported Samsung brand models
- Samsung DE92-02588G is quality tested for excellent performance as per Samsung's standards
- It is recommended to either refer to your appliance service manual, contact your appliance manufacturer, or contact a service professional to validate the needed part number for your appliance prior to purchasing
Set the time with Up and Down buttons
Directional-button models do not all use the same sequence. Depending on the model, you may need to press and hold Clock/Setting, adjust the time with Up and Down, and save with Clock or START/SET. Another variation is to press Clock, set and confirm the hours, then set and confirm the minutes.
Use the prompts on the display and the manual for your model to determine when to confirm each value. Samsung documents examples of these variations for specific model families in its support instructions and additional clock-setting guidance.
Rank #2
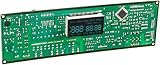
- Oven / Range Control Board and Clock DE92-02588G monitors the oven temperature and controls the oven heating functions in the range, and includes the digital display for the time and temperature settings.
- Works with these Gas Range Models:
- NX58F5300SS NX58F5500SB NX58F5500SS NX58F5500SW NX58R4311SG NX58R4311SS
Set the time on a Smart Dial model
- Open Menu or Options, depending on the model.
- Select Set time.
- Turn the dial to enter the time, then push the dial to confirm.
On some Smart Dial ranges, the time format is a separate setting: open Menu, choose Time format, then select 12hr or 24hr. Menu names and options vary. Samsung’s Smart Dial guidance describes examples of these controls.
Crashes, No Sound, or Screen Glitches?
Random freezes, missing sound and display glitches usually trace back to one bad driver. Find and replace yours safely.Free scan · under a minutePC Slower Than It Used to Be?
A free scan shows the junk files, broken settings and background clutter dragging Windows down - then fixes them in one click.Free scan · Windows 10 & 11Set the date and time on a touchscreen wall oven
For touchscreen wall ovens covered by Samsung Canada’s guide, automatic date and time setup requires Wi-Fi. To use it, open Settings > Date & Time and enable the automatic setting.
Rank #3

- Electric
- Multicolor
- Replacement for Samsung DE92-02588E
For manual setup, go to Settings > Date & Time, turn off the automatic function, then set the time zone, date, and time. The available settings can differ by country; consult the guide for your region and the manual for your model.
Independent reader supportYour contribution helps us test, update, and keep practical guides available for everyone.Why the clock may need resetting
A power outage is one reason to reset a range’s clock. Samsung also says an accurate clock helps automatic functions work properly, including delayed cooking and Sabbath mode.
Quick Recap
Best Value
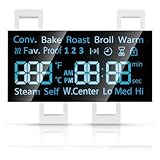
- [Precise Compatibility]: DG07-01005A Range LED Display Board Designed specifically for Samsung Electric Range Models NE59R6631ST/AA, NE59R6631SG/AC, NE59R6631SG/AA, NE59R6631SS/AC, NE59R6631SS/AA, NE59N6630SS/AA, NE59N6630SG/AA for precise compatibility
- [Upgraded LED Display]: Features a high-definition LED screen that delivers bright, clear, and anti-glare visuals, allowing easy reading of temperature, time, and cooking mode even under low-light conditions. The upgraded panel ensures excellent visibility from multiple angles, improving your overall cooking experience
- [Exceeds OEM Quality]: Built with premium-grade electronic components and upgraded soldering technology for enhanced durability, brightness, and long-term stability. Manufactured to exceed OEM standards, ensuring consistent performance, longer service life, and reduced risk of flicker or failure over time
- [Fixes Common Issues]: ①Blank or flickering display screens; ②No power to the range; ③Oven not heating properly; ④Oven not responding to controls; ⑤Oven temperature sensor errors
- [Easy Installation]: Plug-and-play design allows quick replacement of the old LED board without special tools or professional assistance. You can find the installation video on youtube, follow it, and you will easily complete the installation
Rank #4
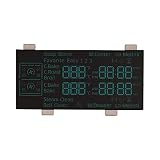
- Replacement compatible for Samsung DE07-00130A Led Display 7S 14D Ne7000J_Flex($1499) I
- REPAIR SOLUTIONS: Upgrade your appliance with ForeverPRO, the top choice for DIYers seeking high-quality maintenance. As a Proud USA Based Company, we provide durable OEM-spec parts—from aluminum mesh filters and stainless steel elements to plastic knobs and gaskets. Whether fixing a clogged pump, leaking valve, noisy motor, or broken sensor, our universal compatible components offer a genuine fit for kitchen, laundry, and HVAC units. From circuit boards and heaters to seals, racks, or handles, our parts fix malfunctioning or worn-out systems for a long-life home or commercial repair. Trust ForeverPRO for an efficient DIY install to get your machine working again.
- PRO Grade Premium Led Display 7S 14D Ne7000J_Flex($1499) I - Meets or Exceeds OEM Specifications Quality. Comes Brand New in Original Retail Packaging
- ForeverPRO Range Led Display 7S 14D Ne7000J_Flex($1499) I
- Check Description for Model Compatibility. Compatible With Most Samsung Ranges including NE59J7750WS/AA NE59J7750WS/AA NE59J7750WS/AA NE59J7750WS/AA NE59J7750WS/AA NE59J7750WS/AA NE59J7750WS/AA NE59J7750WS/AC NE59J7750WS/AC NE59J7750WS/AC NE59J7750WS/AC NE59J7850WG/AA NE59J7850WG/AA NE59J7850WG/AA NE59J7850WG/AA NE59J7850WG/AA NE59J7850WG/AA NE59J7850WG/AA NE59J7850W
If the clock will not set
- The buttons or menu names do not match: stop and check the manual for your exact model. Samsung advises using the model-specific manual because instructions are not universal.
- You are following touchscreen steps on a range: touchscreen date-and-time instructions apply to covered wall ovens, not every Samsung stove.
- You are setting automatic time on a touchscreen wall oven: check that Wi-Fi is on. If you prefer to enter the values yourself, disable the automatic setting first.
- You are unsure which instructions apply: find the model number on the appliance and use Samsung’s support materials for that model and region. Do not assume that a control fault or replacement part is needed just because the clock-setting sequence differs.
Product prices and availability are accurate as of the date/time indicated and are subject to change. Any price and availability information displayed on Amazon at the time of purchase will apply.

