Are you wondering why the Attribute Editor is missing in an Active Directory object’s properties? I’ll solve this puzzle and show you other ways to access the Active Directory Attribute Editor for AD objects.
Option 1: Access Active Directory Attribute Editor From Active Directory Users and Computers
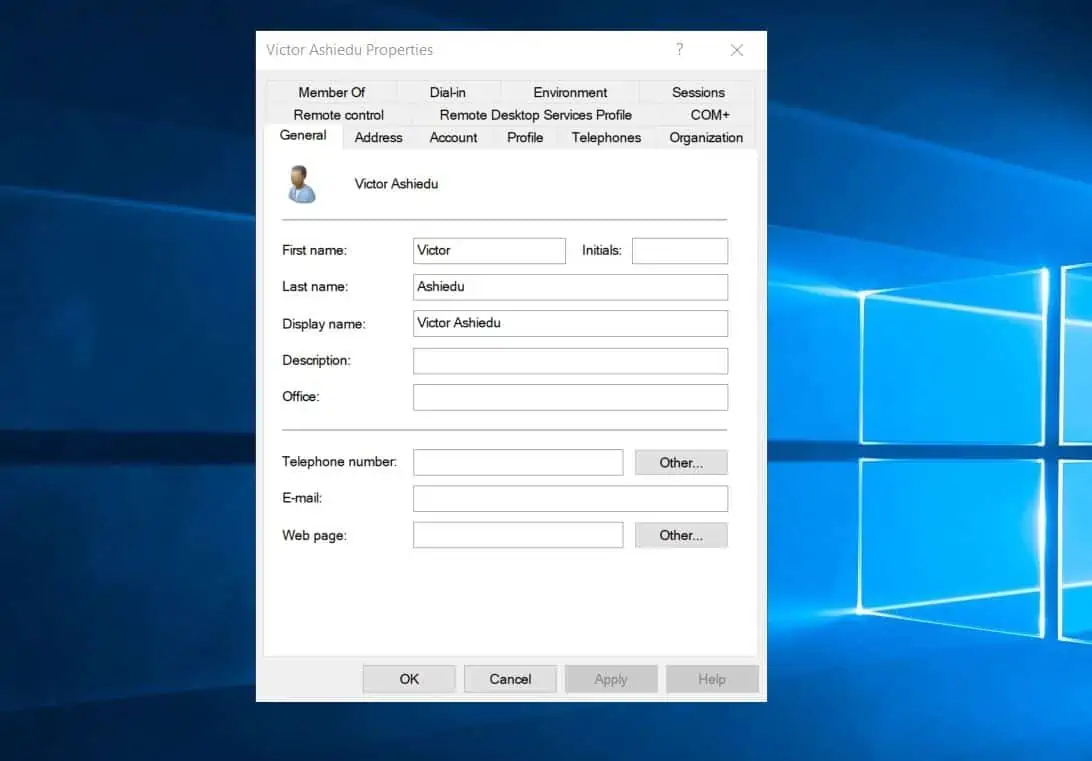
By default, Active Directory Users and Computers (ADUC) do not show the Attribute Editor of an object. The screenshot below shows my user account in ADUC.
As you can see, it does not have the Attribute Editor tab.
So, in the first sub-section of this section, I’ll show you how to enable the Attribute Editor tab in ADUC. Then, in the second sub-section, you’ll learn how to view the Attribute Editor tab of an AD object.
Step 1: Enable the Attribute Editor Tab in Active Directory Users and Computers
- Open Active Directory Users and Computers (ADUC). You could open ADUC from your PC if you enabled RSAT for Active Directory on your Windows 10/11 PC.
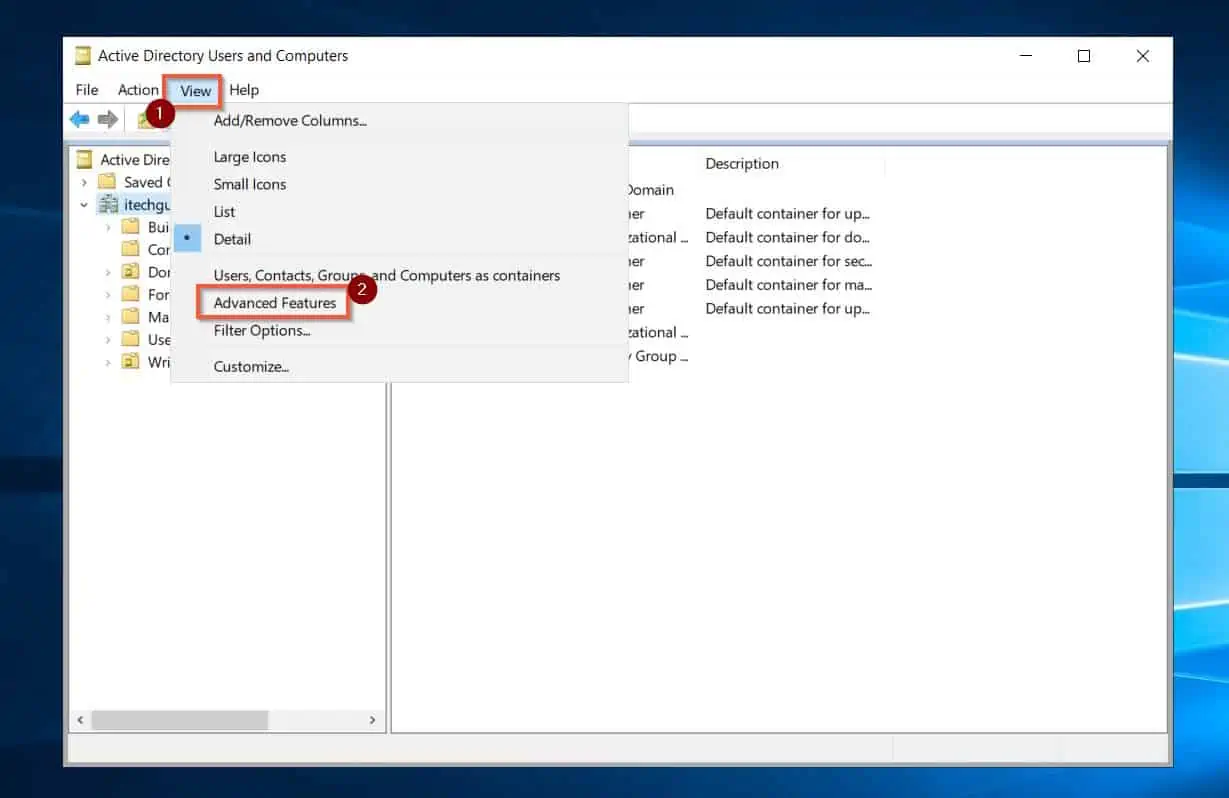
- Then, on the ADUC menu, click View and select Advanced Features.
Step 2: View the Attribute Editor Tab in Active Directory Users and Computers (ADUC)
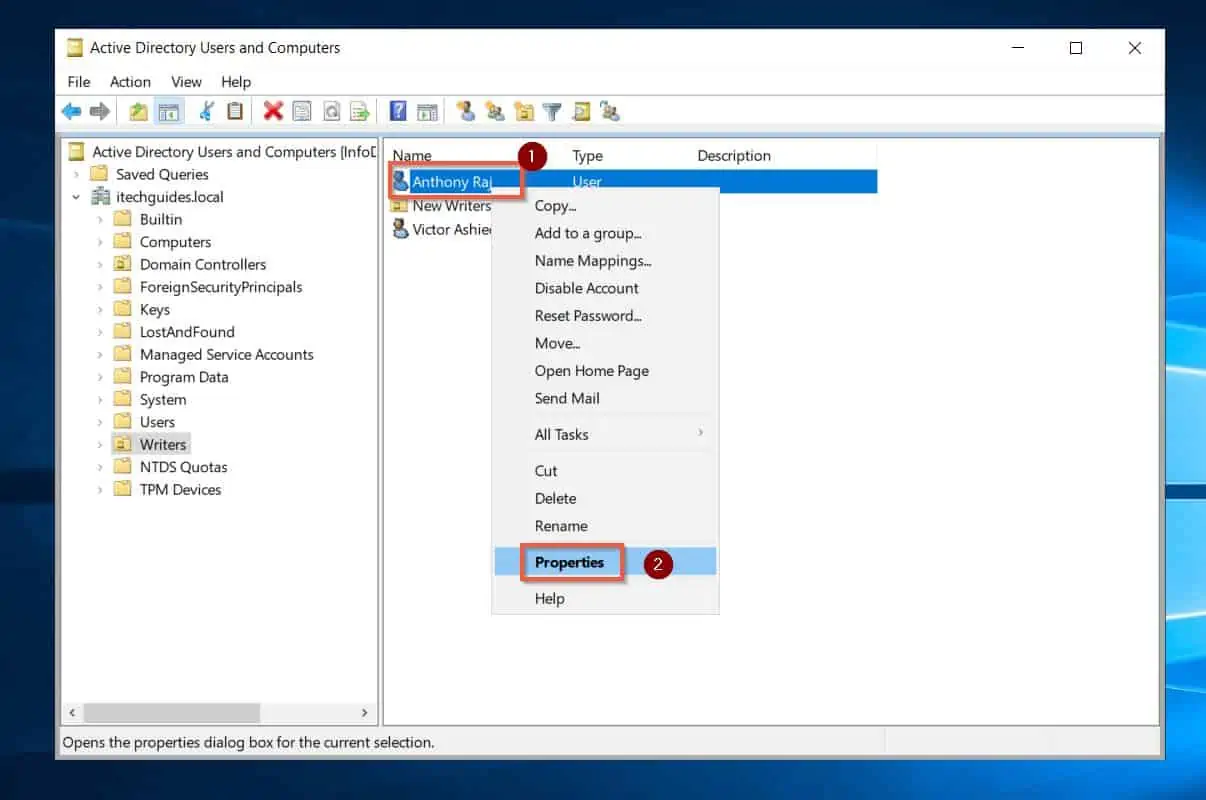
- On Active Directory Users and Computers, locate the object (user, group, computer, OU, etc) that you want to view its Attribute Editor Tab.
- Then, right-click the object and select Properties.
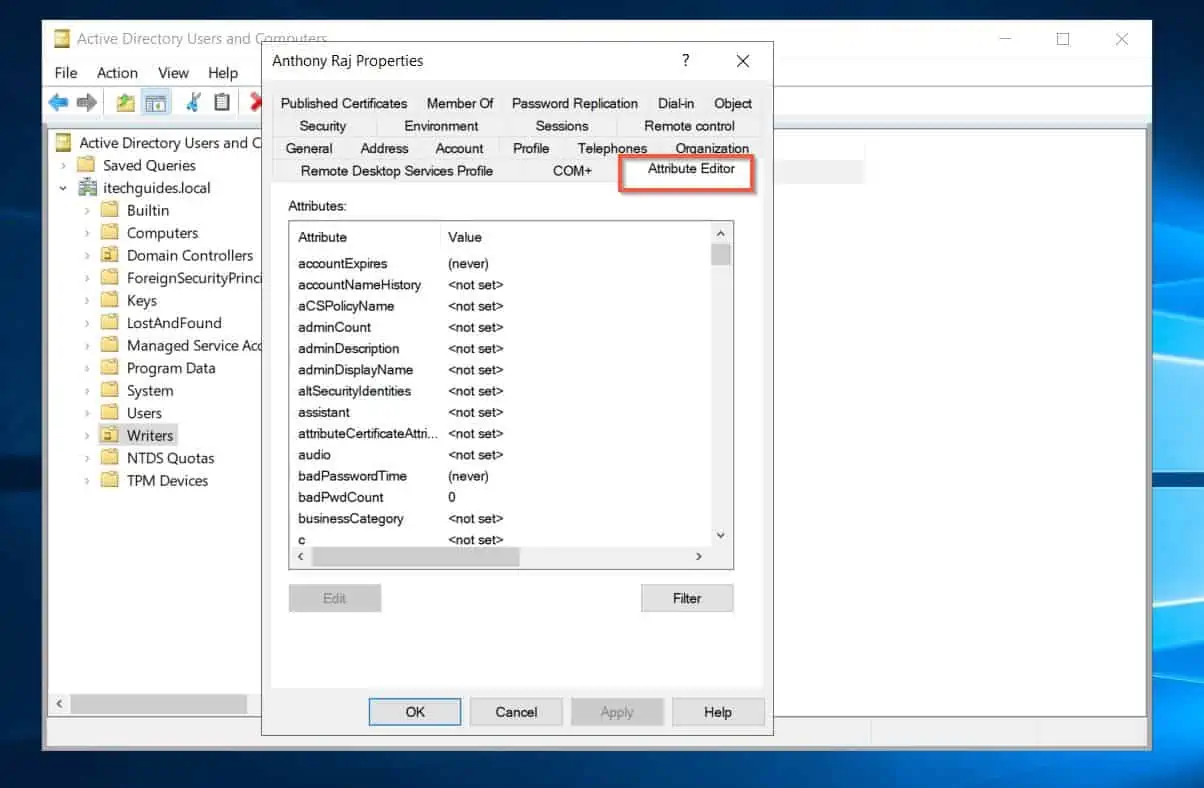
- When the AD object’s Properties open, it will now include the Attribute Editor tab. Click on the Attribute Editor tab to view it.
Option 2: Access the Active Directory Attribute Editor From the Active Directory Administrative Center
As I already hinted in my introduction, you can also view an object’s Attribute Editor with Active Directory Administrative Center (ADAC). However, unlike Active Directory Users and Computers, Attribute Editor is enabled by default.
So, you do not need to enable the feature in ADAC before accessing it. Based on this, to access Attribute Editor for an AD object with ADAC, follow the steps below.
- Open Active Directory Administrative Center (ADAC). You could open ADAC from your PC if you enabled RSAT for Active Directory on your Windows 10/11 PC.
- Then, navigate to the AD object you want to view its Attribute Editor. Right-click the object and select Properties.
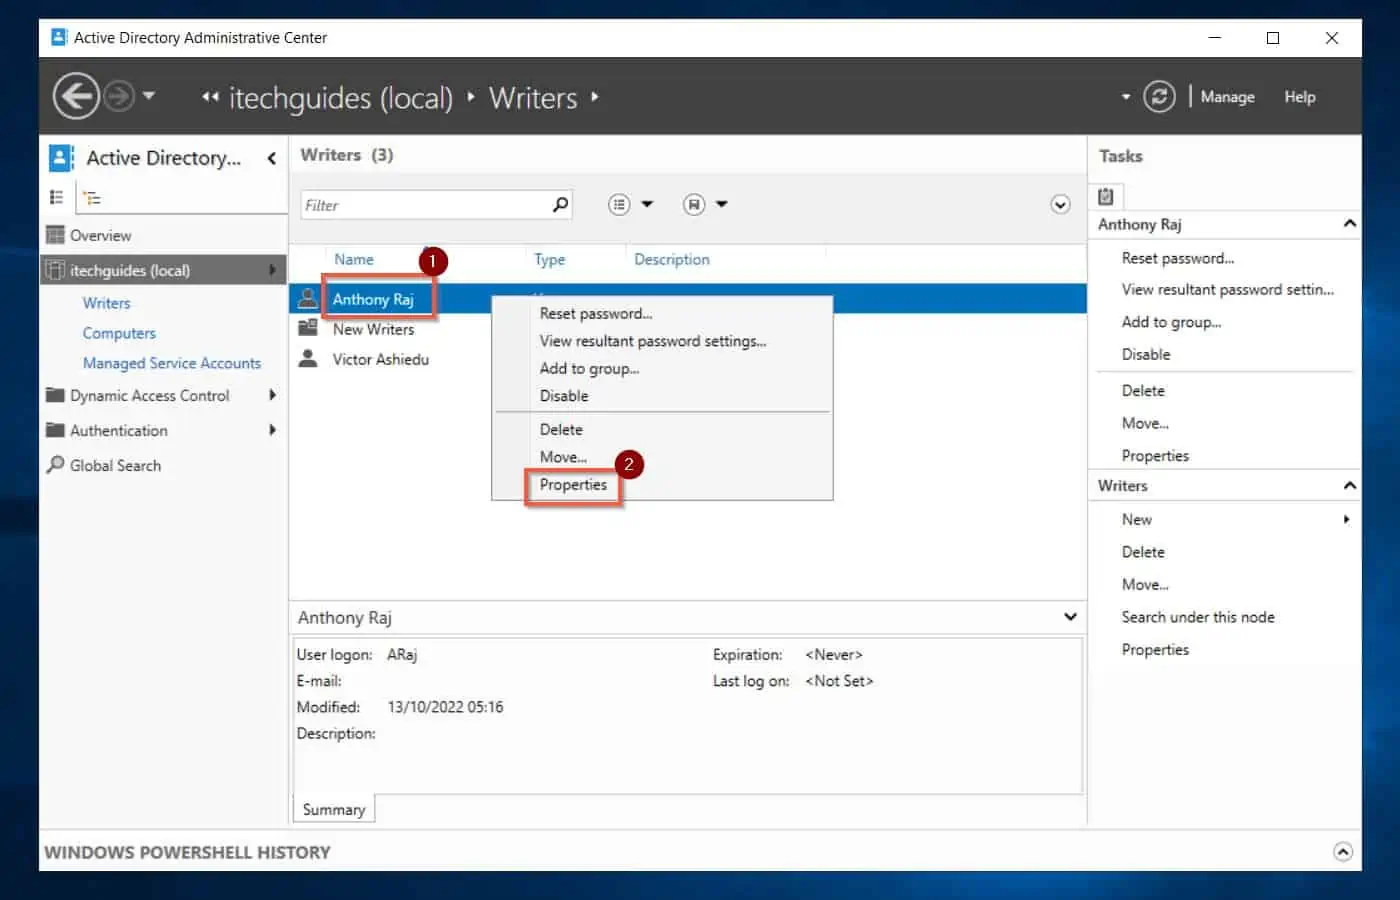
- On the left pane of the object’s Properties, click the Extensions tab.
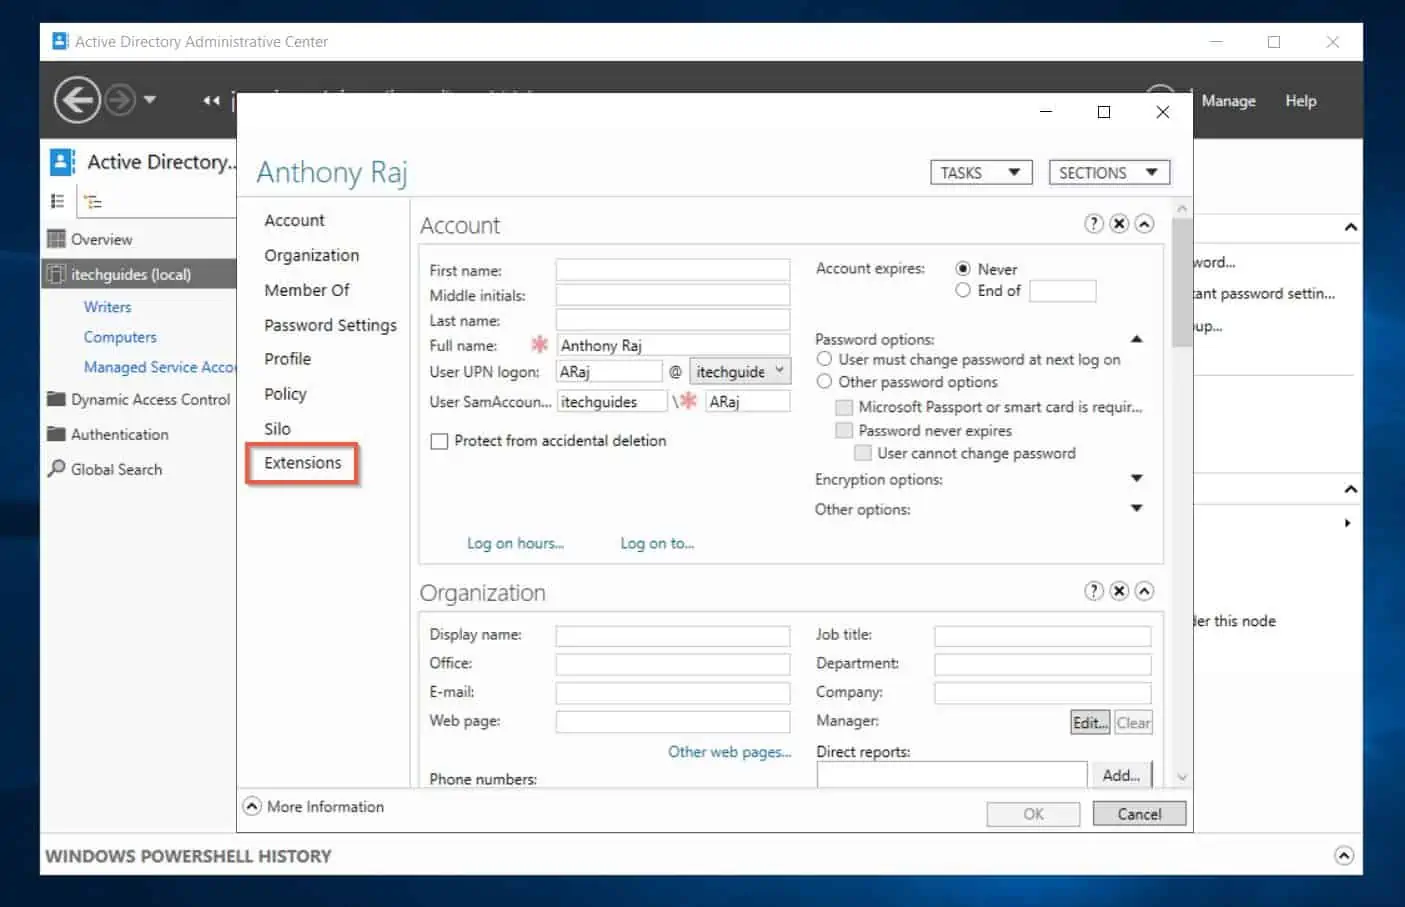
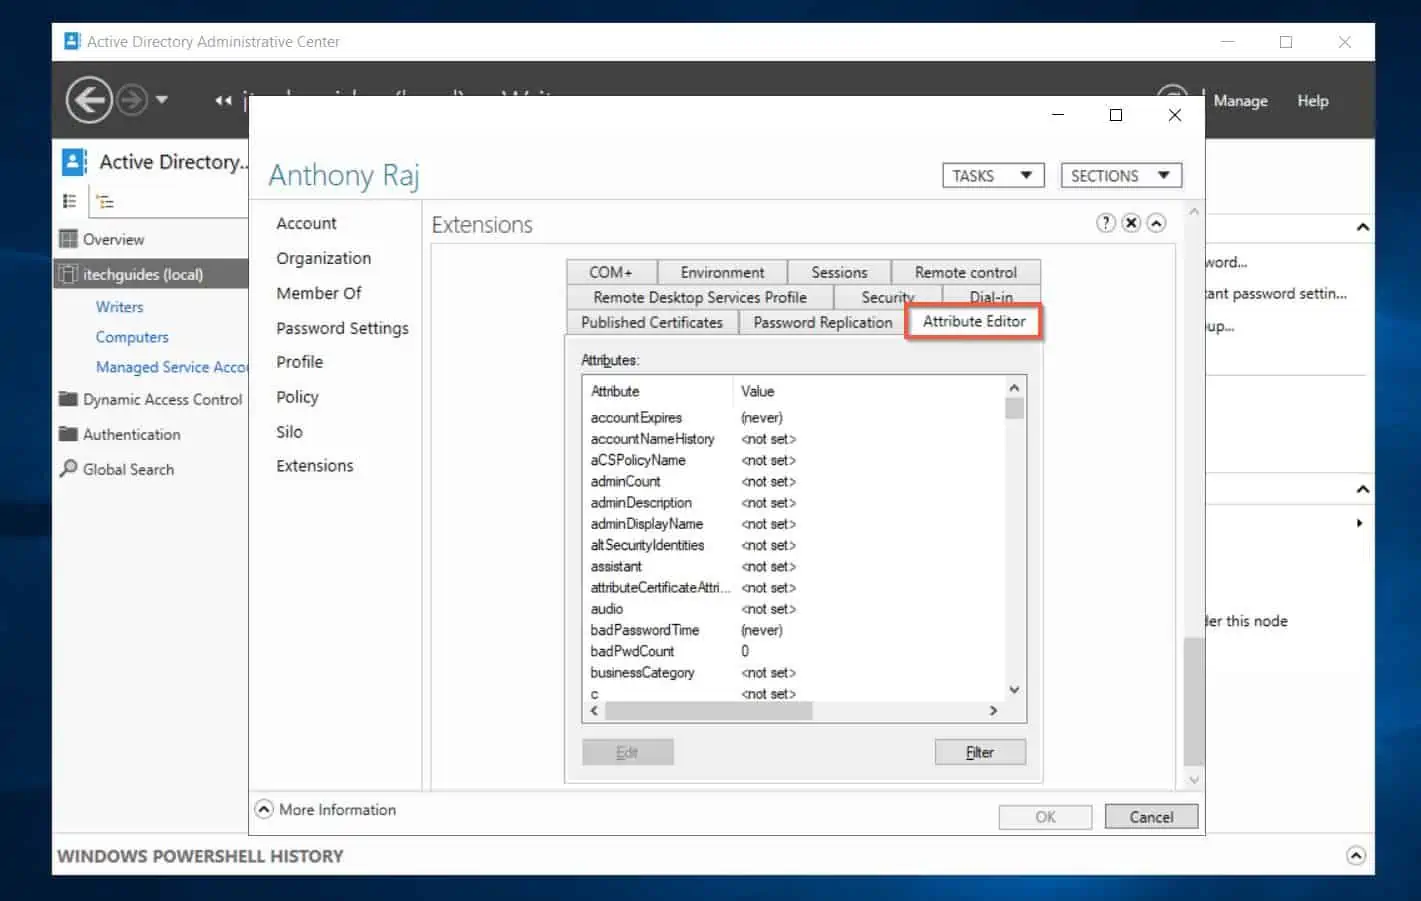
- Finally, when the Extensions tab opens, click the Attribute Editor tab.
Option 3: Access Active Directory Attribute Editor with ADSI Edit
ADSI Edit is the primary tool for viewing and editing AD object attributes. It is more robust than the other tools I discussed in the previous sections of this article.
To use ADSI Edit to view and edit AD object’s attributes, follow the steps below:
- Open ADSI Edit. You could open ADSI Edit from your PC if you enabled RSAT for Active Directory on your Windows 10/11 PC.
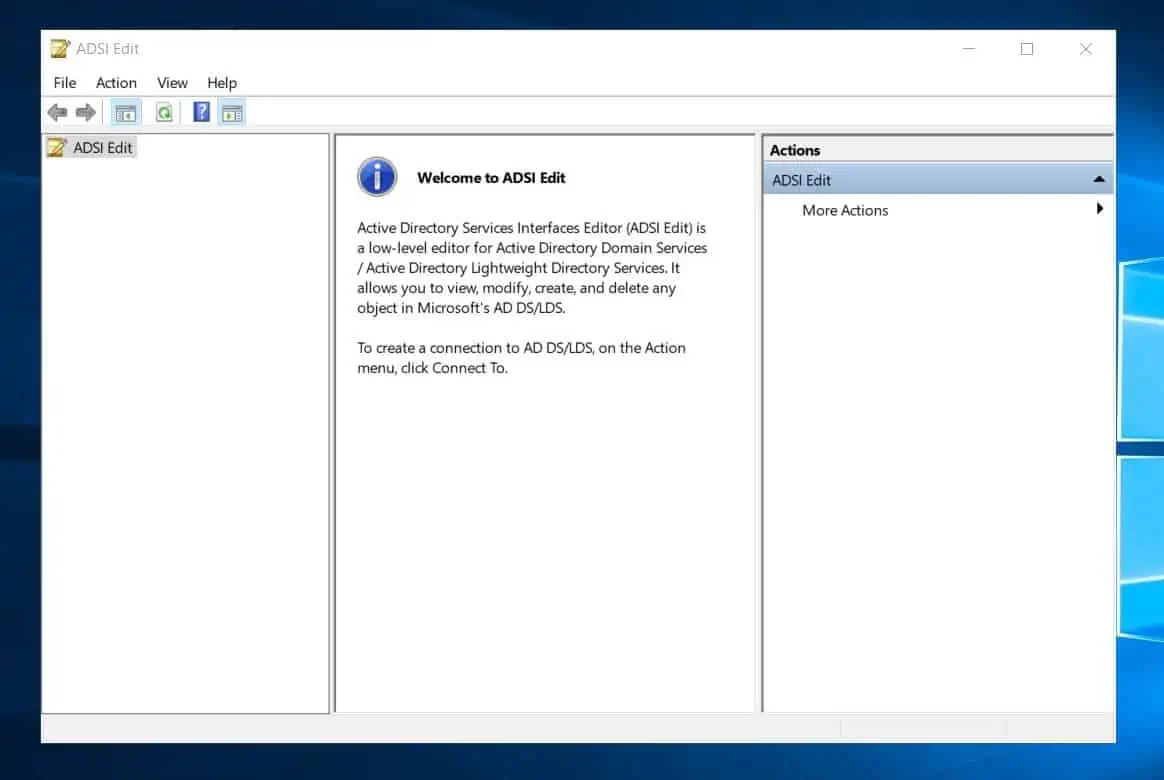
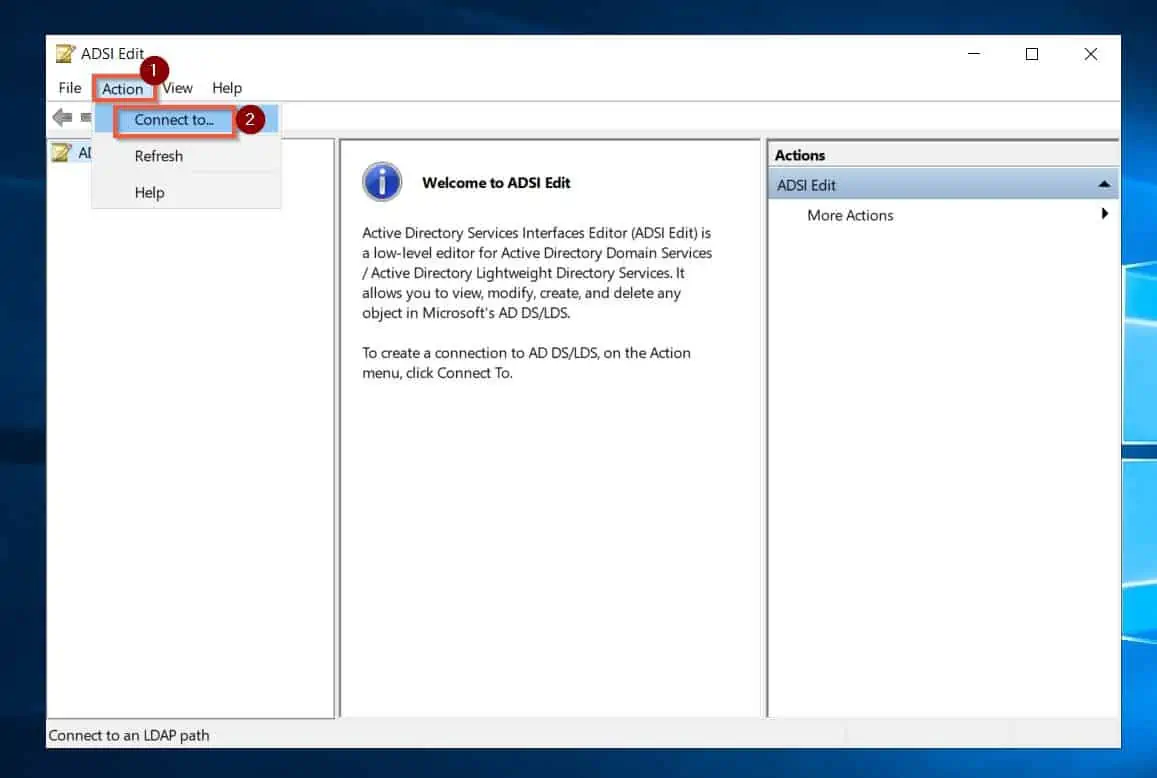
- To connect your Active Directory Domain to ADSI Edit, click the Actions menu of the ADSI Edit. Then, from the options displayed, select Connect to...
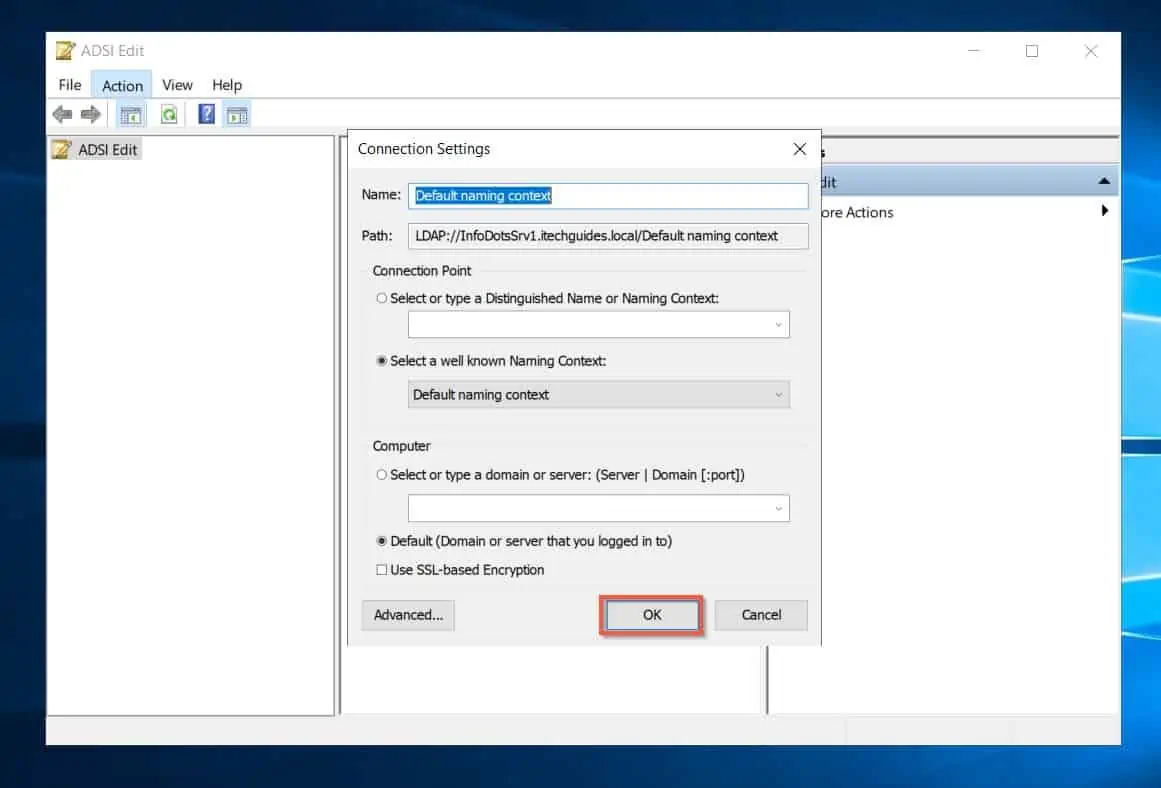
- The ADSI Edit Connection Settings will automatically detect your AD Domain. To connect to the Domain, click the OK button at the bottom right.
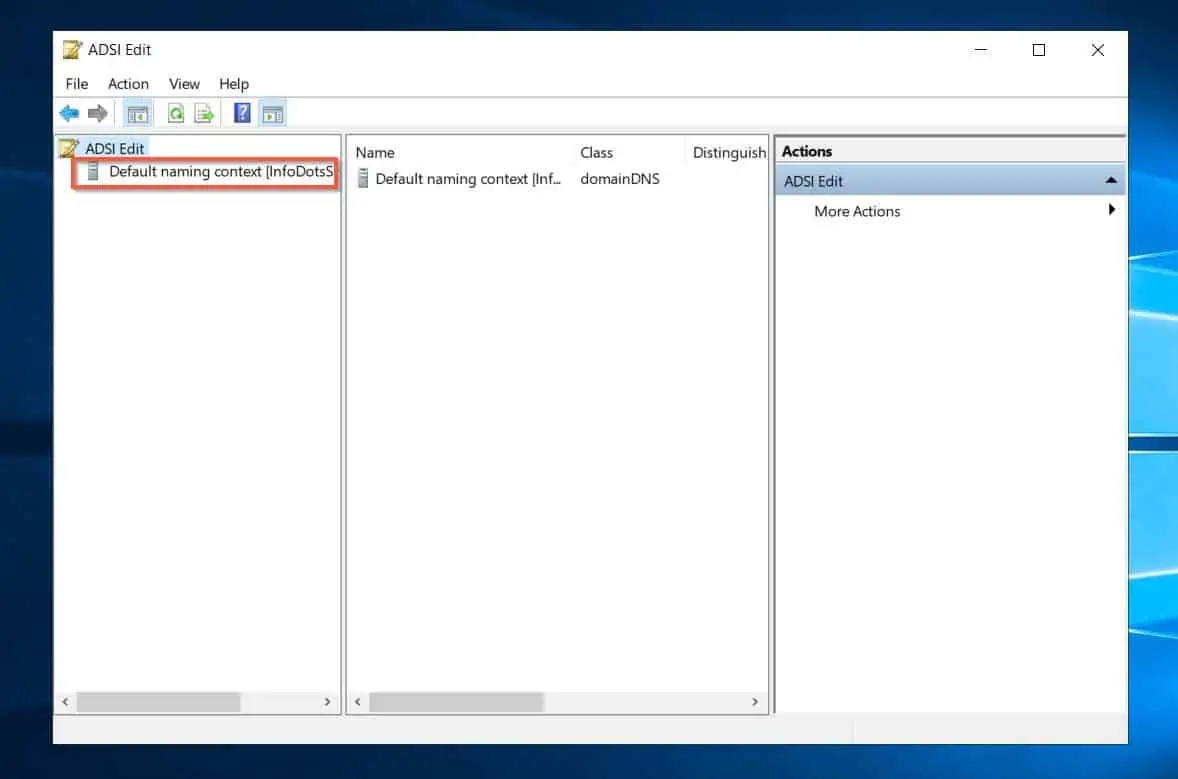
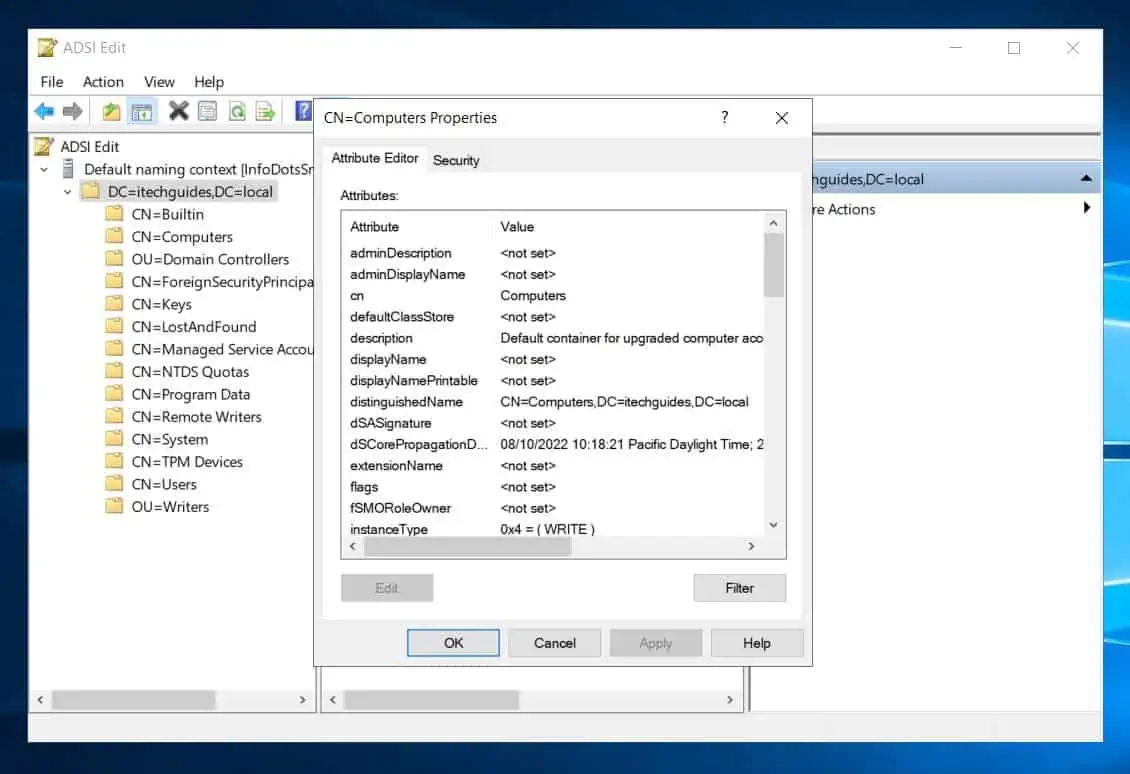
- Then, to display the directory of your AD domain, on the left pane of ADSI Edit, click the Default naming context…Then, double-click the domain name of your AD Domain – see the second screenshot below.

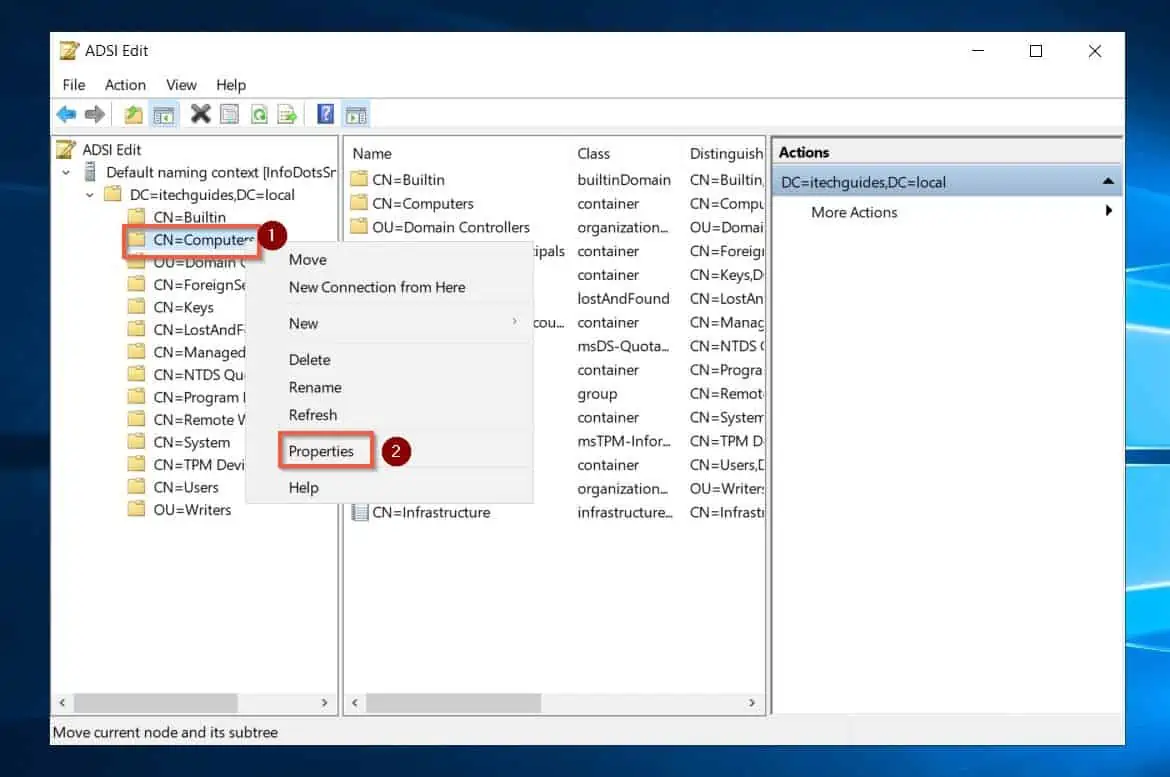
- Finally, to view an object’s Attribute Editor with ADSI Edit, right-click the object and select Properties. The object’s Properties will display its Attribute Editor – see the second screenshot below.
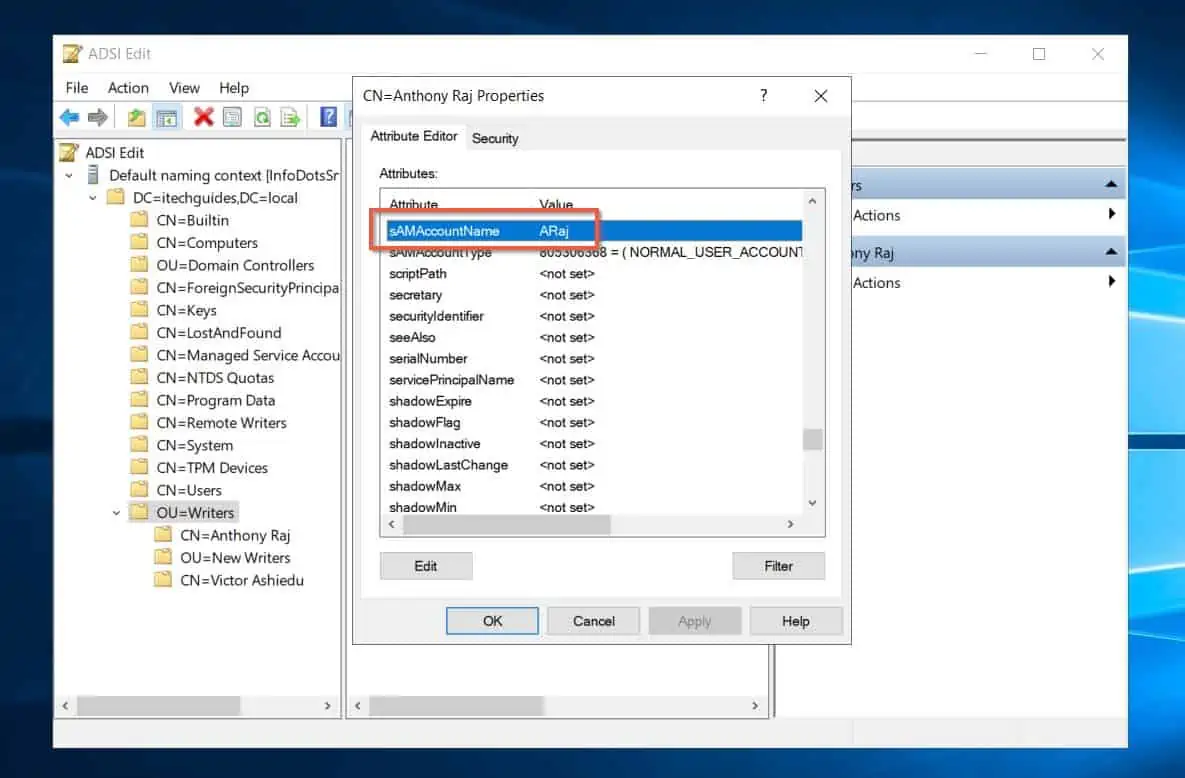
Option 4: View sAMAccountName, distinguishedName, and Other Attributes with Active Directory Attribute Editor
In the last three sections of this article, I have discussed the steps to view an object’s attributes with ADUC, ADAD, and ADSI Edit.
In this section, I will show you how to view and/or edit the common attributes like sAMAccountName, and distinguishedName of an object. I will use the ADSI Edit tool to show you how to view and edit an AD object’s attributes.
Follow the steps below to view and edit an object’s attribute with ADSI Edit.
- Open ADSI Edit. Then, navigate to the AD object you want to view and/or edit its attributes – right-click the object and select Properties.
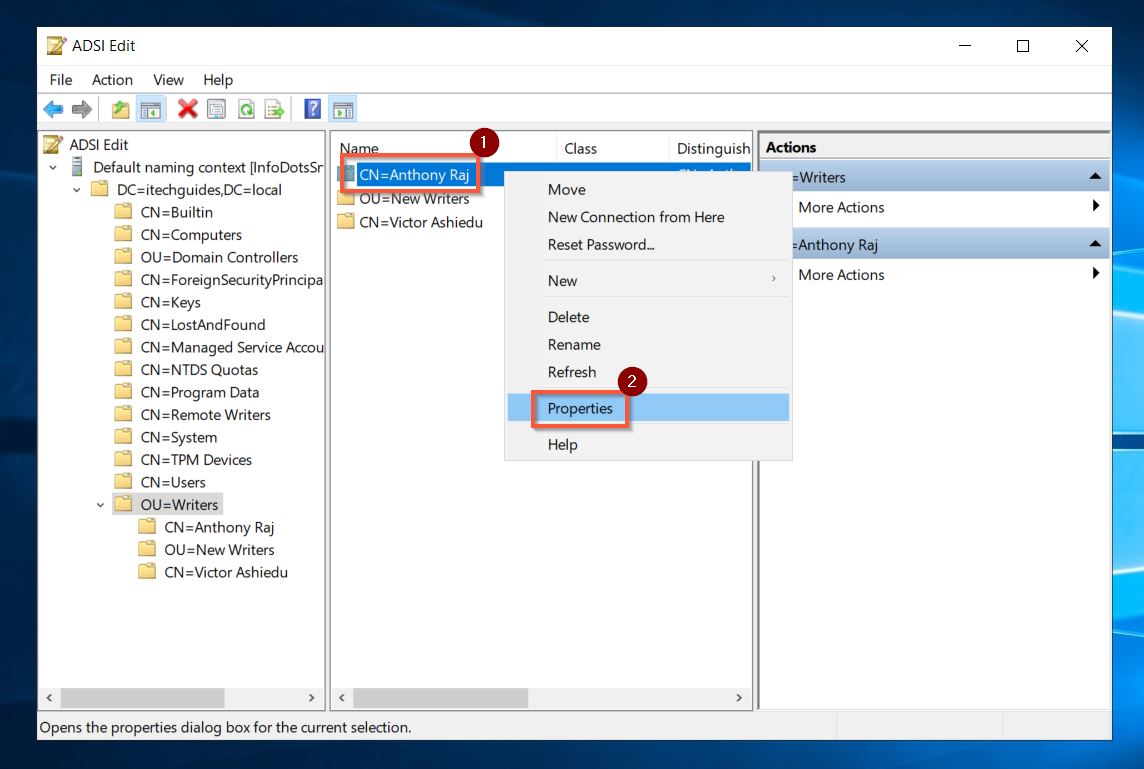
- The object’s Properties open its Attribute Editor tab by default. In this tab, you can view or edit all available attributes of the AD object.
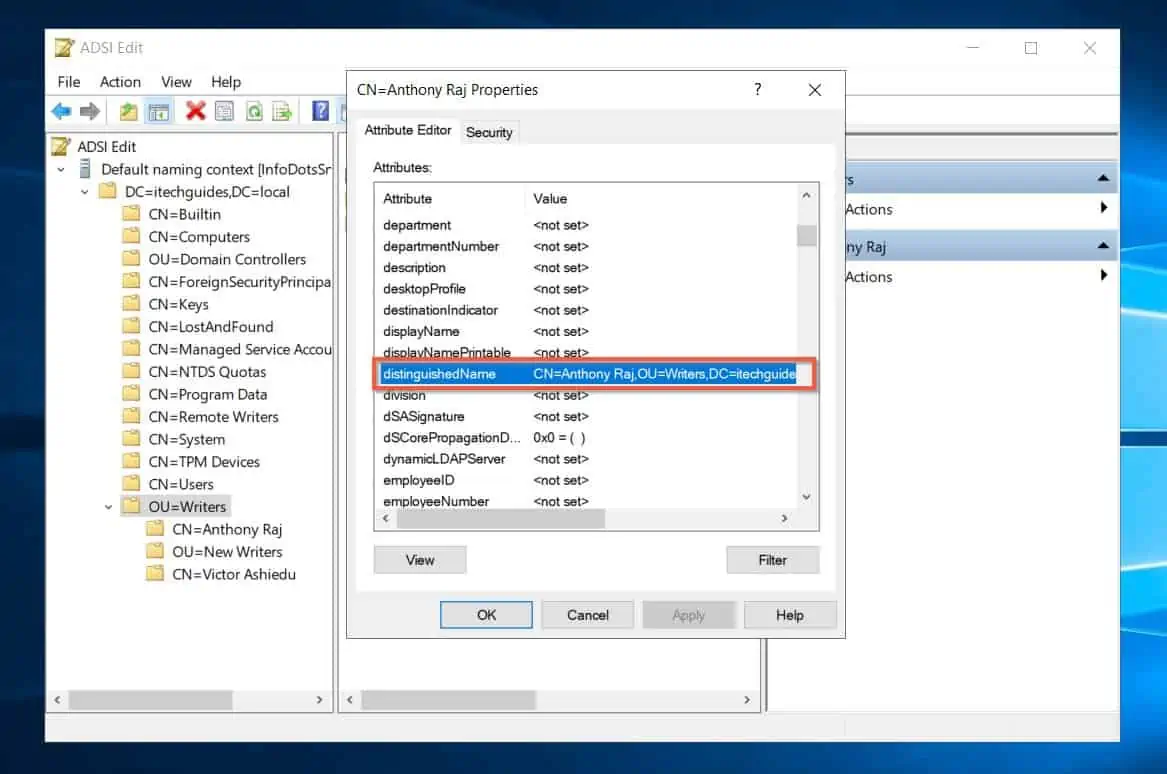
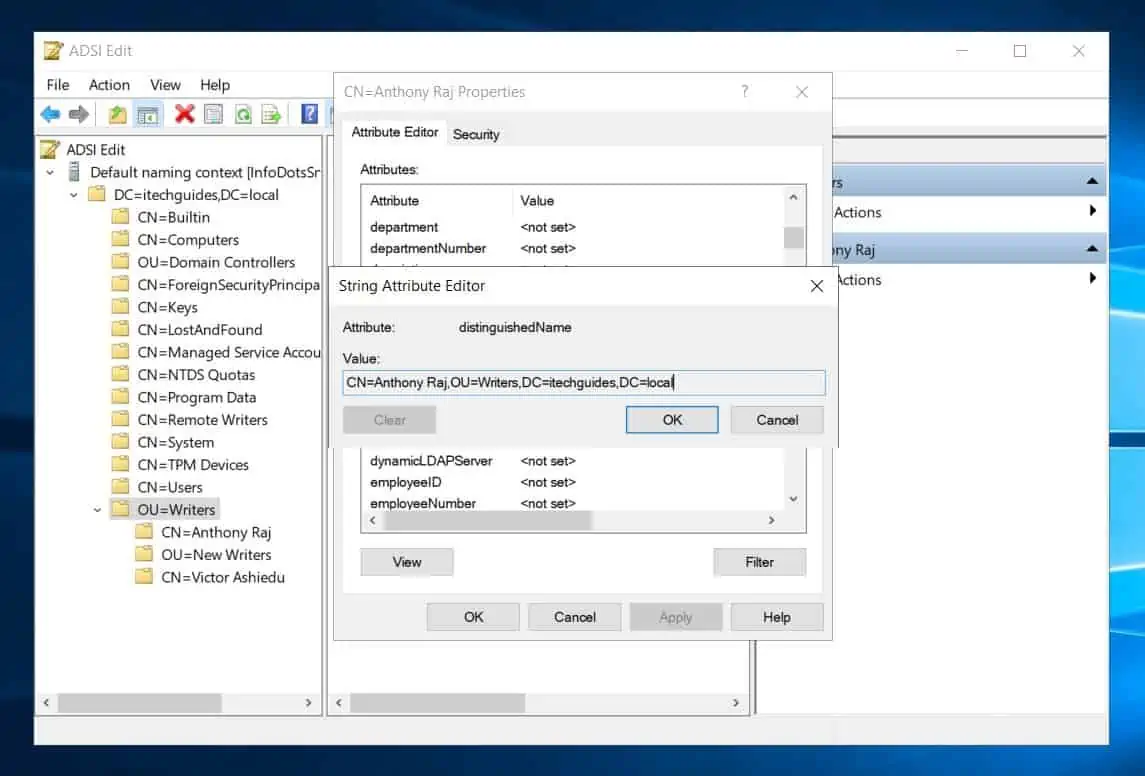
- For example, to view the object’s distinguishedName, navigate to this attribute and double-click it. The object’s DN will open – see the second screenshot below.
- Similarly, to view the object’s sAMAccountName, navigate to sAMAccountName and double-click the attribute.
Frequently Asked Questions
To view an object’s attributes in AD, you can use ADUC, ADAC or ADSI Edit. However, to view attributes in ADUC (Active Directory Users and Computers), you must enable the Advanced Features via the ADUC view menu.
Once you have enabled the Advanced Features in ADUC, navigate to the object you want to view its attributes, right-click the AD object, and select Properties.
To change the attribute value in AD, open the properties of the AD object with either ADUC, ADAC or ADSI Edit. Then, click the Attribute Editor tab.
Finally, double-click the object’s attribute you want to change to open the attribute for editing – make the changes you want to make and click OK.
You can use the Get-ADObject cmdlet to get the attributes (properties) of any AD object. However, there are cmdlets you can use to get attributes for specific AD objects.
For example, to get the attributes of an AD user, use the Get-ADUser cmdlet. Similarly, to get the attributes of an AD computer, use the Get-ADComputer cmdlet.
To export all user attributes in Active Directory, run the Get-ADUser command. However, the parameters you use depend on whether you want to export attributes for one user or multiple users in an AD container.
For example, to export all the attributes of a user with the user name ARaj, run the command below:
Get-AdUser ARaj | Select * | Format-Table -AutoSize | Export-CSV D:\report\<csv file name.csv> -NoTypeInformation
Apart from exporting all the properties of a single user, you can export all the properties of users in an AD container. In the example below, I am exporting the attributes of all users in the Writers OU.
$ou = “OU=Writers,DC=itechguides,DC=local”
Get-Aduser -SearchBase $ou -Filter * | Select * | Format-Table -AutoSize | Export-CSV D:\report\<csv file name.csv>
Follow the steps below to bulk-modify Active Directory user attributes:
i) Create a CSV file and create columns with the names of the attributes you want to modify. This CSV must include a column for the sAMAccountName (AD user names) for the users you want to modify.
ii) Then, run the command below to bulk-modify the attributes for each user in the CSV file.
In the command below, I assume that the sAMAccountName column contains the AD user name for each user. Additionally, I am modifying all user’s manager attributes- saved as manager column in the CSV file.
Import-CSV <full path to the CSV file (including the file extension (.CSV)> | ForEach-Object {
#this first command gets the DistinguishedName of each user and saves it in the $userdn variable. We will use this as the -identity in the Set-ADObject command
$userdn = (Get-ADUser -Identity $_.sAMAccountName).
Set-ADObject -identity $userdn -Replace @{manager = $_.manager }
}
Conclusion
The Active Directory Attribute Editor is one of those tools that every serious AD SysAdmin must know. Knowing about how to use the Attribute Editor sets the senior from junior admins apart.
As a refresher, in this guide, I showed you how to view the Active Directory Attribute Editor tab in ADUC, ADAC, and ADSI Edit.
In addition to that, I also showed you how to view sAMAccountName, distinguishedName, and other attributes with Active Directory Attribute Editor.
I hope that by reading this guide, I have moved you closer to the senior AD SysAdmin end. If I made your day, click on “Yes” beside the “Was this page helpful” question below.
You may also express your thoughts and opinions by using the “Leave a Comment” form at the bottom of this page.
Finally, to improve your AD knowledge, even more, visit our Active Directory Guides page.