
Do these 3 things before closing this tab:
1Scan for outdated or missing drivers - takes under a minute2Clear out junk files and repair common Windows errors3Fix the driver behind crashes, sound loss and screen glitchesiTechGuides is reader-supported. When you buy through links on our site, we may earn an affiliate commission. As an Amazon Associate I earn from qualifying purchases. Learn more
Sanguino is an open, Arduino-compatible AVR hardware platform and a third-party Arduino IDE hardware add-on. It keeps the familiar Arduino programming model but targets larger microcontrollers than classic ATmega168/328-era boards. Its maintained pin map provides 24 digital pins (D0–D23), eight analog inputs (A0–A7), hardware SPI, I²C and additional UART capability on supported ATmega644/1284-class devices.
What Sanguino is
The Sanguino project adds board definitions, pin mappings and core support for larger AVR chips to the Arduino toolchain. Its README describes it as “a Sanguino third-party hardware add-on for the Arduino IDE.” The documented device families include ATmega644/644A and ATmega1284-class microcontrollers. PlatformIO also provides Sanguino targets for ATmega644 and ATmega644P variants.

This is not a separate programming language. Sketches still use the Arduino framework, but the selected board definition determines available pins, memory, clock speed, serial interfaces and bootloader settings.
What’s actually slowing this PC down?
Pick the symptom - the matching free tool is one click away.
How Sanguino differs from an Uno-class board
The practical reason to choose Sanguino is capacity and I/O rather than a different development model. A Sanguino board can expose substantially more pins and memory than the classic ATmega168/328-era Arduino family, while requiring more care with pin numbering and programming hardware.
#1 Best Overall

- Unlock your creativity with the versatile UNO R3 Board ATmega328P! Explore endless possibilities in electronics projects with its user-friendly Arduino development environment, extensive digital and analog I/O pins, and compatibility with various sensors and modules. Let your imagination soar!
- Experience the power of UNO R3 Board ATmega328P! This feature-packed development board boasts a high-performance ATmega328P microcontroller, 32KB of flash memory, and 2KB of SRAM. It's perfect for both beginners and advanced users seeking to build innovative applications in robotics, home automation, and more.
- Ignite your passion for electronics with the UNO R3 Board ATmega328P! Its open-source design allows for customization, while its 14 digital I/O pins and 6 analog input pins provide ample connectivity options. Get ready to bring your ideas to life and create interactive projects like never before.
- Elevate your DIY projects with the UNO R3 Board ATmega328P! This highly versatile development board offers seamless integration with the Arduino ecosystem, providing access to a vast library of code and resources. With its reliable performance and broad compatibility, you can easily prototype and realize your electronic dreams.
- Discover the endless potential of the UNO R3 Board ATmega328P! With its robust communication interfaces, including UART, SPI, and I2C, you can connect and communicate with a wide range of devices. Whether you're a hobbyist or a professional, this powerful development board is a must-have for creating innovative and interactive electronic systems.
| Comparison point | Sanguino | Classic Uno-era Arduino boards |
|---|---|---|
| MCU family | ATmega644/644A and ATmega1284-class devices | ATmega168/328-era devices |
| Digital pin map | D0–D23 (24 ordinary digital pins) | Use the pin map for the specific Uno-compatible board |
| Analog inputs | A0–A7 | Use the pin map for the specific Uno-compatible board |
| Memory example | PlatformIO documents 63 KB flash and 4 KB RAM for its 16 MHz ATmega644P target | Capacity depends on the exact ATmega168/328 board |
| Clock options | PlatformIO lists ATmega644P targets at 8 MHz and 16 MHz | Depends on the selected board and bootloader |
| Programming | Some variants need an external ISP programmer to install or restore a bootloader | Depends on the board; many common boards include a USB bootloader path |
| Debug probe | Documented Sanguino boards have no onboard debug probe | Depends on the board |
Sanguino pinout and interfaces
Digital and analog pins
The maintained Sanguino pin definition exposes D0 through D23 as digital pins and A0 through A7 as analog inputs. The physical 40-pin AVR package also brings out ports A, B, C and D, so package pin numbers and Arduino pin numbers are not interchangeable. Always use the pins_arduino.h file for the exact board package you selected.
SPI
Sanguino’s documented Arduino mapping places SPI on D4–D7. This is a critical difference for sketches or shields written around Uno assumptions that use D11–D13. Such hardware may work only after rewiring, changing chip-select definitions or adapting the library.
I²C and serial interfaces
I²C is mapped to D16–D17. The ATmega644/1284 pin definitions also identify UART0 and UART1, allowing designs with more serial connectivity than a typical small AVR board, provided the selected board definition and wiring support those interfaces.
Free tools Windows power users keep installed
One-click scans. No signup required.
Rank #2

- THREE PRESOLDERED USB-C BOARDS FOR MORE PROJECTS - Keep one Nano on a breadboard, embed another in a robot or sensor node and reserve the third for testing; one USB-A to USB-C data cable is included for programming, while jumper wires, sensors and breadboards are sold separately
- ATMEGA328P PERFORMANCE IN A COMPACT FORMAT - Run familiar 5 V, 16 MHz AVR sketches with 32 KB flash, 2 KB SRAM and 1 KB EEPROM, plus 14 digital I/O pins, 6 PWM outputs and 8 analog inputs for LEDs, buttons, displays, sensors, motor drivers and data logging
- CH340 USB SETUP WITH PRACTICAL UPLOAD GUIDANCE - Install the CH340 driver if no serial port appears, select Nano and the correct COM port, then upload a Blink test; use the included USB-A to USB-C cable because the current board does not support USB-C to USB-C host cables
- PRESOLDERED HEADERS SAVE BREADBOARD SPACE - The 18 × 45 mm footprint arrives ready to plug into a solderless breadboard, while UART, I2C and SPI support serial modules, displays, storage and sensors without soldering header pins before the first project
- POWER AND MODEL EXPECTATIONS - Use USB-C, 7-12 V VIN or a regulated 5 V input, share ground and drive motors or relays through suitable modules; this classic Nano V3-style board has no Wi-Fi, Bluetooth or features from Nano Every, Nano 33, Nano ESP32 or Nano R4
Memory, clock and MCU choices
PlatformIO’s current documentation lists sanguino_atmega644p targets at both 8 MHz and 16 MHz. Its documented 16 MHz target has 63 KB of flash and 4 KB of RAM. Select the frequency and MCU that match the physical chip, oscillator and installed bootloader; choosing the wrong clock can produce incorrect timing and unreliable serial communication.
The ATmega644P and ATmega1284-class options are not drop-in replacements in software configuration alone. Their board definition, bootloader and fuse settings must agree with the hardware.
Installing Sanguino in the Arduino IDE
The Sanguino repository supplies a Board Manager package URL and a manual hardware-package installation method. The exact menu wording varies by Arduino IDE release, but the workflow is:
Rank #3

- START CODING WITH THE ELEGOO UNO R3: Connect the included USB cable, upload your first sketch, and build sensor, motor, display, and automation projects, making it a practical controller for maker desks, classrooms, coding clubs, and robotics labs
- ATMEGA328P CORE FOR EVERYDAY PROJECTS: A 16 MHz clock, 32 KB flash, 14 digital I/O pins with 6 PWM outputs and 6 analog inputs provide a versatile foundation for LEDs, buttons, relays, servos, displays and sensors
- RELIABLE USB PROGRAMMING AND CLEAR WIRING: The ATmega16U2 USB interface supports sketch uploads and serial communication, while clearly labeled headers help simplify connections to jumper wires, shields and modules
- POWER AND EXPAND YOUR WAY: Run the board from USB or a recommended 7-12 V external supply, then add compatible shields and modules for data logging, automation, robotics, test fixtures and custom electronics projects
- BOARD AND USB CABLE INCLUDED: Comes with 1 ELEGOO UNO R3 development board and 1 USB-A to USB-B data cable; breadboard, sensors, shields and power adapter are not included, and younger learners should work with an experienced adult
- Open Arduino IDE and go to File → Preferences (or the IDE’s settings panel).
- Add the Sanguino package’s Board Manager URL supplied by the maintained Sanguino project to Additional boards manager URLs.
- Open Tools → Board → Boards Manager, search for Sanguino and install the available package.
- Select the matching Sanguino board, processor variant and clock under Tools → Board and any processor/clock submenus.
- Choose the correct serial port, compile a small test sketch and confirm that the selected pin numbers match your board’s
pins_arduino.h.
If Board Manager installation is unavailable for your IDE version, follow the repository’s manual hardware-package layout instead of copying only a single pin-definition file; the core, variants and board metadata must be installed together.
Quick wins for a faster PC:
Repair Windows errors before they cause bigger problemsFix Now →Fix the driver behind crashes, sound loss and screen glitchesFind Drivers →Clear out junk files and repair common Windows errorsFree Scan →Using Sanguino with PlatformIO
PlatformIO documents board IDs including sanguino_atmega644p. A minimal project uses the Arduino framework and sets the board in platformio.ini:
[env:sanguino_atmega644p]
platform = atmelavr
board = sanguino_atmega644p
framework = arduino
Choose the documented 8 MHz or 16 MHz target when creating the environment, and verify that the MCU, oscillator and bootloader on the physical board match that selection. PlatformIO marks the ATmega644/644P Sanguino boards as having no onboard debug probe, so source-level debugging requires an external tool.
Rank #4
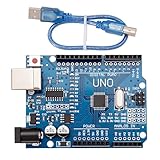
- CORE PERFORMANCE: Features the ATmega328P microcontroller unit (MCU) operating at a 16MHz clock speed. The board is equipped with 32KB of flash memory for program storage and 2KB of SRAM, providing a solid foundation for both novice and expert projects in robotics and smart home technology.
- EXTENSIVE I/O OPTIONS: Provides 14 digital input/output pins and 6 analog input pins for versatile connectivity. Six of the digital pins support Pulse-Width Modulation (PWM), enabling precise control of motors, LEDs, and other actuators for interactive, sensor-driven applications.
- STANDARD COMMUNICATION: Integrated with common communication interfaces including UART, SPI, and I²C. This allows for seamless connection with a wide range of peripheral devices, sensors, displays, and other microcontrollers, expanding your project capabilities.
- BROAD COMPATIBILITY: Designed for full compatibility with the standard Arduino IDE, allowing for easy sketch uploading and access to a vast library of community code and resources. The board also works with many Arduino Shields and is compatible with Arduino UNO R4, Mega, Leonardo, and Raspberry Pi.
- COMPLETE SET & SUPPORT: Includes 1 UNO R3 Board and 1 USB Cable for immediate connection to your computer. Digital documentation and technical support for setup, programming, and troubleshooting are available through our store customer service.
Bootloaders, ISP programming and recovery
A Sanguino board may compile successfully yet fail to upload if its bootloader, clock or processor selection is wrong. Some variants require an external AVR ISP programmer to burn the bootloader. The ATmega1284 workflow documented by the project may require manual command-line bootloader burning rather than a one-click IDE action.
- Use ISP when: the chip is blank, the bootloader is missing or corrupted, fuses need restoring, or serial upload never reaches the bootloader.
- Match all settings: MCU model, CPU frequency, bootloader type and board variant.
- After burning: disconnect or correctly configure the ISP wiring, select the corresponding serial board and try a simple upload.
- For debugging: plan on an external probe; the documented boards do not include one onboard.
Compatibility pitfalls
Uno shields and libraries
Physical fit does not guarantee electrical compatibility. Uno-oriented shields and libraries often assume SPI on D11–D13, whereas the maintained Sanguino mapping places SPI on D4–D7. Check chip-select, SPI and interrupt definitions before connecting a shield.
PC Slower Than It Used to Be?
A free scan shows the junk files, broken settings and background clutter dragging Windows down - then fixes them in one click.Free scan · Windows 10 & 11Outdated Drivers Are Slowing You Down
One free scan finds every outdated or missing driver and matches the right update for your exact hardware.Free scan · exact hardware matchPin-number assumptions
Code that hard-codes Uno pin numbers can address the wrong signal on Sanguino. Prefer named constants supplied by the library or define board-specific pins in one place.
Best Value
Clock mismatch
A board built for 8 MHz must not be compiled and bootloaded as a 16 MHz target, and vice versa. Timing-sensitive code, serial baud rates and delay calculations depend on this setting.
Choosing hardware for a new build or repair
ATmega644P Sanguino-compatible development board
This is the most direct choice when you want a ready-made board with the Sanguino pinout and Arduino-compatible workflow. Confirm the installed oscillator, MCU marking, bootloader and connector layout before buying or wiring it.
ATmega644P DIP-40 replacement
A DIP-40 ATmega644P can be useful for repairing or building a compatible controller, but the chip still needs correct fuse settings, clock hardware and a suitable bootloader. An AVR ISP programmer is normally part of this workflow.
Legacy controller hardware
Sanguino pin mapping remains relevant to older RepRap, Sanguinololu and Gen7 controller designs. For some of these boards, MightyCore documents compatibility with the Sanguino pinout and may provide a more practical modern toolchain route.
Troubleshooting checklist
- Confirm the selected board is the exact ATmega644, ATmega644P or ATmega1284 variant installed.
- Confirm 8 MHz versus 16 MHz matches the oscillator and bootloader.
- Verify that the upload port is the board’s bootloader serial port, not the ISP programmer interface.
- If serial upload fails on a new or erased chip, burn the bootloader with an external ISP programmer.
- Check SPI wiring against D4–D7 and I²C wiring against D16–D17.
- Inspect the selected
pins_arduino.hbefore adapting Uno shields or libraries. - For ATmega1284 bootloader issues, follow the project’s documented manual command-line procedure.
When Sanguino is the right choice
Choose Sanguino when an Arduino-style API is useful but a small ATmega168/328 board lacks pins, serial interfaces or memory. Choose a different platform when you need an integrated debugger, guaranteed modern board availability or broad Uno-shield compatibility without adapting pin definitions. Sanguino’s strengths are its larger AVR targets and established legacy pinout; its costs are more involved board selection, bootloader management and pin-mapping work.
Quick Recap
Product prices and availability are accurate as of the date/time indicated and are subject to change. Any price and availability information displayed on Amazon at the time of purchase will apply.

