
iTechGuides is reader-supported. When you buy through links on our site, we may earn an affiliate commission. As an Amazon Associate I earn from qualifying purchases. Learn more
Home Assistant’s built-in Proxmox VE integration can bring VM and container status, resource-use sensors, backup information, and selected power controls into one dashboard. Add carefully chosen automations and your home lab can alert you to problems and handle routine tasks—but it will not automatically manage or repair itself. This guide covers the official core integration, its setup, permissions, useful automations, and the risks of remote power actions.
What “manages itself” means with this integration
The built-in Home Assistant Proxmox VE integration connects Home Assistant to a Proxmox VE host through its API. It can monitor nodes, virtual machines (VMs), and containers, and expose controls when the configured Proxmox identity has the required permissions. That makes it possible to build dashboards, receive alerts, and automate selected actions; it does not provision a complete lab or independently diagnose and fix every failure.
The integration needs at least one Proxmox node with at least one VM or container before there are guest entities to display. Proxmox’s default API port is 8006. Home Assistant’s integration page displayed an adoption figure of 1.5% of active installations when accessed on October 9, 2026; that is a dated page figure, not a measure of reliability or a lasting adoption rate.
Windows Errors? Fix Them Before They Spread
Repair common Windows errors and clear accumulated junk for a smoother, more stable PC - no reinstall needed.Free scan · no reinstallCrashes, No Sound, or Screen Glitches?
Random freezes, missing sound and display glitches usually trace back to one bad driver. Find and replace yours safely.Free scan · under a minutePrepare a dedicated Proxmox identity
Use a dedicated Proxmox VE account for Home Assistant rather than giving the integration root credentials. Home Assistant recommends granting only the minimum permissions required. A read-only setup and a setup that can control guests need different privileges.
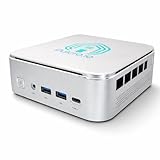
#1 Best Overall

- 12th Intel Alder Lake N95 Processor – The GMKtec G3 S Mini PC is powered by the 12th Gen Intel N95 processor with 4 cores, 4 threads, 6MB cache and a burst frequency up to 3.4GHz. Compared with N100/N5105/N5100/N5095, the N95 delivers up to 36% overall performance improvement. Perfect for routine tasks, office work, and home entertainment, this compact mini desktop is more convenient than traditional bulky PCs.
- 8GB RAM & 256GB SSD Storage – Pre-installed with 8GB DDR4 memory and a fast 256GB M.2 2242 SSD, the G3 S mini desktop offers quicker startup, smoother multitasking, and faster file transfers. Enjoy seamless performance whether you’re working on multiple applications, browsing, or streaming content.
- Rich Interfaces & Connectivity – The G3 S mini computer comes equipped with USB 3.2 (up to 10Gbps), dual HDMI 2.0 (4K@60Hz), and a 3.5mm audio jack. With support for WiFi 5, Bluetooth 5.0, and Gigabit Ethernet (RJ45 1000MbE), it connects easily with monitors, projectors, printers, office equipment, and other peripherals, making it versatile for both home and business use.
- Dual 4K Display Support – Featuring upgraded Intel UHD Graphics (up to 1000MHz), the G3 S supports 4K video playback and AV1 decoding for a smooth viewing experience. With dual HDMI outputs, you can connect two 4K@60Hz displays simultaneously, enabling efficient multitasking for work and entertainment.
- GMKTEC WARRANTY - GMKtec offers a 3-year limited warranty (1 year replacement + 2 years parts replacement) for each mini PC, starting from the date of the purchase effective on all sales starting Oct. 2026. All defects due to design and workmanship are covered. With a professional after sales team always ready to attend to your needs, you can simply relax and enjoy your mini PC
Monitoring-only access
For monitoring, Home Assistant’s documentation says the PVEAuditor role is typically sufficient. Start with that level if you only need status and sensor data. If an entity remains unavailable, check its documented requirements and the account’s access before granting broader permissions.
Permissions for controls
Power actions such as starting, stopping, or rebooting guests require additional permissions; the integration documentation identifies VM.PowerMgmt or PVEVMUser for power actions. Snapshot actions require VM.Snapshot or PVEVMAdmin. Node update entities require Sys.Modify or PVEAdmin. These roles and privileges differ in scope, so prefer the narrowest suitable access and add only what the actions you actually use need. Custom roles can be built around specific privileges.
Rank #2

- 【Processor & OS】Firewall Mini PC with Intel J3710 CPU up to 2.64GHz, 4Cores 4threads 2MB L2 Cache, TDP 6.5w, supports AES-NI. It tested with pf-sens/opn-sense linux ubuntu and other popular open source os. ("DEL" key to enter BIOS)
- 【Interfaces】The firewall pc has 4 * Intel I226 lan ports, 2 * USB3.0 ports, 1 * RS232COM port, 2 * HD port, 1 * DC port. Equipped with VESA mount, you can install the micro pc behind the monitor to save space.
- 【Fanless Design】only 6.5W; fanless heat dissipation design, aluminum alloy shell, efficient and fast heat dissipation, which can withstand temperatures up to 60°C. support 24/7 hours working, no noise.
- 【RAM & Storage】The firewall router equipped with 8G DDR3 RAM, max support 8GB; 128GB mSATA SSD, up to 512GB. Not support HDD. Size:5.27 * 4.98 * 1.43 inches, Weigh:500g, small but powerful.
- 【12 Months Service】You will get a firewall pc and accessories,If you encounter any problems during the use, please contact us through Amazon, we have a professional and efficient team dedicated to serving you.
Password or API token?
The integration supports a Proxmox password or an API token. A token is useful for a service account because it can have its own permissions, expiration, and revocation lifecycle. With Proxmox privilege separation enabled, effective token access is the intersection of the user’s permissions and the token’s permissions; a token cannot exceed the user’s access. The Proxmox user-management documentation also warns that the token secret is shown only once when generated. Store it securely when you create it; if it is lost, create a replacement rather than expecting to retrieve it later. Revoke the token if it is no longer needed.
| Authentication choice | What to weigh |
|---|---|
| Proxmox account password | Supported by the integration; access follows the user’s permissions. Secure the account credentials and use a dedicated account. |
| API token | Can be assigned permissions separately, given an expiration, and revoked without disabling its associated user. The secret is displayed only at creation; protect it accordingly. |
Add Proxmox VE in Home Assistant
- Confirm the prerequisites. Have a reachable Proxmox VE node and at least one VM or container. Decide whether the connection needs monitoring only or particular controls, then create the dedicated user and, if desired, token with appropriate access.
- Open the integration setup. In Home Assistant, go to Settings > Devices & services > Add Integration, search for Proxmox VE, and select it.
- Enter the connection details. Supply the Proxmox host, authentication method and credentials. Use port 8006 unless your Proxmox API is configured differently. Provide the realm when required by the account setup, and configure SSL certificate verification to match your host’s certificate situation rather than disabling verification without considering the security trade-off.
- Finish and inspect the entities. Complete the flow, then open the resulting Proxmox device and review the sensors and controls Home Assistant created. Available entities depend on the host, guest types, API data, and permissions.
Choose useful monitoring and automations
The integration polls Proxmox data every 60 seconds. Depending on availability, its entities include CPU, memory, disk and network input/output measurements; node, VM and container status; uptime; and backup time, duration and status. Home Assistant’s entity and update documentation describes the available sensors and controls. Use the entities that answer an operational question instead of putting every metric on one crowded dashboard.
Rank #3

- ✅【Professional Firewall PC MGCN51N】MOGINSOK Fanless Firewall Mini PC- MGCN51N, a fanless & silent professional firewall router pc bring you a secured and encrypted network environment.Multi-functional support AES-NI, ESXI, Watchdog, Auto power on, RTC, PXE boot, Wake-on-LAN.
- ✅【CPU&Ports】MOGINSOK Firewall PC MGCN51N onboard with Jasper Lake 11th Gen Intel Celeron 5105 Quad cores Four threads 2.0GHz up to 2.9GHz 4MB cache with Intel UHD Graphics ,supported AES-NI . With HDMI 2.0+DP 1.4+ Type C(support display&Data only)Support 3x4K@60Hz.MGCN51-N also with Dual DDR4 RAM slot support 2x16GB DDR4 non-ecc Ram Maximum 3200Mhz and 1xM.2 NVMe/PCIe 3.0x1 2280 SSD slot and 1x2.5Inch SATA SSD/HDD(Maximum 9mm) slot.
- ✅【DDR4 Ram & 3x SSD slots】MOGINSOK Micro Firewall Appliance MGCN51N installed with 8G RAM 128GB NVMe SSD (2xDDR4 slot support maximum 32GB DDR4 ) and 1*M.2 PICE 3.0 slot, also has a M.2 2230 support WIFI or transfer to NVMe SSD slot and 1*2.5INCH SATA HDD/SSD) configurations, you can install your own ram and ssd for DIY depends on your application.
- ✅【Professional OS Supported】This Firewall Route with 4*Intel i226 network card speed maximum up to 2.5GbE(need other device like router, cables etc. also support 2.5Gb) bring you more faster and professional network usage(some system suppliers maybe have not released compatible driver to match yet, suggest to install newest version of following systems: compatiable pf-Sense plus 23.0X or CE 2.7.x, OPNsense 22.1, OpenWrt, ROS7, ESXI , Proxmox, CentOS etc).
- ✅【Quality With Warranty】If you have any questions on MOGINSOK Firewall Appliance MGCN51N, feel free to contact us(if you want to get the latest bios update, you can send us message via Amazon). We offered 12 Months warranty for it and WE'LL REPLY YOUR Questions within 12 hours(during Workdays).
Alert on an offline critical VM
The integration documentation gives an example of alerting when a critical VM remains offline for 15 minutes. Treat that as a suggested condition, not an event-delivery guarantee: the integration polls at 60-second intervals, and actual notification timing also depends on how you configure Home Assistant’s automation and notification service. Use a sustained-offline condition to avoid reacting to a brief transition.
Track backups and resource use
- Build a dashboard view for CPU, memory, disk, network, and uptime so you can spot changing resource use.
- Notify yourself when a backup-status entity reports a failure, then check Proxmox before taking corrective action.
- Review backup time and duration alongside status to identify missed or unusually long jobs. These entities report information; they do not establish why a backup failed.
Keep automated actions guarded
Use notifications and manual review for consequential actions unless you have a well-understood, tested condition and recovery plan. If an automation can stop or restart a guest, constrain its trigger, target, and timing, and avoid wiring a transient sensor change directly to a disruptive control.
Rank #4
- 🌍 𝗔𝘀𝘀𝗲𝗺𝗯𝗹𝗲𝗱 𝗶𝗻 𝘁𝗵𝗲 𝗨𝗦𝗔 – Built and quality-checked in Texas with a 2-Year US-Based Limited Warranty for dependable long-term support.
- 🏠 𝗛𝗼𝗺𝗲 𝗔𝘀𝘀𝗶𝘀𝘁𝗮𝗻𝘁 𝗢𝗦 𝗣𝗿𝗲𝗶𝗻𝘀𝘁𝗮𝗹𝗹𝗲𝗱 – Ready to power your smart home locally with fast, reliable automation and no mandatory cloud dependence. A truly powerful smart home hub.
- ⚙️ 𝗗𝗲𝘀𝗶𝗴𝗻𝗲𝗱 𝗳𝗼𝗿 𝗖𝗼𝗻𝘁𝗶𝗻𝘂𝗼𝘂𝘀 𝗢𝗽𝗲𝗿𝗮𝘁𝗶𝗼𝗻 – Built for reliable 24/7 performance powering virtualization, automation, containers, storage, and professional workloads.
- 🧠 𝗖𝗵𝗼𝗼𝘀𝗲 𝗬𝗼𝘂𝗿 𝗣𝗿𝗼𝗰𝗲𝘀𝘀𝗼𝗿 𝗣𝗲𝗿𝗳𝗼𝗿𝗺𝗮𝗻𝗰𝗲 – Available with AMD R2314 (efficient 4-core), AMD R2514 (8-thread multitasking), or Intel Core i3-1215U (hybrid 6-core performance) to match your workload.
- 💾 𝗘𝘅𝗽𝗮𝗻𝗱𝗮𝗯𝗹𝗲 𝗥𝗔𝗠 & 𝗨𝗽 𝘁𝗼 𝟰𝗧𝗕 𝗡𝗩𝗠𝗲 𝗦𝘁𝗼𝗿𝗮𝗴𝗲 – Dual SO-DIMM slots support up to 64GB RAM. Dual NVMe SSD slots support up to 4TB total storage. Select installed memory and storage based on your needs.
Understand what each Proxmox control does
Controls appear only when the entity is available and the configured identity has the necessary permission. They are not interchangeable: some operations attempt orderly guest shutdown, while others stop a system immediately. Home Assistant’s integration documentation describes the behavior as follows.
What’s actually slowing this PC down?
Pick the symptom - the matching free tool is one click away.
| Control type | Behavior and caution |
|---|---|
| Shutdown or reboot | Attempts a graceful action when the guest agent is installed. At node level, these actions attempt graceful shutdown of each VM or container. |
| Stop or restart | Immediately stops a running system, comparable to removing power. Unsaved work or guest services may be disrupted. |
| Snapshot, hibernate, reset, and other available actions | Availability depends on the entity and required permissions. Check the integration’s documented behavior before automating an action. |
Do not use an immediate Stop or Restart action as if it were a graceful shutdown. A restart that includes an immediate stop can interrupt workloads just as a power cut would.
Best Value
- 🌍 𝗔𝘀𝘀𝗲𝗺𝗯𝗹𝗲𝗱 𝗶𝗻 𝘁𝗵𝗲 𝗨𝗦𝗔 – Built and quality-checked in Texas with a 2-Year US-Based Limited Warranty for dependable long-term support.
- 🖥️ 𝗣𝗿𝗼𝘅𝗺𝗼𝘅 𝗩𝗘 + 𝗛𝗼𝗺𝗲 𝗔𝘀𝘀𝗶𝘀𝘁𝗮𝗻𝘁 – Preinstalled with Proxmox Virtual Environment and a ready-to-run Home Assistant VM, giving you a powerful, flexible platform for virtualization, automation, and self-hosted services - all in one system with full local control and no mandatory cloud dependence.
- ⚙️ 𝗗𝗲𝘀𝗶𝗴𝗻𝗲𝗱 𝗳𝗼𝗿 𝗖𝗼𝗻𝘁𝗶𝗻𝘂𝗼𝘂𝘀 𝗢𝗽𝗲𝗿𝗮𝘁𝗶𝗼𝗻 – Built for reliable 24/7 performance powering virtualization, automation, containers, storage, and professional workloads.
- 🧠 𝗖𝗵𝗼𝗼𝘀𝗲 𝗬𝗼𝘂𝗿 𝗣𝗿𝗼𝗰𝗲𝘀𝘀𝗼𝗿 𝗣𝗲𝗿𝗳𝗼𝗿𝗺𝗮𝗻𝗰𝗲 – Available with AMD R2314 (efficient 4-core), AMD R2514 (8-thread multitasking), or Intel Core i3-1215U (hybrid 6-core performance) to match your workload.
- 💾 𝗘𝘅𝗽𝗮𝗻𝗱𝗮𝗯𝗹𝗲 𝗥𝗔𝗠 & 𝗨𝗽 𝘁𝗼 𝟰𝗧𝗕 𝗡𝗩𝗠𝗲 𝗦𝘁𝗼𝗿𝗮𝗴𝗲 – Dual SO-DIMM slots support up to 64GB RAM. Dual NVMe SSD slots support up to 4TB total storage. Select installed memory and storage based on your needs.
Troubleshoot missing data or controls
- No guest entities appear: Confirm the Proxmox host has at least one VM or container, the host is reachable, and the integration completed setup.
- Sensors appear but a power button is missing or fails: Check the account’s specific power-management privileges rather than switching to root or granting broad administrator access.
- Snapshot or update entities are unavailable: Check the corresponding
VM.SnapshotorSys.Modifyrequirement, or the documented role alternative, and verify the target supports the operation. - A storage sensor is absent: Proxmox’s API does not expose every storage type and data field fully through this integration. Check what the API and the integration expose before assuming the missing entity is caused by Home Assistant configuration alone.
- Connection or certificate setup fails: Recheck the host name, port, credentials, realm, and certificate-verification setting entered in the integration flow.
When removing the integration, delete it from Home Assistant and remove Proxmox permissions or credentials that are no longer needed. If using a token, revoke it in Proxmox rather than leaving an unused credential active.
Built-in integration or community custom integration?
This guide uses Home Assistant’s official core integration. A separate community Proxmox VE custom integration is a different project with its own installation directions; it is not installed merely by adding the core integration in Home Assistant. Consider a custom integration only if you have a specific feature need that the built-in integration does not meet, and review that project’s current documentation, permissions, and maintenance status before installing it.
Quick Recap
Product prices and availability are accurate as of the date/time indicated and are subject to change. Any price and availability information displayed on Amazon at the time of purchase will apply.
Do these 3 things before closing this tab:
1Clear out junk files and repair common Windows errors2Scan for outdated or missing drivers - takes under a minute3Repair Windows errors before they cause bigger problems
