This Itechguide teaches you how to record audio on Windows 10.
Step 1: Grant Voice Recorder App Access to Microphone
Before you record audio on Windows 10, you have to first grant the Voice Recorder app access to the microphone of your PC. Here are the steps:
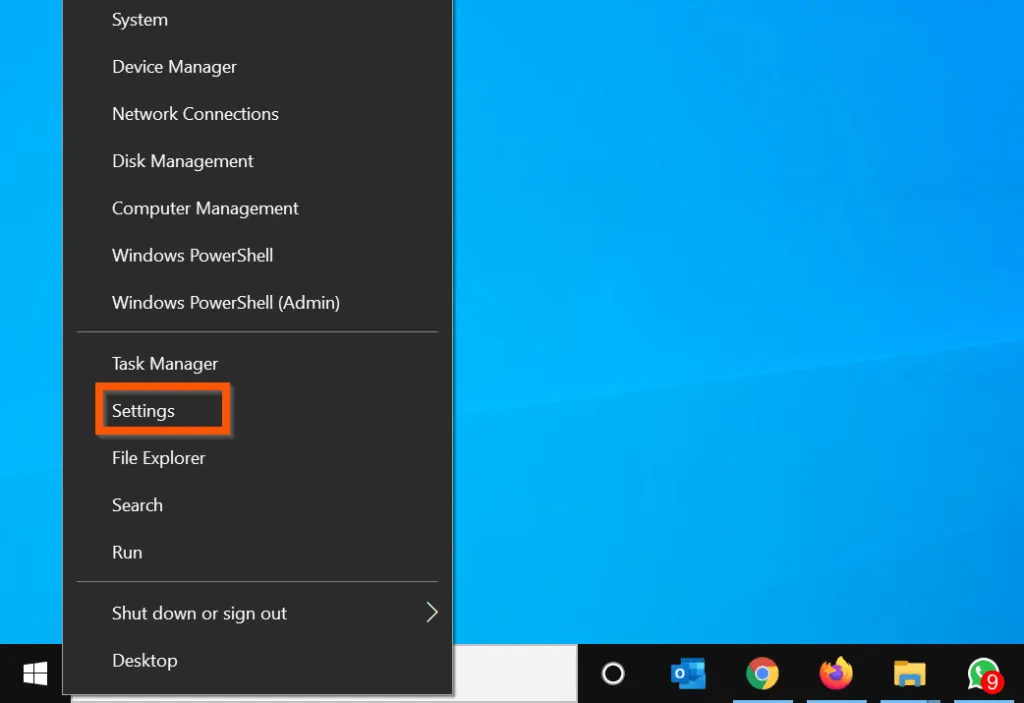
- Right-click Windows 10 Start menu and click Settings.
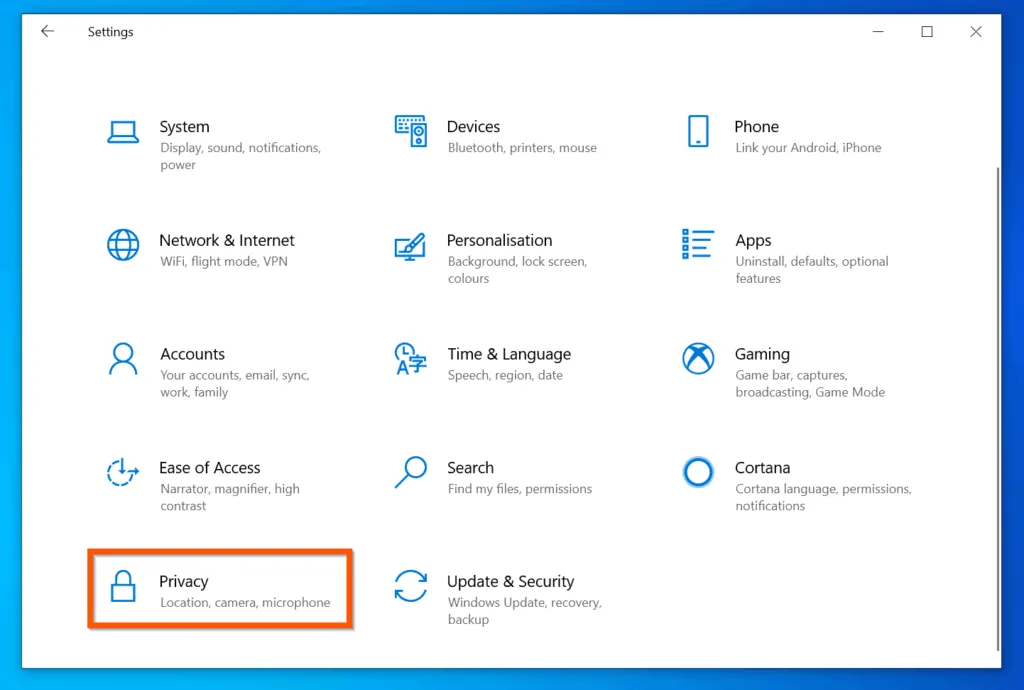
- Then, on the Windows Settings screen, click Privacy.
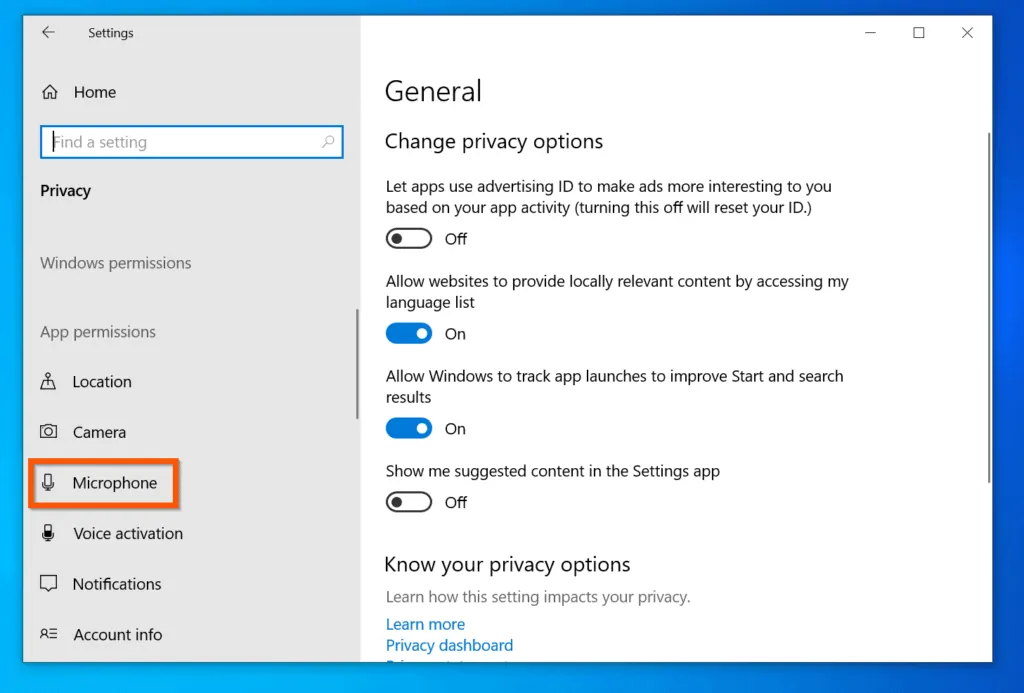
- On the left pane of Privacy Settings screen, scroll down and click Microphone.
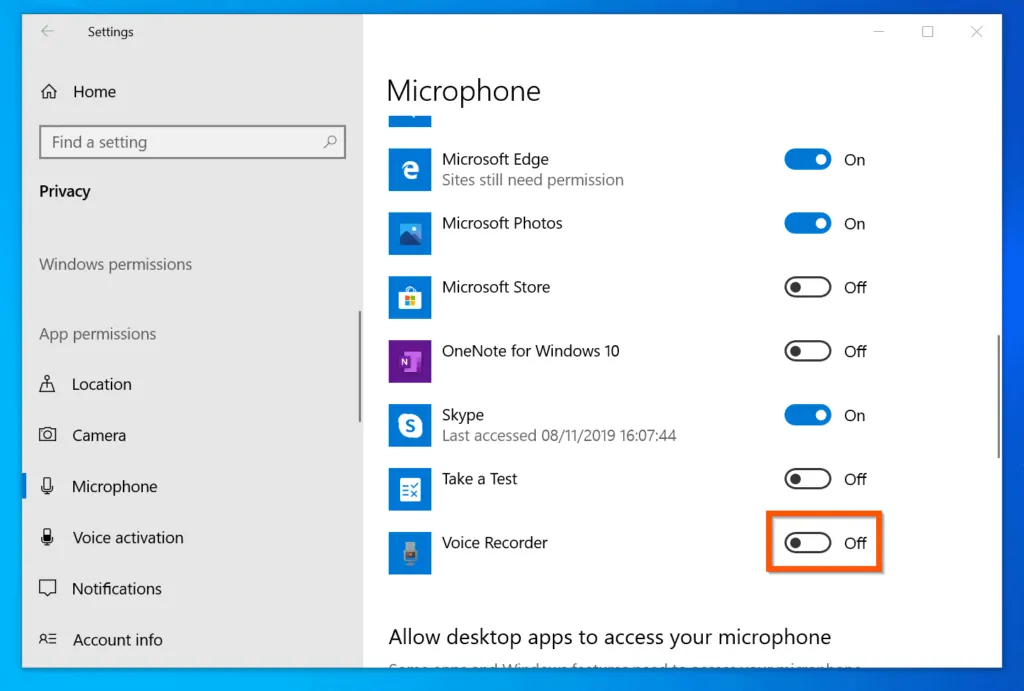
- Finally, scroll down to the Choose which Microsoft Store apps can access your microphone section and toggle Voice Recorder from Off to On.

Step 2: Record Audio with Voice Recorder App
Once you have granted the Voice Recorder app access to use the microphone on your PC, use the steps below to record audio on Windows 10 with Voice Recorder.
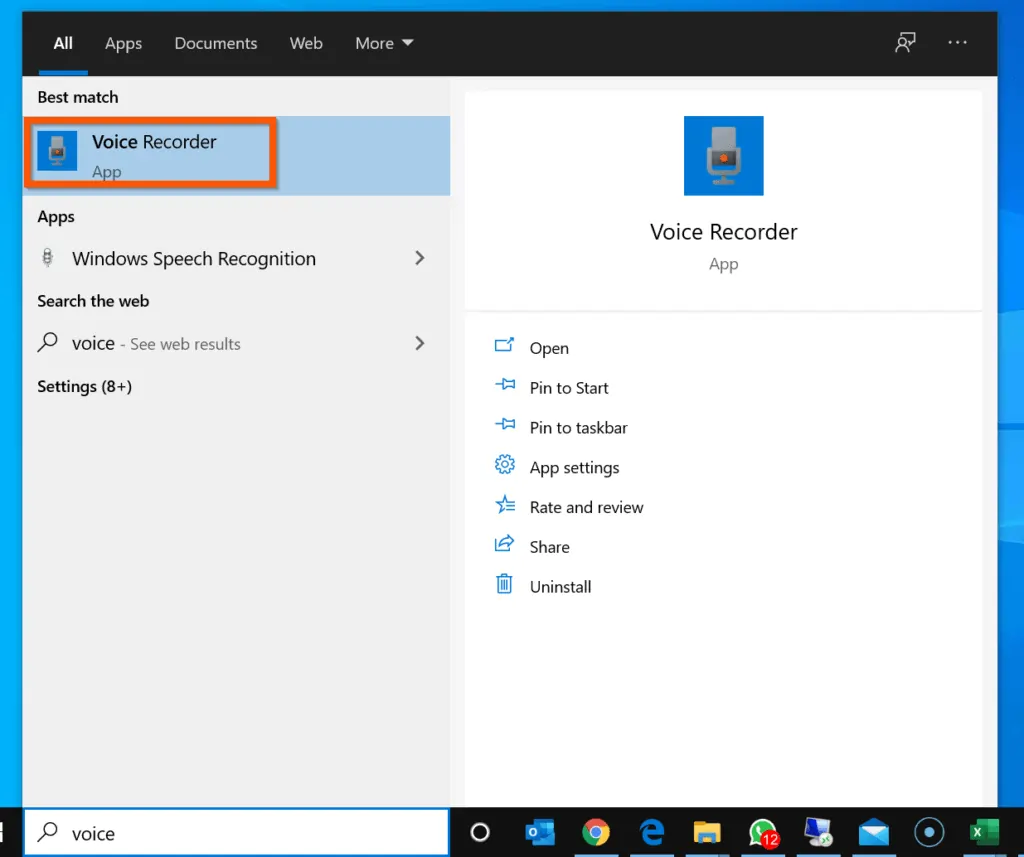
- Enter voice into Windows 10 search. Then, from the search results, click Voice Recorder App.
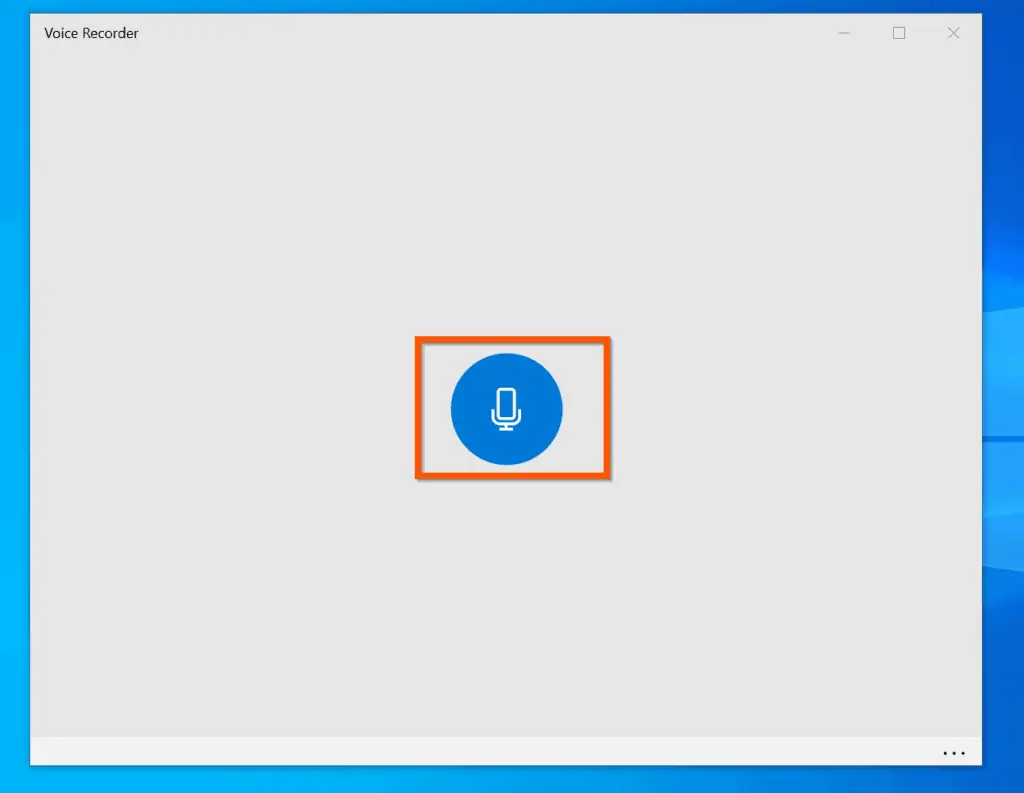
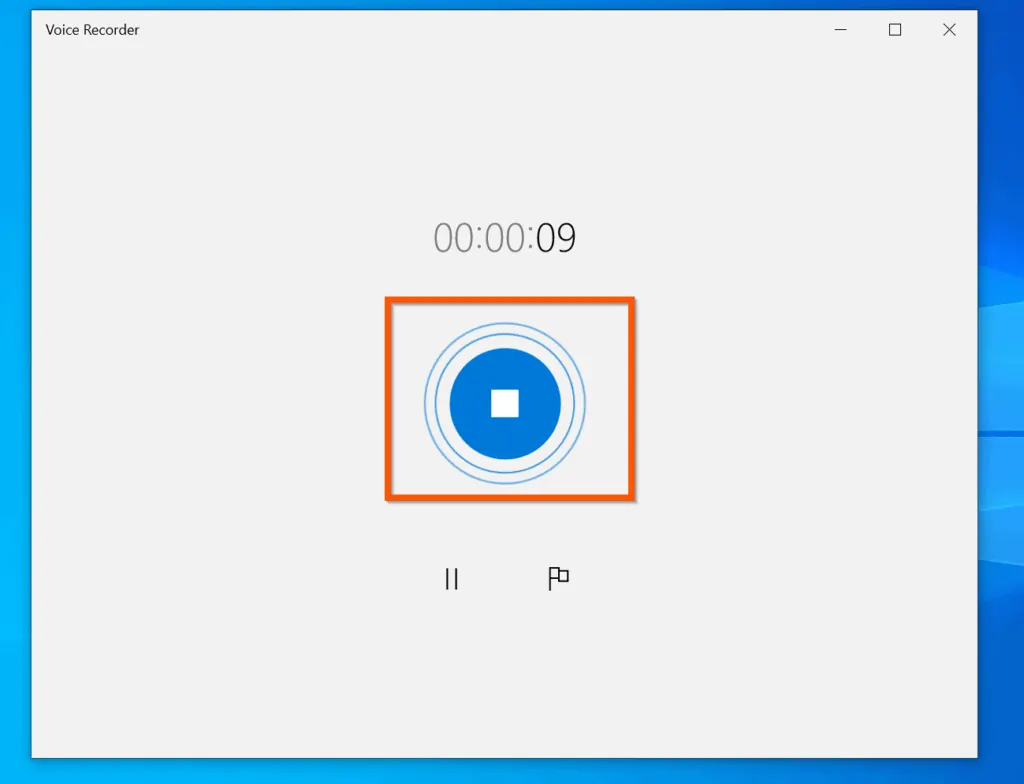
- On the Voice recorder app, click the Microphone icon and speak. The app will record your voice. When you finish recording, click the stop button – see the second screenshot below.
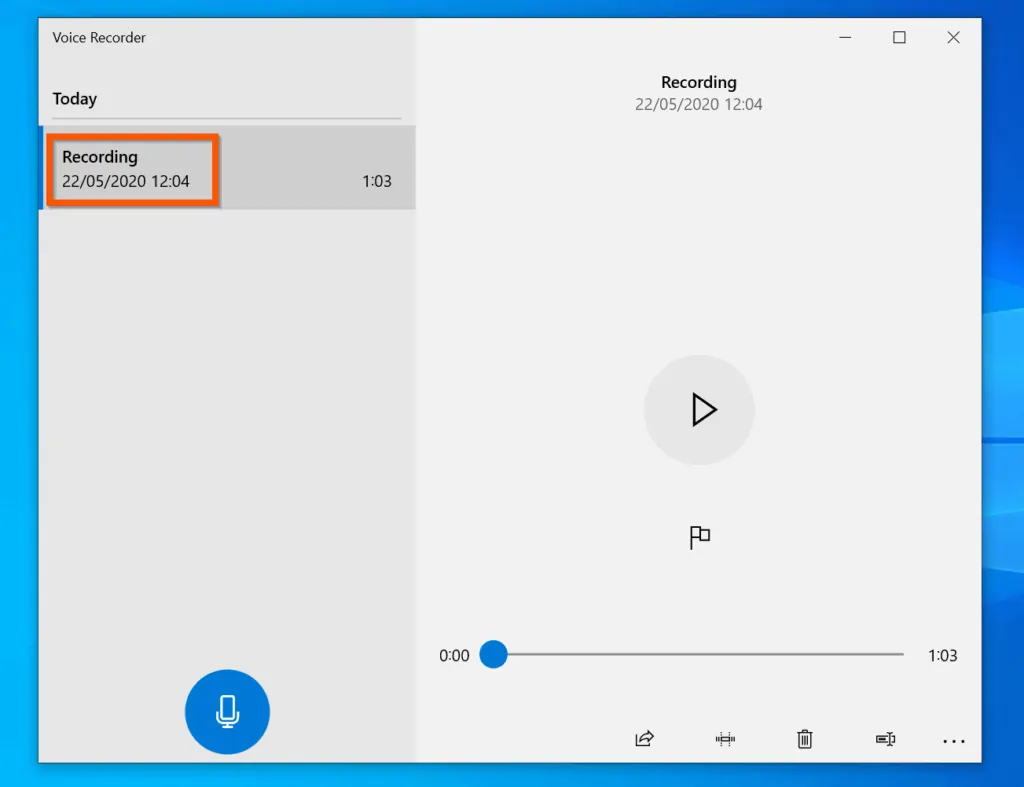
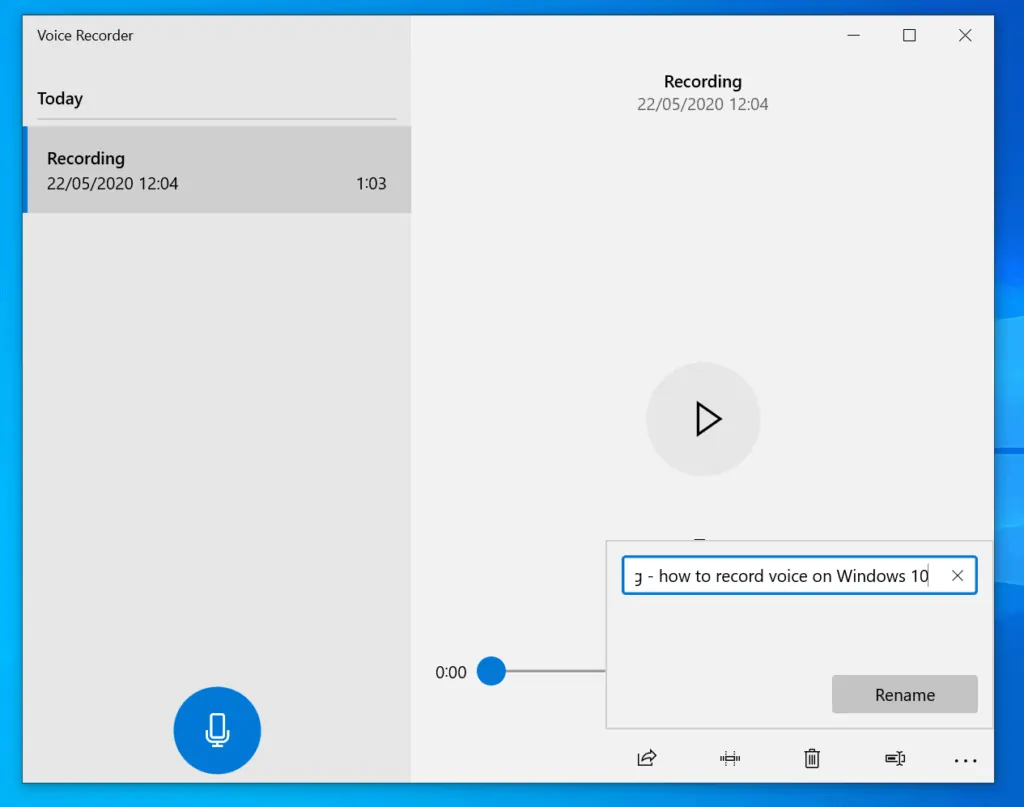
- To rename the recorded audio, on the bottom right, click the last icon (Rename icon). Then, enter a new name for the recorded file and press the enter key.

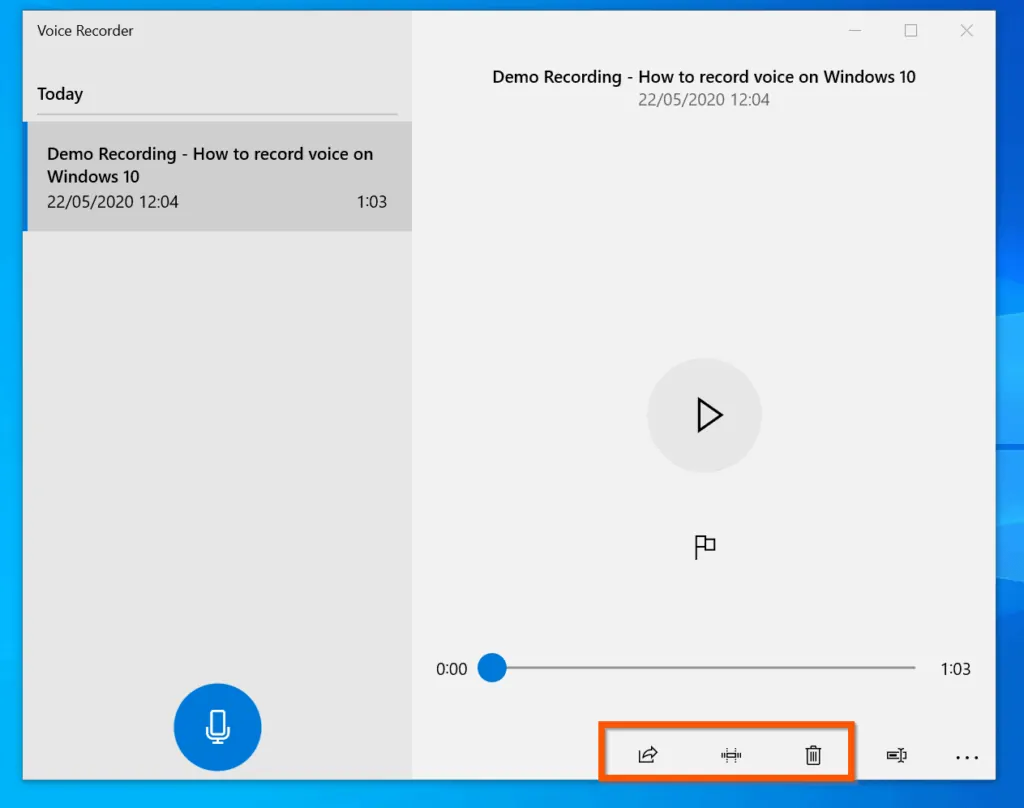
- You can also play back your recorded audio. To listen to your recorded audio, click the play button.

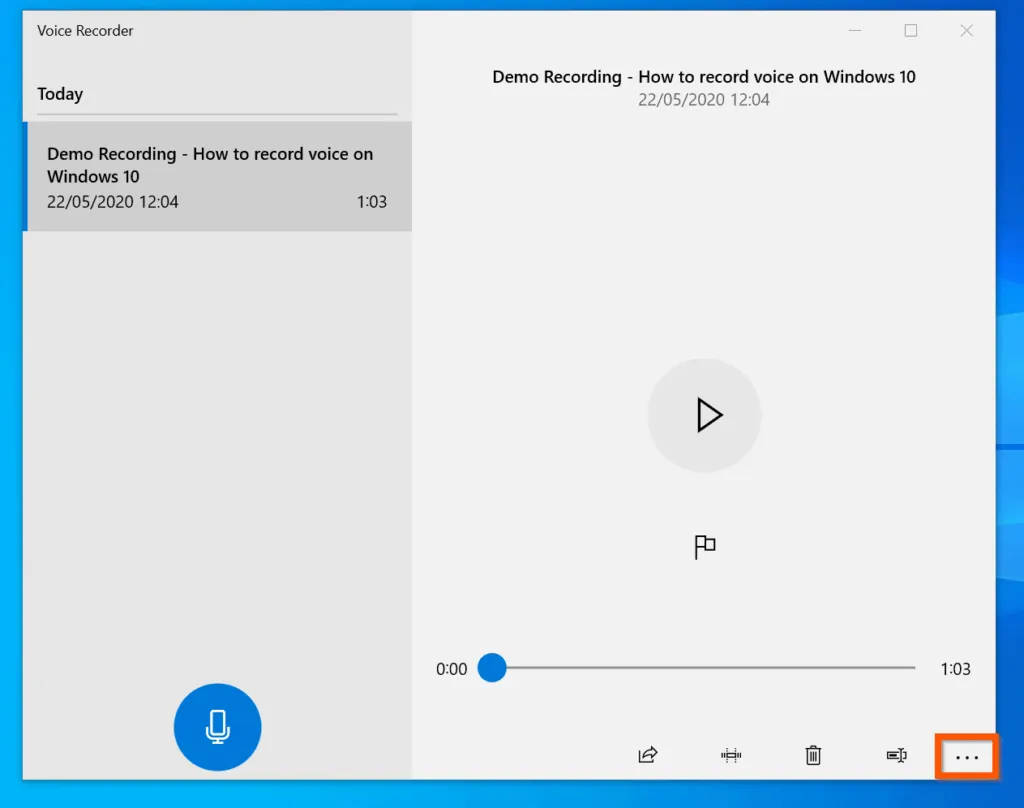
- Use the highlighted buttons (bottom right) to perform the following (counting from left) – Share, Trim or Delete the recorded audio file.
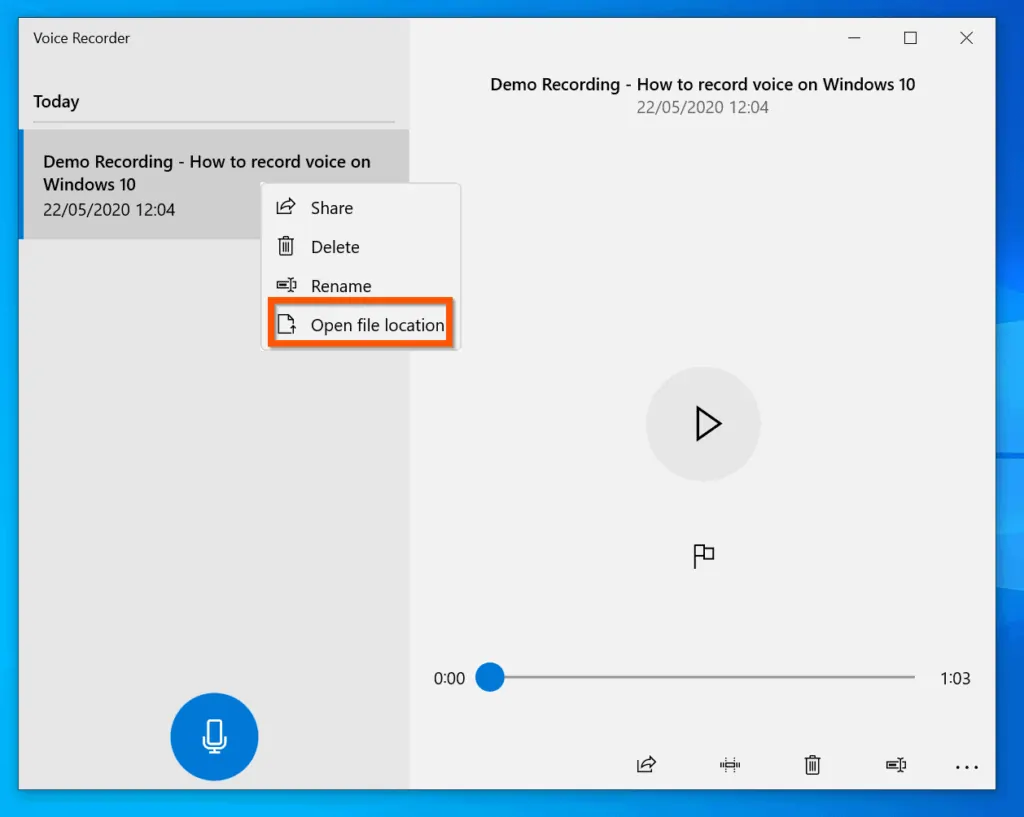
- Finally, to find the location of the saved audio file, right-click the file and select Open file location.
Conclusion
You can use the steps in this Itechguide to record audio on Windows 10! I hope you found this Itechguide helpful. If you found it helpful, click on “Yes” beside the “Was this page helpful” question below.
You may also express your thoughts and opinions by using the “Leave a Comment” form at the bottom of this page.
Finally, for more Windows 10 Itechguides, visit our WINDOWS 10 HOW-TO page. You may also find our Work from Home page very helpful.


![How To Run Sysprep (Generalize) In Windows 10 [2 Methods]](https://www.itechguides.com/wp-content/uploads/2022/05/8-2.webp)