
Free tools Windows power users keep installed
One-click scans. No signup required.
iTechGuides is reader-supported. When you buy through links on our site, we may earn an affiliate commission. As an Amazon Associate I earn from qualifying purchases. Learn more
To switch a 3D-printer nozzle without creating a clog or ruining a long print, use this order: identify the exact hotend and compatible nozzle, determine whether you are changing a nozzle or diagnosing a blockage, install it with the manufacturer’s hot procedure, update the firmware and slicer profile, run the calibration your printer requires, and verify extrusion with a small test print.
A nozzle swap is not a universal operation. Thread size, nozzle shape, heat-break interface, tightening method, safe temperature, and calibration behavior vary by printer. The instructions below use Prusa Research documentation as specific examples, not as a substitute for the service manual for your machine.
How do I know whether I need a new nozzle or a clog diagnosis?
A new nozzle is appropriate when the existing one is worn, damaged, or the wrong diameter for the part. It is not automatically the cure for poor extrusion. A blockage can be in the nozzle, the heat break, a PTFE tube, or another part of the hotend. Prusa Research explicitly warns that “Changing a relatively new nozzle to resolve a clog is not the solution!”
Quick wins for a faster PC:
Scan for outdated or missing drivers - takes under a minuteDriver Scan →Repair Windows errors before they cause bigger problemsFix Now →Fix the driver behind crashes, sound loss and screen glitchesFind Drivers →Start by recording what the printer is doing. These symptoms point to an extrusion problem, but none proves that the nozzle alone is at fault:
#1 Best Overall

- Premium Quality - 25 PCs high-quality brass nozzles, good abrasion resistance, heat resistance, and corrosion resistance.It is convenient for you to replace them in time to achieve high-quality printing.
- Package List - The 3D printer extruder nozzles come with 0.4 mm brass nozzles*25, nozzle cleaning needles*10, hexagon wrench*1, stainless steel tweezers*1, and a storage box.
- Strong Practicability - Storage box for easy carrying and storage of small accessories.The nozzle cleaning needle is made of high-quality stainless steel with good toughness and is not easy to break, and the nozzle can be cleaned from multiple angles.The hexagon wrench makes the adjustment of the nozzle easier.
- High Precision - Input diameter 1.75mm, smooth inner wall, extruder nozzle diameter error less than 0.02 mm.Greatly reduces the risk of print head leaks and avoids nozzle clogging.
- Wide Compatibility - Suitable for Creality Ender 3/Ender 3 Pro/Ender 3 V2/Ender 3 Max/Ender 5 Pro/Ender 3 S1/Ender 3 S1 Pro/Ender 3 Neo and CR 10 Series 3D printers.Compatible with all 1.75mm PLA ABS filament 3D printers.
| Symptom | What it can indicate | First check |
|---|---|---|
| Inconsistent line thickness | Partial obstruction, incorrect flow settings, slipping filament, or a worn drive gear | Extrude a short length manually and inspect the filament path |
| Gaps or missing layers | Under-extrusion caused by a clog, excessive speed, insufficient temperature, or an incorrect nozzle profile | Confirm the physical diameter and slicer profile agree |
| Filament curls upward and sticks to the nozzle | Restricted flow, a dirty nozzle tip, or a first-layer problem | Clean the outside of the tip and check extrusion before adjusting Z |
| Extruder clicking or skipping | Back pressure from a blockage, but also incorrect temperature, excessive retraction, or a mechanical feed problem | Do not treat the clicking sound as proof of a clogged nozzle |
| Plastic leaking around the heater block | Nozzle not seated against the heat break, a damaged sealing surface, or a loose assembly | Stop the print and follow the hot-tightening instructions for the hotend |
If filament cannot be pushed through at the printer’s permitted temperature, inspect the entire hotend rather than immediately buying another nozzle. On older PTFE-lined designs, the obstruction may be in the PTFE tube above the nozzle. A replacement tip will not remove that blockage.
Check compatibility before buying or installing a nozzle
Write down the exact printer model, hotend assembly, nozzle family, thread or mounting interface, and desired orifice diameter. A nozzle that looks similar can still have a different thread length or sealing geometry. Prusa’s procedure for the MK2.5/S, MK3/S/+, and MK3.5/S applies to their E3D V6 hotend arrangement. Newer Nextruder-based models can require a different nozzle assembly or an adapter; do not assume a V6 nozzle fits them.
Use the nozzle diameter to set an objective
| Priority | Typical direction | Trade-off |
|---|---|---|
| Fine lettering, miniature features, and narrow walls | Smaller orifice | Slower printing, lower flow capacity, and greater sensitivity to particles or a marginal clog |
| Fast, robust parts with broad walls | Larger orifice | Thicker lines and layers are possible, but small details and sharp corners become less precise |
| Abrasive composite filament | Follow the filament maker’s minimum diameter and material advice; consider a wear-resistant nozzle approved for your hotend | Small openings can trap particles, while abrasive fibers can erode unsuitable nozzle materials |
| Flexible filament | Use the diameter and hotend combination recommended by the filament maker | Flexible material can be harder to feed through a small or poorly supported path |
The filament manufacturer’s limits matter as much as the printer manufacturer’s. A diameter that works for ordinary PLA may be a poor choice for a composite or flexible formulation. Also verify that your heater can maintain the temperature and flow rate required by a larger nozzle.
Recommended Free Tools
Confirm the physical fit
- Match the nozzle interface and thread to the hotend, not merely the printer’s brand.
- Check whether the nozzle is intended for a heat-break arrangement, a cartridge-style assembly, or a proprietary module.
- Confirm the nozzle length and tip shape will not collide with the heater block, silicone sock, probe, or print surface.
- Use the manufacturer’s approved tool size. In Prusa’s E3D procedure, the nozzle is turned with a 7 mm socket while a 17 mm wrench or adjustable wrench holds the heater block.
- Have a non-flammable place ready for the removed hot nozzle.
How do I change a 3D printer nozzle without clogging it?
The safest sequence is to unload filament, heat only as specified by the maker, support the heater block, remove and install the nozzle without stressing wires, and verify the final seat before cooling. The following temperature and gap are examples for the Prusa MK2.5/S and MK3/S/+ hotend procedure; they are not universal settings.
Rank #2
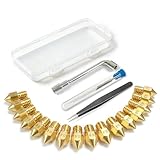
- All-in-One MK8 Nozzle Kit with Tools & Case: This complete set includes 16 brass nozzles: 8 high-use 0.4mm nozzles and 2 each of 0.2mm, 0.6mm, 0.8mm, and 1.0mm, along with an M6 hex wrench, tweezers, and 6 cleaning needles—all housed in a compact case for perfect organization and portability
- Compatible with Most Ender-3 & CR-10 Series: Designed as direct replacements for standard MK8 hotends. These nozzles are compatible with Creality Ender-3 Series (Ender 3, 3 Pro, 3 V2, 3 Max) and CR-10 Series (CR-10, 10S, 10S Pro, 10 Mini, 10 Max). Please Note: Not compatible with Ender-3 S1 Pro. Always verify your printer model before ordering
- Match the Nozzle Size to Your Project: Quickly switch between nozzle sizes to optimize print quality and speed: use 0.2mm for ultra-fine details and miniatures, 0.4mm for reliable everyday printing, and 0.6mm to 1.0mm for rapid prototyping or large models. One versatile kit unlocks your full creative potential
- Reliable Brass Construction for Consistent Performance: Made from quality brass for excellent heat transfer, durability, and consistent filament flow. This material helps maintain stable printing temperatures and is compatible with common 1.75mm filaments like PLA and ABS
- Easy to Install & Swap—Even for Beginners: The included tools make nozzle swapping or cleaning a quick, simple task. Whether you’re performing routine maintenance, clearing a clog, or experimenting with different sizes for new effects, this kit saves time and gets you back to printing faster
1. Prepare the printer and workspace
- Identify the exact service procedure for your printer and hotend. If the manual specifies a cold change or a different temperature, use that instead.
- Clear the build area and place tools where you can reach them without touching the heated assembly.
- Wear appropriate protection and keep other people away from the work area. Prusa Research’s warning is direct: “Heated parts can cause severe burns!”
- Keep the heater and thermistor wires visible. Do not twist, pull, or allow a wrench to catch them.
2. Unload the filament
Unload the filament using the printer’s normal procedure while the hotend is at the temperature required for that material. Remove the strand completely so it cannot bind while the nozzle is being turned. If the filament will not unload, diagnose that obstruction first; forcing the drive can grind the filament and make the blockage harder to remove.
3. Heat the hotend for the specified operation
For the Prusa V6 procedure, heat the hotend to 280 °C before loosening or tightening the nozzle. That number belongs to those printer families and that hotend procedure. Using 280 °C on a different machine without checking its manual can damage components or create a burn hazard.
4. Hold the heater block and remove the old nozzle
- Place the 17 mm wrench or adjustable wrench on the heater block.
- Use the specified socket or wrench on the nozzle and turn it while the hotend is supported.
- Apply controlled force. Do not let the heater block rotate, and stop if the block begins to twist or the wires move.
- Place the removed nozzle on a non-flammable surface and assume it remains hot.
5. Install and seat the replacement
- Start the replacement nozzle by hand to avoid cross-threading.
- Hold the heater block in the same way while tightening with the approved tool.
- On the Prusa V6 assembly, tighten the nozzle against the heat break while hot. Prusa describes an approximately 0.5 mm visible gap between the nozzle and heater block; that gap is part of that assembly’s sealing arrangement.
- Do not copy the 0.5 mm appearance to another hotend. Some systems use a different shoulder, gasket, or integrated nozzle and have no equivalent visual gap.
- Check that the heater and thermistor wires have not been pinched or damaged.
Incorrect seating can produce a leak inside the heater block or inconsistent extrusion. If the nozzle bottoms out against the block before contacting the heat break, or if plastic emerges from the threads, stop and consult the hotend-specific service instructions rather than compensating with excessive torque.
Why does my printer clog after changing the nozzle?
Post-swap clogs usually come from a mismatch or contamination introduced during the change, not from the diameter number alone. Use this symptom-to-cause path:
Rank #3

- Material: Premium brass. It has good thermal conductivity and high wear resistance, reducing oxidation reactions at high temperatures and achieving excellent printing results
- Dimension: Input diameter: 2.00mm; Output diameter: Size; Out thread: M6; Thread length: 5mm; The outer surface is marked with a size. You can easily identify the specifications of the nozzle
- Universal: Compatible with CR-10, CR-10mini, CR-6, CR-10S, MK8 I3, Creality Ender 2, Ender 3 (Pro), Ender 3 V2, Ender 3 Max, Ender 5, Ender 5 Pro, Ender 3 S1, Ender 3 S1 Pro, Ender 3 Neo and Ender 6. Suitable for most 1.75mm PLA ABS filament 3D printers
- Convenient: High precision, low cost DIY engraving machine, 3D printer preferred. Designed in smooth feeding chamfer with a perfect round aperture. It significantly reduces frictional resistance on the feed and makes the feeding process smoother
- What You Receive: 2pcs (0.2mm) printer nozzles, 16pcs (0.4mm) printer nozzles, 2pcs (0.6mm) printer nozzles, 2pcs (0.8mm) printer nozzles, 2pcs (1.0mm) printer nozzles. 10pcs stainless steel needles. A ten-grid parts box. A 6mm inner hexagon wrench
| What happens after the swap | Likely cause | Correction |
|---|---|---|
| No filament comes out immediately | Residual filament in the heat break, an incomplete unload, or a nozzle installed against the wrong surface | Follow the hotend’s cleaning procedure and verify the nozzle interface |
| Plastic leaks above the nozzle | Nozzle and heat break are not sealing, or the assembly was tightened cold when the design requires hot tightening | Stop heating and reassemble according to the maker’s instructions |
| Extrusion is thin after changing diameter | G-code was sliced for a different nozzle or the new profile uses unsuitable widths and speeds | Select the installed diameter and reslice |
| Extruder clicks during the first layers | First-layer height is too low, a partial clog remains, or flow is too high for the hotend | Check calibration, then perform the approved cleaning method |
| Print begins well and fails later | Heat creep, excessive volumetric flow, contamination, or a gradual restriction | Reduce demand within the printer’s guidance and inspect the filament path |
Never reuse an old G-code file simply because the model is unchanged. The file contains assumptions about line width, layer height, extrusion amount, speed, and often the nozzle diameter. Reslice after changing the physical nozzle.
Do I need to change slicer settings when I change nozzle size?
Yes. Select a printer profile that identifies the installed nozzle diameter, or create a custom profile if your slicer does not provide one. In PrusaSlicer, the official documentation directs users to choose the printer and nozzle size in the configuration wizard; a custom diameter requires a manually created profile.
Settings that must agree
| Setting or record | What to do | Why it matters |
|---|---|---|
| Physical nozzle diameter | Measure or read the installed nozzle and record it in the printer and slicer profiles | Determines the extrusion assumptions used to generate G-code |
| Printer firmware nozzle value | Set the value required by the printer’s interface | On the MK2.5/S and MK3/S/+ firmware, a mismatch with the G-code can trigger a warning |
| Extrusion width | Use the slicer’s calculated values or adjust deliberately for walls, infill, and first layer | Width controls line overlap, strength, and the flow demanded from the hotend |
| Layer height | Keep it within the printer and slicer guidance | Very tall layers can exceed the nozzle’s ability to form a stable line |
| Speed and volumetric flow | Reduce them if the larger line width or layer height exceeds heater capacity | A nozzle can be physically clear yet under-extrude when the hotend cannot melt material fast enough |
Prusa gives around 80% of nozzle diameter as a maximum layer-height guideline and about 110% as a general extrusion-width starting point. These are starting points, not guarantees for every material, printer, or motion system. For example, a 0.4 mm nozzle would have a roughly 0.32 mm guideline for maximum layer height, while a 0.6 mm nozzle would be around 0.48 mm; the printer and material may require lower values.
The Tool Desk
Outbyte Driver Updater FREEFix the driver behind crashes, sound loss and screen glitchesFind Drivers →Outbyte PC Repair FREERepair Windows errors before they cause bigger problemsFix Now →The firmware diameter record does not itself change extrusion flow during first-layer calibration. It helps the firmware compare its stored value with the G-code and warn about a mismatch. Actual flow is determined by the generated G-code and the printer’s extrusion system.
Rank #4

- 【Quality Assurance】MK8 nozzles are made of high-quality brass material. Heavy duty and provide a long service life. Easy to install and change
- 【Precise Design】3d printer nozzles can prevent the print head leakage effectively and produce consistent prints with smooth and glossy polish. Reduce the resistance from the corners and avoid blocking the filament with a rounded chamfer. Easy to identify with engraving the size on each nozzle
- 【Applicability and Compatibility】MK8 extruder nozzles fit for 3D Printers like Creality Ender 3/Ender 3 V2/Ender 3 Pro/Ender 3 Max/Ender 5 Series/CR 10 Series, compatible with all 1.75mm PLA ABS 3D printers. Fit exactly like the original
- 【Package Include】Printer nozzles come with 5 pieces of MK8 nozzles in 0.4mm
- 【After Sales Service】We pay great attention to the buyer’s user experience. If you have unsolvable problems during installation and use, please feel free to contact us, our after-sales technical team will provide you with detailed solutions within 24 hours
Calibrate and test before starting a long print
Calibration requirements depend on the printer. Prusa requires first-layer calibration after nozzle replacement on some families, while its nozzle documentation says it is not required on the MK4/S, MK3.9/S, and XL models. Check the manual for the exact machine instead of applying either rule universally.
Use this verification sequence
- With the correct profile loaded, command a small extrusion into free air or onto a protected surface. The strand should emerge continuously rather than pulsing, curling sharply, or stopping.
- Inspect the nozzle tip for a burr, trapped filament, or plastic leaking from the threads.
- Run the required first-layer or Z calibration for your model. A nozzle change can alter the tip’s height even when the nominal diameter is unchanged.
- Print a small single-layer square or other short test that uses the same material and temperature as the planned job.
- Look for a continuous first layer, even line width, clean corners, and no clicking. Stop if the nozzle drags, the line is transparent from excessive squashing, or gaps remain.
- Only then begin the long, high-value, or difficult print.
This short test isolates installation and profile problems before they consume hours of material. It is especially important when changing both nozzle diameter and filament type at the same time, because either change can affect flow.
Independent reader supportYour contribution helps us test, update, and keep practical guides available for everyone.How do I clear a clog safely?
Use the cleaning method documented for the exact printer and hotend. A newer-model Prusa procedure begins by removing filament, then pushing fresh filament through at temperatures selected for the previously used material; it may recommend a cold pull when appropriate. Older PTFE-lined designs may require separate inspection of the tube or heat break.
When a cold pull is appropriate
A cold pull can draw softened residue from a compatible nozzle, but it is not suitable for every material or nozzle construction. In the Prusa MINI guidance, Prusa recommends PLA or cleaning filament when material can reach the nozzle and says that Nozzle X should use cleaning filament rather than a cold pull. Follow the procedure for your own nozzle coating and model.
Best Value

- Precision & Consistency: Engineered with a precision-machined nozzle, this A1 Mini Hot End ensures ultra-smooth and stable filament extrusion. It delivers exceptional layer-to-layer adhesion and fine detail reproduction, significantly reducing common issues like under-extrusion, stringing, or layer shifting for flawless 3D prints every time.
- Wear-Resistant Hardened Steel: Made from premium hardened steel, this A2L nozzle is built to withstand the most abrasive filaments. It offers superior durability, outlasting standard brass nozzles by up to 5-10 times, making it the perfect long-term, cost-effective upgrade parts.
- Leak-Free: Featuring precisely cut threads and a perfectly flat sealing surface, this replacement part guarantees a tight, leak-proof seal. This precision engineering eliminates the risk of filament oozing or clogging, ensuring consistent back pressure and reliable extrusion even during long, complex multi-hour prints.
- High-Temperature: The A1 Mini Hotend operates reliably at high extrusion temperatures (up to 350°C). The A1 nozzle is fully compatible with high-performance engineering materials like ABS, ASA, PETG, PA (Nylon), and PC. It maintains structural integrity and thermal stability under extreme conditions, allowing you to expand your printing capabilities beyond standard PLA.
- Quick Swap & Compatibility: Designed as a direct plug-and-play replacement, this A2L nozzle hotend is perfectly compatible with Bambu Lab A1, A1 Mini, and A2L Series hotend assemblies. No additional modifications or tools are required for installation.
When cleaning does not solve the problem
- If filament cannot reach the nozzle, inspect the path above it rather than repeating cold pulls.
- If the PTFE tube is deformed, discolored, or not fully seated, replace or reseat it according to the manufacturer’s instructions.
- If plastic leaks around the heater block, correct the nozzle-to-heat-break seal before printing again.
- If the drive gear grinds filament, clean the gear and check idler tension after the hotend is clear.
- If extrusion is still inconsistent with a clean path and correct profile, inspect the heater, thermistor, and hotend cooling system.
What nozzle size should I use for detailed prints?
Choose the smallest diameter that can reliably pass the material and deliver the required throughput, not simply the smallest nozzle available. A fine nozzle can resolve narrow features and small lettering, but it has less tolerance for particles, contamination, and an imperfect first layer. A larger nozzle can produce wider, taller lines and reduce print time for broad geometry, but it cannot reproduce the same fine detail.
For abrasive composites, prioritize the filament maker’s nozzle guidance and the hotend maker’s compatibility list. Fibers and mineral particles can damage a soft nozzle or lodge in a small opening. For flexible filament, a small nozzle combined with a long or poorly supported feed path can increase feeding difficulty. Temperature, retraction, and speed still need material-specific tuning after the diameter is selected.
How long should a nozzle last?
There is no universal replacement interval. Prusa states that its stock brass nozzle can last “many hundreds of printing hours” when it is not used with abrasive materials. That is a qualified manufacturer statement, not a lifetime guarantee for every printer, temperature, filament, or operating schedule.
Do these 3 things before closing this tab:
1Scan for outdated or missing drivers - takes under a minute2Clear out junk files and repair common Windows errors3Fix the driver behind crashes, sound loss and screen glitchesReplace the nozzle when its tip is visibly damaged, extrusion remains inconsistent after the hotend is clean and correctly assembled, or wear has enlarged the opening enough to change line width. Abrasive materials can shorten service life substantially, so record the material used and inspect the tip rather than relying on hours alone.
A practical pre-print checklist
- Exact printer and hotend identified.
- Replacement nozzle interface, length, material, and diameter confirmed.
- Filament unloaded without grinding or forcing the drive.
- Manufacturer’s temperature and hot-swap procedure available.
- Heater block supported and heater/thermistor wires protected.
- Nozzle seated using the hot or cold method specified for that assembly.
- No plastic leak visible around the nozzle or heater block.
- Firmware nozzle value and slicer profile match the physical nozzle.
- Layer height, extrusion width, speed, and material settings are within guidance.
- Required first-layer or Z calibration completed.
- Short extrusion check and small test print pass before the full job.
Bottom line
Reliable nozzle switching is a compatibility-and-verification task, not just a matter of unscrewing one tip and installing another. Diagnose the whole hotend, use the model-specific installation method, keep the nozzle and profile in agreement, calibrate where required, and prove the change with a short test print. Those steps prevent most avoidable clogs, leaks, and failed prints without treating every extrusion problem as a bad nozzle.
Quick Recap
Product prices and availability are accurate as of the date/time indicated and are subject to change. Any price and availability information displayed on Amazon at the time of purchase will apply.

