
iTechGuides is reader-supported. When you buy through links on our site, we may earn an affiliate commission. As an Amazon Associate I earn from qualifying purchases. Learn more
For smooth podcast episode handoffs on a YouTube live stream, prepare the next episode as a separate OBS scene, choose whether the change is a cut, fade, spoken bridge, or branded slate, and rehearse both the picture and audio before going live. A visual fade alone does not guarantee a clean audio handoff, so check the actual encoder output.
Choose the kind of handoff before you configure OBS
Decide what viewers should hear and see as one episode ends and the next begins. There is no universally prescribed transition length: match the pacing of your show, then verify the result in rehearsal.
| Approach | What happens | Consider |
|---|---|---|
| Direct cut or fade | Move directly from the outgoing episode scene to the incoming one. | A cut is immediate; a fade softens the visual change. Decide separately whether outgoing audio stops, fades, or continues. |
| Spoken bridge | Use a host introduction or short narration to connect the episodes. | Set the outgoing audio level and timing so the bridge is intelligible and the next episode does not start underneath it unexpectedly. |
| Branded slate | Show a title card or other interstitial visual between episodes. | Choose whether the slate is silent, carries music, or sits under narration; avoid leaving viewers with unintended dead air. |
These are production choices, not formats ranked by OBS or YouTube. A simple fade is a reasonable starting point for a conversational show, but test the timing with your actual material.
Do these 3 things before closing this tab:
1Clear out junk files and repair common Windows errors2Fix the driver behind crashes, sound loss and screen glitches3Repair Windows errors before they cause bigger problemsPrepare episode media and scenes
Load each episode in a predictable way
OBS Media Sources support common audio formats such as MP3, AAC, OGG, and WAV, and video formats including MP4, TS, MOV, FLV, MKV, AVI, GIF, and WebM. If you want OBS to play an ordered playlist, its VLC Video source can do that, but VLC must be installed for the source to be available. See the OBS Media Sources documentation.
#1 Best Overall

- [XLR Mic Input] One XLR microphone input interface is set on the gaming audio mixer, which is great to up your audio quality with your XLR setup. The XLR mixer is a stepping stone to upgrade your live streaming. Audio mixer offered built-in 48V phantom power which opens up more choices for mics. Directly use it with your condenser microphone but do not solve added peripherals. (NOT available for USB mic)
- [Individual Channel Control] Gaming audio mixer for one mic recording with smooth volume slider fader take your streaming recording to a whole new level with full pleasure. Four independent channels set on the DJ mixer give audio volume of the MICROPHONE, LINE IN, HEADPHONE, and LINE OUT channels individual control. Configurable on the PC audio mixer instead of just operating on your game or streaming software.
- [Mute and Monitor] The front mute and monitor buttons but not at the back, make it easier to get the audio interface use. Ability to mute audio, the audio mixer for streaming prevents background noise from damaging your live broadcast. Real-time feedback between speaking and hearing will not distract your attention, which encourage you to speak more confidently. The sturdy-built control button allow you to operate freely and easily during live streaming.
- [Sound Effects] The computer sound mixer supports four pre-recorded customized button that can be recorded and activated at the press of button to post production. 6 kinds of voice changing modes change your output style. 12 auto tune changes the tone of your voice. The podcast mixer being able to add different and fun effects is a huge bonus for your streaming or game voice.
- [Controllable Vibrant RGB] RGB button on the audio mixer DJ meets different live streaming themes. Lights on the video mixer is vibrant but not harsh on your eyes. Flowing or frozen RGB color rotation in a decent pace presents a greatly strong impression as a "light show" to your audience. Even a streaming equipment accessory will not be dull looking when video production.
Set up a scene for the outgoing episode, any bridge or slate, and the incoming episode. For each media source, check its visibility and playback behavior: whether it restarts when shown, loops, or unloads when it is not visible. Those choices affect whether a clip starts at the intended point or appears late when you switch scenes.
Keep the next scene ready
OBS Studio Mode separates the live scene from the scene you are preparing. Select the incoming scene in the preview first, confirm it looks right, and then transition it to the live output. OBS provides Fade and Cut transitions and lets you configure a transition duration. You can also add a configured transition as a Quick Transition in Studio Mode. The OBS Studio Mode documentation explains the workflow.
Rank #2
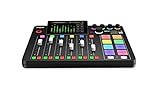
- EVERYTHING IN ONE DESK UNIT: 4 XLR mic inputs, headphone outs, sound pads and effects, no separate interface or PC mixer needed
- STUDIO SOUND, ZERO EXPERTISE: APHEX audio processing presets make voices broadcast-ready with one tap
- PODCAST, STREAM OR RECORD: multitrack to computer, microSD or USB drive, works standalone without a computer
- SHOW CONTROL: 8 customizable SMART pads trigger music, sound effects and mix-minus phone calls live
- IN THE BOX: RØDECaster Pro II console, power supply and USB-C cable, add your microphones
Set the visual transition and audio handoff
- Choose a transition: In OBS, select a scene transition such as Fade or Cut and set its duration. Treat the duration as a show-specific choice, not a YouTube standard.
- Prepare the incoming scene: In Studio Mode, choose the next episode scene in Preview. Confirm the correct media source, title or artwork, and intended playback position.
- Decide what happens to outgoing audio: Determine whether it ends before the switch, fades under narration, or continues into a slate. A video transition does not automatically create the audio result you want.
- Check audio sources and routing: Confirm the episode source is active in the correct scene and that the stream output carries it. OBS supports audio input and output capture scoped to a scene. If a hardware device is also selected in global audio settings, selecting it again in a scene can create echo; avoid unintended duplicate capture.
- Make the switch: When the handoff is ready, trigger the configured transition or Quick Transition to take the prepared scene live.
OBS source persistence and audio behavior depend on how your scenes and sources are arranged. Listen to the stream output during rehearsal instead of assuming that changing scenes will fade or stop every audio source as intended. Consult the OBS audio sources documentation for capture options.
What’s actually slowing this PC down?
Pick the symptom - the matching free tool is one click away.
Connect OBS to YouTube and rehearse the complete handoff
- Get the stream connection details: YouTube’s encoder workflow uses the stream URL and stream key provided in YouTube Studio. Keep the key private; anyone who obtains it may be able to send a stream to your channel.
- Enter them in your encoder: Configure OBS with the YouTube stream URL and key, then confirm that OBS is sending the intended program output.
- Test like the real show: Play representative episode audio and video, including the outgoing clip’s ending, the bridge or slate if used, the transition, and the incoming clip’s start. YouTube advises: “Tests should include audio and movement in the video similar to what you’ll be doing in the stream.”
- Listen and watch the output: Check for clipped words, a gap, doubled audio, an unexpected restart, late media, or a sudden volume change. Adjust the scene and source behavior, then test again.
- Monitor the live event: Check YouTube’s stream health and messages during the broadcast so you can catch delivery problems as well as production mistakes.
YouTube describes encoder software as useful for external audio/video hardware and more advanced productions; examples of hardware include microphones, headsets, and mixers. Its encoder guidance supports AAC or MP3 audio and recommends a two-second keyframe interval, warning not to exceed four seconds. These are stream-configuration recommendations, not evidence that a particular transition improves audience retention. See YouTube’s live encoder settings and YouTube’s encoder setup guidance.
Rank #3

- 【All-in-One Audio Setup for Creators】Complete Podcast Equipment Bundle for Streaming, Recording & Content Creation.Designed as a complete audio solution, this kit includes an audio mixer, condenser microphone, and essential accessories—ideal for building a clean and efficient setup without extra equipment.
- 【Clear, Balanced & Reliable Sound】Enhanced Vocal Clarity with Built-in Noise Reduction.Capture clean, natural sound with reduced background noise. Optimized for streaming, podcasting, voice recording, and everyday content creation.
- 【Follow Singing Mode for Live Performance】Hear the Original Track While Your Audience Hears Only Your Voice & Music.Perfect for live singing, TikTok streams, and online performances. Monitor the original vocals privately while delivering a clean mix to your audience.
- 【Voice Changer & Sound Effects】Multiple Voice Styles & Built-in Effects for Interactive Content.Switch between different voice styles and trigger sound effects like applause or laughter to enhance engagement during streaming or recording sessions.
- 【Real-Time Audio Control】Adjust Bass, Treble, Reverb & Pitch with Ease.Fine-tune your sound in real time to match different scenarios, from chatting and gaming to singing and recording.
Troubleshoot common transition problems
- There is a silent gap: Check whether the outgoing source ends before the incoming source starts, whether the new source is visible and playing, and whether the handoff includes an intentional bridge or slate.
- The episode restarts unexpectedly: Review the Media Source restart and loop behavior and how the source is activated when its scene becomes visible.
- The incoming clip appears late or at the wrong point: Check the source’s unload and visibility behavior, then rehearse the same scene activation sequence you will use live.
- Audio echoes or doubles: Look for the same hardware device captured both in global audio settings and a scene-specific source. Remove unintended duplicate capture.
- The picture fades but audio cuts abruptly: Set and test the audio handoff independently. A visual scene transition does not establish how your particular audio sources behave.
- The transition feels too slow or abrupt: Adjust the configured duration to fit your program’s pacing and rehearse again; there is no documented universal ideal duration.
- YouTube reports stream-health trouble: Check the encoder connection and stream settings, then monitor YouTube’s messages. Do not assume an editorial scene change is the cause without checking the output and health indicators.
Or let it run in the cloud
If the episodes are prerecorded and your goal is to keep a YouTube stream running without leaving a computer on, StreamNeo is a cloud option: upload your recording or build a playlist, add your YouTube stream key once, and go live. It loops uploaded videos; it does not broadcast a live camera. Nothing has to stay on at home, and the video streams as uploaded at any quality up to 4K 60fps for one flat price per slot. StreamNeo automatically recovers if YouTube drops the stream. The first day is free with no card; one free day is available per account. Monthly billing is $9.99 per month. The service is YouTube-only. Start your free day with StreamNeo.
Quick Recap
Best Value

- Upgraded Podcast Equipment Bundle: Elevate your podcasting, streaming, and studio recording with the E2 Gen2 podcast equipment bundle. This all-in-one solution offers an intuitive design that allows you to start your podcasting journey right away. With two XLR combo inputs and a high-quality preamp offering 60dB gain, E2 GEN2 is perfect for co-hosts. Plus, the USB-C and 3.5mm ports make it easy to connect to phones and computers, ensuring smooth and clear audio every time
- Crystal-Clear Audio with XLR Interface: The E2 Gen2 podcast interface has two premium and low-noise preamps, delivering up to 60dB of gain. This ensures you get rich, clean sound even when using dynamic microphones. Whether you're a beginner or a pro, the E2 gen2 eliminates needing an external preamp. Noise reduction technology keeps unwanted sounds like fan noise away, so your podcast recordings stay pristine
- Add Personality with 8 Custom Sound Effects: Bring your content to life with the E2 gen2's 8 customizable sound effect buttons. Perfect for podcasters and streamers, you can upload your favorite intro music, quirky sound bites, or custom effects to engage your audience. Each button supports up to 20 seconds of recording with adjustable volume, making it the ultimate podcast mixer to add personality to your shows
- Ultimate Convenience for Podcasters and Content Creators: The E2 Gen2 podcast mixer features a one-touch mute button, so you can easily handle any mishaps during podcast recording. The monitoring button lets you listen to your own voice while gaming, allowing seamless communication with teammates and clear game audio. The Loopback function enables you to start a live stream with just one computer. Plus, the built-in 1500mA battery offers up to 8 hours of use, so your podcast never has to stop
- Enhance Your Podcast Atmosphere: Add flair to your podcast with E2 Gen2’s pitch-changing effects. Whether creating a fun atmosphere or protecting your privacy, the interface's versatile options let you adjust your voice for added entertainment. Choose from six preset reverbs to set the perfect mood for any show. SingAlong mode even allows you to hear the singing without your audience hearing it, letting you shine as a performer
Rank #4

- Pro performance with great pre-amps - Achieve a brighter recording thanks to the high performing mic pre-amps of the Scarlett 3rd Gen. A switchable Air mode will add extra clarity to your acoustic instruments when recording with your Solo 3rd Gen
- Get the perfect guitar and vocal take with - With two high-headroom instrument inputs to plug in your guitar or bass so that they shine through. Capture your voice and instruments without any unwanted clipping or distortion thanks to our Gain Halos
- Studio quality recording for your music & podcasts - Achieve pro sounding recordings with Scarlett 3rd Gen’s high-performance converters enabling you to record and mix at up to 24-bit/192kHz. Your recordings will retain all of their sonic qualities
- Low-noise for crystal clear listening - 2 low-noise balanced outputs provide clean audio playback with 3rd Gen. Hear all the nuances of your tracks or music from Spotify, Apple & Amazon Music. Plug-in headphones for private listening in high-fidelity
- Everything in the box: Includes Pro Tools Intro+, Ableton Live Lite, Cubase LE, and Hitmaker Expansion: a suite of essential effects, powerful software instruments, and easy-to-use mastering tools
Product prices and availability are accurate as of the date/time indicated and are subject to change. Any price and availability information displayed on Amazon at the time of purchase will apply.

