
iTechGuides is reader-supported. When you buy through links on our site, we may earn an affiliate commission. As an Amazon Associate I earn from qualifying purchases. Learn more
Secure Boot is enabled in your computer’s UEFI firmware, not from a normal Windows Settings switch. It checks whether boot software has a trusted digital signature before allowing it to run, helping block boot-level malware and tampered bootloaders.
Before changing anything, check whether Windows 10 already uses UEFI and whether the system disk uses GPT. If Windows is installed in Legacy BIOS mode on an MBR disk, convert it with MBR2GPT before switching firmware settings. Simply changing Legacy to UEFI can make Windows unbootable.
Check whether Secure Boot is already enabled
Use System Information
- Press Windows key + R.
- Type
msinfo32and press Enter. - In System Summary, find BIOS Mode and Secure Boot State.
| BIOS Mode | Secure Boot State | Meaning |
|---|---|---|
| UEFI | On | Secure Boot is already enabled. |
| UEFI | Off | UEFI is active, but Secure Boot is disabled. |
| Legacy | Unsupported | Windows is booting through Legacy BIOS. Check the disk and convert it before changing firmware mode. |
Use PowerShell
Open Windows PowerShell as administrator and run:
Confirm-SecureBootUEFITruemeans Secure Boot is enabled.Falsemeans the PC uses UEFI but Secure Boot is disabled.Cmdlet not supported on this platformusually means Windows is booted in Legacy mode or the firmware does not support Secure Boot.Access is deniedmeans PowerShell was not opened as administrator.
Check whether the Windows disk is GPT
Secure Boot requires Windows to boot in UEFI mode, and UEFI installations normally use a GPT system disk.
Check with Disk Management
- Press Windows key + R.
- Enter
diskmgmt.msc. - In the lower pane, right-click the disk containing Windows. It is often Disk 0, but do not assume that on a computer with multiple drives.
- Select Properties, open the Volumes tab, and check Partition style.
The required value is GUID Partition Table (GPT). If it says Master Boot Record (MBR), follow the conversion procedure below.
#1 Best Overall

- [Package Offer]: 1 Pack USB Flash Drive 8GB Available in black.
- [Plug and Play]: No need to install any software, Just plug in and use it. The metal clip rotates 360° round the ABS plastic body which. The capless design can avoid lossing of cap, and providing efficient protection to the USB port.
- [Compatibilty and Interface]: Supports Windows 7 / 8 / 10 / Vista / XP / 2000 / ME / NT Linux and Mac OS. Compatible with USB 2.0 and below. High speed USB 2.0, LED Indicator - Transfer status at a glance.
- [Suitable for All Uses and Data]: Suitable for storing digital data for school, business or daily usage. Apply to data storage of music, photos, movies, software, and other files.
- [Warranty Policy]: 12-month warranty, our products are of good quality and we promise that any problem about the product within one year since you buy, it will be guaranteed for free.
Check with PowerShell
Get-Disk | Select-Object Number, FriendlyName, PartitionStyle, Size | Format-TableIdentify the disk containing the Windows installation and confirm that its PartitionStyle is GPT.
Before changing UEFI or Secure Boot
Back up important files
Secure Boot changes are normally straightforward, but a wrong boot-mode setting or failed disk conversion can temporarily prevent Windows from starting. Back up important documents before continuing.
Find your BitLocker recovery key
Changing firmware settings can cause BitLocker or Windows Device Encryption to request its 48-digit recovery key. Make sure the key is available before restarting into firmware.
Recommended Free Tools
To back it up from Windows:
- Open Control Panel.
- Select System and Security > BitLocker Drive Encryption.
- Next to the operating-system drive, select Back up your recovery key.
- Save an additional copy somewhere that is not the encrypted drive.
On a personal PC, the key may also be available at Microsoft’s recovery-key page. A work or school computer may store it in the organization’s Microsoft account or with IT. Match the key’s Recovery key ID with the ID shown on the BitLocker screen.
Suspend BitLocker if it is enabled
From an elevated Command Prompt, run:
manage-bde -protectors -disable C:After Windows starts normally with Secure Boot enabled, re-enable protection:
manage-bde -protectors -enable C:Enable Secure Boot when Windows already uses UEFI and GPT
1. Open the UEFI firmware settings
- Open Start > Settings.
- Select Update & Security.
- Select Recovery.
- Under Advanced startup, select Restart now.
- Choose Troubleshoot > Advanced options > UEFI Firmware Settings.
- Select Restart.
If UEFI Firmware Settings is missing, restart the PC and press the manufacturer’s firmware key as it starts. Common keys include Delete, Esc, F1, F2, F10, and F12. The correct key varies by manufacturer.
Rank #2

- Ultra-compact and portable contoured styling
- Share your photos, videos, songs and other files between computers with ease
- Protect your private files with included SanDisk SecureAccess software (Password protection uses 128-bit AES encryption and is supported by Windows Vista, Windows 7, Windows 8, Windows 10 and Mac OS X v10.6+ (Software download required for Mac, see official SanDisk Secure Access website for more details.))
- Store more with capacities up to 8GB (1 gigabyte (GB) = 1 billion bytes. Some capacity not available for data storage.)
2. Enable the required firmware options
Firmware interfaces differ, so the options may be under Boot, Security, Authentication, or Advanced. Look for settings with names such as:
Free tools Windows power users keep installed
One-click scans. No signup required.
- Boot Mode, UEFI Boot, or UEFI Only
- Legacy Boot, Legacy Support, or CSM
- Secure Boot
- OS Type
- Key Management
Make these changes:
- Set the boot mode to UEFI or UEFI Only.
- Disable Legacy Boot, Legacy Support, or CSM.
- Set Secure Boot to Enabled.
- If there is an OS Type setting, select Windows UEFI mode, Windows, or the standard Windows option. Do not select Other OS unless your manufacturer specifically requires it.
- If the firmware says that Secure Boot keys are missing, choose Install Default Secure Boot Keys, Restore Factory Keys, or similar.
- Save the changes and exit, commonly with F10 or Save Changes and Exit.
Do not delete the Platform Key, Key Exchange Keys, allowed-signature database, or revoked-signature database unless you have a specific key-management plan. Restoring default keys can affect custom bootloaders and some non-Windows operating systems.
3. Verify the result in Windows
After Windows starts, open msinfo32 again. The expected values are:
BIOS Mode: UEFI
Secure Boot State: On
You can also run this command in elevated PowerShell:
Confirm-SecureBootUEFIThe result should be:
TrueConvert an MBR Windows installation before enabling Secure Boot
If msinfo32 shows BIOS Mode: Legacy and the Windows disk is MBR, use Microsoft’s MBR2GPT tool. Do not switch the firmware to UEFI first.
Do these 3 things before closing this tab:
1Clear out junk files and repair common Windows errors2Scan for outdated or missing drivers - takes under a minute3Repair Windows errors before they cause bigger problemsMBR2GPT requirements
Validation can fail if the disk has more than three primary partitions, an extended or logical partition, an invalid BCD configuration, an unsupported partition type, or insufficient room for the EFI System Partition and GPT metadata. The tool is intended for the Windows system disk, not as a general-purpose converter for any data disk.
Rank #3

- 【What You Get】 1 pieces 8 GB small capicity bulk usb flash drives,which allow you to classify your files, music, pictures etc. Great choice for enhancing your Name's visibility as the pen drives can be printed on
Convert the system disk
- Open PowerShell as administrator and identify the Windows disk:
Get-Disk | Select-Object Number, FriendlyName, PartitionStyle, Size | Format-TableRecord the correct disk number. The following example uses Disk 0; replace it if necessary.
- If BitLocker is enabled, suspend its protectors:
manage-bde -protectors -disable C:- Open Command Prompt as administrator and validate the disk:
mbr2gpt.exe /validate /disk:0 /allowFullOSContinue only if the command reports:
MBR2GPT: Validation completed successfully- Convert the disk:
mbr2gpt.exe /convert /disk:0 /allowFullOS- Restart immediately into firmware setup.
- Change the boot mode to UEFI and disable CSM or Legacy Boot.
- Choose Windows Boot Manager as the first boot entry.
- Enable Secure Boot, save, and reboot.
- Verify BIOS Mode: UEFI and Secure Boot State: On in
msinfo32. - Resume BitLocker:
manage-bde -protectors -enable C:Do not use DiskPart’s convert gpt command on an active Windows disk. That command requires an empty disk; preparing it normally involves deleting the existing partitions.
Common Secure Boot problems
Secure Boot is not listed
The system may still be using Legacy or CSM mode, the device may not support Secure Boot, or the firmware may be missing its default keys. Disable Legacy/CSM only after confirming that Windows is installed for UEFI, and check the manufacturer’s documentation for the exact menu location.
PC Slower Than It Used to Be?
A free scan shows the junk files, broken settings and background clutter dragging Windows down - then fixes them in one click.Free scan · Windows 10 & 11Outdated Drivers Are Slowing You Down
One free scan finds every outdated or missing driver and matches the right update for your exact hardware.Free scan · exact hardware matchWindows will not boot after changing the setting
Restore the previous firmware mode so Windows can start, then check msinfo32 and the disk’s partition style. If the installation is Legacy/MBR, run MBR2GPT validation and conversion before switching back to UEFI. If conversion has already succeeded, select the UEFI entry named Windows Boot Manager, not a legacy entry showing only the physical disk.
MBR2GPT validation fails
Read the error in the command window and check the tool’s logs in %windir%, including setupact.log and setuperr.log. Typical causes are too many partitions, logical partitions, insufficient free space, an invalid boot configuration, or specifying the wrong disk number. Do not proceed until validation succeeds.
BitLocker asks for the recovery key
This is a normal possible response to firmware and boot-measurement changes. Enter the correct 48-digit key using the Recovery key ID shown on screen. If the key cannot be found, Microsoft cannot recreate it; resetting the encrypted PC can remove the files on the drive.
Rank #4
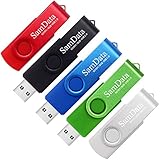
- [Package Offer]: 5 Pack USB 2.0 Flash Drive 8GB Available in 5 different colors - Black Blue Green Red Silver. The different colors can help you to store different content.
- [Plug and Play]: No need to install any software, Just plug in and use it. The metal clip rotates 360° round the ABS plastic body which. The capless design can avoid lossing of cap, and providing efficient protection to the USB port.
- [Compatibilty and Interface]: Supports Windows 7 / 8 / 10 / Vista / XP / 2000 / ME / NT Linux and Mac OS. Compatible with USB 2.0 and below. High speed USB 2.0, LED Indicator - Transfer status at a glance.
- [Suitable for All Uses and Data]: Suitable for storing digital data for school, business or daily usage. Apply to data storage of music, photos, movies, software, and other files.
- [Warranty Policy]: 12-month warranty, our products are of good quality and we promise that any problem about the product within one year since you buy, it will be guaranteed for free.
Secure Boot keeps switching off
Check that CSM and Legacy Boot are disabled, the firmware is using a Windows operating-system profile rather than Other OS, and the default Secure Boot keys are installed. A firmware update from the PC or motherboard manufacturer may also be required.
The Tool Desk
Outbyte PC Repair FREERepair Windows errors before they cause bigger problemsFix Now →Outbyte Driver Updater FREEFix the driver behind crashes, sound loss and screen glitchesFind Drivers →A graphics card or another operating system stops working
Secure Boot blocks unsigned or untrusted pre-boot software. Older graphics-card firmware, expansion-card Option ROMs, custom bootloaders, and some older Linux installations may be affected. Update the component or operating system where possible. If you disable Secure Boot for troubleshooting, turn it back on afterward.
Secure Boot and Windows 10 requirements
Secure Boot and TPM are separate features. Secure Boot validates the signatures of boot components through UEFI; TPM is a security processor used by features such as BitLocker and Windows Hello.
Windows 10 does not require Secure Boot to be enabled for normal installation or operation. However, a compatible UEFI configuration and enabled Secure Boot provide stronger protection against boot-level threats. A firmware screen may show that Secure Boot is “capable” even while msinfo32 reports Secure Boot State: Off. “Capable” means the hardware supports the feature; it does not mean enforcement is active.
FAQ
Can I enable Secure Boot from Windows 10 Settings?
No. Windows 10 can restart the computer into UEFI firmware through Settings, but the actual Secure Boot switch is in the firmware interface.
What’s actually slowing this PC down?
Pick the symptom - the matching free tool is one click away.
Do I need to enable Secure Boot to use Windows 10?
No. Windows 10 can run with Secure Boot disabled. Enabling it is recommended when your hardware, drivers, bootloaders, and operating systems support it.
Best Value

- 10 Pack USB Sticks: 10 pieces of USB flash drives are fit for a variety of scenarios. Whether the flash drives USB are used as school supplies for high school students to backup data storaged in USB jump drives or music USB flash drive for car, zip drive can meet the basic storage needs. USB drive pack of 10 has a higher cost performance. USB flash drive pack of 10 is suitable for ordinary users with appropriate needs, but also for special groups such as companies, schools or other organizations that need a large number of U disks. In short, thumb drives can meet the needs of different customers.
- Swivel Design: With the 360° swivel design, all the ports of the thumb drives 10 pack can be hidden inside the metal casing. When needed, simply swivel the casing gently and the ports will automatically expose, making it convenient for you to insert and remove. This design is not only fashionable and beautiful but also more user-friendly, whether you'd like your flash drive for photos, flash drive for video storage, or memory sticks for computers. In addition, the swivel design can effectively protect the interface from damage and pollution, increasing the service life of the flash USB drive.
- Portability: The small hole on the thumbdrive USB is designed for lanyards, which is convenient to carry. Besides, the USB flash drive keychain can also be tied through the small hole to prevent loss. This design is very thoughtful and reflects the humanized design concept of the memorias USB flash drive.
- Plug and Play: You can use the computer storage flash drive immediately for data storage or backup without any additional installation after inserting it into the computer. This plug and play feature makes the laptop storage drive a very convenient external ssd. You can copy the required data files to the external drive at any time without worrying about computer system compatibility issues. In addition, the design of the external flash drive enables it to be quickly recognized by the system after being inserted into the computer. (NOTE: Please check if your device has a USB-A port before purchasing. If not, a USB-C hub is needed.)
- FAT32 format: The default system format for 8GB flash drive is FAT32. FAT32 USB flash drive is widely applicable, such as in televisions, DVD players, vehicles, printers, embroidery machines, etc. Be patient if you have problems with system recognition. It may take some time for initial recognition, but it will happen.
Why is Secure Boot greyed out?
Secure Boot is commonly unavailable while Legacy or CSM mode is active. It can also be greyed out when the firmware is in a non-Windows operating-system profile or when default Secure Boot keys are absent.
Will enabling Secure Boot delete my files?
Enabling Secure Boot itself should not delete files. However, changing Legacy/UEFI mode incorrectly can prevent Windows from booting, and an incorrect disk conversion or reset operation can cause data loss. Back up first.
What should I do if my disk is MBR?
Do not switch directly to UEFI. Back up your files, suspend BitLocker, run mbr2gpt.exe /validate, convert only after successful validation, then change the firmware to UEFI and enable Secure Boot.
How do I know Secure Boot is working?
Press Windows key + R, run msinfo32, and confirm BIOS Mode: UEFI and Secure Boot State: On. Elevated PowerShell should also return True for Confirm-SecureBootUEFI.
The Bottom Line
For a Windows 10 PC already using UEFI and a GPT system disk, open the firmware settings, disable Legacy/CSM, enable Secure Boot, and select the Windows UEFI operating-system profile if available. If Windows uses Legacy BIOS and MBR, convert the system disk with MBR2GPT first. Always keep a backup and your BitLocker recovery key available.
Quick Recap
Product prices and availability are accurate as of the date/time indicated and are subject to change. Any price and availability information displayed on Amazon at the time of purchase will apply.

