
In vMix, open Streaming Settings → Quality → Streaming Quality, set the encode size to your intended output resolution, and enter a bitrate in kbps based on YouTube’s live-encoder recommendations for your codec and frame rate. For H.264, YouTube recommends 10 Mbps for 1080p30 and 14 Mbps for 1080p60; these are starting points, not guarantees. A continuous channel has no special published 24/7 bitrate preset: choose a rate your upload connection and encoding system can sustain, leave upload headroom, and test the full setup.
Choose a resolution and bitrate that your connection can sustain
Resolution and bitrate are separate controls: resolution sets the encoded picture dimensions, while bitrate determines how much data the video uses each second. Match the encode size to your intended stream resolution and preserve your production’s aspect ratio. Use YouTube’s live-encoder recommendations, not its separate recommendations for uploaded video files.
| H.264 output | YouTube recommended video bitrate |
|---|---|
| 720p at 30 fps | 4 Mbps |
| 720p at 60 fps | 8 Mbps |
| 1080p at 30 fps | 10 Mbps |
| 1080p at 60 fps | 14 Mbps |
These figures are YouTube’s current live H.264 recommendations; the help page does not state a publication year. They are starting recommendations, not a promise of picture quality or uninterrupted streaming. For AV1 or H.265/HEVC, consult the corresponding column in YouTube’s live encoder settings table and confirm that your vMix version and hardware support the format.
Balance detail, motion, and stability
Higher resolution and frame rate increase the recommended bitrate and the sustained work for your encoder and connection. Choose 60 fps when the production’s motion benefits from it and your system can encode it continuously; otherwise, 30 fps may be the more sustainable choice. A higher output resolution will not add real detail to a low-resolution source, and an unstable high-bitrate stream can be worse for viewers than a stable lower setting.
#1 Best Overall
![Debut Video Capture Software to Record from a Webcam, Computer Screen or Device [Download]](https://m.media-amazon.com/images/I/91wYZySob4L._SL160_.jpg)
- Capture video directly to your hard drive
- Record video in many video file formats including avi, wmv, flv, mpg, 3gp, mp4, mov and more
- Capture video from a webcam, network IP camera or a video input device (e.g.: VHS recorder)
- Screen capture software records the entire screen, a single window or any selected portion
- Digital zoom with the mouse scroll wheel, and drag to scroll the recording window
Set the vMix streaming controls
- Open the stream configuration. From the Stream control, open Streaming Settings and select the YouTube destination, or configure the current YouTube stream URL and key using a custom RTMP destination. vMix supports provider destinations and custom RTMP settings. The available output-selection choices depend on your vMix edition. See the vMix Streaming Settings guide.
- Set the encode size. Open Quality → Streaming Quality and set Encode Size to the intended output resolution. vMix advises matching the size to the aspect ratio in use.
- Enter the bitrate. Set Video Bit Rates in kbps. For example, 10 Mbps is 10,000 kbps. Use the YouTube live table for the selected codec, resolution, and frame rate.
- Choose the stream source. Select the intended vMix output if your edition offers that choice, and verify the output actually contains the production you want viewers to see.
- Choose a compatible encoder and audio format. H.264 video with AAC audio is a broadly compatible starting path. vMix’s current guide recommends FFMPEG and describes H.264, AV1, and HEVC support where hardware support applies. YouTube lists H.264, H.265, and AV1 for live ingest; do not select a newer format until your encoder and the receiving stream are confirmed compatible. See the vMix guide and YouTube’s encoder requirements.
- Set keyframes to two seconds. YouTube recommends a two-second keyframe interval and says not to exceed four seconds. vMix also identifies two seconds as its recommended/default interval.
- Set the network buffer with care. The Streaming Quality panel’s network buffer setting controls the maximum number of seconds vMix can keep buffered. vMix documentation says increasing it may help when maximum network speed is unreliable. A larger buffer can affect latency; it cannot repair a failed internet connection.
If you configure a custom YouTube destination, prefer RTMPS when the connection route supports it. RTMPS encrypts RTMP using TLS/SSL; choose the RTMPS URL supplied in YouTube Live Control Room. Details are in YouTube’s RTMPS guide.
Calculate upload headroom for continuous streaming
YouTube recommends that total streaming bitrate fit within the available upload bandwidth and advises leaving 20% headroom. Measure outbound upload capacity rather than relying on download speed. A shared network may limit the bandwidth available to the streaming computer, and YouTube warns that a connectivity disruption can break a stream. See YouTube’s streaming tips.
Rank #2
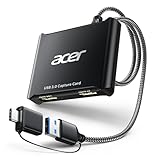
- 【4K Clarity, 1080P Performance】Enjoy stunning clarity with our USB 3.0 Video Capture Card—featuring 4K input and smooth 1080P@60Hz output. Featuring YUY2 technology, it delivers richer colors than MJPEG for lifelike live streaming and recording. Plus, it delivers high-quality video with minimal latency, making it perfect for gamers and content creators.
- 【Mic-in for Easy Commentary】Plug in a headset or mic directly to stream/record voice easily—no extra adapters. Great for real-time gaming commentary, online classes, or vlog dubbing. Paired with its low-latency tech, it keeps voice synced perfectly with video, eliminating post-editing hassle from mismatched audio-visuals. Fits most 3.5mm devices—ideal for gamers, teachers, creators.
- 【Plug and Play, no Extra-Drivers】No extra drivers or external power—just plug in and start capturing instantly. Small and lightweight, it fits easily in your bag for outdoor live streams, on-the-go recordings, or emergencies. Ideal for game capture, video conferences, and online teaching, it saves hassle while delivering smooth results.
- 【Wide Compatibility: Apps & Devices】No extra adapters—works flawlessly with your go-to platforms and gear. It pairs with streaming/recording apps like Twitter, YouTube, Facebook, OBS, XSplit, and VLC, plus devices including Switch/Switch2, PS5/PS4, Xbox, DSLR cameras, PC, macOS, and Android. Whether gaming, streaming, or hosting video calls, it keeps HD quality intact, eliminating "compatibility headaches".
- 【Worry-Free After-Sales Support】We are committed to delivering exceptional quality products that combine sophisticated design with affordable pricing, offering you the best solutions for seamlessly connecting your work and life. Whether you're a newcomer or a seasoned user, feel free to reach out anytime with any questions—your satisfaction is our top priority.
For a single H.264 stream, the recommended video bitrate is not the only traffic to allow for: audio and protocol overhead also use capacity. For multiple simultaneous streams, plan for their combined outgoing rates, not just one stream’s setting. A speed-test result is a snapshot, so check behavior while other ordinary network use is happening too.
- Use wired Ethernet for a fixed workstation where practical.
- Consider whether a backup internet path is appropriate, but test that viewers continue receiving the stream during a real transition before relying on it.
- Consider backup power for the computer and network equipment if local power loss is a relevant risk.
- Validate encoding load, heat, and sustained operation on the actual PC and GPU. There is no universal router, UPS, ISP, or capture-card choice established for every installation.
Test the channel before leaving it live
- Create a private or unlisted test stream and verify that YouTube receives the intended resolution and frame rate.
- Use representative movement and audio from the real program. YouTube explicitly advises: “Make sure to test before you start your live stream.”
- Check stream-health messages in YouTube Live Control Room and the streaming status in vMix; address warnings rather than assuming the configured values mean the stream is healthy.
- Confirm actual upload capacity and headroom under ordinary network use. For a 24/7 channel, observe sustained operation before treating the installation as dependable; the longer observation is practical operating advice, not an official YouTube 24/7 requirement.
- If you have backup equipment or a second connection, test the transition on the actual installation. Do not assume failover works until you have seen it work.
Troubleshoot common vMix and YouTube streaming problems
| Symptom | Likely cause | What to check or change |
|---|---|---|
| Stream health reports instability or viewers see buffering | Insufficient or inconsistent outbound bandwidth, network contention, or an excessive bitrate | Measure upload, reduce bitrate or resolution if needed, leave YouTube’s recommended 20% headroom, and retest while the network is in normal use. |
| YouTube does not receive the expected resolution or frame rate | Encode Size, stream source, or production output does not match the intended settings | Verify the vMix Streaming Quality encode size and selected output, then confirm the received format in Live Control Room. |
| YouTube flags keyframe or encoder settings | Keyframe interval exceeds the recommendation or selected codec settings are incompatible | Set a two-second keyframe interval, stay within YouTube’s four-second maximum, and verify the codec and encoder configuration against YouTube’s current requirements. |
| Stream disconnects during a long run | Connectivity, power, or computer interruption; a buffer cannot fix a failed link | Review vMix status and YouTube health messages, inspect the network and power path, and test any backup connection or power arrangement. |
| Video looks poor despite using a recommended bitrate | Source quality, motion, encoder performance, or network variation may limit the result | Test representative content and check sustained encoder load and stream health. YouTube’s bitrate values are recommendations, not a quality guarantee. |
Keep YouTube Live rules and limits in view
Correct vMix settings do not settle account-specific YouTube Live eligibility, continuous-stream limits, or archive-retention behavior. Confirm what Live Control Room allows for your account and event, and test the actual workflow. Also use only video and audio you have the rights to stream; a continuous channel does not make copyrighted or reused material exempt from YouTube’s policies. Review YouTube’s live encoder guidance and account-specific notices before relying on a long-running broadcast.
The Tool Desk
Outbyte PC Repair FREEClear out junk files and repair common Windows errorsFree Scan →Outbyte Driver Updater FREEScan for outdated or missing drivers - takes under a minuteDriver Scan →Rank #3

- 【1080P HD High Quality】Capture resolution up to 1080p for video source and it is ideal for all HDMI devices such as PS4, PS3, Xbox One, Xbox 360, Wii U, DVDs, DSLR, Camera, Security Camera and set top box. Note: Video input supports 4K30/60Hz and 1080p120/144Hz. Does not support 4K120Hz/144Hz. Output supports up to 2K30Hz.
- 【Plug and Play】No driver or external power supply required, true PnP. Once plugged in, the device is identified automatically as a webcam. Detect input and adjust output automatically. Won't occupy CPU, optional audio capture. No freeze with correct setting.
- 【Compatible with Multiple Systems】suitable for Windows and Mac OS. High speed USB 3.0 technology and superior low latency technology makes it easier for you to transmit live streaming to Twitch, Youtube, Facebook, Twitter, OBS, Potplayer and VLC.
- 【HDMI LOOP-OUT】Based on the high-speed USB 3.0 technology, it can capture one single channel HD HDMI video signal. There is no delay when you are playing game live.
- 【Support Mic-in for Commentary】Rybozen capture card has microphone input and you can use it to add external commentary when playing a game. Please note: it only accepts 3.5mm TRS standard microphone headset.
Or let it run in the cloud
If your 24/7 channel consists of uploaded recordings rather than a live camera or switching production, StreamNeo is a cloud alternative: upload your video or build a playlist, add your YouTube stream key once, and go live. It loops uploaded videos from the cloud, so your computer and home connection do not have to stay on. It streams to YouTube only and does not stream from a camera.
Quick Recap
Rank #4

- 【1080P 60FPS Video Capture Card】 This HDMI game capture card is based on USB3.0 high speed transmission port, input resolution up to 4K@30HZ, output resolution up to 2K@30Hz or 1920×1080@60Hz. Type c and USB interface can meet most of the devices in daily life. Easily meet the online capture, real-time recording, online meetings, live gaming and other functions, so you have a better visual enjoyment. Note: For capture use only; requires capture software to function and is not intended for direct screen casting to a monitor or TV
- 【Ultra Low Latency Screen Sharing】 HDMI capture card is made of good quality aluminum alloy with strong heat dissipation, allowing you to enjoy ultra low latency while live gaming or video recording or live streaming, avoiding blue screens and lag. This HDMI to USBC capture card supports easy recording of good quality audio or HD video and transferring it to your computer or streaming platform, allowing you to record 60 fps HD video directly on your hard drive and real-time preview
- 【Plug and Play, Easy to Carry】 This HDMI 1080P video capture card does not require any additional drivers or external power supply, just plug and play for fast capture. The capture card is small and lightweight, so you can put it in your bag for emergencies, making it very portable for outdoor live streaming. It's also a great way to share content in game recording, video conference, video recorder and online teaching
- 【Wide Compatibility USB Capture Card】 Easily streams to Facebook, Youtube or Twitch. With the connection, this HDMI to USB C/3.0 video capture devices can be working on several Operating Systems and various software: Windows 7/ 8/ 10, Mac OS or above, Linux, Android, Laptop, Xbox One, PS3/PS4/PS5, Camera, DVDs, Set Top Box, Webcame, DSLR, Switch/Switch 2, TV BOX, HDTV, Potplayer/VLC, ZOOM, OBS Studio etc.
- 【Package Content & Note】 1x HD Audio Capture Card , 1x USB 3.0 to USB C Adapter (A-side 3.0, B-side 2.0), 1x user manual. Please note that you need to restart the OBS Studio software after the audio setup is complete, otherwise it will result in no sound output. When using an adapter, if the device is recognized as USB 2.0, try using the other side with the USB-C port. Simply flip the capture card and reconnect it to be recognized as USB 3.0
- Nothing has to stay on at home; StreamNeo runs the stream in the cloud.
- Uploaded video streams as made, up to 4K 60fps, at one flat price per slot, with no re-encode or quality tiers.
- Automatic recovery is included if YouTube drops the stream.
- The first day is free with no card; one free day per account.
- The monthly option is $9.99 per month.
Start your free StreamNeo day.
Product prices and availability are accurate as of the date/time indicated and are subject to change. Any price and availability information displayed on Amazon at the time of purchase will apply.

