
To create your first visual template, decide what it must do and where it will appear, then build one reusable design around that job. This walkthrough uses a digital social post as its example: a square graphic that a small team can update with a new announcement without rebuilding the layout each time. The same planning steps apply to other designs, but a presentation, printed flyer, and website interface have different format and sharing needs.
1. Decide what the template is for
Before opening a design editor, answer three questions: who will use this, what information must it communicate, and where will people see it? These answers determine the format, dimensions, visual hierarchy, and how you will distribute the finished template. A social graphic needs to work in a feed; a presentation needs a repeatable slide structure; a printed design also needs print-provider specifications.


For this example, the intended user is a teammate who will announce events. The graphic needs a headline, date, short description, and a place for a photo or illustration. Its destination is digital sharing, so the workflow focuses on an editable design rather than print production.
- Write the job in one sentence: “This template helps our team announce an event clearly in a social post.”
- List the content that changes: event title, date, description, and image.
- List what stays consistent: organization name, logo or identity, type styles, and layout.
- Choose one output: avoid trying to make one first design serve as a post, flyer, and presentation all at once.
Figma’s design introduction describes visual design in terms of composing shapes, images, and text to support goals such as readability and usability. That is a useful test for any format: the decoration should help people understand the content, not compete with it. Figma’s design fundamentals
Do these 3 things before closing this tab:
1Repair Windows errors before they cause bigger problems2Scan for outdated or missing drivers - takes under a minute3Clear out junk files and repair common Windows errors#1 Best Overall
2. Choose an editor and a starting point
Canva is a practical route for a general-purpose graphic or presentation: its beginner guide covers creating, editing, and sharing designs, while its template help explains searching, previewing, and customizing templates. Figma is more directly relevant when the outcome is a digital interface or a team-produced asset; its Figma Buzz help covers editable templates for social posts, ads, emails, and one-pagers. These sources describe different workflows, not a comparative usability test, so choose according to the output and collaboration context rather than assuming one tool is universally easiest.
| Need | Route to consider | What the cited guidance establishes |
|---|---|---|
| General graphic or presentation, including a beginner-friendly template workflow | Canva | Its help documents finding, previewing, and customizing templates, and its beginner guide covers design editing and sharing. |
| Digital design or team-oriented marketing assets | Figma and Figma Buzz | Figma’s resources cover digital design fundamentals; Buzz templates include social media assets, ads, emails, and one-pagers. Publishing templates is plan-dependent. |
For a Canva design, you can start from a blank design or browse templates. Canva’s Help Center also documents an AI generation route; it is an option, not a prerequisite. Search for a format and purpose close to your intended result, preview candidates, and choose one whose structure already accommodates your content. Canva’s template guidance
If you are using Figma, its Help Center explains how to create a new file. The precise choices and controls available can vary with design type, device, workspace settings, and plan. Figma: Create a new file
3. Learn the editor’s working areas
In Canva, the main areas are a side panel for items such as templates, elements, text, uploads, brand tools, and apps; the canvas where the design is assembled; a top toolbar for editing; and page controls. Knowing where these live is more useful than memorizing every feature before you begin. Available controls may differ by design type, device, workspace settings, and plan. Canva’s beginner guide to customizing templates
Outdated Drivers Are Slowing You Down
One free scan finds every outdated or missing driver and matches the right update for your exact hardware.Free scan · exact hardware matchWindows Errors? Fix Them Before They Spread
Repair common Windows errors and clear accumulated junk for a smoother, more stable PC - no reinstall needed.Free scan · no reinstallRank #2
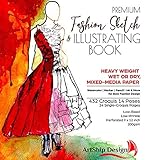
- Illustration-Grade Paper, specially-textured and heavyweight to allow bold use of color and techniques. Other pads use traditional paper and bleed through and wrinkle easily in response to marker and paint - frustrating your ability to show your creativity. Hardcover for long standing durability. Spiral bound to keep pages flat. Perforated for true-size paper.
- 144 Pages with 432 Internationally Designed Figure Outlines (“Croquis”) in 14 poses. "Croquis" is a term originating in France in 1805 to describe a rough sketch. It is now used in the fashion industry for figure templates used in the design process. Our Croquis are newly designed by our international team with a fresh and modern perspective. Produced with designers from London, NY, LA, Italy, Austria, and Brazil. This design pad represents the best from around the world of fashion.
- Single-Croquis, Full-Illustration Pages! 24 of this book's 136 pages are printed with only one figure outline on each! Other fashion sketchbooks place a minimum of 2 figures on every page in order to advertise the most number of figure outlines at the cheapest possible cost. This premium design pad provides both.
- "Perfect-Printed" Croquis. We tested many croquis offerings and found what we believe is the perfect balance of outline visibility with outline vanishing-ability when illustrated. Many products print too dark, or too light. Our testing and designer-input led us to this flexible balance. Practice-Through-Final Process.The Croquis poses are printed in small, medium, and large sizes. Create multi-pose designs side-by-side, or use the smaller sizes for practice and experimenting freely!
- Please Note, some customers have misunderstood this product: This is a sketchbook of our professionally created croquis (body outlines) exactly as used by fashion designers. Our pre-printed body outlines allow you, kids, students, artists, and designers to focus on creative designing without wasting time properly sketching the human form. This is also not a book of instructions and ideas; our customers have told us they can use Google for that! 🙂
- Open the chosen design or template. Confirm it is the format you intend to publish.
- Locate the canvas. This is the working surface; select an object to edit it.
- Use the side panel to find content. Look there for text, images, shapes, uploads, and other available elements.
- Use the top toolbar for selected content. Its available controls depend on what you have selected.
- Use page controls when the design has pages. They let you manage, duplicate, rearrange, or remove pages where relevant.
4. Turn the starting design into a reusable template
Whether you start blank or adapt an existing layout, first establish a clear hierarchy. For the example event post, make the event name the most prominent text, place the date where it is easy to scan, and keep the description short enough to remain legible. Reserve consistent positions for the organization name and image. A template is useful when someone can replace the changing content without having to guess which parts are safe to alter.
Replace example content with purpose-specific content
Change sample text, pictures, and decorative elements deliberately. Remove content that does not serve the announcement, and use images that support rather than obscure the message. If the source design includes multiple pages or slides, decide which ones your users actually need; duplicate, reorder, or remove pages when that makes the intended sequence clearer.
Make the reusable and changeable parts obvious
- Keep the organization name and other recurring identity elements in a consistent place.
- Use a clearly recognizable area for the headline and date.
- Leave a defined image area if each announcement will use a different picture.
- Avoid filling every space with decoration; empty space can make the important information easier to read.
- Check the layout with realistic replacement text, not only the sample wording. A much longer title can break an otherwise tidy design.
Canva’s beginner materials describe customizing template elements and pages; the same general principle applies elsewhere, though the controls differ between products. Canva: Customizing templates
5. Check the output before sharing
Review the design at the size and in the context where it will be used. Check that essential text is readable, the image does not cover important information, and a longer-than-usual headline still fits. If other people will edit the template, ask one of them to replace the example content; the exercise can reveal which areas are unclear or too easy to disturb.
Free tools Windows power users keep installed
One-click scans. No signup required.
Rank #3
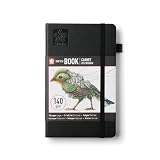
- Drawing Sketchbook: The Sakura Sketchbook A5 is a 160-page sketchbook crafted with thick cream paper and a leather-bound hardcover for creative expression and artistic exploration
- A5-Size Sketchbook: This 5.1 x 8.3 inch sketchbook is designed for visual journaling, sketching and creative exploration, offering a versatile layout ideal for personal use or professional stationery
- Functional Design Details: Built with a durable design that includes an elastic band, bookmark ribbon, sturdy stitch binding, a lay-flat design and expandable inner pocket for effortless sketching
- Traditional Japanese Colors: Black, or Sumi-iro, is inspired by Japanese calligraphy and sumi-e ink painting; used in significant cultural works, it represents wisdom and introspection
- High-Quality, Every Time: Our rigorously-tested Japanese quality Sakura products deliver beautiful results every time
Decide whether the result is digital or printed before exporting. For print, Canva recommends CMYK because colors can look different on screen and on paper. Confirm final color and file requirements with the actual print provider; a general design-editor setting does not replace that provider’s specifications. Canva’s template and design guidance
6. Share the reusable version, not just a view link
If you made the design in Canva and want other people to reuse it, use Canva’s Template link workflow. Canva’s Design School explains how to turn a design into a template and create a shareable Template link. This is specifically the template-sharing flow; do not assume that an ordinary link for viewing a design behaves the same way. Canva: How to turn designs into templates
For Figma Buzz, the documented workflow provides templates for marketing assets such as social posts, ads, emails, and one-pagers; publishing templates is plan-dependent. Check the relevant workspace and plan before designing a process around publishing. Figma: Find and use Figma Buzz templates
Or skip the browser setup
If you need a screenshot of a web page as an asset or reference while developing a visual design, ScreenshotNeo offers a one-request capture API. For example, this cURL request saves a screenshot of Stripe’s public homepage as a WebP file:
Rank #4
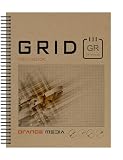
- GRID SKETCH BOOK : Spiral bound sketchbook for pencil, ink, charcoal, marker and watercolor painting. Great for art, design and education.
- HIGH QUALITY PAPER : Idea Journal is fitted with 67 lb (147 gsm) mixed media paper. White. Semi-smooth. Works well for combined media projects. Book Format: 50 heavy paper sheets. Printed grid one side. Grey grid. 1/8" box.
- DURABLE BINDING: The journal style sketchbook is spiral bound with a durable PVC binding. The book binding won't bend and lasts longer than wire loop binding.
- HEAVY COVERS : Design Ideation sketch books are finished with heavyweight front and back covers. Extra heavy back cover provides stiffener when additional support is needed.
- MADE IN THE USA by Design Ideation Studio. Professionally packaged for retail sale.
curl -G "https://api.screenshotneo.com/v1/shot" -d access_key=YOUR_API_KEY --data-urlencode url=https://stripe.com -o shot.webp
Replace YOUR_API_KEY with your API key. See the ScreenshotNeo API documentation for request options. ScreenshotNeo removes cookie and consent banners, newsletter popups, and chat widgets before capture; each step can be turned off. Bot checks or CAPTCHAs, blank pages, timeouts, failed loads, and cache hits are not billed, and responses identify page verdict and billing status in headers. Its MCP server provides take_screenshot, get_page_info, and capture_pdf tools for AI agents and MCP clients.
The free plan includes 1,000 screenshots per month with no card; paid plans start at $5 for 3,000 shots. Learn about ScreenshotNeo, or sign up free for 1,000 screenshots a month, with no card.
Independent reader supportYour contribution helps us test, update, and keep practical guides available for everyone.Common first-template problems
The design looks good, but does not fit its destination
Cause: the output format was chosen after the layout, or one design is being stretched across unrelated uses. Fix: choose the destination first and build for that one format; make a separate version when the content or dimensions materially change.
Replacing the sample headline breaks the layout
Cause: the design was checked only with short example text. Fix: test it with a realistic longer headline and adjust the text area or hierarchy before sharing it.
Best Value
Other people can view the design but cannot reuse it as intended
Cause: the shared item may be a view link rather than the product’s template-sharing workflow. Fix: use Canva’s shareable Template link process when you intend recipients to reuse a Canva design; in Figma Buzz, verify the template-publishing availability for the plan and workspace.
Printed colors differ from the screen
Cause: screen and paper render color differently. Fix: for print, follow Canva’s CMYK recommendation and obtain final specifications from the print provider.
A control described in a guide is missing
Cause: controls can vary by design type, device, workspace settings, or plan. Fix: check the product’s current help for the exact workflow and confirm the account or workspace context before assuming the feature is unavailable.
FAQ
Should I begin with a blank canvas or an existing template?
Either is a valid start. A blank design gives you a clean structure to build; an existing template gives you a layout to adapt. Choose the route that best matches the content and format you already know you need.
Can I use one template for both digital sharing and print?
You can adapt a design, but do not assume one file or set of settings will meet both uses. Check the dimensions, color needs, and file requirements for each destination with the relevant platform or print provider.
Quick Recap
Product prices and availability are accurate as of the date/time indicated and are subject to change. Any price and availability information displayed on Amazon at the time of purchase will apply.

