
The Tool Desk
Outbyte PC Repair FREERepair Windows errors before they cause bigger problemsFix Now →Outbyte Driver Updater FREEScan for outdated or missing drivers - takes under a minuteDriver Scan →iTechGuides is reader-supported. When you buy through links on our site, we may earn an affiliate commission. As an Amazon Associate I earn from qualifying purchases. Learn more
If the corners of a 3D print lift, the problem is usually warping: plastic contracts as it cools, and the stress pulls an edge away from the build plate. Large footprints and materials such as ABS, ASA, PC Blend, and PP are especially prone to it. A print can have a seemingly perfect first layer and still lift several layers later as the upper part cools.
Start by separating two failures that look similar: weak first-layer contact and thermal warping. Clean and inspect the sheet, verify the first layer, then correct the material profile, cooling, drafts, and contact area in that order. A brim is often the next low-risk intervention. Enclosures, draft shields, geometry changes, and surface aids can help in the right material and on the right sheet, but each has limitations.
Why are the corners of my 3D print lifting?
Corner lift is the visible edge of a larger thermal problem. Molten filament is deposited hot, then cools and contracts. The newly deposited layers are constrained by the layers below and by their contact with the build plate. As the part shrinks, internal stress accumulates. When that stress exceeds the grip between the part and sheet, the lower edge bends upward, often beginning at a sharp corner.
What’s actually slowing this PC down?
Pick the symptom - the matching free tool is one click away.
The effect is strongest on parts with long straight edges, broad footprints, or a large volume of material cooling at different rates. ABS, ASA, PC Blend, and PP generally demand more careful thermal control than low-warping materials. PLA and PETG can also lift when the first layer is poor, the part-cooling setup is wrong, or a draft creates an uneven temperature across the print.
#1 Best Overall

- WORKS ON MULTIPLE FILAMENTS: This versatile 3D printer glue is ideal for securing prints made with ABS, PLA, PETG, HIPS, and TPU filaments. This PLA glue's reliable bonding ensures your creations stay in place throughout all printing processes, making this adhesive glue an essential addition to your 3D printing supplies. Whether you are a professional or looking for gifts for 3D printer lovers, our adhesive glue guarantees smooth results across various filament types of all 3D printing projects. It is also compatible with TPU Flex filament.
- WORKS ON ALL SURFACES: Designed for flexibility, this 3D printer glue stick works seamlessly on different types of build surfaces like Flex Plate, Glass, PEI, Buildtak, Kapton, and more. The advanced formulation of this 3D printer adhesive glue ensures a secure grip on your 3D printer build plate for consistent and high-quality prints. Whether you are working with ABS glue or experimenting with different materials, this adhesive glue ensures reliable performance across every 3D printing surface.
- EASY TO USE: Applying this glue stick for 3D printing is effortless! Just shake, press, and apply to your active printing area. This 3D printer adhesive glue bonds seamlessly to the 3D printer build plate, reducing warping and delivering stable results. Compatible with various materials like PETG, it's the ultimate PETG glue for professional results. This 3D glue for 3D printing easily releases prints once cooled and cleans up with water, making our adhesive glue a staple for all 3D enthusiasts.
- LONG-LASTING ADHESIVE GLUE: Delivering over 100 prints, this 3D printer glue is built to last through multiple uses without reapplication. Perfect for all 3D printing materials, especially ABS, PLA, PETG, HIPS, and TPU filaments. It's the ultimate companion for hobbyists and professionals. This 3D adhesive glue provides ideal durability while remaining easy to apply. Whether using filament glue or other glue for 3D printing, it ensures strong bonds for consistent, high-quality prints every time. Magigoo MO2016 is also an essential addition to 3D printing accessories, supplies, and materials.
- ODOURLESS AND SAFE: This 3D printer adhesive glue is designed with your safety in mind. Completely odorless and non-flammable, this 3D printer glue is ideal for home, office, or educational settings, including workshops with kids. Whether you need a reliable adhesive glue for daily projects or a 3D printing adhesive for intricate designs, our adhesive glue delivers consistent results. Perfect for bonding ABS materials, this ABS plastic adhesive is a dependable choice for every printing hobbyist.
Warping may begin after the first layer rather than during it. Therefore, a first layer that looks smooth and well attached does not prove that the print is safe from later corner lift. Watch when the failure starts: separation immediately on layer one points toward contact or setup; separation after several layers points more strongly toward shrinkage, cooling, drafts, or geometry.
Weak first-layer contact versus thermal warping
| Symptom | More likely cause | What to check first |
|---|---|---|
| Filament does not form a continuous line, has gaps, or peels up immediately | Weak first-layer contact | Sheet cleanliness, leveling, and nozzle-to-bed distance |
| The first layer is uniform, but corners rise after upper layers cool | Thermal warping | Material profile, bed and nozzle settings, cooling, drafts, and ambient temperature |
| Only very sharp bottom corners lift | Stress concentrated by geometry | Brim, orientation, and a radius or chamfer on the bottom edge |
| One side lifts near an open window or air-conditioning outlet | Uneven cooling or a draft | Printer location, fan behavior, and ambient stability |
Do not respond to every lift by lowering the nozzle. Excessive squish can damage some sheets, make removal difficult, and still leave a thermally unstable part. Correct the actual failure mode.
A reliable troubleshooting sequence
Change one major variable at a time and inspect the result. The sequence below starts with free, reversible checks before moving to material or hardware changes.
1. Clean and inspect the build surface
Grease, fingerprints, dust, and old residue reduce the effective contact area. Remove the sheet according to its manufacturer’s care instructions. Prusa’s surface guidance uses IPA of 90% or higher for its compatible surfaces, but that concentration is not a universal instruction for every coating. Some sheets require a different cleaner, a cool surface, or no solvent at all.
- Let the sheet cool before handling or cleaning it.
- Look for a glossy patch, scratches, delamination, or residue concentrated where the corner lifts.
- Use a clean, lint-free wipe and the cleaner approved for that sheet.
- Keep fingers off the active print area after cleaning.
A damaged or contaminated sheet can mimic a temperature problem. If the same location fails with different models, inspect that region rather than immediately changing filament temperatures.
2. Verify leveling and first-layer contact
Run the printer’s leveling or bed-mesh procedure when appropriate for the machine, then print a first-layer test. Lines should be laid down consistently and joined into a continuous surface. Gaps between lines indicate insufficient contact; lines that are severely flattened, ridged, or pushed aside indicate excessive squish or an incorrect nozzle-to-bed distance.
Check the entire footprint, not just the center. A corner can be high even when the center looks correct. Confirm that the sheet is fully seated, the nozzle is clean, and the printer’s selected sheet or bed profile matches the surface installed.
Free tools Windows power users keep installed
One-click scans. No signup required.
Rank #2
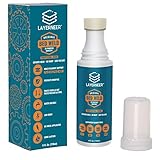
- THERMAL DYNAMIC COATING: Based on science, works like magic; Parts stick at hot and release when cooled; CHECK COMPATIBILITY IMAGE FOR YOUR SURFACE TYPE
- LONG LASTING: Print several times on a single coating; recharge with a wet sponge to get more prints out of a single application; Cost pennies per print
- LOW ODOR & WATER SOLUBLE: No harsh smells; No headaches; Easy to touch up or remove with water
- NO-MESS APPLICATOR: Built in foam tip makes applying the coating to your build plate surface simple and it won't accidentally spill
- WIDE FILAMENT COMPATIBILITY: Works with PLA, ABS, PETG, ASA, and CPE filaments for versatile 3D printing applications across multiple material types
Once the first layer is continuous and evenly bonded, stop lowering the nozzle as a default response. If the print only begins lifting later, further squish will not remove the shrinkage stress and may damage the sheet.
3. Select the correct material profile and temperatures
Use the filament and printer maker’s profile as the starting point. Bed temperature, nozzle temperature, cooling limits, and maximum volumetric flow are material-specific. Do not copy a temperature from PLA to ABS, or from one manufacturer’s filament to another, simply because the labels look similar.
An older Ultimaker 2 manual gives 60°C for PLA and 90°C for ABS as examples for that particular model. Those figures are not universal settings for modern printers, sheets, or formulations. Treat them as model-specific examples, not a general temperature table.
Confirm all of the following before making a small adjustment:
- The slicer has the intended filament selected.
- The first-layer and subsequent-layer bed temperatures are what the profile specifies.
- The nozzle temperature is appropriate for that filament and nozzle size.
- The printer firmware is not applying a different material or sheet preset.
- The build sheet is rated for the selected temperature.
4. Control part cooling and drafts
Cooling must match the material. PLA and PETG generally need substantial part cooling. High-temperature materials such as ABS and ASA usually benefit from a stable, warmer ambient environment instead of a cold airflow across the part. An open window, ceiling fan, or nearby air-conditioning outlet can cool one side faster than the other.
More fan is not automatically better. Excessive fan can cool an edge so quickly that it lifts or can reduce bonding between layers. Too little cooling can create localized deformation and other print defects. Use the material profile first, then adjust fan behavior only when the failure pattern supports it.
- Keep the printer away from direct drafts.
- Do not open a door or window beside the printer during a sensitive ABS or ASA job.
- Check that the part-cooling fan actually reaches the intended speed.
- For PLA and PETG, avoid enclosing the printer merely to cure lifting; trapped heat can make their cooling harder.
Prusa describes the objective succinctly: “Our goal is to minimize the thermal shock the printed part receives so it doesn’t warp as much.” The practical meaning is to avoid abrupt, uneven temperature changes while still providing the cooling the filament requires.
Rank #3
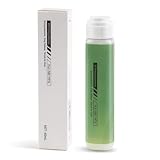
- 【Strong Adhesion】Liquid 3D printer glue is specially developed for 3D printing; it ensures consistent grip even during high-speed printing, prevents model lifting or warping, ensures a perfect first layer, and thereby increases printing success rates while reducing waste of filaments and time.
- 【Durable】The 3D Printer Glue provides strong bonding properties, requiring just a small amount per print. With 60ml, you can achieve lasting adhesion over many prints. For optimal results, it is recommended to reapply the glue before each printing session.
- 【Easy Print Release】Enjoy effortless removal of 3D prints after cooling, ensuring a hassle-free post-printing experience with 3D printer bed adhesive.
- 【Wide Compatibility】Ideal 3d printer bed adhesion solution for PLA, PETG, PET, ABS, ASA, and TPU. Adheres well to diverse 3D printing surfaces such as low-temperature, high-temperature, textured/smooth build plates, glass, PEI, PEO, PET, Buildtak, and aluminum plates,etc.
- 【Easy to Apply】Experience a mess-free process with Bamboo Lab 3D print glue. Simply press the applicator head to open the valve and spread evenly over the printing area. Its liquid form ensures a more uniform and quicker application compared to solid 3d printer glue stick for hot bed.
5. Increase first-layer contact with a brim
A brim adds sacrificial lines around the model’s base, increasing the area resisting peel forces. It is a sensible early intervention for a large footprint, a narrow base, or a model with corners that repeatedly lift. Prusa’s slicer documentation generally advises a brim of at least 3 mm as a starting recommendation. That is a setting recommendation, not a guaranteed result or a measured success rate.
Recommended Free Tools
In your slicer, enable Brim, set the brim width to at least 3 mm, and preview the first layer to ensure the added lines are connected to the model. Increase the width only as needed; a very wide brim consumes material and takes longer to remove. Use a brim rather than a raft when the model already has a reasonably flat base and you want to preserve bottom-surface accuracy.
6. Use a draft shield for suitable materials
A draft shield creates a thin perimeter around the print to reduce moving air at the part. It can help retain warmth around ABS and ASA jobs in an otherwise drafty environment. It does not replace a correct material profile or a stable printer location, and it adds print time and material.
Do not use a draft shield as a reason to trap heat around every filament. PLA and PETG commonly need effective cooling, and an unnecessarily warm chamber can create other defects.
7. Change orientation or bottom geometry
When the design permits, orient the troublesome region toward the bed center, where temperature and airflow are often more uniform. Maximize the flat area touching the sheet and avoid a tiny base supporting a tall, wide part.
Crashes, No Sound, or Screen Glitches?
Random freezes, missing sound and display glitches usually trace back to one bad driver. Find and replace yours safely.Free scan · under a minutePC Slower Than It Used to Be?
A free scan shows the junk files, broken settings and background clutter dragging Windows down - then fixes them in one click.Free scan · Windows 10 & 11Sharp bottom corners concentrate stress. UltiMaker’s design guidance notes that sharp bottom edges are more liable to warp and that rounded corners reduce the risk. Add a radius or chamfer to the bottom edge when the part’s function allows it. This is especially useful when only the sharp corners lift while the rest of the perimeter remains attached.
Geometry changes are not always possible for an existing functional part. In that case, use orientation and a brim, and address the material and thermal conditions rather than forcing a redesign.
Rank #4

- Quality Assurance: Produced by Creality, our 3D printer glue sticks guarantee reliability and consistent performance
- Eco-friendly Composition: Formulated from PVP material without the addition of formaldehyde, these 3D printer glue sticks prioritize safety and environmental sustainability, providing a safer and healthier printing environment
- Premium 3d Printer Adhesive: Engineered specifically to elevate the 3D printing process, they facilitate smooth application for thin coatings, ensuring precise prints with improved adhesion at high temperatures and easy demolding post-cooling
- Easy Maintenance: Designed for simple upkeep, they are water washable, enabling the printing glue easily cleaned without leaving any residue behind
- Wide Compatibility: With versatile adaptability, these 3D print glue sticks effectively adhere to various materials and printing bed surfaces, ensuring compatibility across diverse printing setups
8. Stabilize ambient temperature with an enclosure when appropriate
An enclosure can reduce drafts and maintain a warmer, more stable environment for ABS and ASA. It is not a universal fix. Check the printer maker’s heat limits before enclosing it: prolonged elevated temperature can deform printer components, soften mounts, or affect electronics and motion hardware.
Enclosures can also make PLA and PETG cooling more difficult. If you use one for those materials, verify that the resulting chamber temperature and fan behavior still match the filament profile. Never assume that a generic enclosure is safe for every printer or every sheet.
9. Consider a surface aid only after the free checks
A thin layer of glue stick is an optional aid on compatible sheets. Prusa documents glue stick for its steel sheet, including a separation-layer role that can make removal safer. That documentation does not establish compatibility with every build plate or coating.
- Confirm that the sheet manufacturer allows the product.
- Apply a thin, even layer rather than a heavy buildup.
- Let the sheet cool before removal.
- Clean the sheet according to its care instructions between jobs.
Too much adhesion can damage a surface or make removal unsafe. Treat a generic 3D-printer build-plate glue stick as optional, not as a substitute for cleaning, leveling, or thermal control.
Material-specific fixes
| Situation | First actions | Important caveat |
|---|---|---|
| PLA or PETG corners lift | Verify a clean sheet and even first layer; confirm that part cooling works; remove drafts that create uneven cooling; add a brim when the base is small. | Do not assume a hot enclosure is helpful. These materials commonly need substantial cooling. |
| ABS or ASA warps | Use the material profile, reduce drafts, stabilize ambient warmth, and try a brim or draft shield. | Check whether the printer’s components tolerate prolonged enclosure heat. |
| PP warps or will not adhere | Follow material-specific surface preparation; consider a compatible PP tape or sheet recommendation; use an enclosure where the printer permits it; try a 5–10 mm brim, as Prusa suggests for its guidance. | PP adhesion is highly surface-sensitive. Prusa’s recommendation may not transfer to another PP brand or sheet. |
| Only sharp corners lift | Try a brim, reorient the model, or round/chamfer the bottom design where allowed. | A geometry change may be impossible for an existing functional part. |
For PC Blend and other high-temperature materials, begin with the manufacturer’s profile and the same thermal principles: stable ambient conditions, controlled drafts, and sufficient contact area. Do not borrow ABS or ASA temperatures without a profile for the exact filament and printer combination.
Independent reader supportYour contribution helps us test, update, and keep practical guides available for everyone.How to choose between competing remedies
Several interventions can appear plausible at once. Choose by asking five questions:
- Is the material compatible? A cooling change that helps PLA may hurt ABS; an enclosure that helps ASA may overheat a PLA job.
- Is the sheet compatible? Cleaners, glue, and PP tape can be safe on one surface and harmful or ineffective on another.
- When does the failure begin? Layer-one separation points to contact; later lift points to shrinkage and thermal gradients.
- Can you increase contact area? A brim, better orientation, or a rounded bottom edge may solve a localized problem without changing temperatures.
- What are the printer’s heat limits? An enclosure is useful only if the frame, electronics, motors, and sheet can tolerate the environment.
This framework prevents an adhesion fix from creating poor layer bonding, sheet damage, or heat stress. It also keeps you from making several changes at once and losing track of which one mattered.
Best Value

- Quality Assurance: Produced by Creality, our 3D printer glue sticks guarantee reliability and consistent performance
- Eco-friendly Composition: Formulated from PVP material without the addition of formaldehyde, these 3D printer glue sticks prioritize safety and environmental sustainability, providing a safer and healthier printing environment
- Premium 3d Printer Adhesive: Engineered specifically to elevate the 3D printing process, they facilitate smooth application for thin coatings, ensuring precise prints with improved adhesion at high temperatures and easy demolding post-cooling
- Easy Maintenance: Designed for simple upkeep, they are water washable, enabling the printing glue easily cleaned without leaving any residue behind
- Wide Compatibility: With versatile adaptability, these 3D print glue sticks effectively adhere to various materials and printing bed surfaces, ensuring compatibility across diverse printing setups
Diagnosing common failure patterns
The entire first layer peels
Start with sheet cleanliness, seating, leveling, and nozzle-to-bed distance. Inspect the first-layer test for gaps or weakly joined lines. Confirm the bed temperature and sheet preset match the filament. Do not begin with an enclosure or glue unless the basic contact checks are correct.
Only one corner lifts
Look for a local high spot, residue, a draft from one direction, or a model edge positioned near the sheet perimeter. Re-clean and reseat the sheet, then rotate or move the model toward the center. If the corner is geometrically sharp, add a radius or brim.
The print lifts after several layers
Because the initial bond held, inspect cooling, ambient temperature, drafts, and the material profile. Large cross-sections can develop more shrinkage stress as they cool. A brim may add enough resistance, but a material or thermal change is usually needed when the lift repeats at the same height or on broad edges.
More squish made the result worse
Back out the nozzle adjustment and restore the manufacturer’s recommended first-layer procedure. Excessive flattening can damage some sheets and does not address shrinkage that occurs later. Check whether the original problem was thermal warping rather than first-layer contact.
A glue layer makes removal difficult
Use less product, allow the sheet to cool, and follow the sheet maker’s removal method. If the surface is not documented as compatible, stop using the aid and return to profile, cooling, brim, and geometry changes.
An enclosure helped one filament but hurt another
That outcome is expected when material cooling requirements differ. Keep the enclosure or draft shield for suitable ABS/ASA work only if the printer’s heat limits permit it. For PLA and PETG, restore effective part cooling and avoid unnecessary heat buildup.
A repeatable prevention checklist
- Identify whether separation starts on the first layer or later.
- Clean the sheet with its approved method and inspect for damage.
- Run leveling or mesh calibration and print a first-layer test.
- Confirm the exact filament and printer profile in the slicer.
- Verify first-layer and subsequent-layer bed temperatures.
- Confirm nozzle temperature and fan behavior match the profile.
- Move the printer away from windows, vents, and air-conditioning drafts.
- Add at least a 3 mm brim when the base is narrow or the footprint is large.
- Use a draft shield or enclosure only for materials and printers that support them.
- Orient the model toward the bed center and maximize bottom contact area.
- Round or chamfer sharp bottom corners when the design allows it.
- Use glue or another surface aid only when the sheet maker documents compatibility.
What the evidence does—and does not—establish
Manufacturer guidance consistently identifies cooling, shrinkage, adhesion, drafts, and geometry as the main controllable factors. It does not provide a neutral controlled comparison ranking every remedy, a universal temperature chart, or a success percentage for brims, enclosures, or glue. The 3 mm brim and 5–10 mm PP brim figures are recommendations for particular guidance, not guarantees.
Do these 3 things before closing this tab:
1Clear out junk files and repair common Windows errors2Scan for outdated or missing drivers - takes under a minute3Repair Windows errors before they cause bigger problemsApply every temperature, surface treatment, and enclosure decision to the matching printer, build sheet, and filament. If a setting comes from an older model manual or a particular manufacturer’s material page, keep that qualification with the setting rather than presenting it as a rule for all 3D printers.
Quick Recap
Product prices and availability are accurate as of the date/time indicated and are subject to change. Any price and availability information displayed on Amazon at the time of purchase will apply.

