Introduction
This guide demos Windows Server 2016 router configuration. It walks you though how to configure Windows Server 2016 to work as a router.
A router is used to route traffic between two subnets (or networks).
Most people may know about Cisco routers. But what they may not know is that Windows Server 2016 can also be configured as a router. Yes, it can!
Lap Setup for Windows Server 2016 Router Configuration
To be able to demo this guide I setup a lab as shown below:
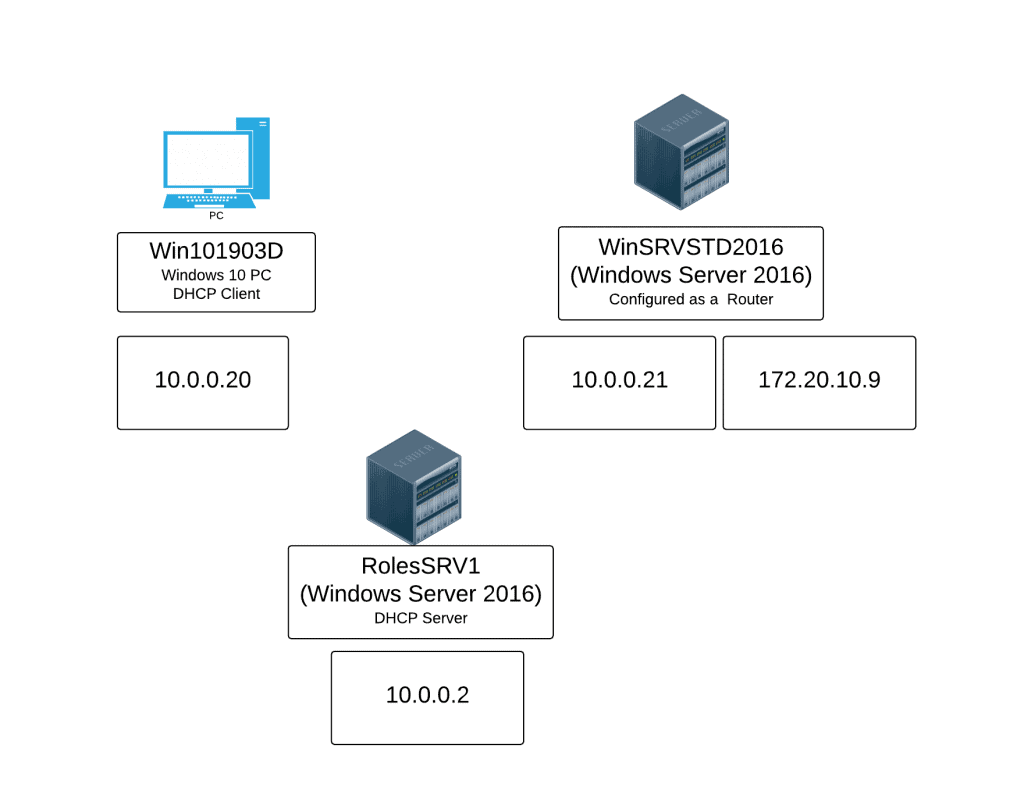
WinSRVSTD2016: Server 2016 with 2 network cards – one with IP 10.0.0.21, the second 172.20.10.9
Win101903D: Windows 10 client configured to receive IP addresses from a DHCP server.
RolesSRV1: DHCP Server with 10.0.0.0 scope
Before I configure the Windows Server 2016 server WinSRVSTD2016 as a router, I pinged the IP address on the second network card of the server 172.20.10.9.
Here is the result: “Transient failed: General failure”
The Windows 10 PC could not reach that IP address because it is outside its local subnet.
Steps for Windows Server 2016 Router Configuration
- Install Remote Access Role
- Configure Windows Server 2016 as a router
- Modify DHCP Scope
Here are the detailed steps
Install Remote Access Role
Windows Server 2016 router configuration requires Routing and Remote Access role.
Here are the steps to install this role in Windows Server 2016:
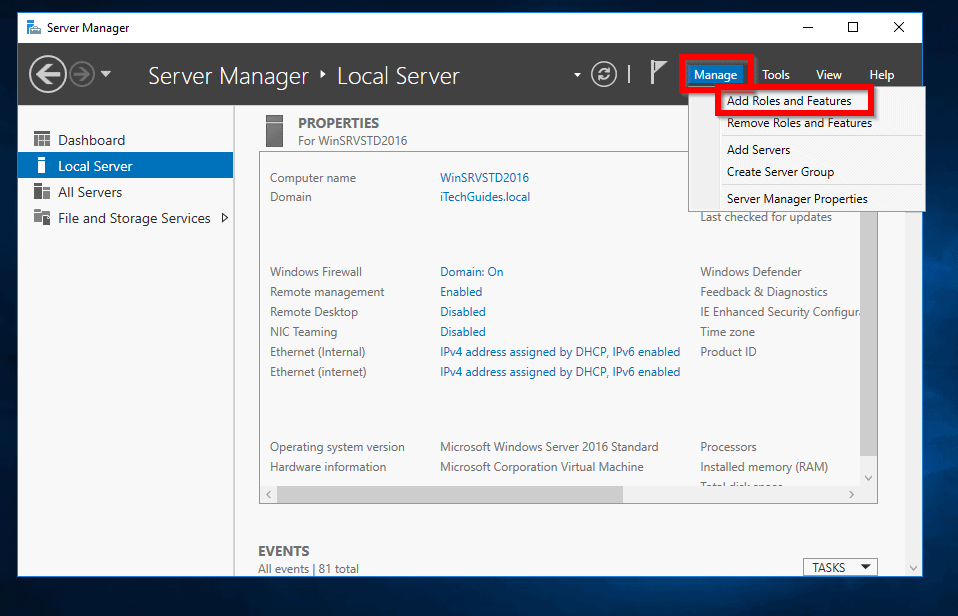
- Login to the server you wish to configure as a router and open Server Manager.
- From Server Manager, click Manage and select Add Roles and Features.
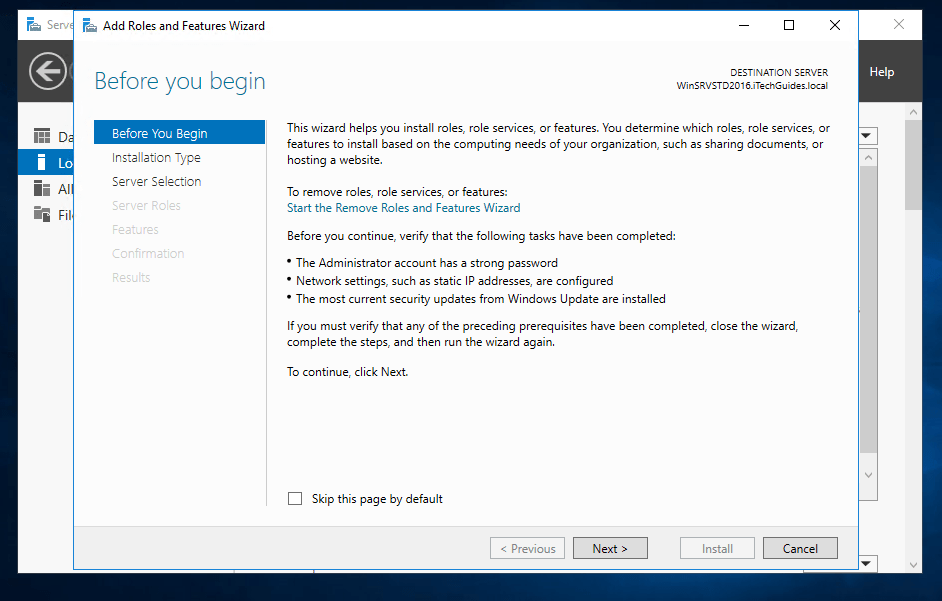
- When Add Roles and Features Wizard opens click Next.
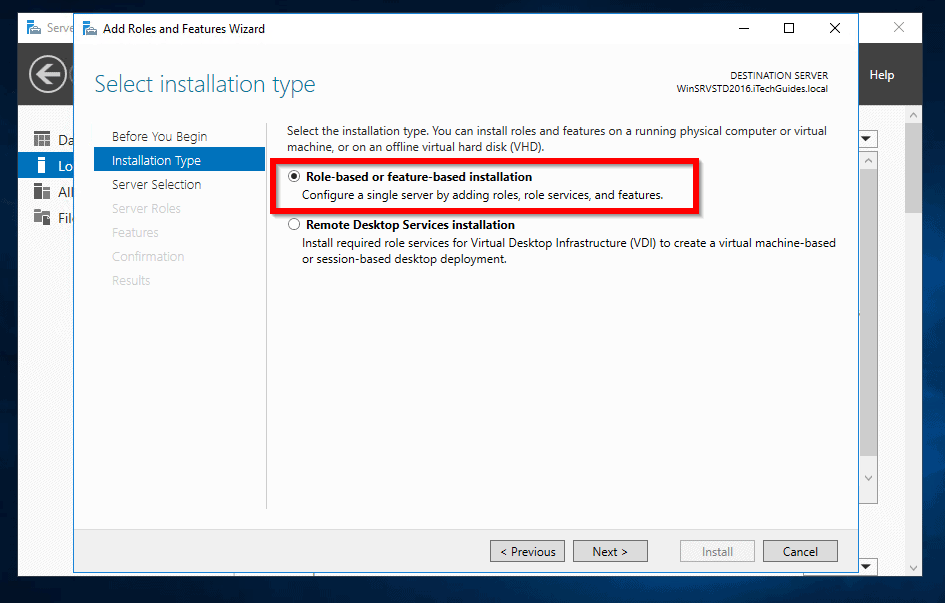
- Then on the Select installation type, select Role-based or feature-based and click Next.
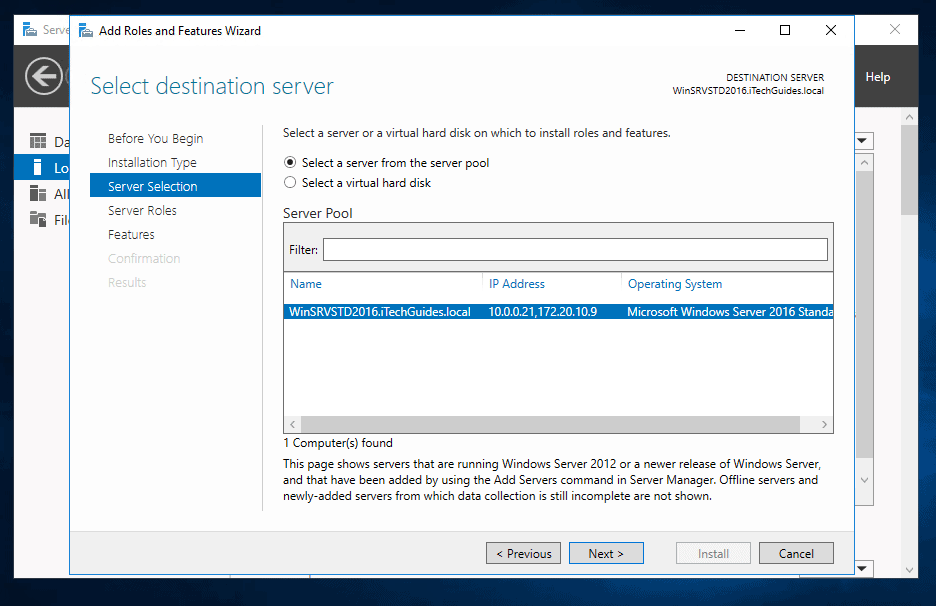
- Select the server to install the role. Then click Next.
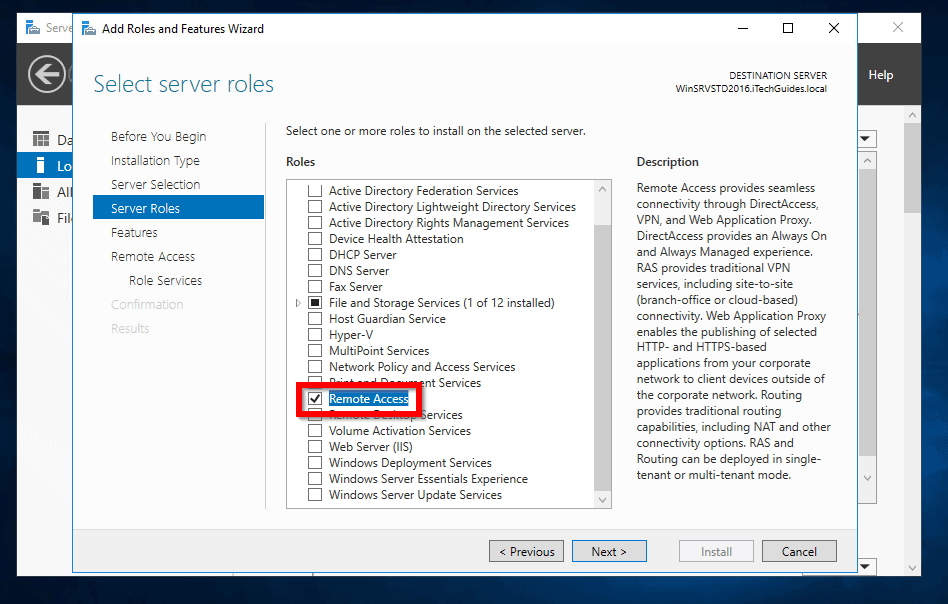
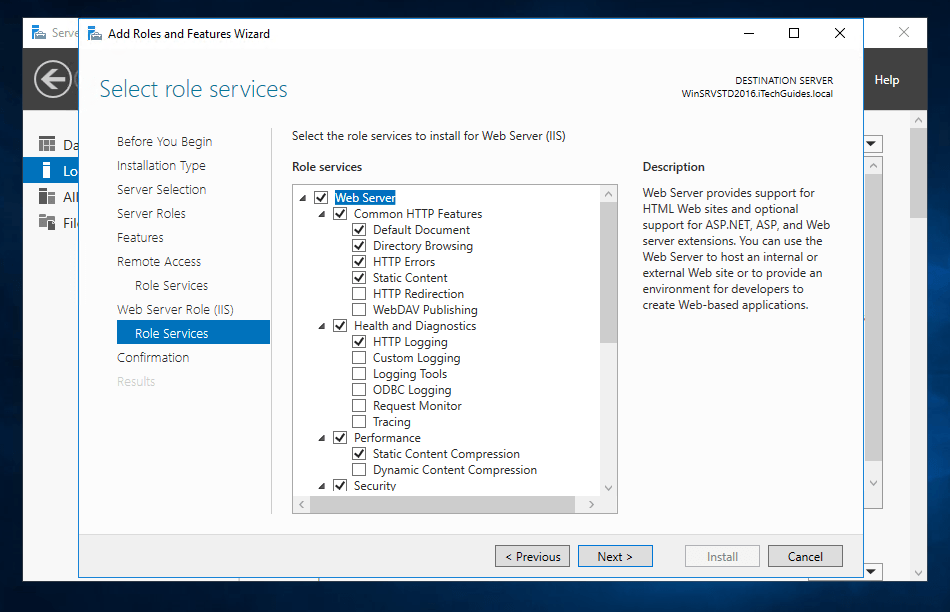
- On Server roles screen, check the box beside Remote Access. Then click Next.
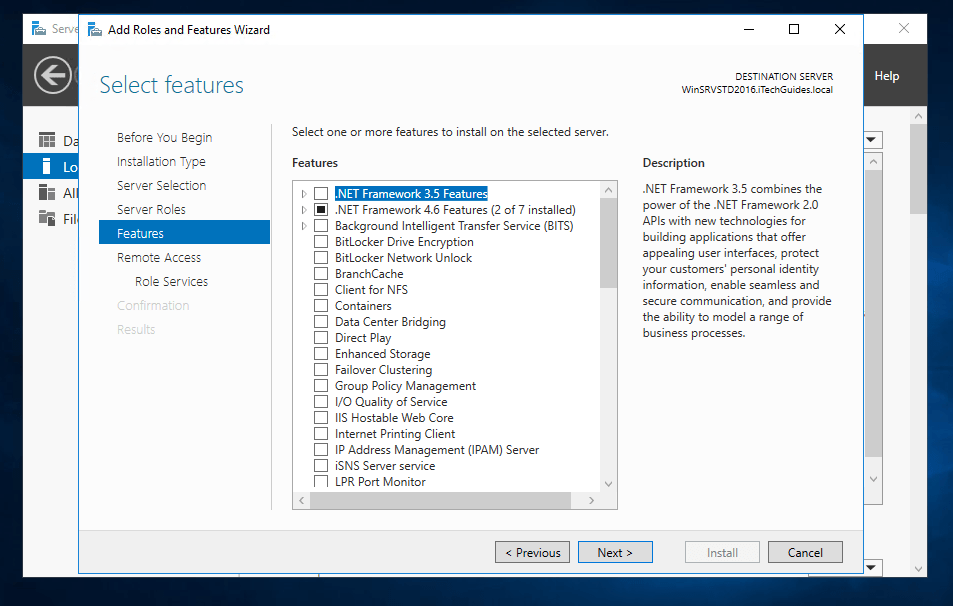
- When Features screen opens click Next
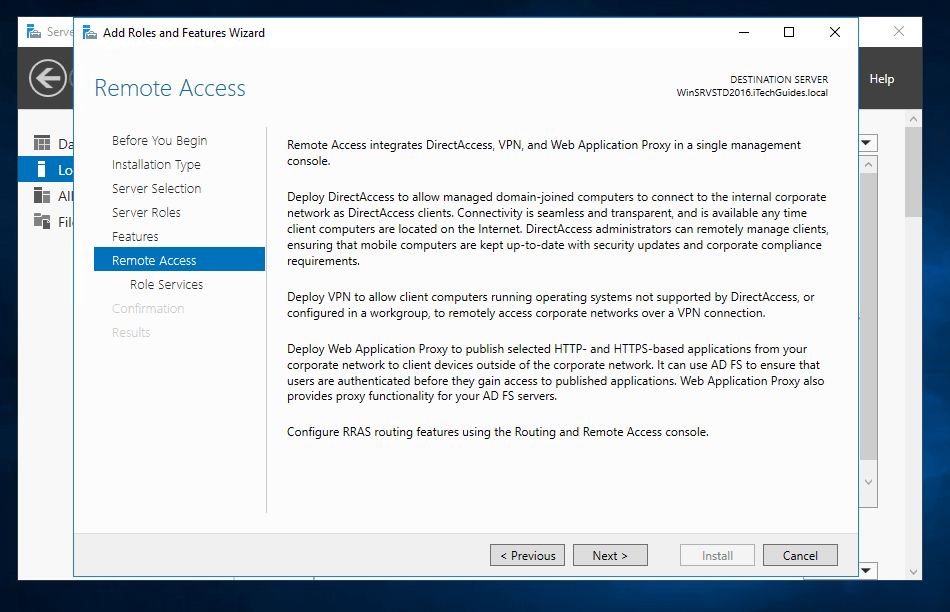
- Then read the information about Remote Access role and click Next.
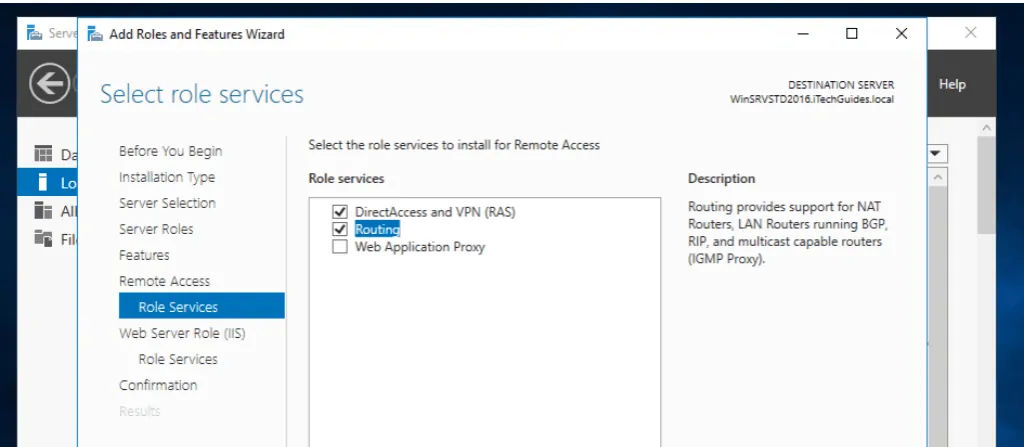
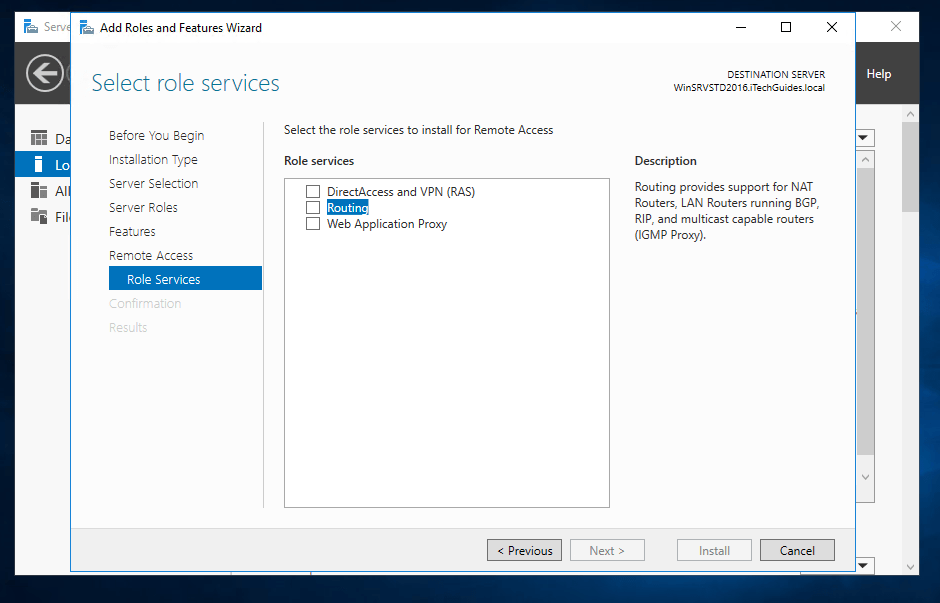
- On Role Services screen, check the box beside Routing. Then at the add features that are required for routing pop up, click Add Features.
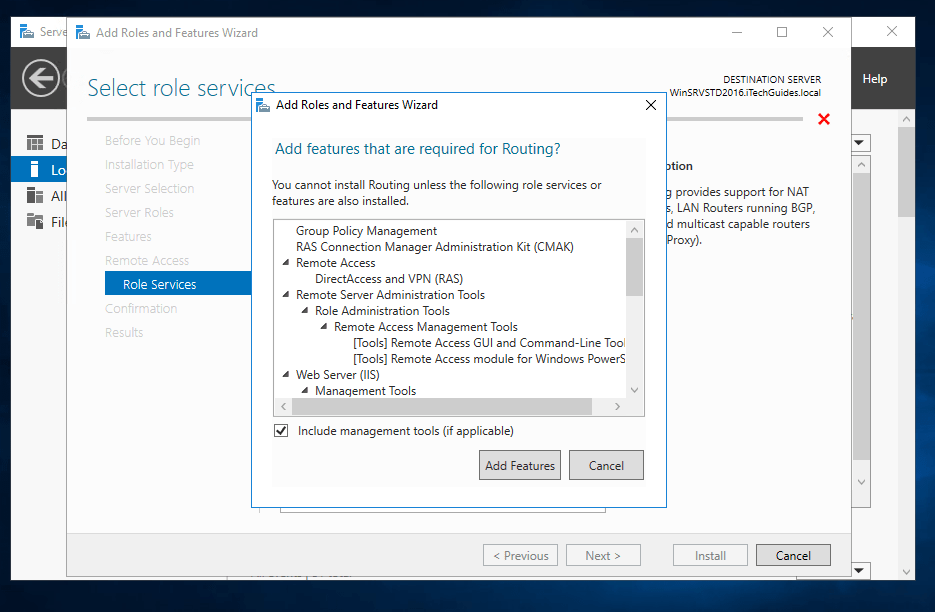
- Note that Direct Access and VPN (RAS) is also checked. The two role services are installed together. Click Next.

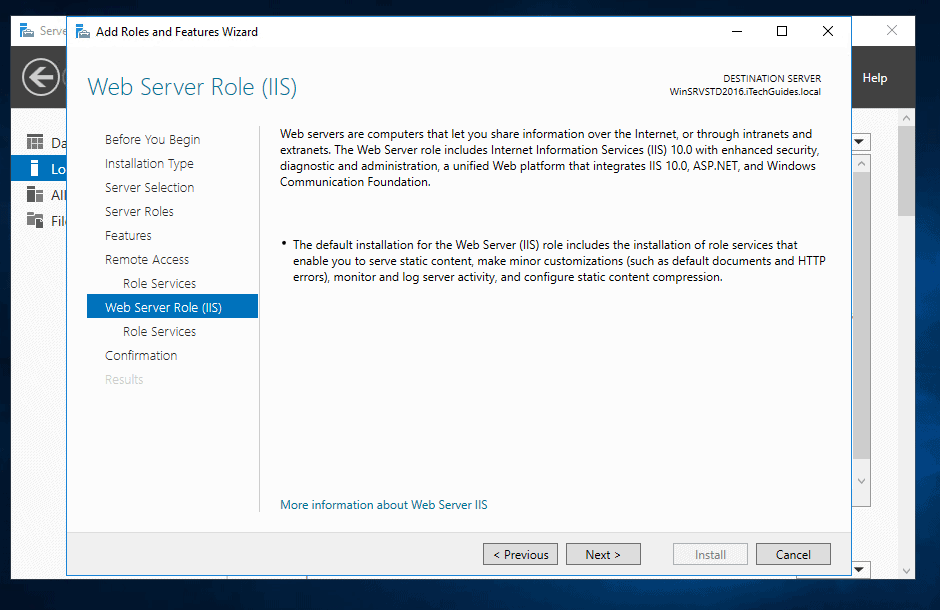
- At the Web Server Role (IIS) screen, read the information and click Next.
- Review the role services selected and click Next.
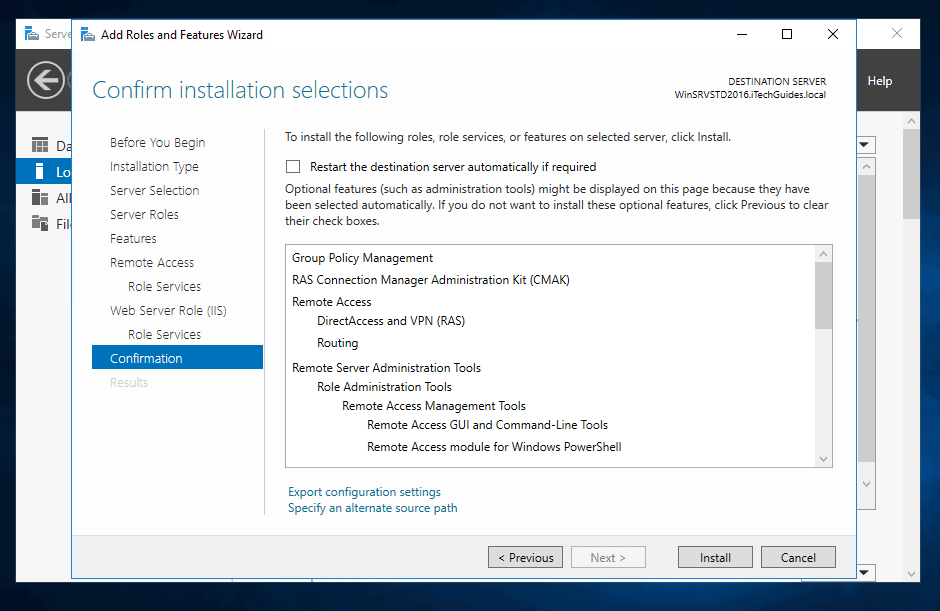
- Finally, at the Confirmation screen, click Install.
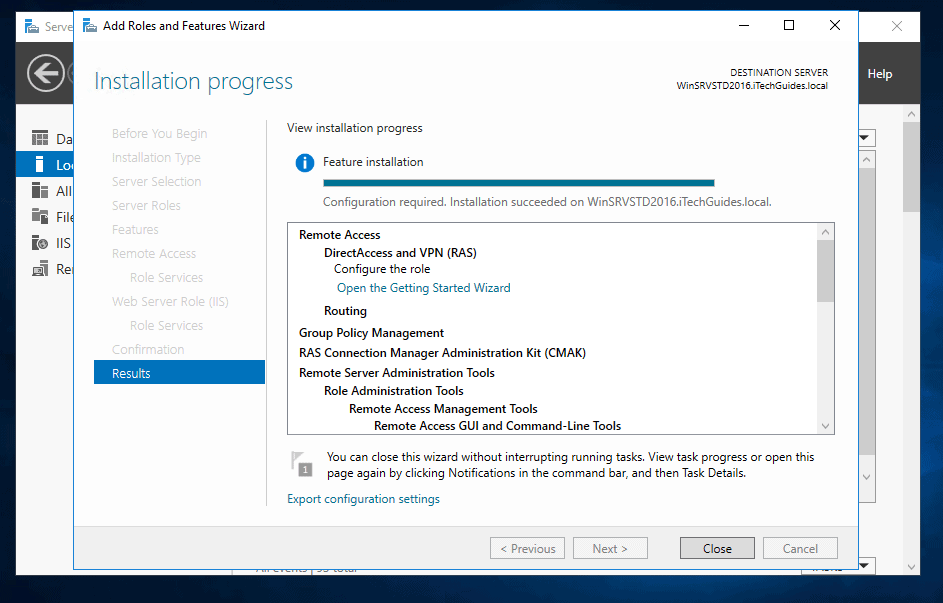
- When Remote Access role installation is completed, click Close.
Windows Server 2016 Router Configuration
After installing the role, the final step is to complete Windows Server 2016 Router Configuration.
Here are the steps:
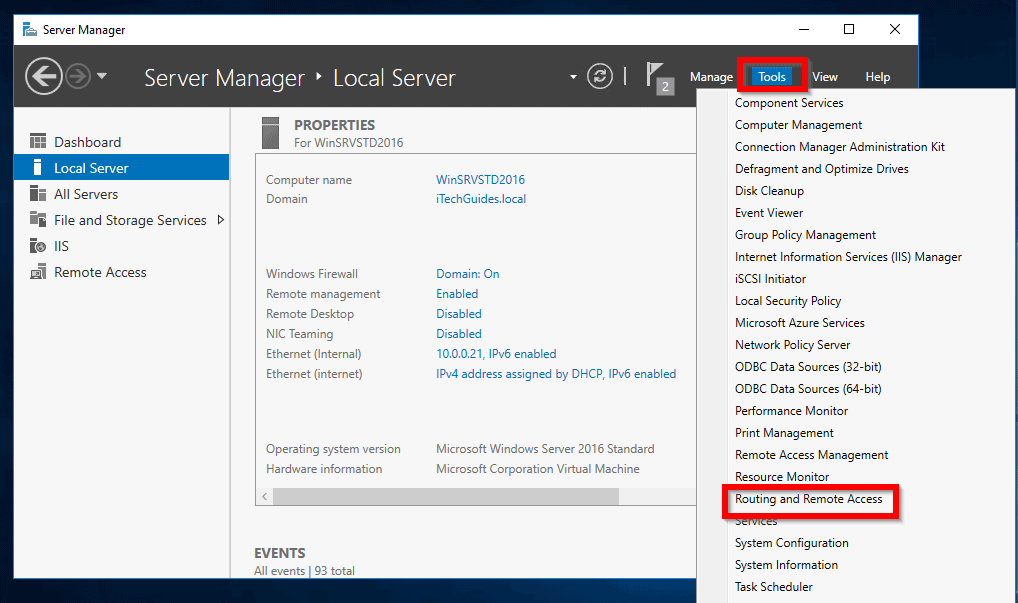
- Still from Server Manager, click Tools. Then select Routing and Remote Access.
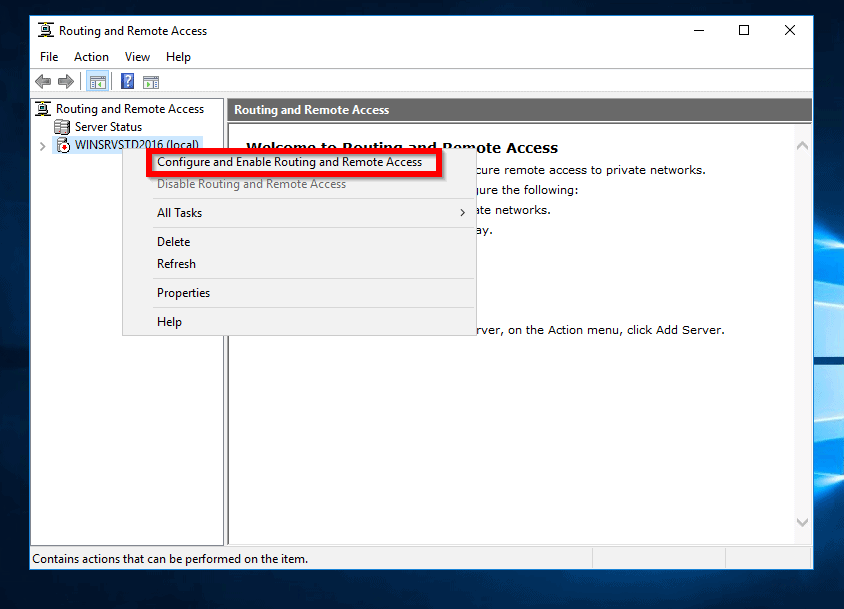
- When Routing and Remote Access opens, right-click the server. Then select Configure and Enable Routing and Remote Access.
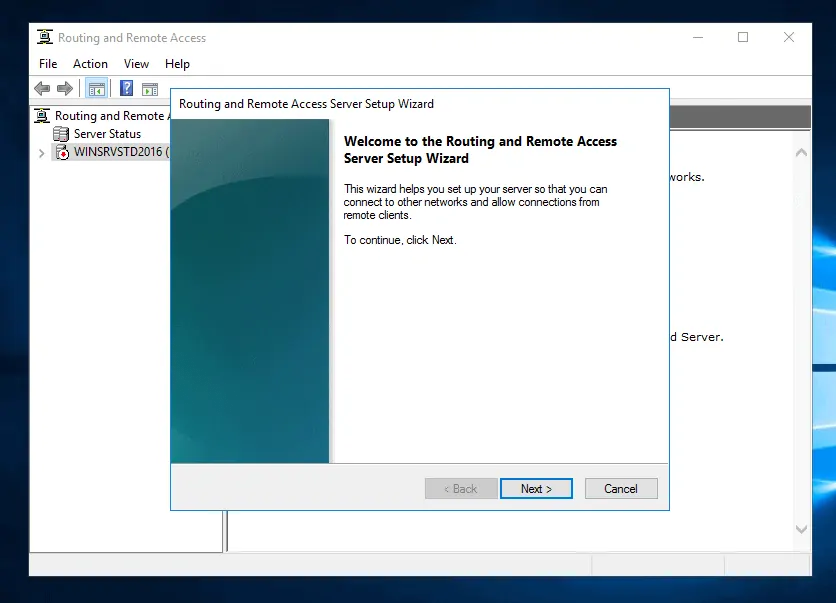
- On the first page of the setup wizard, click Next.
- Then on the Configuration page, select Custom configuration and click Next.
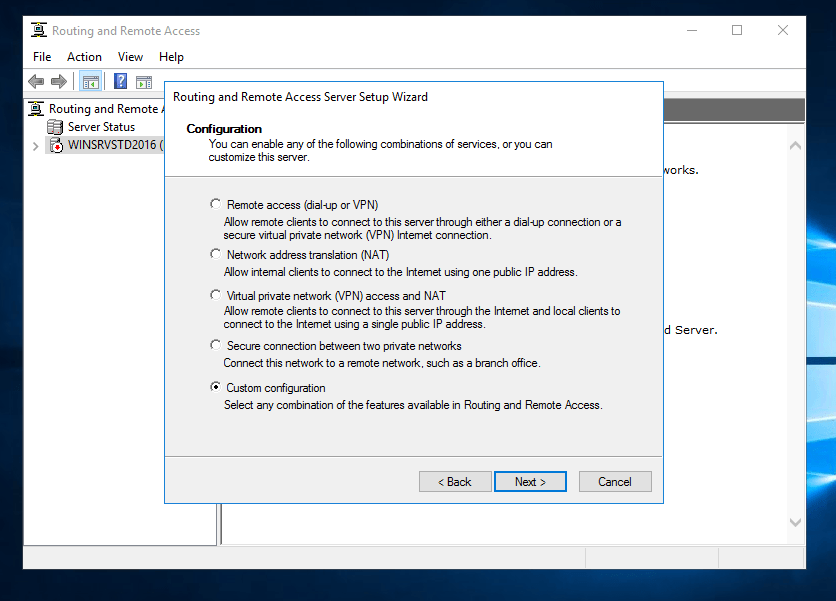
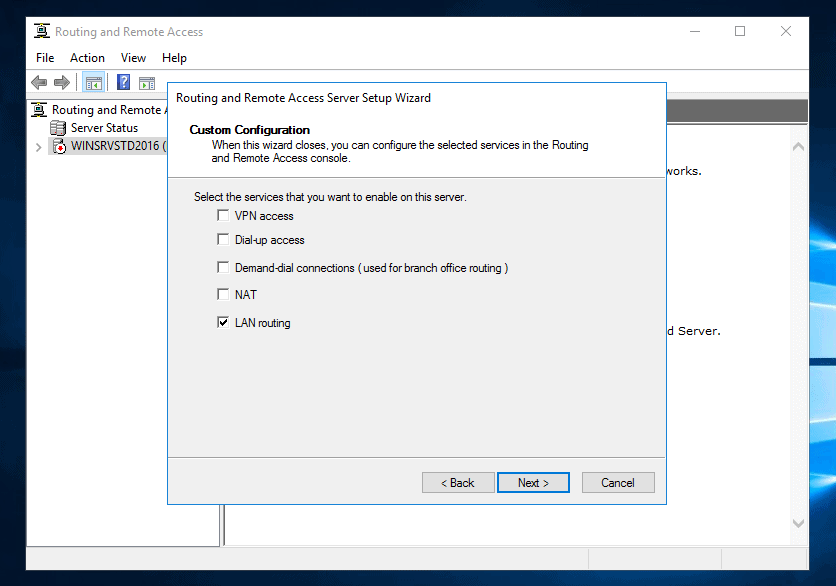
- On the Custom configuration page select LAN routing and click Next.
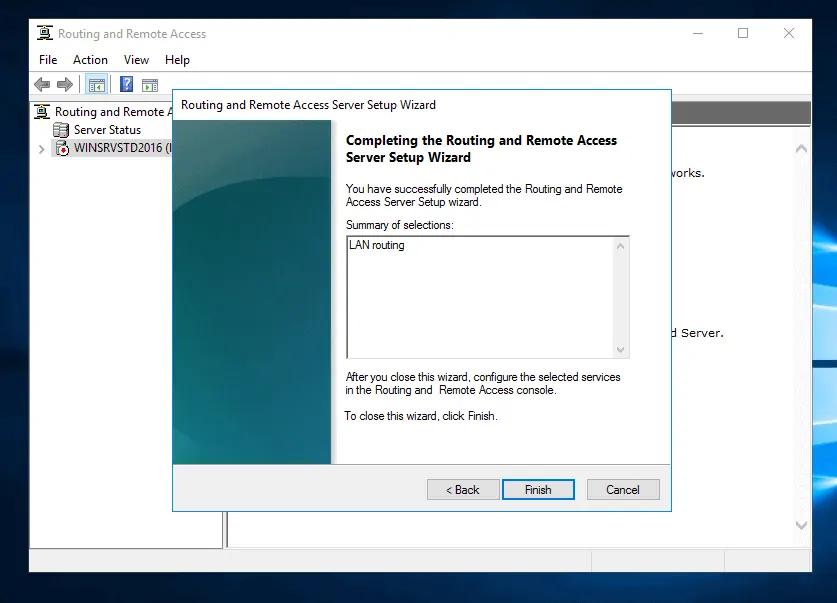
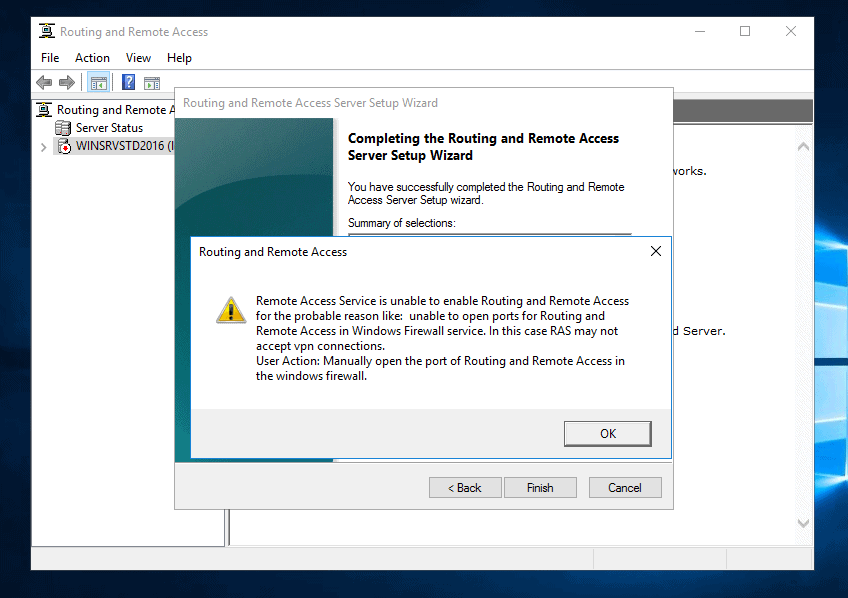
- On the summary page, click Finish. If you receive the prompt in the second image below, click OK.
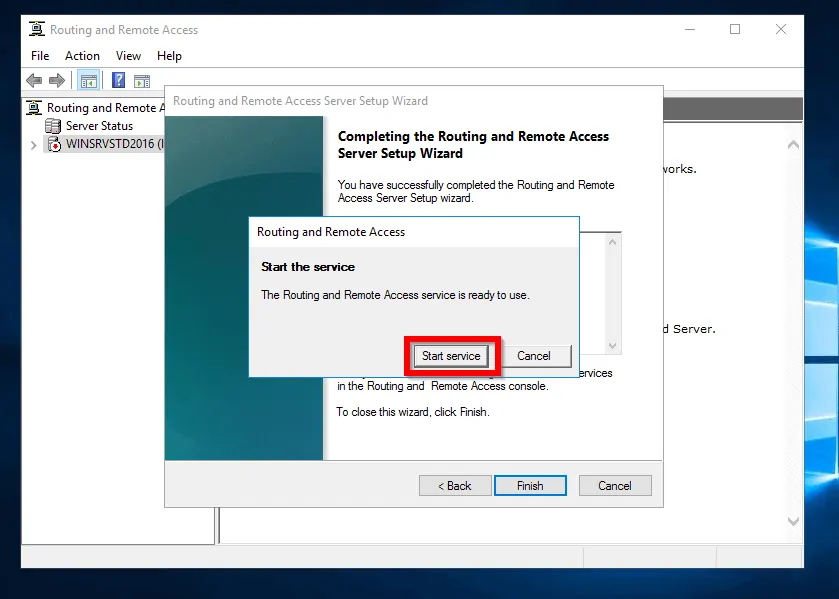
- Finally, to start the service, click Start service. Then wait. When the service starts, the server will turn green.
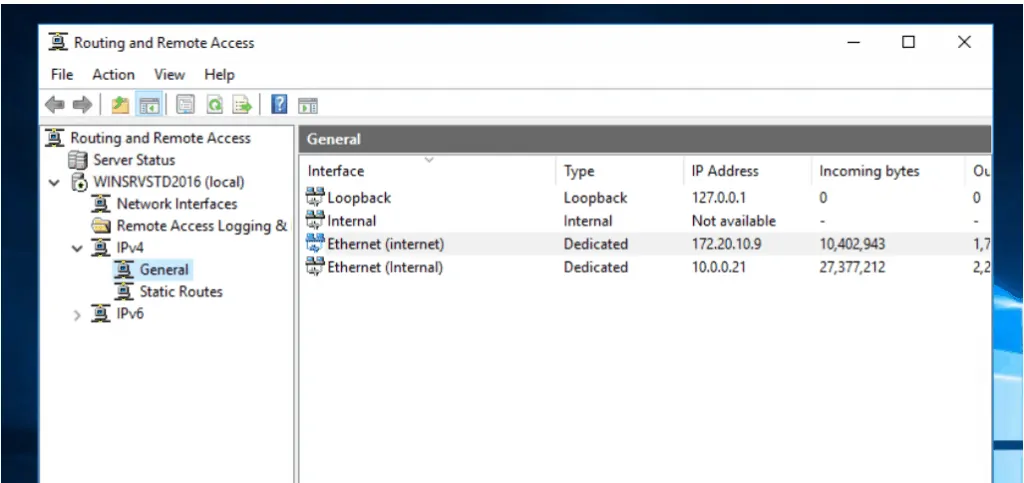
- Once the service starts, expand the server. Then expand IPv4 and click the General node. The network cards on the server are now acting as routers.
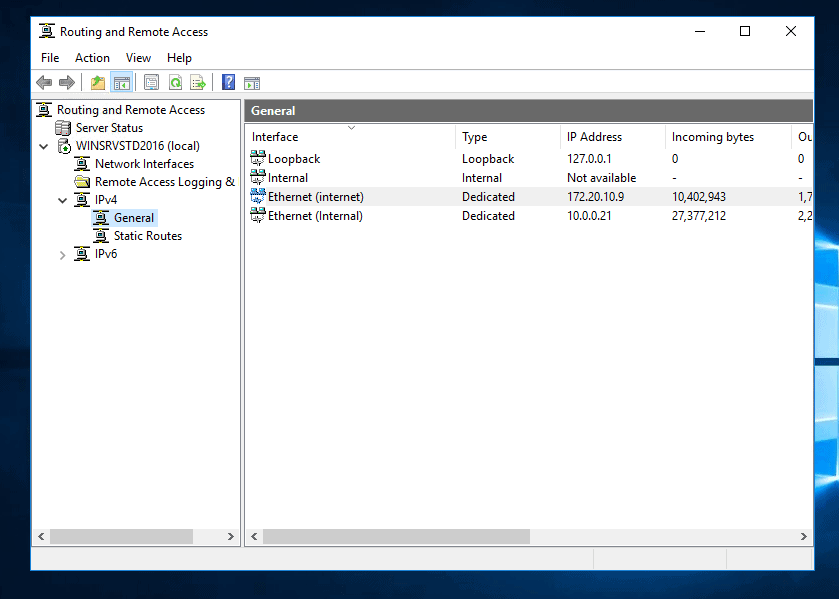
The network interfaces on the server are configured to route packets.
Add the New Router IP as Default Gateway in Your DHCP Scope

Though you have completed Windows Server 2016 router configuration, you will need to add the IP address of the server as Default gateway for your clients.
You can do this in one of 2 ways:
- Add the default gateway manually to the TCP/IPv4 of your computers
- Modify the DHCP scope to add 003 Router Option
This last part of this guide demos how to add Option 003 Router to the DHCP server. This adds the IP address of the router (Server 2016 you just configured) as the default gateway.
Here are the steps:
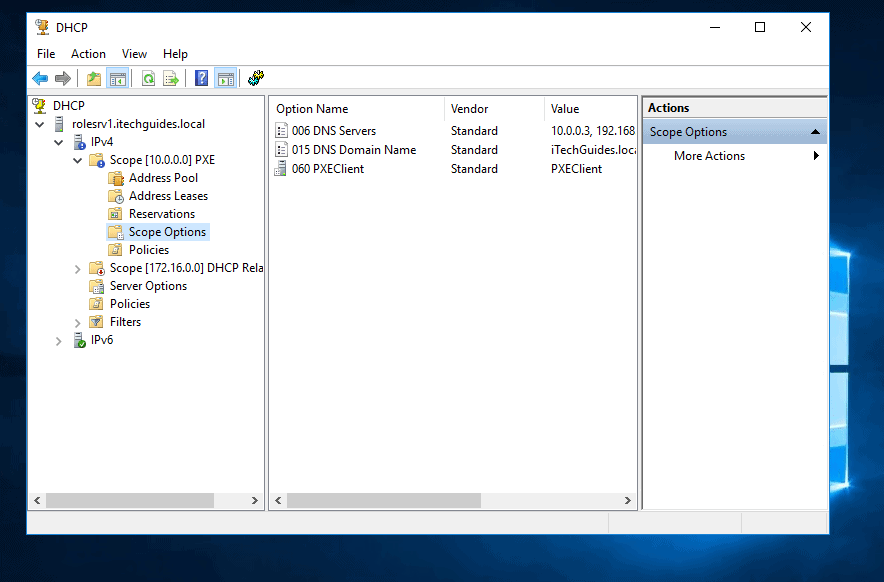
- Open DHCP Configuration tool. Expand your DHCP server. Then expand IPv4. Finally, expand the scope.
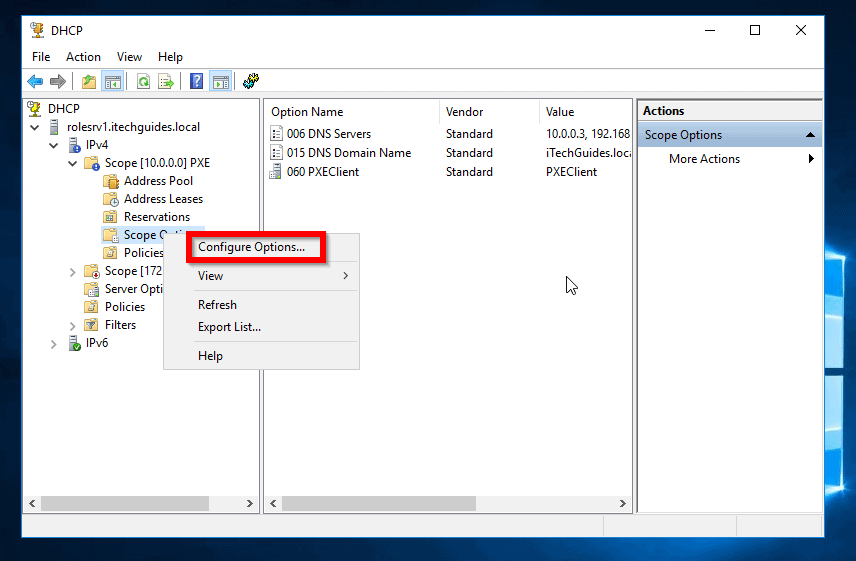
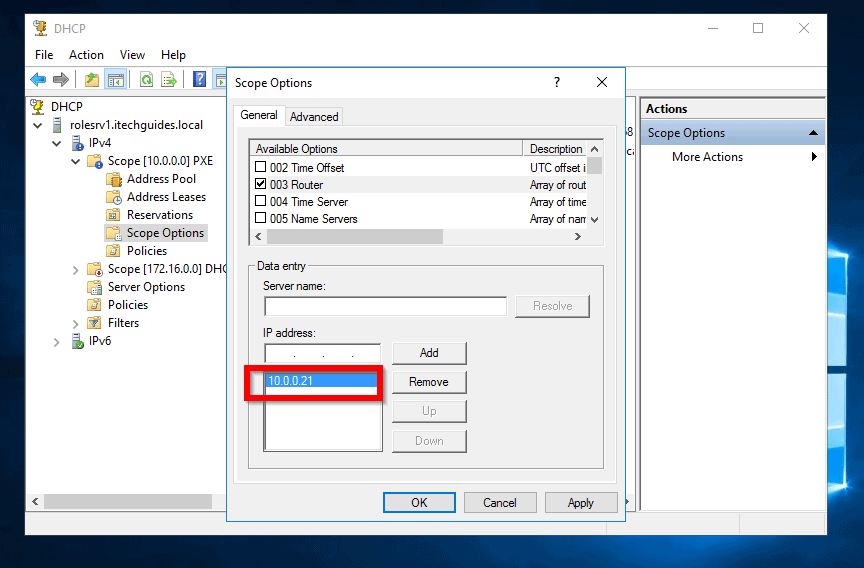
- Beneath the scope, right-click Scope Options and select Configure Options…
- Beneath Available Options, locate 003 Router. Then check the box beside it. Data entry will then be displayed. Beneath IP address, enter the IP address of the server you configured as a router then click Add.
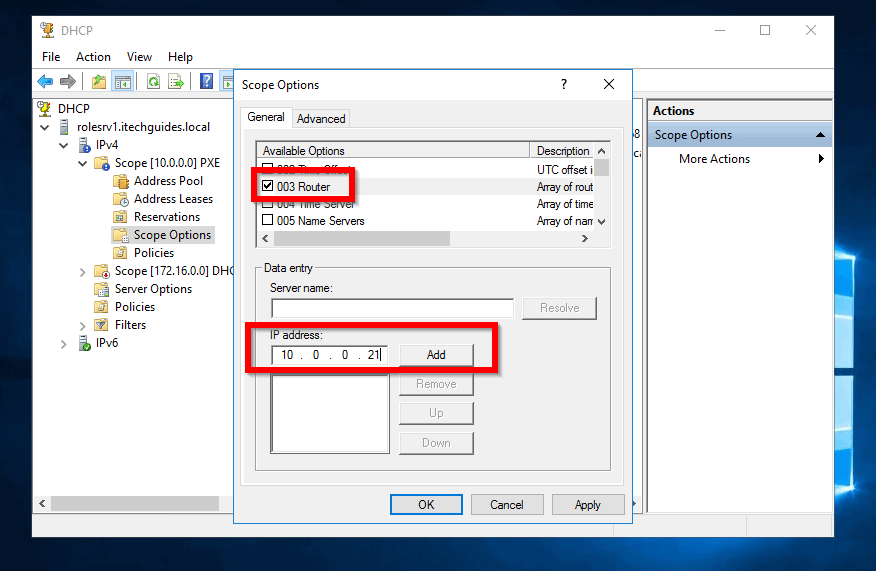
- The IP address will now appear in the list. To save the changes, click Apply, then click OK.
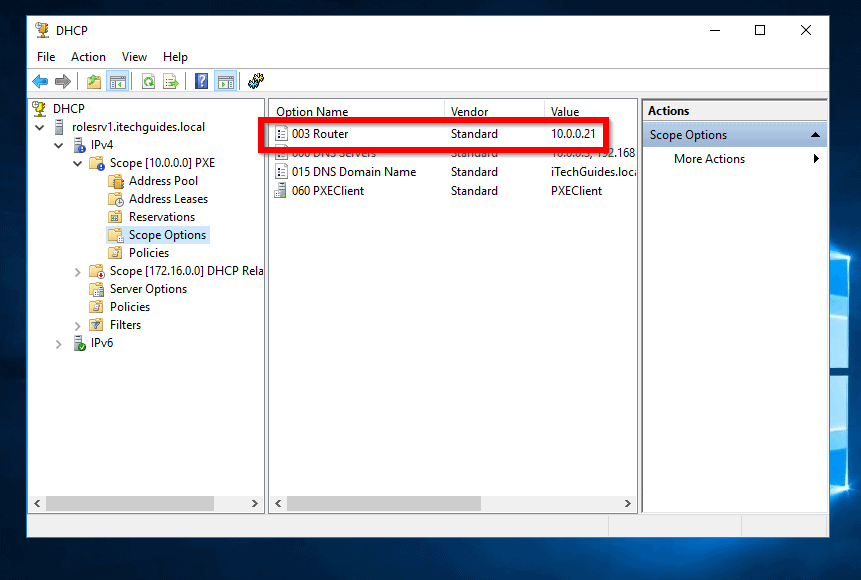
- The option is now listed in the scope
When computers configured to receive IP address from the DHCP scope are rebooted, they will pick up the new configuration.
However, if you wish to force a computer to receive the new configuration, open command prompt from the client computer, type the command below and press enter.
ipconfig /renew
It will pick up the servers IP as its default gateway.

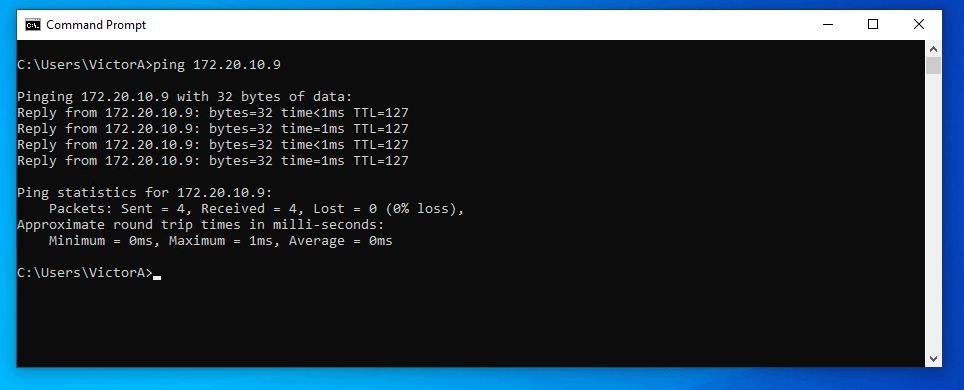
For my own test, when I now ping the IP address on the other network of the server, 172.20.10.9, it replied!
Conclusion
It is that easy to configure Windows Server 2016 as a router!
At www.itechguides.com, we love to hear from you. Thus, if you found this article helpful, kindly spare 2 minutes to share your experience with our community at [discourse_topic_url].
If you have any questions or want to comment on this guide, take the advantage to engage with our community at [discourse_topic_url].
If you want to read more Windows Server guides visit our Windows Server How Tos page.
To read more about routers and how they work, click this Wikipedia link – Router (Computer).


Hi,
I followed your article to installed RRAS on server 2016 on a standalone physical computer with 2 NICs (internal NIC static IP 10.0.0.1 and external NIC IP 192.168.0.178 which connect to my home’s router (192.168.0.1).
I configured “Custom configuration–>Lan routing” service only, the service started normally. However the router seems doesn’t works. I can ping between two NICs (“ping -S 10.0.0.1 192.168.0.178” successful and “ping -S 192.168.0.178 10.0.0.1” also successful) but “ping -S 10.0.0.1 192.168.0.1” failed.
If I configure NAT instead of “Lan routing”, I can successfully ping internet from 10.0.0.1.
In addition, “ping -S 192.168.0.178 192.168.0.1” without issue.
Any suggestions are appreciated!
Thank you.