
PC Slower Than It Used to Be?
A free scan shows the junk files, broken settings and background clutter dragging Windows down - then fixes them in one click.Free scan · Windows 10 & 11Crashes, No Sound, or Screen Glitches?
Random freezes, missing sound and display glitches usually trace back to one bad driver. Find and replace yours safely.Free scan · under a minuteiTechGuides is reader-supported. When you buy through links on our site, we may earn an affiliate commission. As an Amazon Associate I earn from qualifying purchases. Learn more
The four settings that determine whether a trail camera gets useful evidence are trigger interval, PIR sensitivity, resolution and night mode. Set the interval to match how quickly animals cross the frame, use medium sensitivity as a starting point, choose resolution against your storage and viewing needs, and keep infrared video short at night—especially on batteries. Then change one setting at a time after reviewing real captures.
What each trail-camera setting controls
These controls solve different problems. Trigger interval governs how soon the camera can react again after an event. PIR sensitivity changes how readily the passive-infrared sensor detects movement and body heat. Resolution determines how much pixel detail each file contains and how large that file becomes. Night mode controls infrared operation or a model-specific night-capture profile, and often affects battery use and maximum video length.
| Setting | What it changes | Main benefit | Main cost or risk |
|---|---|---|---|
| Trigger interval (detection delay) | Rest period after a trigger before the camera accepts another event | Controls how completely a sequence is captured | A long delay can miss a second pass; a very short delay can create duplicate files |
| PIR sensitivity | How readily the sensor responds to movement and temperature differences | Improves detection of small or distant subjects when raised | Higher settings can increase false triggers from environmental interference |
| Resolution | Pixel detail and file size for photos or video | Provides more detail for identification and cropping | Consumes more card capacity and can increase transfer time |
| Night mode | Infrared behavior, operating window or a model-specific night profile | Determines how subjects are illuminated after dark | Longer or stronger IR operation uses more battery and can increase blur |
Trigger interval: the time between captures
What “trigger interval” means
Trigger interval, also called detection delay or PIR interval, is the rest period after a motion event. During that period the PIR sensor is disabled or ignores new movement. If the interval is one minute, a second pass that happens during that minute may not be recorded. The same delay also prevents one animal standing in front of the camera from filling the card with nearly identical files.
The Tool Desk
Outbyte Driver Updater FREEScan for outdated or missing drivers - takes under a minuteDriver Scan →Outbyte PC Repair FREERepair Windows errors before they cause bigger problemsFix Now →NUM’AXES describes programmable PIR intervals from 5 seconds to 59 minutes 59 seconds. Boly defines the interval as the time the PIR sensor is disabled after each triggering. The menu name and available values vary by model, so use the range shown in your camera’s manual rather than assuming every camera offers the same choices.
#1 Best Overall
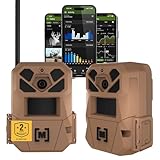
- HARVEST MORE BUCKS THIS SEASON - EDGE 3 delivers real-time deer activity, movement patterns, and location intelligence—so you know when and where mature bucks are moving instead of hunting on hope.
- AI BUCK DETECTION + INSTANT ALERTS - Moultrie AI identifies bucks and immediately delivers high-resolution photos or HD video—reducing false alerts and helping you act fast when it matters most.
- NATIONWIDE 4-CARRIER AUTO-CONNECT - Automatically connects to the strongest of four major U.S. networks. No SIM cards. No manual setup. Reliable photo and video delivery—even in remote hunting properties.
- 40MP PHOTOS + 1080p HD VIDEO - Capture crisp, detailed images and lifelike HD video. Low-glow infrared flash keeps nighttime shots clear without spooking deer.
- 0.5-SECOND TRIGGER + 100FT RANGE - Fast trigger speed and long detection range ensure moving deer are captured cleanly—no blur, no missed opportunities.
Choosing an interval by location
- Travel route, trail or narrow crossing: use the shortest practical delay. An animal may cross the detection zone quickly, and a long pause can lose the next subject.
- Feeder, bait or water source: use a longer delay when the same animal can remain in the zone. This reduces redundant files and conserves card space.
- Survey where every event matters: favor a short interval, then check whether the resulting file volume and battery drain are acceptable.
- Observation where sequence detail is less important: lengthen the delay to reduce repeated images from stationary animals.
The Defenders of Wildlife monitoring guide recommends the shortest practical capture delay for its wildlife example, while noting that the objective and location determine the ideal value. There is no universally correct number: the setting is a compromise between capture completeness and storage, power and review time.
PIR sensitivity: high, medium or low?
What sensitivity changes
PIR sensitivity controls how readily the passive-infrared detector responds to movement and differences between a subject’s body heat and the background. NUM’AXES states that High sensitivity is more responsive to smaller subjects, offers longer detection distance, more easily distinguishes body heat from outdoor temperature, and can trigger the camera more easily.
That extra responsiveness is useful, but it also makes the camera more vulnerable to environmental interference. Wind-blown plants, heat shimmer and other changes in the scene can produce empty frames. Menu labels differ by manufacturer; a three-level Low/Medium/High menu is common, but some models use different wording.
Do these 3 things before closing this tab:
1Clear out junk files and repair common Windows errors2Scan for outdated or missing drivers - takes under a minute3Repair Windows errors before they cause bigger problemsRank #2

- VALUE WITHOUT COMPROMISE – The FLEX-M2 cellular trail camera proves you don’t have to pay top dollar to get top performance. It’s easy to use, customizable, reliable and comes with features that punch well above its price tag.
- HIGH-QUALITY PHOTOS AND VIDEOS – Receive 32MP pictures and 1080p videos with sound directly to your cell phone via the free SPYPOINT app. Request full-HD files anytime from your cellular trail camera.
- EASY SET UP AND REMOTE MANAGEMENT – Leave your hunting area undisturbed by activating, managing, and updating your cellular trail camera remotely via over-the-air updates with the SPYPOINT app. Plus, locate your trail cam anytime using the GPS locator on the SPYPOINT app.
- UNINTERRUPTED SCOUTING: Pair the FLEX-M2 with the LIT-22 rechargeable battery pack (not included) that replaces up to 1,000 AA batteries, to enable up to 12 months of uninterrupted performance that reduces battery waste, saves money and extends time in the field
- CROSS-CARRIER COVERAGE – Dual-SIM technology automatically connects your cellular trail camera to all major carriers and the strongest signal in the area, so you can count on reliable coverage. No Wi-Fi needed.
A practical starting point
- Set sensitivity to Medium for the first deployment.
- Raise it to High when small or distant animals are being missed, or when high ambient temperatures make body heat harder to separate from the background.
- Lower it to Low when empty captures are caused by moving vegetation, wind, heat shimmer or similar interference.
- Review a representative sample in daylight and darkness before making another adjustment.
High ambient temperature deserves special attention. NUM’AXES notes that High sensitivity can help the camera distinguish body heat from the background in hot conditions, even though high sensitivity can otherwise increase unwanted triggers. The right choice depends on whether missed subjects or false triggers are the larger problem at your site.
Resolution: how much detail do you need?
Photos and video make different demands
Resolution sets the number of pixels recorded. Higher resolution can preserve more detail for identification or cropping, but it creates larger files and uses more SD-card capacity. GardePro documentation describes the same trade-off for both stills and video: increasing video resolution improves quality while increasing file size and card usage.
A high megapixel label cannot repair motion blur, poor focus, an out-of-range subject or insufficient night illumination. It gives a sharp, properly exposed image more pixels to work with; it does not make an unsharp image sharp.
Rank #3
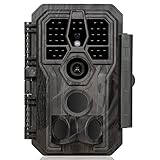
- 64MP Photos & 1296P HD Videos: Equipped with a high-quality optical lens and advanced image sensor, the E5S captures ultra-sharp 64MP photos and smooth 1296P HD videos.
- Low-Power, Eco-Friendly Wildlife Viewing: Simply retrieve the SD card to see what your camera has captured—each visit could bring a new surprise. Non-Cellular and Non-WiFi operation ensures minimal power use, fewer battery changes, and zero disturbances.
- Rugged & Weather-Resistant: Built to withstand harsh outdoor conditions with an IP66 waterproof rating. Features a 1/4"-20 mounting thread for secure placement on trees, posts, or fences. Ideal for use as a durable trail camera.
- Fast 0.1s Trigger Speed with 3 PIR Sensors: Never miss fast-moving deer wildlife. Three PIR sensors enable a lightning-fast 0.1s trigger speed motion activation, perfect for hunting purposes.
- Extended Power Options & Efficient Design: Powered by 8×AA batteries (not included). For continuous outdoor use, the E5S supports the GardePro SP350 Solar Panel (sold separately), ensuring reliable power even in remote areas.
Useful baseline values
For a high-quality still-photo example, the Defenders of Wildlife guide lists 16–20 megapixels. For video, it lists 1080p or higher. These are example targets for that wolf-monitoring setup, not a universal requirement or a guarantee of image quality on every camera.
| Goal | Resolution approach | Why |
|---|---|---|
| Species or individual identification in good light | Use the highest still setting that your card and download workflow can handle; 16–20 MP is the Defenders guide’s high-quality example | More pixels retain useful markings and support moderate cropping |
| General activity records | Use a middle or high setting after checking expected file volume | Balances detail against capacity and review time |
| Video behavior study | 1080p or higher is the Defenders example; select a higher mode only when the extra detail is worth the larger files | Video rapidly consumes storage, especially with long clips |
| Limited card or slow transfer workflow | Choose the highest setting that will not fill the card before you can service it | A camera that stops recording because the card is full provides no additional detail |
Resolution, storage and transfer decisions
Before selecting the top setting, estimate how often you can retrieve the card and how quickly you can copy files. Video and high-resolution stills both increase the amount of data to move. A compatible high-speed SD card becomes more valuable as resolution and video use rise, but the camera’s manual must determine the card type, maximum capacity and supported speed. Do not assume that a card accepted by one model will work in another.
Night mode and night-video length
Why the label is not universal
“Night mode” may select an operating window, infrared behavior or a model-specific night-capture profile. Some cameras expose separate choices for IR intensity, flash range or night video; others combine them. Read the exact model manual before treating a menu label as a standardized setting.
Rank #4

- 30MP photo & 1080P video: This mini trail camera captures 30MP clear images and full HD 1080P video during day (color) and night (black and white), ensure every details will be captured. (Included 4pcs 16GB SD cards and 16pcs AA batteries) Since the camera cannot connect to a phone, accessing photos or videos requires removing the SD card.
- Fast trigger speed: The WOSODA game camera features a trigger speed of 0.3s ensures that no details are missed, allowing for precise and fast capturing of photos or videos even in the dark.
- Low power consumption: The deer camera with night vision only need 4 AA batteries, with such a compact design, it boasts a sleek appearance and offers extended standby time under the same conditions, without the need for frequent battery replacements.
- Stealthiness: Trail cam feature a camouflage appearance, allowing it to blend better into the natural environment and avoid easy detection by target animals or others.
- Easy to Operate: These wildlife trail cameras are designed for simple setup and operation. They are ideal for a variety of outdoor applications, such as home security, property surveillance, wildlife monitoring, and farm safety.
Set a conservative night-video duration
The GardePro E6 manual highly recommends setting night video to less than 30 seconds because its infrared LEDs consume more battery power. Core trail-camera documentation records a 15-second nighttime maximum for certain configurations with high LED control. These figures demonstrate why a value from one model cannot be copied blindly to another: the 15-second limit applies only to the specified Core configurations, while the under-30-second recommendation is for the GardePro E6 guidance.
On a battery-powered camera, start with a short night clip and increase it only when the additional behavior is worth the power cost. Verify the model’s maximum before saving a longer value; some cameras will reject it, shorten it automatically or change modes.
What’s actually slowing this PC down?
Pick the symptom - the matching free tool is one click away.
Match infrared behavior to distance and motion
- Close, predictable subjects: a power-saving IR mode may be sufficient and can reduce battery demand.
- Farther subjects: a stronger or longer-range setting can illuminate more distance, but may consume more power.
- Fast-moving subjects: longer illumination or exposure can increase motion blur. Position and timing matter as much as nominal IR range.
- Unknown conditions: test the available flash/IR choices at the actual mounting distance; do not infer performance from the menu name alone.
A reliable first-time setup
Use this sequence when the camera is new or moved to a different site. It keeps the initial choices conservative and makes later changes diagnosable.
- Choose the capture mode. Start with photo mode unless movement behavior is the main question. Photos generally use less storage and power than continuous video. The Defenders guide recommends photo or photo-plus-video according to the monitoring goal.
- Set the trigger interval. Use a short-to-moderate delay on a route and a longer delay at a feeder or bait site where subjects linger.
- Set PIR sensitivity to Medium. This gives you a neutral baseline before you know whether the site produces misses or false triggers.
- Select resolution. Choose the detail needed for your viewing distance and identification task, while confirming that expected file volume fits the card and service schedule.
- Configure night mode. Select the IR behavior suited to the subject distance and keep night video under the model’s documented limit. For the GardePro E6, the manual recommends less than 30 seconds; certain Core high-LED-control configurations allow no more than 15 seconds.
- Mount and aim the camera. Keep the intended path inside the detection zone and avoid unnecessary moving vegetation in front of the PIR sensor.
- Review a sample. Look for missed passes, empty frames, usable detail, card capacity and battery drain. Change one setting at a time, then observe another representative sample.
How to tune settings from real evidence
If animals are missing from the sequence
- Shorten the trigger interval first when a second animal or second pass is occurring during the rest period.
- Raise PIR sensitivity when the subject is small or distant and the camera is not detecting it.
- Check aim and detection-zone coverage before increasing sensitivity; a setting cannot capture a subject outside the sensor’s field.
If the card fills with duplicates
- Lengthen the trigger interval at sites where one animal remains in view.
- Switch from video to photo or reduce clip length when behavior details do not require long footage.
- Lower resolution only after deciding that the lost detail is acceptable for your identification task.
If you get many empty frames
- Lower PIR sensitivity from High to Medium or Low.
- Remove or redirect moving vegetation and reconsider a location exposed to wind or strong heat shimmer.
- Use a sample from the same time of day as the problem; temperature and wind conditions can change the result.
If night footage is dark or blurred
- Confirm that the subject is within the selected IR range and that the chosen mode is intended for that distance.
- Try a stronger IR setting for distant subjects, accepting its higher power demand.
- Shorten the subject-to-camera distance or improve the approach angle rather than relying solely on higher resolution.
- For moving subjects, check whether long exposure or insufficient illumination is causing blur; more pixels will not correct it.
If batteries drain too quickly
- Reduce night-video length, because IR LEDs consume substantial power; the GardePro E6 manual specifically recommends clips under 30 seconds.
- Use photo mode when continuous behavior footage is not essential.
- Review whether high sensitivity is causing frequent triggers and unnecessary recordings.
- Check the manual for supported battery chemistry and firmware before changing the power source.
Compare the settings on four practical trade-offs
| Decision | Move the setting upward or shorter when… | Move it downward or longer when… |
|---|---|---|
| Capture completeness versus battery and storage | Every pass matters and missed events are costly | The same subject generates redundant files or service visits are infrequent |
| Detection range versus false triggers | Small or distant animals are being missed | Wind, vegetation or heat creates empty captures |
| Image detail versus file size | You need markings, identification or cropping | The card, transfer process or retention period is the limiting factor |
| Night behavior versus power use | Longer behavior sequences justify additional IR and video power | Battery life is more important than extended clips |
What to verify before buying cards or batteries
Adjustable PIR sensitivity, detection delay, photo and video resolution, and night-video controls are the features that directly support this tuning process. Higher-resolution recording increases the value of a compatible high-speed SD card, while night IR recording increases battery demand. Verify the exact model’s card type, maximum capacity, battery chemistry and firmware requirements in its manual before purchasing accessories. These specifications are model-specific and are not established by a generic setting label.
Source-specific limits to keep in mind
The numerical examples above come from particular documents and should be read in context: 16–20 MP for high-quality stills and 1080p or higher for video are examples in the Defenders of Wildlife 2025 guide; the 5-second to 59-minute-59-second interval range is stated by NUM’AXES; the interval definition is stated in Boly’s 2017 SG880MK Series manual; the under-30-second night-video recommendation is from the GardePro E6 manual accessed in 2026; and the 15-second nighttime maximum applies to specified high-LED-control configurations in Core documentation accessed in 2026. Your camera’s own manual controls when those values differ.
Quick Recap
Product prices and availability are accurate as of the date/time indicated and are subject to change. Any price and availability information displayed on Amazon at the time of purchase will apply.

